The 'Shroom:Issue 186/Strategy Wing
Director's Notes
Greetings, beautiful 'Shroom readers! That might as well be your third time reading this today.
That's right, our avian compatriot Pitohui has flown off for vacation, so I get to occupy three offices this month. Did you know that when I initially applied for The 'Shroom, I was actually looking towards being the Strategy Wing Director? I suppose you could consider this moment a glimpse of what could've been. I'm the Strategy Wing Director in some alternate universe, and I'll also be the Strategy Wing Director in this universe once I steal Pitohui's keys!
I don't have the verbosity of our favorite feathered fellow, so I'll keep these notes briefer than you might be used to. The Greatest Quest couldn't make it this month, but all the rest of your favorite Strategy Wing content is here to enjoy. Pitohui also left me this sticky note on his desk, let's see... "ENCOURAGE READERS TO SIGN UP FOR THE 'SHROOM"... That's really impressive, I wonder how he managed to put a hyperlink on a sticky note.
I won't keep you any longer, so thank you for reading, and please enjoy this wonderful edition of Strategy Wing!
Section of the Month
Cooking class was a hit, it seems! Congratulations to Ray Trace (talk) on winning section of the month and hosting a successful one-lesson cooking course (the clothes really help seal in moisture, it seems). Maybe next time we have a cookout, though, we cook something the Strategy Wing team can actually eat... If you want to show your support for our writers (and maybe earn them a proper cookout), don't forget to vote in the section of the month poll at the bottom of the page!
| STRATEGY WING SECTION OF THE MONTH | ||||
|---|---|---|---|---|
| Place | Section | Votes | % | Writer |
| 1st | SIMulation | 3 | 42.86% | Ray Trace (talk) |
Getting That Payday
Welcome back, heisters, to Getting That Payday, a Payday 2 strategy guide! Your Professor of Crime is back after taking a month off to make some creative projects (of which I’ve finished none, go figure) and play way too much Ultrakill (really good, by the way, you should play it). Looking back, this summer for me has looked like I’ve been doing pretty much nothing, but this has actually been a pretty productive summer for me! This is fairly similar to a lot of Engineer classes in video games, looking like they just put down a few buildings and then sit there doing nothing when they can be some of the most complex classes in the game! This isn't much different in Payday 2, so how about I take some of the burden of using the Engineer skill tree off your back with a few tips and explanations of it?
Definitions
Payday 2 is a Co-op First Person Shooter where getting on the FBI Most Wanted List by stealing anything you can get your hands on is the tutorial.
Skill Trees are, well, skill trees. On level up, you get one skill point which you can spend on any of the 15 skill branches, split between 5 skill trees. There are 4 tiers, where you have to spend so many points in that branch in order to unlock the higher tiers.
Use Gun. And If That Don’t Work, Use More Gun.
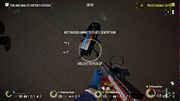
Since this entire skill tree is reliant on a specific piece of equipment, I figured I'd explain that first. The sentry gun is a deployable piece of equipment that will target and shoot any cops in its sight-line. It has 400 health, deals 30 damage, and has 100 rounds of ammunition. When deployed, it will take 30% of your current maximum ammo across both guns, unless you have less then 25% of your total maximum ammo, at which point it will not allow you to deploy one. When one runs out of ammo, you can refill it by interacting with it for a few seconds. This also takes some of your ammo. These are a great distraction, as some cops will shoot at them rather than you, but they’re not much else until you start getting some upgrades, such as…
Our opening skill, Third Law, decreases the ammo cost of deploying sentries from 30% of your maximum ammo to 25%. Useful, if a bit basic. Aced, Third Law adds armor to sentries, making them totally invulnerable from the front, the right, and about half of the left. This makes the best place to put them down next to a wall on their left side, as this keeps the only weak point to the sentry hidden.
Our first tier 2 skill, Improved Targeting Package, increases the accuracy of them by 100%, doubling the stat. Simple, but very useful, as the base accuracy isn’t the greatest. When aced, it gives the sentry 150% increased turning speed (or 2.5x, for those of you who’re bad at percentages) and 50% increased ammo. The turning speed is nice for when you have them covering a rather large area, with the faster turning speed keeping more cops out of that area. The ammo is nice, too, since more ammo is always a good thing.
The counterpart to ITP is Eco Sentry. This reduces the ammo cost of deploying and refilling from another 5, from 25% to 30%, letting you keep your sentries going longer without having to find more ammo elsewhere. Ace the skill, and it gives your sentries 150% extra health. Extra survivability is always nice!
Heading up to tier 3, our next skill is the not-at-all confusing name of Engineering. Unlocking the skill will give you access to silent sentries, which, despite the name, do not make your sentries completely silent. It will still make noise, but the main use is not in stealth, rather being that it makes some cops focus on it less, leaving it free to attack. Aced, and the sentries get toggleable AP round, which deal 250% (3.5x) more damage, and gives them armor pierce, at the cost of only firing at 25% speed. Usually, you’d want to have some sentries using AP, and some using regular, but in some cases one or the other is significantly more useful, such as against large hordes of shields.
Also at tier 3 is Jack Of All Trades. Basic just gives you 100% increased deployment and interaction speed for equipment. The star of the show here is its Aced upgrade, which lets you take a second equipment piece with half the amount. This is one of the most useful upgrades in the game, as having a second equipment slot opens up so many possible combos and extra avenues for healing that it’s hard to list them all! You can take shaped charges to blow open safes instead of having to pick them, drill them, or find the key, you can take both first aid kits and doctor bags making the amount of healing absolutely ridiculous, and most notably for our purposes, you can take both the standard and silent sentries to get 2 sentries at once! This, however, is just a fraction of the amount of sentries you can get.
The tier 4 skill is Tower Defense. Basic gives you a second sentry, having 2 sentries, with a third if you take both kinds of sentries. Aced gets you 2 more sentries, having a total of 6 sentries (4 on slot 1, 2 on slot 2)! This gives you tons of options for how you put your sentries, as you can put 2 or 3 small groups in choke-points, you can bunch them up to keep one area completely on lockdown, you can have a group using AP rounds in the front and standard in the back, and that's just scratching the surface for sentry placements!
As for some tips, bringing low ammo, high ammo pickup weapons makes keeping your sentries ammo high relatively easy. Another way to make ammo a non-issue is to bring an ammo bag alongside your sentries to easily reload your guns with extra ammo.
And now you know how to play Bloons Tower Defense 6 while robbing a bank. I hope you enjoyed this edition, as I found it to be one of my better ones! Until next month, this is professional heister Kinger, signing off.
Pitohui's Pokémon Academy
Written by: Hooded Pitohui (talk)
Alright, settle down. Welcome back to class, everyone. It's been some time since our last session, hasn't it? Well, it turns out that it can be a bit dangerous to go climbing mountains in search of Alolan Ninetales. I thought finding one might help me escape this dreadful heat, but, well… I required some unscheduled leave after the trek. The campus clinic suggested spending time underneath the warm sun. Luckily, I had already been bringing a smaller sun which I could bask under to class. Summer may be on its way out, but, so long we're all soaking in what remains of the sunshine, why don't we use this session to discuss raising Solrock?
Before we can start our work with the Meteorite Pokémon, I'd like to remind all students attending today that, as a matter of policy, I make the syllabus and reference notes available at the beginning of every class session. If you need an overview of our course, open up the box below.
First, a Smogon University course, this course is not. No, this academy's lessons are designed to get trainers of any stripe thinking about how they can raise their Pokémon, and, as a result, aren't designed to keep up with the widely-accepted metagame for the series. In some cases, the way I've raised my Pokémon may even flies in the face of conventional wisdom. If you're looking for top-tier strategies, do check out Smogon, but if you merely want to get a little deeper into raising Pokémon while still doing things your own way, feel free to use this section as a reference.
Secondly, know that, unless otherwise noted, these builds assume these Pokémon were raised in the seventh generation of Pokémon games (Sun, Moon, Ultra Sun, and Ultra Moon). Generation VIII cut some moves out of the games, and I'm not keen on changing the movesets for Pokémon I raised a few years ago.
Please note, also, that I'm having to guess at the effort value (EV) spreads of some of these Pokémon. Again, I raised these years ago, so I'm using stat calculators and working backwards to figure out their EVs in some cases.
Finally, since we all know the importance of citing our sources, I need to credit the design of some of the tables used in these lectures to Crocodile Dippy, author of the Pocket Handbook which can be found in early editions of Strategy Wing.Now, should you need a refresher on terms commonly used in this class, you'll want to take a look at this second box, instead. If you find yourself lost during class, feel free to message me, and I can update this handout with additional terms.
Base Stats: Base stats are the values associated with a particular Pokémon species, and are the same across every individual Pokémon of a given species. You have no influence on them. You can think of them as traits tied to a species. A chimp isn't ever going to be able to get as good as digging as a mole will be, and, likewise, an Abra is never going to have the defensive prowess a Shuckle has.
Individual Values (IVs): Individual values, as their name implies, are associated with individual Pokémon. They range from 0 to 31 in each stat, with 31 being considered a "perfect" IV and higher numbers corresponding to different stats. Magikarp A and Magikarp B will have the same base stats, but they may very well have different IVs. To stick with the animal analogy, one mole may be born with larger claws than another mole, and that first mole is probably going to have an easier time digging through dirt than the latter. Individual values are set in stone, strictly speaking, but you can use Hyper Training (from Generation VII onwards) to functionally get a perfect IV in a stat.
Effort Values (EVs): Effort values are the one thing you can easily change. A Pokémon can earn, primarily through battling, but also through means like the use of certain items or mechanics like Super Training, up to a total of 510 effort values, with up to 252 in any given stat. To finish off the animal analogy, no matter what kind of claws a mole is born with, moles who have more experience digging are probably going to be better at digging than moles which have never dug.
Nature: A Pokémon's nature is, more or a less, a stat modifier with a name meant to make it sound like a Pokémon has some personality. Natures will raise one stat by ten percent and lower another stat by ten percent. Some natures raise and lower the same stat, canceling out the effect and leaving stats unchanged. Natures can be changed with the use of special mint items from Generation VIII onwards.
STAB: STAB stands for Same-Type Attack Bonus, and refers to the boosted power of moves that match the type of the move's user. To illustrate this, consider the case of a Lombre, a dual-type Pokémon which is both a Water-type and a Grass-type. Any Water-type moves Lombre uses will have their power boosted by 1.5x, and any Grass-type moves Lombre uses will, likewise, have their power boosted by 1.5x. (There are circumstances where this does not apply, and, while the 1.5x multiplier is typical, some games use other multipliers.)
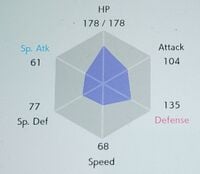
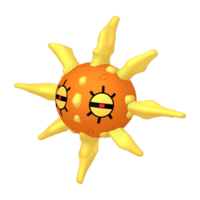
Are we all ready, then? Right, let's get to it. As always, we'll begin with a look at Solrock's base stats as we begin to consider how we might approach raising this celestial Pokémon. If you're at all familiar with Solrock and its counterpart, Lunatone, you may not be surprised to find out that, where Lunatone has higher special attack and special defense, Solrock's physical stats are higher than its special stats.
|
Name: | Solrock | Base HP: | 90 | |
| Species: | Meteorite | Base Attack: | 95 | ||
| Type: | Rock | Psychic | Base Defense: | 85 | |
| Abilities: | Levitate | Base Special Attack: | 55 | ||
| Base Special Defense: | 65 | ||||
| Base Speed: | 70 | ||||
Immediately identifying stats which are too low to be considered usable is a fine starting strategy that will rarely steer you wrong. As difficult as it is to get perfect IVs in every stat, it's important to identify the stats you can ignore so that you can begin building around them. With Solrock, it should be quite obvious at a glance that we can safely drop Solrock's special attack from consideration. Solrock's special attack is simply too low to be usable.
On the contrary, Solrock's physical attack, we can actually leverage. We've already decided that Solrock will be physically-oriented when it comes to offense, so let's look at its speed stat next to see if it might be able to strike quickly. At 70, that base speed is fairly middling, making it difficult for Solrock to outspeed its opponents consistently and making it difficult for Solrock to excel in Trick Room conditions. Speed can be set aside as a lower priority here.
That leaves only the question of how you should go about investing in Solrock's defensive stats. While I often end up, for better or worse (usually for worse), splitting defense investment, even I look at this and know immediately that it's not worth investing in Solrock's special defense. You can get a 31 IV and 252 EVs in special defense and cap it off with a nature that boosts special defense, but your Solrock will still crumple if one moderately powerful special grass or water attack hits it.
After going over everything, the only worthwhile approach here is going all-in on Solrock's physical attacks, planning to keep it away from opponents with high special attack. Since we'll try to keep it pitted against only strong physical attackers as much as possible, we'll want to make sure it can last as long as possible against those physical attackers, so we'll let its naturally high attack carry its offenses and go all in on investing in defense and HP.
To facilitate this, you'll want IVs of 31 in attack, defense, and HP (IVs of 31 in special defense and speed are less important, but recommended if possible). An Impish nature is by and large the best choice here, since it will further raise defense (no natures raise HP) and you won't lose anything from having a reduced special attack stat, since this Solrock will run no special moves. If you really wanted to further boost attack instead of bolstering defense, Adamant is a respectable alternative. The important thing is that you choose a nature that drops special attack. Take the 510 EVs and split them between defense and HP, sparing the little bit leftover after investing the maximum in those stats for attack.
Abilities aren't a concern here, since Solrock can only have Levitate as its ability. Levitate here isn't a terrible ability, giving Solrock an immunity to a type it would otherwise be weak to. While Ground-type moves tend to be physical and, thus, easier for Solrock to take, with all the weaknesses Solrock has, eliminating an additional weakness isn't a bad deal.
As much as it may surprise you to hear this, for once, I seem to have followed my own advice. My attempt at raising a Solrock mostly followed the strategy I just outlined. I did, admittedly, settle for an IV of 30 in attack, which was unwise. As much as physical attack is a priority here, and in light of my decision to minimize its EV investment, I could have used the little boost a higher IV would bring.
My other mistake should be immediately visible. I settled for an IV of 0 in speed while having an IV of 31 in special attack. This isn't too big of a blunder, since special attack is a complete non-factor and since the lower speed gives Solrock a minuscule advantage in Trick Room conditions, but, in the end, I could have easily continued on with breeding until I was able to get a 31 IV in attack, even if speed and special attack were reshuffled.
| Zen Headbutt | Physical | The user focuses its willpower to its head and attacks the target. This may also make the target flinch. |
| Stone Edge | Physical | The user stabs the target from below with sharpened stones. Critical hits land more easily. |
| Flare Blitz | Physical | The user cloaks itself in fire and charges the target. This also damages the user quite a lot. This attack may leave the target with a burn. |
| Will-O-Wisp | Status | The user shoots a sinister flame at the target to inflict a burn. |
With stats thoroughly examined, we can move on to a discussion of my Solrock's moveset. Much of this moveset is based around maximizing Solrock's striking power. Stone Edge and Zen Headbutt are simple picks, present to give Solrock two STAB moves with high base power. Unfortunately, with 80% and 90% accuracy, respectively, these two moves can miss at crucial moments. I rely on the investment in Solrock's bulk when that happens, hoping that it can take one attack so it can get a second opportunity to attack and knock out its opponent.
Flare Blitz is partially included to give Solrock wider type coverage, specifically giving it an option to deal with Grass-types and, to a lesser extent, given their typically-high defense, Steel-types, both of which Solrock is weak to, but it's mostly included as a last-ditch effort attack. If it looks like Solrock is in a pinch and is liable to faint anyways, it can take the recoil damage and at least get in a powerful (120 base power) attack in an attempt to knock out at least one more opponent.
While Solrock could be given another physical attack for more coverage (Earthquake being a reliable choice), I opted instead to give Solrock Will-O-Wisp to further shore up its defenses. A reliable method of burning opponents to lower their attack makes Solrock's defense and HP investment go just a bit further.
All in all, already, I can see some changes that could be made here, if you were interesting in raising a Solrock but were dissatisfied with this approach. There's a bit of a disconnect between the EV investments I made and the moveset I gave Solrock. As much as this moveset is focused on powerful strikes, it could have been better to invest EVs into attack. I say "could have," because, in that scenario, I'm left wondering how long Solrock will last in battle, relying on its base defense alone. Investing more in attack to complement the focus on high-powered but unreliable moves is a viable option, though, at the day's end, it's only one option.
Evaluating my Solrock now, I also wonder if Morning Sun might fit on its moveset. While it would mean more limited coverage, replacing Flare Blitz with Morning Sun to give Solrock a little more longevity with an HP-restoring move might better complement the emphasis on defense here. It may be worth trying if you have more confidence in Solrock's ability to stay on the battlefield than I do.
Now, what's this? Is the sun setting already? I couldn't have let class run that far past its scheduled end, could I? Oh, no, that's simply Solrock slowing its spinning and putting out less light. I take it that's my cue to wrap up, no? Well, that's fine. We've discussed everything we needed to discuss today. Now that you've all become acquainted with Solrock, your assignment before next class is using what you've learned to create a plan to raise a Lunatone. If you format your plan as an article and send it to Strategy Wing in The 'Shroom, I'll give you some extra credit. How does that sound?
That's all for today's lesson. Enjoy the last gasp of the heat and the lengthy days, if you're the kind to appreciate those, and I will see you here in a month for our next session.
To Infinity and Beyond
Written by: Waluigi Time (talk)
So, we meet again, 'Shroom readers... FOR THE LAST TIME!
...In this issue. Assuming you're reading it in order.
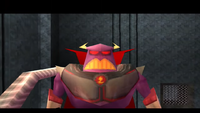
Uh, anyway, last month, we went through Al's Penthouse, bringing us to the end of another zone, and naturally, another boss battle. Following an unsuccessful attempt by the toys to bring Woody back with them, they make their way back through the vents in continued pursuit of Al - only to be confronted by Buzz's archnemesis, Emperor Zurg, accidentally released by Buzz from Al's Toy Barn earlier on. So today, we get to fight Zurg himself, in the aptly titled level The Evil Emperor Zurg, unlocked with 28 Pizza Planet Tokens. As a fair warning, I go on a few tangents about game design today.
Contrary to most of the boss levels, there's actually quite a bit to talk about here. This boss level is unique in that it's the only one in the game directly based on events seen in the movie. In fact, Zurg is one of only two (potentially three, if the Buzz Lightyear Buggy from Al's Space Land is intended to be the movie's Utility Belt Buzz) bosses in the game that appeared in the movie at all. As a result, while the other boss levels in the game borrow the theme of the second level in the zone, things get flipped around here, where this is pretty much just Elevator Hop condensed into a small space.
The arena itself is similar to one of the elevators from Elevator Hop, though a bit bigger to give you more room to work with. Surrounding the elevator is nothing but a bottomless pit, the only one in the entire game. If you fall in, say goodbye to one of your extra lives. (If you really want to, you can die and even get a game over without ever activating the fight. Not sure why you'd want to, though.) As usual, it's silent aside from some ambient sound effects until you walk forward a bit. Then, the boss music kicks in as Zurg descends from above (you can actually see him before the fight by going into visor view) and assures Buzz that defeating him will be his greatest triumph. Unlike almost all of the other bosses in the game, Zurg is fully voiced and will spend the entire battle taunting you! It's a nice touch that adds a lot of personality to the fight.
(It's actually impressive what they pulled off with the voice acting in general, considering this is a tie-in game. Of the characters who are voiced, all of them, with the exception of Rex, have their original voice actors from the movie. It's not just recycling clips from the movie either, all of them have unique lines for the game. Wallace Shawn's absence as Rex is notable, since it's one of only two times that Rex was voiced by someone else in the history of the Toy Story franchise, as far as I'm aware.)
The fight against Zurg is a bit different from the ones up until this point, because he's totally immune to Buzz's laser! He can only be damaged by Buzz's spin attack (or stomping, if you feel the need to make things more difficult on yourself), which is a trend that will continue with the bosses for the rest of the game, except for one of the previous bosses that will return later. It's a welcome and honestly overdue change, in my opinion. The midgame bosses, for the most part, are hot garbage in terms of difficulty - specifically, the Clown Top, Dinosaur, Buzz Lightyear Buggy, Spider Gunro, and Gunslinger. If you get the green laser upgrade, you can annihilate all of them in seconds with no effort while taking minimal damage, or even no damage at all. It's almost baffling that some of the game's earliest bosses, like the Tin Robot, are more challenging. But no more of that, now you're fighting on the developers' terms, and you can't trivialize the bosses with the laser upgrade or even speed them up with charged shots anymore. My only complaint is that I feel like this is too little, too late. The remaining bosses follow the pattern of "approach Buzz, use singular attack repeatedly", and boss fights that had potential to be interesting if you couldn't just melt them, like the Buzz Lightyear Buggy and Spider Gunro, are just wasted.
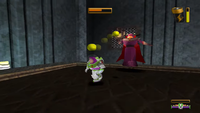
As for Zurg's actual behavior, he floats around the arena, and unlike the other bosses who generally constantly approach Buzz, Zurg actively tries to distance himself from Buzz so that you can't damage him, although he'll begin to approach if you try to run away from him, since he also needs to be in range to attack you. He can also levitate, including over the bottomless pits where you can't do anything to him at all, so if he does that, you'll need to reposition yourself to get him to move back onto solid ground. His method for attacking is his trademark ion blaster, and he'll fire three shots at a time out of it. There's two types of projectiles Zurg can fire - the first kind that he'll start off with are yellow ones, which are just standard projectiles that you can deflect with a spin. Whenever Zurg takes damage, he'll instead fire three green ones, which are mostly the same as the yellow ones, but they home in on Buzz. You'll definitely want to deflect those! As the fight continues and Zurg takes more damage, he'll start to mix in the green projectiles during his normal attack, so beware of that. After spinning into Zurg 10 times, he gets a unique animation for his defeat, being knocked off the side of the elevator and falling into the abyss while swearing revenge, mimicking his defeat in the film.
Or at least... that's what's supposed to happen. If you're playing on the PC version, however, there's an issue that you may end up running into that makes this fight a lot trickier. You see, Zurg is programmed so that his speed is determined by your FPS (frames per second), so the higher the FPS, the faster Zurg is. So, if your FPS is too high, Zurg is too fast, making it extremely difficult to catch up with him to hit him with a spin attack. It's not outright impossible, and I've managed to get a few lucky hits on Zurg before in this state, but managing to actually attack him all ten times is practically a herculean task. Luckily, there's a couple of methods I've found that make beating Zurg in this state much easier, without having to resort to anything outside of the game to lower your FPS.
The first method is to corner Zurg in, well, the corners. Even with his increased speed, if you get him positioned in the corners just right, he won't be able to maneuver as easily, so by activating a charged spin attack, you can jump into Zurg and damage him. The main issue here is the bottomless pit surrounding the arena, which you can end up falling into if you're not careful. Keep in mind that Buzz can only have a total of 9 lives, while Zurg takes 10 hits, so falling in too many times, or worse, missing Zurg entirely, can spell disaster. I prefer to use the corner opposite of where you start the level, as there's less of a gap there, giving you more room to work with.
The second, and much easier method, is to start up a charged spin attack, pause the game, and unpause. This will briefly reset Zurg's speed and allow you to hit him, I've even managed to get two hits with a single attack doing this. The downside to this method is that when you pause and unpause, the music stops and restarts from the beginning, so you miss out on Zurg's fantastic boss theme. Personally, it also kind of feels like you're cheesing the fight, even though you're just bringing the game closer to its intended mechanics.
So, that's how to defeat Zurg - and how to defeat Zurg if the game won't let you defeat Zurg. Before I go, there's another interesting bit about this level. You may remember waaaay back in Issue 176, I covered a glitch that makes Buzz invincible, but mentioned that there's a point in the game where it causes a softlock. Well, this is where that softlock occurs! The way the bottomless pit in this level works, Buzz automatically dies when hitting a certain point. If you have the invincibility glitch active, Buzz passes through that point unharmed and endlessly falls out of bounds, with the only way out being to pause and exit the level.
That's everything I have to say about this level. Hopefully you enjoyed reading it, I had fun writing this and geeking out a bit. Next time we press on ahead into the game's final zone! We're getting close to wrapping things up, only four more sections left. See you then!
All gameplay screenshots were taken from Nin's playthrough on YouTube.
SIMulation
How To Use The Toilet In Batuu
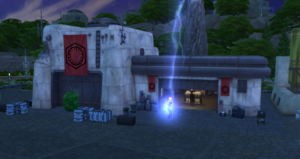
In the day and month of September 8, 2020, a Star Wars-themed pack The Sims 4: Journey to Batuu was released to the utter excitement of fans everywhere.[1][2][3] But wait. Before you pack your bags and actually journey to Batuu, there are several considerations you need to take to prepare yourself so you won't be presented with a nasty surprise when you finally arrive there and that you seem you cannot meet some very specific needs, as the game pack frequently forgets that you are playing a Sims game and that yes, you need to take care of your character's very....Sims-esque maintenance.[4]
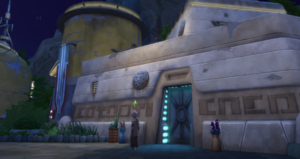
1. Freshen up at the Black Spire Outpost. Despite the Galaxy's Edge theme park that Batuu is clearly and strongly based upon and actually does contain restrooms to relieve yourself in,[5] there are no actual restrooms in Batuu from The Sims 4. Rather than scouring the map to find places where you can bathe yourself, cook and feed yourself, or even sleep, everything is all jammed up in one single building in Batuu, called the Dwelling.
- If you don't like seeing your Sims naked, taking a dump, or laughing while sleeping in bed, then the Dwelling is the absolute perfect place for you. It's a rabbit hole, meaning your Sim just disappears into a building and gets their needs met. In fact, everything except the cantina in the Black Spire Outpost is a rabbit hole, you don't actually see your Sim getting served food by the alien inhabitants despite pictures showing implications of it. Get used to this motif in Batuu, it's everywhere. Again, this pack very often forgets it's supposed to be a Sims game.
- You also don't need to worry about your appliances breaking or toilets getting pranked since there aren't actually any. Handiness skill, who needs it?
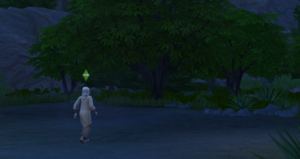
2. Take a piss in the woods in the Resistance Encampment.[6] Of course, being the resistance against the oppressive First Order, they wouldn't have access to the facilities, even in the Black Spire Outpost which is probably presumably likely controlled by the First Order. So your Sim is just stuck in the dinky woods and outdoors. Even future technology cannot add proper bathrooms in outdoors areas; have you ever seen any of the major Star Wars characters use the restroom? I thought so.
- Your Sim can also shower out in the woods too. We cannot explain how this is possible. They showcase what's going on with a tent picture in the queue but you don't actually see any tents, and tents don't come with portable showers anyway.
- This is also how Rey canonically uses the bathroom. We will not take any other explanations.
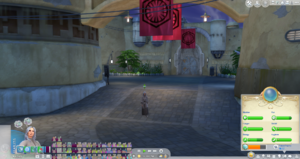
3. There are no bathrooms in the First Order District.[7] What are you doing here? Go back to the Black Spire Outpost if you need to take a leak. Sit through another loading screen.
- However, if you're crafty such as myself, you can enable Build/Buy on the menu through cheats and just plop toilets yourself. Editor's choice toilets are the bushes, because you can not only piss without need for privacy in them, you can WooHoo and even nap in them.[8]
- The First Order District is the best place to put those aforementioned bushes because it looks too natural in the Resistance Encampment.
Oh by the way, the alternative is not buying the game pack at all and just buying Realm of Magic instead.[9][10]
Notes
- ^ The Sims. (Sep 1, 2020). The Sims™ 4 Star Wars™: Journey to Batuu | Official Gameplay Trailer. YouTube. Retrieved September 17, 2022.
- ^ People loved the preceding trailer so much it received 28k likes, which is more than the Toddler Stuff trailer which got only 24k likes.
- ^ Of course, Journey to Batuu actually got 57k dislikes as well, a hard ratio, but hey, you can't verify that because YouTube hid the dislike bar for that very reason!
- ^ One of the charms of the Sims is that this is one of the only video games out there where you do actually need to send your characters to the bathroom.
- ^ Source: I have actually been there and gotten drunk from my visit from the cantina, but I get the feeling that you don't actually need to be there to believe it so just take my word for it.
- ^ If you spend any good amount of time there, it will come sooner or later, trust me on this.
- ^ However, just like the Resistance Encampment, if you click Auto-Solve needs, your Sim will just disappear in the entrance as in the Resistance Encampment but it's much funnier to think they're doing their business out in the woods. Toddlers, however, are scull-screwed very badly and are required to use their diapers.
- ^ You are required to own either Get Together, Jungle Adventure, or Werewolves for access to them. We do digress, however, since we strongly recommend you to buy not only those named packs, but every other piece of DLC for this game before even considering buying Journey to Batuu.
- ^ In fact, the only thing remotely Jedi or Sith-related here is the ability to wield a lightsaber, which just relies on your Fitness skill than its own special skill tree. There are no Force life states or skills, there are no special aliens (they are just regular Sims in costumes), all occults can't even use their powers here so vampires, werewolves, aliens, and mermaids are extremely restricted and will have a miserable time here, especially vampires without sun immunity and they cannot drink from others. You also cannot take anything with you, which includes plasma packs for vampires in case they get thirsty, and you can't take your pets with you to here. We seriously mean it to not buy this pack.
- ^ You can replace Realm of Magic with any other game pack and you'd get a better deal. We chose Realm of Magic because it's the closest thing you can get to pretend you have the Force.
On the Origin of Species
Written by: ZelenPixel (talk)
I'm back for a bonus enormous 11th issue, for Spore's anniversary month! It released on, again, September 4th, or 5th, or 7th, depending on the region! Either way, happy birthday, Spore, my favorite game!
Last issue I finished off the let's play proper with a visit to the Galactic Core, for the first time in my life, and remarked on what's happened through the playthrough, from a mere cell to an enlightened space empire. It was fun! I promised I would come back to share a history of this game's development, so, that's what I am doing! This game has a fascinating development history, and it's a shame it's so undocumented, so I'm compiling what i can in a hopefully easy-to-read format, but there's much more info out there that I know of.
I am going to be referencing the Wikipedia page Development_of_Spore, and other sources that I'll try to link as I go.
2005 and prior
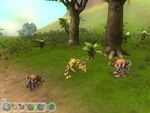
Spore started out as a work-in-progress title called SimEverything, back in 1994. It was main developer Will Wright's first choice for the title, but he chose Spore, a working title instead, stating that it felt more refreshing, not just another Sim title. Proper development for the game started in 2000, and it was properly revealed at the 2005 GDC and E3.
The 2005 Spore showed a very different game to what we have today. While the basic idea was still there, the tone of the game was less silly, if still unrealistic to an extent. It was also where the iconic Willosaur was being played as. It's worth noting its official name is, in fact, Tripod, evidenced by the filename of an unused model in a Spore prototype GonzagoGL, and a creature in the final game, which closely resembles it, named Tripod Neuvo. The fans named it Willosaur, however, and the name is more well-known and recognizable, so I'm going to stick to this!
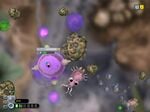
Here's a good video with Will Wright showcasing the game at the 2005 GDC, where the following information is going to be coming from. After 12 minutes of talking about something, Will Wright starts showing the Cell Stage, and says he's controlling "this little guy here". Unlike the final stage, the cells here can have limbs just like creatures, and this one uses them to move around. There's no other cells like it, and Will Wright says "these little bad things chase me" upon some green clouds coming on-screen, which damage the cell on contact, and so do some other brown things. Whatever these are aren't in the final game. After eating enough "food pellets" the cell lays an egg to enter the editor just like in the final game. The cell editor parts are conceptually the same as in the final game, minus the eyes which are elsewhere I guess.
It's worth noting this wasn't actually a properly playable game at this stage, and was actually a tech demo built off of the engine of The Sims 2, I recall? I swear I read that on a Reddit AMA, but I couldn't find where it was. Where was it? Take that claim with a grain of salt, then. Either way, the fact that this was mostly a sorta-playable mockup will explain a lot of things, such as the cell having eyes and spike parts that aren't in the editor selection.
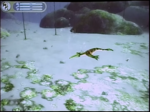
Will Wright skips ahead to the Aquatic Stage with an all-new creature, one of the stages that isn't present in the final game. It's in a 3D environment, and at this point you don't get to see much environment, though it's curious that the creature doesn't move up or down at any point. It's never been stated why the stage was scrapped, but it's speculated there were problems with animation, navigation in such a 3D space with verticality, the camera, etc. This stage is well-known among fans, and many people have wanted it back. Curiously, in 2015, the Spore website added a mysterious image suggesting there was going to be an aquatic expansion pack that never actually happened? We don't know if it was going to be real or merely a joke, but it's something to think about.
Will Wright discusses a system for filling out your world with creations from other players, which is a big theme in the final game as well, though it's not as complex as he was describing here, with no ecosystems involved really? He enters the Creature Editor after the creature lays an egg. The overall function of the editor is similar to the final game as well. Curiously, there are actually ribs inside of the creature, whereas in the final game it's just the vertebrae! Here's a thing that isn't in the final game - Wright opens the graspers list and then the game just lets him place a grasper part anywhere on the body, whereas in the final game they can only be attached to the ends of limbs. The grasper part used here isn't in the final game either! Limbs don't come with graspers and feet parts either, unlike the final game. He places some limbs down and then finally says "So this guy is gonna be a tripod", finally creating the Willosaur! Curiously enough, I think the creature he makes in the editor is different from the one he actually plays as in the next section, considering the limbs are set completely differently. I speculate he was just remaking it and it didn't affect the actual playable stage demos.
Next section, the Willosaur just emerges from water onto land starting the Creature Stage, which is another interesting note. The final game had pretty defined transitions between stages with cutscenes and loading screens, but it just seems to happen seamlessly here? Though we don't really get to see enough of it to judge for sure. What you CAN judge starts appearing here. Wright makes the Willosaur kill a one-legged creature with its tail, and eventually you start seeing pretty explicit blood, which obviously isn't in the final game, unless you count the pink liquid cells will emit when hurt. The Willosaur also eats from the corpse more realistically, and can even drag it around while doing so, also something not in the final game. Wright even talks about procedural verbs at this point, and how it lets you do stuff like that! I don't think procedural verbs ended up being in the final game either. At the very least you can't drag corpses around.
The Willosaur starts being chased by a large spider-like creature and runs off. Fun fact, did you know all these creatures have names? The one-limbed one is the Tamaranian Hopper, and the big one is the Tick or Splodey. Pretty sure these names are fanmade too, but here's that! The Willosaurs' home planet is also Tamaran! Anyway, Wright also talks about how your creature has to mate in order to access the editor again, just like in the final game, though here you don't have a defined nest and you just have to find a mate with mating calls. Which is kind of like the final Cell Stage, actually! Wright also really had to say "Okay, and then we get to the procedural mating!". That's not in the final game. It's not all that explicit, thankfully, but it sure... was a thing...
Wright enters the editor and shows off other creatures, demonstrating how even creatures with weird limbs still get procedural walking animations. He shows a creature walking around by using a cursor to drag a small sphere around the editor field with the creature walking towards that orb, unlike the final game's separate Test Drive, which you have to enter in order to see the creature animate. Some of the parts shown here are actually recognizable from the final game!
Wright, after talking about more stuff I admittedly skipped because I didn't have the time for it, shows off a unique parts section in the Creature Editor. This shows a progression more similar to prototypes (more on them later) than the final game; here you have larger brains that you unlock through saving up DNA (presumably) for them. In the final game, your creature's brain grows through specific progression goals instead. In both, once you get the biggest brain, your creature is sapient and can have tribes now. The Tribal Stage is also an RTS, with some differences, such as the fact that the tools you buy don't come with entire little huts, and the campfire was also a tool that had to be bought separately instead of just coming by default with every tribe. Also, there are drums! The tribe people were also automatically picking up spears, dancing at the campfire, and drumming, instead of these actions being directed by the player.
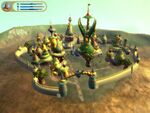
He doesn't show it, but he talks about how you can control multiple creatures, send them to hunt, and compete with tribes. You also have to buy huts manually too, which later get upgraded through progression goals too. A better hut unlocks better tools, too. Eventually the hut upgrades enough to enter the City Stage, which isn't in the final game either! This is actually the same as the final's Civilization Stage really, though they were more distinct in a prototype (more on that later again). Here, the buildings are also playermade creations just like in final, though, interestingly enough, they're also procedural? He talks about how the shopping catalog will emulate the style of the buildings you currently have. This seems very complex and isn't something in final, but it's very interesting! Seems like this also influences the city walls.
The Building Editor has an interesting background like it's inside a barrel, and simple geometric shapes are whole parts in themselves. There are other different parts here too. It's not much different from the Building Editor in the final game generally. Wright talks again about keeping the creatures in the city happy, and scrolls over to another city with more Willosaurs. Apparently, you have to "upgrade your city enough to start building vehicles", which is how cities interact, like the final. Wright mentions three ways to take over a city - economic, military, or "cultural", which are all the same as in final, though the latter got renamed to religious.
Wright also talks about the Vehicle Editor and how it also uses playermade creations. Interestingly, I don't think the vehicles had three (technically four) distinct vehicle types, and you can make any vehicle be able to fly or swim through using specific parts which are all available. It's not explained how it works, but it's interesting. Wright's city gets attacked, and at this point he mentions that at this point we're entering the civilization game and thus is like Civilization, like the game series? I'm not sure what the difference is. He talks about how cities become exaggerated as you zoom out, I guess.
I should note that selecting buildings and vehicles is different here. In the final game, you can choose anything from the Sporepedia, but here the game just selects some specific vehicles or buildings to put in your buy mode and it chooses them based on several factors. Interesting! Wright describes his inspirations for the game's stages, mentioning how the Creature Stage is like Diablo apparently, talks about other stuff I skipped again, and mentions how the vehicle buy mode has another vehicle slot that eventually unlock, and also mentions underwater vehicles too, which aren't in final! The last slot is a UFO, which starts the Space Stage seamlessly too.
Wright beams up a random Tick with the tractor beam, which is also different from the final game and harder. Here he has to move the UFO over the creatures to pick them up, but in the final you just hover your cursor over what you want to pick up and hold for a few seconds. He also implied you could beam up a vehicle, which you can't in final. He then exits the planet and shows the solar system view, then goes to a cold lifeless planet. He talks about wanting to terraform it, and then drops the Tick he picked up earlier onto the planet which explodes. Which is why it was called Splodey too. "Can anybody tell me why that happened?", he says. He talks about KidPix and how he wanted the terraforming to feel like that somehow. He places volcanoes onto the planet to form the atmosphere, and decides to place down a colony, also pointing out how it would also have a bubble around it if it were to be built underwater - also not a feature in final! He also mentions something about getting to upgrade the UFO, and then uses a tool to terraform the planet rapidly, similar to the final's Staff of Life. He just has it at the start here, though!
He zooms out the solar system and talks about how space is much more three-dimensional than it is depicted in photos and such. There are black holes, nebulas, very differently sized stars, he mentions that he should stay away from the blue giants because they're gonna be supernovas soon - stars don't do that in the final game, he mentions how new stars form in nebulas too. That stuff mostly ended up being cosmetic in the final game. Wright searches for other sapient empires via the SETI tool (same as in final), and, apparently, at this point he's visiting other players' worlds, whereas in final the galaxy is populated with NPC species and sometimes your own save games. Wright tries to befriend the other empire by getting close to their city and presenting a light show, or something, they attack, and Wright proceeds to blow up the entire planet. Which is in the final game too, of course. He talks about more stuff, zooms out to show the entire galaxy, which is kind of an iconic view for Spore, being on its main screen. The music that plays at this point is actually seen in the Flash file on the 2005 Spore website, on the galaxy view too!
Boy did I ramble. That's that more or less Spore, with some basic stuff already in place, but with a lot of ambition (and probably too much for Maxis to deal with), and a lot of interesting little differences from the final game, especially with the stuff like the Aquatic Stage and blood and stuff. To be honest, I don't get why fans always wish we had this version instead? But it's neat regardless!
2006
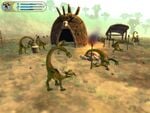
The game was drastically reworked to have a lighter tone, and resembles the final game much closely in a lot of aspects, especially the creations, showing many familiar parts and paints. This era is represented by the Screeble in a gameplay video, which you may know as I named the Stabbies' planet after the Screebles' planet, Blizac!
Here's another video I'm going to be referencing here. It's much shorter than the other one. First of all, the Aquatic Stage has already been cut, but the City and Civ stages are still distinct. The editors are much like final too, with one Vehicle Editor again, however there's the scrapped Flora, Hut and Terrain editors! The editors are much more like the final game as well, with no ribs again, familiar sound effects, etc. The limbs still don't come with hands or feet attached to them by default, but the parts depicted otherwise are already basically the same as in the final game, though rearranged in the parts selection. A lot of the animations are also similar to the final, I'm pretty sure that was an actual playable early version of the game at this point instead of a mockup.
The biggest difference from the final editor is the background (actually being more similar to the Cell Editor), the creature not animating when not being hovered over, a unique paint texture, more awkward animations in the Test Drive (which is a thing now too!), and the creature's sounds. This particular creature would sound like a songbird in the final, but instead sounds like the civilized (Tribal onward) bird creatures, which is really interesting!
The Creature Stage has rather tiny trees compared to the final game. It looks like Wright is controlling the player creature with a keyboard this time instead of exclusively using the mouse like in the 2005 demonstration. A lot of the things are already recognizable from final, so there's not much to note here. The Screeble being played here very quickly destroys an egg (it takes much longer in final) and eats it, and for some reason procedural mating is back.
One of the creatures lays four eggs which then need to be protected until they hatch, which wasn't in the 2005 showcase OR the final game! It only takes a few seconds, however, and then you click on them to enter the editor. Wright makes the Screeble meaner and bluer, and exits the editor. One difference from final is that you actually properly exit out the editor as a baby creature and have to survive until you grow up. Wright gets a nestmate to join the player Screeble's herd, basically like in final, gets some other nest angry at both of them, and then just skips to the Tribal Stage before anything happens to them.
He demonstrates images (no actual gameplay though) of the Tribal Stage, the Hut and Flora Editors, the City Stage, the Building and Vehicle Editor, and then skips to "the very end of the Civilization game", and purchases an UFO (like the 2005 showcase!), which slowly forms above the City Hall. The spaceship gameplay is much more like the final game, instead of the spaceship awkwardly floating in front of the camera like in the 2005 showcase. He abducts a creature much more like the final game too, uses the abduction tool to toss other creatures and make them orbit the planet (you can also do this in final though it's a bit trickier), and then zooms out into the solar system view.
An interesting note about this is that we finally get one song that's actually in the final game! Like final, it's used in the solar system view, though the early version is actually sped up compared to final. He visits a different planet, talks about the ability to place down a colony and modify biospheres and stuff, then puts down an abducted creature here, next to some other creatures that immediately attack and eat it. With blood, which is somehow still here. He scans other creations and adds them to the database, the Sporepedia, which is similar to the final's but presented differently. Here, it's much more of a system of card decks, and it's also layered, letting you view specifically the card for a star, which lets you view cards for each of its planets, which lets you view cards for its creatures and plants and stuff. It's not layered like that in final, each section is more separated by what type of creation it is (like a creature or a planet are completely separate). Which is there too, but the layered card system thing is neat, I kind of wish it stayed.
Another song from the final game though sped up plays once Wright zooms out the solar system view. He visits a black hole, which is actually almost identical looking and sounding to the final's wormholes! He also says you eventually unlock the ability to travel through them. Interstellar travel is a lot slower here, interestingly enough, and the camera is more focused on the spaceship as it travels. The lava planet also has very different looking lava from the final game! He also finds an upgrade on the planet and picks it up, which is interesting because spaceship upgrades in final are almost only ever unlocked through achievements and then bought from empires, but here they appear to be scattered more like the artifacts and planet terraforming tools.
Wright visits a planet with intelligent life on it, demonstrates fireworks over a city making all the citizens cheer, which, by the way, also have city music that's used in the final for religious nations in the Civ stage! The citizens start worshipping him and then he just picks up one of the citizens and starts being zapped, with fight music that's also in the final game. Turns out the city was a space empire after all, who contact him after he exits the planet and start being mad. The homeworld also starts calling in because it's under attack.
Wright zooms out and the galaxy music is also in the final game, though MUCH more sped up! It was actually pitched down in some update to the final game too, I think! Overall, a very interesting look too at something that's much more like the final, but with a lot of interesting little differences.
2007
This version has no creature to represent it, but it's even closer to the final game, appearing very similar, aside from a lot of the UI elements. The Cell Stage looked rather different, however, with early versions of the final game's cells, as well as some unique cells entirely, like the Squiggly, or the Poisoner. The overall look was rather different, too, with less shiny cells, completely different debris floating around, and different backgrounds. The UI was mostly just compacted into the bottom left too, though functionally seems about the same.
The Creature Stage shows an environment and creatures mostly identical to the final game, just with an entirely different UI. It's very interesting seeing very specific UI graphics that remained in the final game! This isn't much notable, beyond a creature being titled "singer_bruiser" in one of the screenshots.
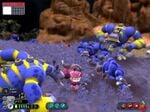
The Tribal Stage seems somewhat more different to the final game, but not much, mostly consisting of blurry ground textures. Unlike the final game, the tribe members list (as well as the pack in the Creature Stage, there titled Posse, and your vehicles in Civilization) is on the left, and the notifications and the minimap are on the right. Completely the other way around!
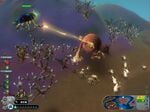
The Civilization Stage is also rather similar to the final game, but the images actually depict harvester vehicles in the UI, something which is not in the final game. The vehicles themselves aren't shown in any of the images, and their function is unknown, but it seems to be that they go and pick up spice from spice geysers. Curiously enough, they're still accessible in the final game, to an extent! If you launch it with the VehicleEditor launch state, the DNA display will be replaced with a selector of what exact vehicle you're making, like VehicleMilitaryLand or VehicleCulturalAir. The last selection in it is VehicleHarvester, not a land or air or water vehicle, not military or religious or economic!
Harvester vehicles can be saved, though they don't display in the Sporepedia, but their PNG saves in the My Spore Creations folder. If you drag their PNG into an adventure, they'll mostly act as a normal land vehicle, with nothing in place of the icons depicting what Civilization archetype it is. Also, if you click the Sporepedia icon on the harvester vehicle to pick another creation, it'll actually let you pick another vehicle, or even a creature or a building, and it'll be in the vehicle tab for some reason, despite acting like the type of creation it truly is! If you ever undo your actions, the game will redistribute the creations to their correct tabs and replace the harvester vehicle with a random normal vehicle (even an air one).
Ramblings about a scrapped vehicle type aside, the Space Stage also seems rather similar, with a placeholder "complete-o-meter", which is fun to say. It's hard to extrapolate much from a bunch of screenshots. Overall, this version of the game seems very similar to final, UI differences and harvester vehicles aside.
Near-final
These versions of the game are almost the final build, just with some different-looking UI. That UI actually made it into the demo Spore Creature Creator! The only other differences are differently-colored and shinier cells, which were also depicted in some videos on the Spore YouTube channel, and a bunch of screenshots in the Prima strategy guide. There are other images with UI closer to the final game, compared to the image you're seeing in this section.
Some editor images feature different backgrounds and icon placeholders, which are pretty interesting to look at! There's not much of note in these builds, beyond a few minor, interesting differences. There's also an old article depicting a completely different Creature Editor UI, though functionally still pretty similar. Interestingly, the positions of the insect mouth (carnivorous) and the omnivorous bird mouths were swapped in this version, suggesting the former was going to be omnivorous, and the latter carnivorous!
Launch and post-launch
Spore released in September 2008. Critics generally praised it pretty well, though some people were disappointed about how much the scope was cut down. It was clear even the final product was a bit ambitious for Maxis, to be honest. There was also a controversy over the SecuROM DRM, which only let you install the game on three computers per disc, alongside other issues, and, ironically enough, this anti-piracy feature only led to the game being one of the most pirated games of its time. EA backed down on the DRM just a few months later, selling it DRM-free digitally, and tweaking the authorization limit on physical copies.
Post-launch saw the release of a few expansion packs. The Creepy & Cute expansion pack released on November 17, 2008, with a bunch of new parts and colors for the Creature Editor, as well as a couple Test Drive backgrounds and animations, alongside releasing with a free update that added the insect-like exoskeletal limbs.
The Galactic Adventures expansion pack released on June 23 or 26, 2009, featuring a whole new Creature Stage-like game mode, the titular Adventures, alongside the new Adventure Editor, and the ability to customize your Captain with new captain-exclusive parts, as well as other stuff from the previous outfitters. It also came with one new paint option for creatures. The Adventure Editor is highly expansive, and is regarded by some to be the best part of the game!
Finally, there was the Bot Parts Pack, which was exclusive to a Dr. Pepper promotion in the US (and Canada?) throughout 2010 and 2011. It adds a few new parts to the Creature Editor, which, from experience, tend to all be rather glitchy in one way or another; for example, the mouths have no Sing, unlike every other mouth, so you can have a creature with no social abilities. Trying to socialize with one will just crash the game. Naturally, not many people got it, and there's a few mods that just add the parts that this pack does for free.
There were also a number of Spore spinoffs! There was stuff such as Spore Hero for the Wii, Spore Hero Arena and Spore Creatures for the DS, a couple mobile games (I've played Spore Origins and the other Spore Creatures! I like them strangely!), and the grittier action RPG Darkspore, which has been shut down since, and has mostly been repurposed by modders for parts for the main game (like the well-known Dark Injection). There's, fortunately, a fan revival for Darkspore out there! There was also going to be Spore Creature Keeper, but it's been canceled for whatever reason.
EA might have mostly abandoned the game after 2011 or so, but the community is still thriving to this day (if maybe less active), and the servers are still around as well! There's also the eternal rumor of Spore 2. I don't know whether it's ever happening. I'm not expecting it, personally, but maybe someday...? Meanwhile, the fans have picked up the task themselves, making numerous spiritual successors, such as Thrive or Elysian Eclipse.
So that covers it! For some more information about cut content, you can visit the TCRF page on the game, the SporeWiki, or the Spore Modding Community Database, which has pages on cut content and other assets. I really wish this game had its development history documented as well as for some other games. There are just so many fascinating things here! I can't contribute much at the moment, but by writing this issue, I'm at least doing my part! And while, yes, that is a lot of great features that were cut or changed, I honestly still love the final game as is so dearly, and nothing will change that for me.
But I'm not actually done here! I mentioned the prototypes a few times, and I do intend to talk about them, but this issue was already getting far too long, so I had to split this up! Tune in next month for the 12th and final issue where I talk about the prototypes for this game and the many interesting things in them!
Koops, Your Emblem is on Fire
Would you look at that Koops uploads this month in spite of uni starting. Peculiar behavior, that.
This time we're just redoing the same chapter except its other version. The inferior one.
We have a new recruit, and he is certainly gonna let us know he's here what with this MASSIVE COnstitution of his.
Harken
The sole survivor of the Knights of Pherae.
Level 8 Hero.
HP: 38~43 (80%)
Str: 21~23 (35%)
Skl: 20~22 (30%)
Spd: 17~19 (40%)
Luck: 12 (20%)
Def: 15~17 (30%)
Res: 10~12 (25%)
Con: 11
Move: 6
Weapon Ranks: B Swords, B Axes.
Remember when I said Karel's alternative was much sexier than him? Yeah.
Harken is statistically flawless, sporting high bases in every category, all of which outside of luck are even more ridiculous on Hector Hard Mode due to him starting out as an enemy. On top of that, he is also a Hero, meaning he has access to Axes, in which he has a B rank, allowing him to use a wide range of those, which of course includes the all important 1-2 range that sets him apart from Karel. Other than even that, most of his stats are almost on par to even higher than Karel's anyway, rendering the latter completely obsolete. Not only that, but Harken also comes with the sole brave sword in the game, a more valuable weapon than the Wo Dao.
To put it simply, god is real and he's a FE7 unit. I don't think it needs to be said availability is his one and only issue.
Next time, we will finally pursue Jaffar and Nino and forcibly try to stop them from being dumb.
| The 'Shroom: Issue 186 | |
|---|---|
| Staff sections | Staff Notes • The 'Shroom Spotlight |
| Features | Fake News • Fun Stuff • Palette Swap • Pipe Plaza • Critic Corner • Strategy Wing |

