Director's Notes
Written by: Hooded Pitohui (talk)
Hello, all of you readers of The 'Shroom! I'm buried up to the hood of my robe in work this month! There's awards results to distribute, cruise ships to oversee (that, contrary to what you might hear, certainly don't have any murderers on them...), and survey results to collect so we can all finally get Waluigi Time and Ninja Squid to give us our vacation!
That all said, there's never too little time for me to turn my attention to The 'Shroom or our wonderful Strategy Wing team. Yes, you might notice the team is a little smaller this month, with myself and Pitohui's Pokémon Academy absent, Koops and Koops, Your Emblem is on Fire absent, and the Wandering Shoestrel taking a month to rest his voice from sharing The Greatest Quest with us, but we still have the rest of the team here to help you plan out your heists, explore space, get on the F-Zero track, reach to infinity and beyond, and to put on the greatest fireworks display involving Sims you've ever seen. Some of our sections are making great progress this month, with Zelen accomplishing a goal she has been working towards for a few issues now and Waluigi Time revisiting an old level to finish up some tasks he couldn't do before, so don't miss them!
Now, with the awards season and a busy summer upon us all, Strategy Wing might be a little lighter this month and next month, but all that means is that it's as good a time as any for you to join the team, no? Whether you want to take us through your playthrough of a game like Zelen does in On the Origin of Species or Waluigi Time does in To Infinity and Beyond, tell us everything about a subject in great detail like Superchao does in Mach Speed Mayhem, give us some tips and tell us some tricks like Kinger in Getting that Payday, or want to instruct us in something a bit sillier like Ray Trace in SIMulation, we can find a place for you! If there's anything at all you want to instruct us in, give us tips on, or just go extremely in depth in analyzing it, go and sign up today! If you want to talk through your idea or need help writing an application, reach out, and I'd be happy to help you!
If you aren't quite ready to jump in with that yet, though, consider brushing up on the awards presentations and signing up for one, maybe two, even! They can be short, sweet, and simple, they should be fun to make, and you still have a few weeks to make them! Don't miss your chance to show your creativity during awards season!
Regardless of if you present or write for us, regardless of if you apply tomorrow or in six months, there's great sections waiting for you to read them, so I'll sign off here so you can go and, well, read what the Strategy Wing team has brought you this month!
Section of the Month
In our summer special, the sun shined down on you voters, and you voters shined down on the classic Sims pool party activity, trapping Sims in pools and letting them remain there until they die from exhaustion. Congratulations go out to Ray Trace (talk)! Please do keep voting in our Section of the Month polls to show your support for our writers!
| STRATEGY WING SECTION OF THE MONTH | ||||
|---|---|---|---|---|
| Place | Section | Votes | % | Writer |
| 1st | SIMulation | 6 | 42.86% | Ray Trace (talk) |
| 2nd | Mach Speed Mayhem | 4 | 28.57% | Superchao (talk) |
| 3rd | On the Origin of Species | 2 | 14.29% | ZelenPixel (talk) |
Getting That Payday
Welcome back, criminals, to another issue of Getting that Payday, a Payday 2 strategy guide! More specifically, an issue that I'm writing last minute because deadlines really creep up on you when you lose all sense of time... This time around, I thought we could learn how to support rather than murder with the Gambler perk deck! A free perk deck, this is all about giving ammo pickups more use, having them give more ammo, give health, and having your teammates benefit from both! Why is it called Gambler if it's about ammo packs? Good question!
Definitions Payday 2 is a Co-op first person shooter about robbing banks and jewelry stores, with some extra-curricular about rigging elections and stealing nuclear bombs. Perk Decks are a set of passive abilities that you can upgrade with perk points, something you get by completing heists.
Something about luck? I don't know. I'm bad at coming up with these title-things!
Starting at tier 1, you now heal from picking up ammo packs. Every three seconds, you can heal between 16 and 24 health, the specific amount being random. The health bonus also increases by 20% for each teammate that has more health than you. Specifically, when one ally has more health then you, you heal between 19.2 and 28.8 health, when two allies have more health you heal 22.4 and 33.6 health, and when all allies have more health than you, you heal 25.6 and 38.4 health. While not a massive health pickup, it does let you catch up to your team in health rather quickly, keeping you in the fight for longer.
At tier 3, picking up ammo pickups also gives your team ammo, giving your team half the ammo pickup. This can only happen every five seconds however, so it's more of a nice bonus rather than a game changer. This tier, however, also gives you an extra 20% health, upping it from 230 to 276. There's not really much to say about that; it just makes you harder to kill.
Tier 5 is where things start getting interesting. The health pickup now heals your teammates for half as well, with a minimum of 8 health, with no teammates having a higher health than you and getting the smallest amount of health, and a maximum team heal of 19.2, with all teammates having more health and a maximum health roll. It's odd how it heals your team more when they have more health, but it's still great for topping the team up and giving them the edge needed to finish a heist. That's what I find this deck to generally be about, giving the team that extra push needed to pull out on top!
Tier 7 and 9 are the exact same, so I'll cover them at the same time. Simply enough, they both increase the minimum and maximum health each ammo pack can give by 8. Doing some more calculations, we can figure out that, at tier 9, the maximum health that can be regenerated at once is 64 health points. That's a very solid amount of health, though still not a game changer. The fact that this is the perk deck at its best leaves the deck somewhat underwhelming... But that's fine! The deck isn't meant to be the star of the show for your build; it's simply meant to give you and your team an extra chance at pulling off a heist.
And with that, you now know how to... do what the perk deck does! Yeah, the deck doesn't really have a major identity for itself, which makes sense considering it's role in a build. With that, this is professional heister Kinger, signing off.
To Infinity and Beyond
Written by: Waluigi Time (talk)
Greetings space rangers! Today in Toy Story 2, we're going to be finishing up something we started all the way back in January. That's right, we're headed back to Alleys and Gullies now that we have access to both of the items required to grab those last two Pizza Planet Tokens. This section is going to assume you're familiar with the level already, otherwise I'd just be repeating myself a lot. If you didn't read it, or need a refresher, I recommend giving our original run through this level in Issue 178 a quick look. With that out of the way, let's get right into it!
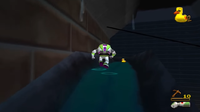
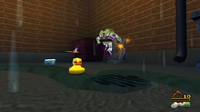
So, one of the things we were unable to do last time was recovering all five of Mother Duck's baby ducklings. To get the first one, immediately turn around and head back into the gulley where we originally did Slinky's challenge. If you head all the way to the left, you'll find a set of Rocket Boots at the bottom of the gulley. With these, Buzz will be able to deal with not only the water, but the slopes on both sides of the gulley with no issue. Grab them and rocket upward onto the slope opposite of the entrance, and in the corner, you'll find a small carved out area. Drop down in here, and you'll find the first baby duckling. I also recommend grabbing the Rocket Boots a second time on the way out, just to make things a bit faster, since traversing through water isn't exactly the greatest experience this game offers.
Now, backtrack to the beginning of the level, and pick up the green laser upgrade before heading over to the dumpster to your left. You'll find the Grappling Hook here, and a target to grapple up onto the dumpster. And just like that, the rest of the level is available to explore. Grab onto the ladder and climb up onto the apartment balcony. There's not too much that you'll need to deal with on these balconies, mostly because we've already gotten Hamm's Pizza Planet Token in this level, so there's no need to be going coin hunting or fighting enemies for them. Generally, you're given two options on how to progress. One option is to ride the zipline to the next balcony, which has coins along its path, although like others in the level, these are electrified and can zap Buzz, causing him to fall off if you don't time it well. The other option is simply to use the grapple targets to get across. This method is much less risky, but the trade-off is you won't get any coins out of it. Of course, coins aren't an issue this time around as I just mentioned, but even if you didn't get it the first time, coins are plentiful enough in this level (it's the only one I'm aware of where you can max out the coin counter) that you're probably just better off skipping these anyway.
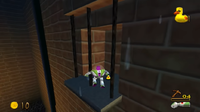
Anyway, just progress across using your preferred method, it's pretty straightforward. It's best to stick to the railings for the most part, as there's generally nothing important on the balconies themselves. If you do end up down there, each balcony has its own ladder to help you get back up to the railing - you can use it to go down too, but with one exception, there's nothing important down below, you'll just end up wasting time at best and losing progress at worst. The exception is actually just up ahead - after the second balcony, jump over to the windowsill, and make your way across to the third balcony. From here, use the ladder to drop down onto a trash can, and you'll see a small box nearby that can be pushed. By pushing it off of the larger box that it's sitting on, you'll create a shortcut that allows you to easily return to that balcony should you fall off, saving you a little bit of time. Once the shortcut is usable, head back up the ladder, and then grab onto another ladder above that one, to climb up to the second story of balconies.
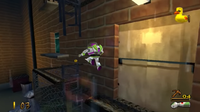
On this balcony, there's a battery over a gap in the railing, so grab that if you want. The next balcony is on the opposite building, but rather than using the grapple target, I'd actually suggest using the zipline here, because to the left, there's an alcove with the second baby duckling. It's easier in my opinion to jump there from the zipline than from the balcony itself, but either way works. There's three poles in the alcove that you can climb on, allowing you to get some height to jump back to the balcony without issue. Back on the balcony, you'll want to grapple onto a box (I think it's an air conditioning unit), and from here, the level design gets a little mean, because you'll only have the option to use ziplines from here on out. So zip across to the next balcony, and climb up the pole until you reach the windowsill.
Oddly enough, there's a Grappling Hook available, even though there's no grapple targets up here. I guess it's for if you fall back down? Zip across to another windowsill, and here you'll have two ziplines to pick from. Pick the one closer to you, and zip across to yet another windowsill, where you'll find another pole to climb up. At the top, there's two sets of gutters. If you're still looking in the direction you were when you jumped onto the windowsill into the first place, you'll see the one with the third baby duckling first, so make sure to grab that. Optionally, you can also take a zipline from here which will take you to a windowsill with an extra life on it, and then you can take a zipline back to the platform below the gutters. The alcove with the second baby duckling is below here as well, so if you didn't get it earlier, you can drop down to get it, but it'll take more time.
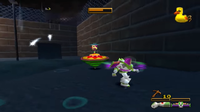
Whatever you end up doing, once you're finished up, run across the other gutter, jumping across the gap, and at the end you'll find a small hole to the right. This takes you to the rooftop where you'll find the Clown Top boss, probably one of the least interesting in the game. Its sole attack is moving in your general direction (although to the game designers' credit, it's got some wonky movement that you might expect from a top). It's got some decent speed, so you'll need to move to avoid damage, but otherwise just keep firing your laser (the upgrade helps a lot) and it'll go down pretty quick. This is yet another boss that explodes and drops a coin, alongside Jackhammer and Spider Gunro, but I'm pretty sure these three are the only ones that do it. The arena itself is honestly more interesting than the boss, and honestly, kind of weird. There's water on parts of the floor to make it slippery, and poles that you can climb up with no apparent purpose. There's also another air conditioning unit up here, but this one emits electrical sparks, presumably due to the water, making it more of a hazard, but there is a battery above it if you jump off the nearby pole. While the Clown Top is active, it's able to glitch on top of it if you're standing there, so it's far from a safe zone. And speaking of the pole, it has a zipline on it that goes nowhere. The whole thing is just weird, and doesn't seem to have much to do with the boss fight itself.
And that's everything we needed the Grappling Hook for, so jump down and head over to the marketplace to pick up the last two baby ducklings. The best place to jump down is from the gutter where you found the baby duckling, as that'll put you pretty close to where you want to be. One thing I do want to point out before we head over there is that there's another dumpster in the corner of the alley as you make the turn to approach the marketplace. There's a grapple target on it, and if you go up there, you'll find... nothing. Yeah, as far as I can tell, there's absolutely no point to this whatsoever. There's no collectibles up here, and you can't access any other areas from on top of it. It's just... a dumpster. I can't possibly imagine what the devs put it here for, but here it is!
Anyway, on to the marketplace. The first one is on one of the awnings above the fruit stands. What you're meant to do is progress until you reach the trampoline, bounce onto the second awning, and then use the Rocket Boots up there to jump across to the first. But you can cheese this by grabbing onto one of the poles you'd normally spin off to progress ahead on the platforms, and jump over to the umbrella closest to the entrance. From here, it's easy to jump and grab onto the awning, meaning you can collect this duckling without even having the Rocket Boots unlocked, but since you outright need them for one of the others, there's no real point to doing that. Besides bragging rights, maybe. The other duckling is at the end of the marketplace in the pool of water, just swimming there. It's by far the easiest one to get. We have all five now, so head back to the marketplace entrance, climb up the boxes, and head back out, and follow the trail of water until you find Mother Duck. Talk to her, and the last Pizza Planet Token is ours!
So, that's Alleys and Gullies wrapped up, for good this time. Next time, we'll be back to continuing our progress through the rest of the game. See you then!
Gameplay screenshots were taken from Nin's playthrough on YouTube.
Mach Speed Mayhem
Hello, 'Shroom readers! Welcome back, to the penultimate character analysis of Mach Speed Mayhem! That's right, next month is the last one! But there might be just a bit more after that. This month, we're doing #28: Roger Buster! Partner of Draq from last year, he races across the galaxy to deliver on time!
Main Series
Like twenty-five others we talked about before him, Roger Buster debuted in F-Zero X, helping to round the roster up to its modern thirty instead of the starting four. He's the very last of the X debuts to be covered in MSM, even! Roger is the partner of Draq in the galactic delivery server the two of them run - which, one day, received two strange machines with no owners. According to his X bio, Draq talked him into ditching that and taking the machines for their own races, but this was actually tweaked in GX. When we got the expanded GX bio, it clarified that Roger has not given up on the delivery. Draq convinced him to race the machine in the Grand Prix to try and get the attention of the intended recipient, but while Draq really wanted to race F-Zero, Roger doesn't much care about it. Draq wants to hold on to his machine, but for Roger, if the proper owner shows up to claim it, that's all fine with him. We also learn his motto - "No consignment too dangerous!"
When you get to Roger's interviews, he emphasizes not really caring about the race. Mr. Zero asks him point-blank what happens if someone shows up to take the machine, and Roger just says he'd hand it over without a thought. He even calls it his "until someone turns up to claim it", and explains he's only in the F-Zero because it was Draq's idea. He does enjoy winning, though - he'll challenge his rivals when they howl for revenge, and he deeply appreciates the support of his fans. His life is simple, too. Once he wins, he'll hit the sauna, and then get a nice, cold beer - or a nice cold drink if you live in the USA, this being one of the censored questions. He even compares racing in F-Zero to his truck driving, stating that he won because he channeled the same skills he used there, and it's a dangerous job. Not only is the cargo more important than your life, but he once got lost - and he spent quite a while drifting around the galaxy afterwards! Speaking of drifting though, Roger doesn't do much in the F-Zero GX story mode. He shows up in the intro to chapter 3, appearing talking in the background with Draq and on the scoreboard results for the previous race, and he helps fill out Chapter 7's field, but other than that? Nah.
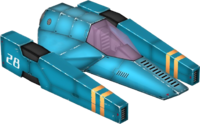
And then there's his machine. Like Draq's Mighty Typhoon, the Mighty Hurricane was built by Team Shooting Star, which had to disband after the infamous Huge Accident four years before GX. Since the accident, every single member of the team has gone missing, and the machine just got dumped on Roger's doorstep. With an E Body, B Boost, and B Grip in listed stats, the Mighty Hurricane is a relatively fast machine in F-Zero X, though it's certainly not cut out for direct battle. Like a good delivery man, it's better to just get ahead of the group and stay ahead, instead of trying to tangle directly! As for F-Zero GX, and its many mysterious stats... actually, Mighty Hurricane's pretty close to them! Cheap body, but a good grip, and while the boost isn't as good as promised Roger has both acceleration and top speed that put him ahead of the pack. A delivery driver needs to be trustworthy!
GP Legend series
In the F-Zero: GP Legend anime, Roger actually makes two appearances instead of just one! And for whatever reason, he's slightly more alien, his head shape and ears redesigned to not be Normal Human Man. Anyway, the first appearance is as the hero of the episode Roger & Draq, where he (and, naturally, Draq) is ready to race. You see, a young kid named Alias needs to have a vital operation, and he's scared, as one tends to be before lifesaving operations. But he's also a huge fan of Roger Buster in F-Zero, and Roger makes a deal - if I win, or if Rick wins, you'll go have that operation! Also here's some mangos I delivered across the galaxy in one day, enjoy! Naturally, with our aspirational plotline established, there's a complication that Roger is unaware of...
Once the race of the day gets underway, it focuses on three people - Rick, Roger, and Draq, all of whom want to win for their own reasons. Roger takes the lead early, experienced with the boosters and his machine, but he's quickly followed by Rick... which sets up the chance for Pico, legendary sniper, to snipe all the machines with speed-activated bombs, the anime setting up their own version of Speed (1994). For you see, it's a Dark Million trap, with Miss Killer holding Roger's life hostage to force Draq to win and hand over the prize money. The bombs force everyone to bunch up, maintaining a specific range of speed to avoid exploding... which is a problem for hot blooded men like Roger and Rick!
Deciding to throw caution to the wind, Roger, Rick, and Draq all start speeding up, trying to win for their own reasons. They won't lose here, and as the speed creeps up, it seems like we'll have a series of explosions, but that's when Captain Falcon is able to shut down the bomb transmitters from afar. With those out of the way, the three of them can go all out for a final push, and we get a one two three finish of Rick, then Roger, then Draq! Afterwards, Roger and Draq patch things up over Draq's hostage situation - and then do their next delivery job: escorting Alias to the operation. Surprisingly, though they feel exactly in the mold of true one-off characters here, they show up much, much later in episode 45. That one opens with Zoda capturing the two deliverymen to challenge them about one of their deliveries, with Draq accidentally spilling that they know people in the Mobile Task Force. Naturally, Zoda decides this makes them the perfect bait.
With Roger and Draq held over their heads - and Roger's attempts at an escape resulting in him getting kicked down by Zoda - the Mobile Task Force is forced to go investigate, and get in a pitched battle, not just with the defenses but even with Black Shadow himself. In an impressive play, though, after being mysteriously freed, Roger and Draq show up to help. Roger even manages to get a hit on the Black Bull, delaying it long enough for Rick to get inside - though the sheer power of the Reactor Might makes it easy for Black Shadow to blow him away. That's pretty much it for the role Roger and Draq can play in the episode, though they do get to make an appearance at the end, hanging out with the rest of the Mobile Task Force.
That's everything we've got on Roger Buster - he's pretty minor in the grand scheme of things. But now, we've covered all of F-Zero X's debuts! And next month, we get the very last character writeup! Join me then!
SIMulation
How To Safely Enjoy Fireworks Indoors
Fireworks shows are very common in the month of July, and while the celebration of both Independence Day and Bastille Day are long over, that doesn't mean you cannot enjoy fireworks at just this time of the year, and the The Sims 4 allows you to even create your own spectacle in the absolute safety of being indoors.[1]
You require City Living to buy the fireworks.[2]
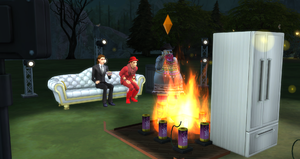
1.Buy some fireworks.[3] You can purchase fireworks from a stall in San Myshuno, from Build/Buy mode when bb.showhiddenobjects is active if testingcheatsenabled true is on via console, or just ordering them online from a computer (the fastest and safest route, without any need for loading screens and without requiring cheats if you're one of those console players). Totally safe and easy!
- Fireworks are also very cheap too, you can buy them with just about any budget. I just bought a bunch of Mortar fireworks instead of just one because subtlety is not what I'm good at and putting fireworks next to each other always seemed like a good idea and won't set off any chain reactions or anything.[4]
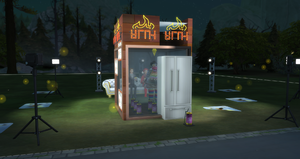
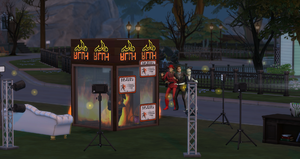
2.Construct an enclosed area surrounding the fireworks.[5] A small little enclosement, that's all. You don't need to go crazy with the decor like what we did here, but having fun is what we strive for in SIMulation! Would be too boring if the decor was too spartan, eh?[6]
- You have to build the lot so that no passerbys can save the guy on fire, should they happen among him. You have to build it as small as possible for maximizing enjoyment that your Sim will not miss, otherwise they'll be too excited and extinguish the fire themselves.[7]
- Not even having the "Fireproof" trait will save our buddy here.[8]
3.Watch the Sim burn stuck inside burn to death.[9] Having no place to run guarantees that the Sim who light the firework will get set on fire himself.
- Did we forget to mention that it's totally safe? We didn't install fire alarms because bah...who needs fire fighters and water sprinklers?[10]
- We forget to mention that when we say that it's totally safe to light fireworks indoors, we didn't mean for the poor sap who gets to light the firework inside the enclosed building. We advise you make some hated guy be the winner here.
Notes
- ^ Really, you're within the safety of your own home, probably protected by an ample anti-burglary system and formidable walls and windows that cannot be broken through no matter how hard you smash against it. What more could you want?
- ^ City Living was also referenced in the first fire-related issue all the way back in 174. We do not know why City Living is required for many fire-related activities, as we don't think that was the pack's intention.
- ^ You can't see a fireworks show without fireworks. Not even makeshift lasers or giant Mario bosses flying to the sky and exploding will suffice this time.
- ^ After all, who has seen fireworks go off from just fire before? Preposterous!
- ^ Boxing in Sims is a common strategy for Simmers everywhere and everyone who has played The Sims knows what is going to happen next.
- ^ Seriously, building in this game is fun, I can't simply settle for the most basic design for a house ever.
- ^ I've had a lot of outtakes building this lot, it was a lot harder than I thought it would be. Sims are actually pretty smart when it comes to saving burning Sims in this game compared to prior titles, they can extinguish across small pools of water and can even extinguish over fences and while they are swimming themselves. Found these out the hard way.
- ^ It's only for summer heat, not for like, actual fires. We don't know if there are actual fire immunity in this game and we won't toss in our own Sims we spent forever on CAS to find out.
- ^ It's not as gruesome as it sounds, btw, and no butts were set on fire in the making of this.
- ^ It's not any sort of firefighters can even get to him anyway. Water sprinklers are for cowards and the weak.
On the Origin of Species
Written by: ZelenPixel (talk)
July I guess! Not much to say! I wanna make an unrelated recommendation, though. If you like fast 2D platformers, play The Fancy Pants Adventures games. They're all on Steam, as far as I know, and Flashpoint (which is also a big recommendation of mine if you like Flash games)! Anyway, let's get back to this Spore playthrough.
Space Stage number six
Last issue, we worked on badges for the whateverth time and also visited Earth! Now we're going to get back to working on badges for the whateverth plus one time. The first thing I do is fly around an unexplored system near some empire that's a little angry at me, and then proceed to intentionally make them more than a little angry at me! I found a unique artifact, so I have ten left until I get Collector 5! I also I got to an uninhabited cube planet, so let's remove all the water. At the moment, it's like a sphere jammed within a vague cube shape. I start decreasing the atmosphere while ensuring it doesn't get to a higher terrascore since I don't have any wildlife on hand. I succeed at draining all the water eventually, and with this you can see it looks a bit funny, but it is, indeed, kind of a cube!
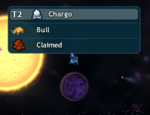
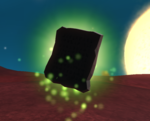
After that brief diversion, I give some extra money to the empire I had to go to a couple times to recharge (the atmosphere changing tools drain a lot of energy) and, now being friendly enough with them to trade (they're a warrior empire), I sell them the three artifacts I've obtained, and then get back to the artifact hunt. It's uneventful as usual. I get one of my colonies plundered by pirates, which I ignore and the pirates get taken care of within a few seconds. It's funny that I found a planet named Chargo that's got tribes of Bulls on it. I got another unique artifact, and also noticed I have a habit of just shaking my cursor left and right when I've started beaming up an artifact or similar pickupable. It's funny! If the artifact emits sparkles, like the various archetype related scrolls, you can leave a trail of sparkles, which is probably the main reason I keep doing this with every other artifact too.
I flew past another empire once and now they're at war with me for no reason. I suppose I've flown past them more than once, and that was the breaking point! Apparently I've never introduced myself to them either! Well, I can't now, because the only options for communicating are related to ending or continuing the war, even though they greet me with "State your case for continued existence", which is like, something you're supposed to introduce yourself to normally. I also figured I should start writing down the home planet of some empire of each empire archetype, for easily selling the artifacts I get at a higher price. I can just mark down the specific planet through the Sporepedia and then navigate there. It's great! I also picked up two trees somewhere by accident along the way, and dropped them on the first planet I could.
There's a strange T2 planet with all possible flora and fauna slots filled in, but there's just... very little land to actually support any of it. Most of the planet is an ocean with scattered islands, some of them way above the ocean level for some reason. Of course, I can find plants on them, but it's just kind of funny. Elsewhere, hey, look, an uninhabited T3 planet! I get Wonderland Wanderer 2, and this storybook planet type is Marshmallows. Neat! For the uninitiated (considering I only mentioned this back in October), storybook planets are very rare uninhabited planets that are T3 and have unique layouts, and earn you rares for finding one. The description for this one is interesting. It states "What kind of mind could create such a planet? I bet they make good cupcakes", implying that this planet is artificial in some way. Exploring the planet, there's nothing that really evokes any kind of confectionery, but it's still pretty cool, isn't it? And hey, in the same system, there's another unique artifact! Curiously, I don't think the planet counted as another artifact for this badge, even though it's kind of grouped in with all the other rares.
I was going to head back to my system to start finding empires for each archetype and, right on cue, someone gets an ecodisaster so I have to run back anyways. I dealt with that and got the Eco Hero 3 badge! I also went out and marked down the home planets of empires for each archetype, while selling off the artifacts and spice. After that, I had to defend my ally from attack, which actually hasn't happened in a while! Unfortunately, one of the ally ships was destroyed in the process, so I picked up another one from another empire, and now all of my five allied ships are different, at least. It's time to continue looking for artifacts, so I'm now going through a wormhole first. Did you know the color of the nebulae in the background depends on where you're at in the galaxy? Near my home system, it's a dull purple. Where I am now, it's closer to a vivid bluish-purple. Going through another wormhole, here it's a more mixed purple. I'm also kinda close to the galaxy center this time, though I'm not going there just yet...
My current goal is to finish this dang Collector 5 badge, and after that, I think I'll head towards the galaxy center, for the first time in my life actually! But that's later. Here's another unique artifact! I found "Knot the Grawx Empire", which is a Maxis creature (of the same name) and I dressed up to resemble the Grox. This empire is also one of the two mean archetypes and is located somewhat close to the center of the galaxy, like all the Grox are. Hm. The big difference is that they only have one system, as opposed to like, the 2,400 of the actual Grox. Also another zealot empire got mad at me again for existing, which is never going to stop being funny. Oh look, their planet has yellow radar waves. Let's yoink it while they try to kick our butts, and then escape!
This one planet contained both a Yellow Geode (yellow, and also another unique artifact!), and Opals (yellow, not a unique artifact). It also had yellow spice, if that makes things better. Unfortunately, the planet is bright pink and orbits a red star. I decided I'd just make the planet yellow myself, but not the sky or sea since I hadn't unlocked that yet, sadly. Another unique artifact is found, so now I have 95/100! I noticed I have at least five of each set of artifacts (aside from storybook planets for obvious reasons), so that's pretty cool! Also, this is the third time today I find a Petrified Sun Dried Nautilus. Come on, game, give me something else!
I also got contacted by a zealot empire again. Apparently, if you're close to them but they're not mad enough yet to start attacking you, they just kind of.. send their ships to follow yours, even into planets. So I'm just here picking up a thingamabob while this crystal ship slowly approaches me and then just kind of flies around me for no reason, no attacking, just rotating around me. This is not too long before they start shooting at me, also for no reason, and then get really mad that I fought back and ended up destroying this one ship. Also, I found another storybook planet! This one was T2, so yeah, they can be other terralevels occasionally. This one was Tentacles. This is why I try visiting every uninhabited planet that's above T1 - what if it's something cool like that? Apparently, storybook planets also have a chance of being T1 or even T0, but that'd be really hard to look out for. They're typically T3, and uninhabited T2 planets are also rare anyways, so just know to look out for those.
Three artifacts left!!! And here's... another storybook planet. What is even going on today? Looks like that Craters again, though, since I didn't get a new artifact. I did get Wonderland Wanderer 3, though! This one actually looks completely different from the other Craters planet, so I don't know what's up with that? This one actually matches the name better than the previous one did, at least. Apparently the planets may just generate the wrong layout, or something, and it's unknown whether it's a glitch or not? Honestly, knowing this game, it probably is. I also accidentally got Sightseer 4, I guess because I visited this binary star system? And that counted as a cosmic discovery, even though I've visited many binary star systems (no doubt many of this exact type) before.
I found The Mask of Todd, making this the 99th unique artifact, which means I have one left! And, right away, there it was. The 100th artifact is a Tablet of Prosperity No.9. The description of that tablet is just complaining that the Grox took up the whole center and you can't trade there. It's also fitting, though, since it's a Trader artifact, and I'm sure going to sell all these artifacts for a large sum of money! In any case, I'm glad I finished this. I guess Sightseer 5 is next, since I've just been made aware of it. Just like I thought, visiting a binary star system or something like it counts towards it, and so does visiting a wormhole. It's a bit unfortunate wormholes don't get checked twice (once for each of its two points in the galaxy), but I get it. And hey, here's another Petrified Sun Dried Nautilus.
I should note that, through another wormhole venture, I landed not far from the galaxy center, so I guess I'm ready to finally start this big journey after this badge is done. I should also cite the game: "As you approach the galactic core, it gets harder to plot a course through the gravity wells of the dense star clusters. Your travel range has decreased to provide better precision." What this means is that your travel range gets shorter the closer you get to the galactic core itself.
I also ventured to Grox empires by accident while visiting binary star systems, and visiting a planet (it had yellow radar waves I had to go see it) made the game go "Your scanners failed to identify the inhabitants of this planet. Report back to Homeworld.", for some reason. The game also shows a cutscene, wondering if this could be a Grox colony, which, well, yeah. You showed to me that it was, silly. Curiously, despite the Grox being the evilest empire in the galaxy, they don't start sending their ships after me when I get near their systems, unlike some of these other numerous zealot empires I keep encountering. Isn't that weird? Well, that didn't last long, I stole a (statue) leg from their planet and they said they're at war with me. Well. It had to happen sooner or later, I guess. Another one of their planets had yellow radar waves, but I didn't bother with that one.
The fact that my colony briefly got plundered by pirates (for a few seconds, again) was, like, the least of my concerns. My or my allies' colonies better not be attacked entirely or be affected by an ecodisaster or whatever while I'm here. Sure, I can use Return Ticket to get back, but I'd like to stay close to the center while I can to get to the core, alright? Wait, it looks like I'll have to go back anyways, since one of my allies' ships is gone again. Oh well. I can prepare better, then. And here's Sightseer 5, finally! I'm Return Ticket-ing back and just decide to look at my home colony's missions. For some reason, NOW they have a mission to ally an empire, which I complete instantly since I'm allied with, like, eight and have been for a while at this point. They also finally let me do that quest to go at war with another empire, and told me to destroy all cities on this one planet of an empire I already spared with money, which, like. Were all those empires already mad at me for existing not enough?
I replaced a ship in my fleet with one of a higher star empire (which means the ship will have more HP), stocked up on various repair and energy packs for restoring health and energy on the go, got Swirly Valley and Tentacle River (just some terrasculpting tools), saved my allies from an ecodisaster, and deposited that Tablet of Prosperity (my 100th artifact) on the sanctuary planet. I think I'm ready to go. Next issue! I'm excited to be getting to the galactic core for the first time in my life (despite how long I've been playing this game), but you'll see that in a month! Or two, maybe! I gotta do something for September, though, as Spore's anniversary month... Anyway, see you next time!
| The 'Shroom: Issue 184 | |
|---|---|
| Staff sections | Staff Notes • The 'Shroom Spotlight • 'Shroomfest Highlights • Poll Chairperson Address |
| Features | Fake News • Fun Stuff • Palette Swap • Pipe Plaza • Critic Corner • Strategy Wing |


