Director Notes
Written by: Hooded Pitohui (talk)
Hello, all of you readers of The 'Shroom, and welcome to October's edition of Strategy Wing for the year. October is a month near and dear to my heart, for multiple reasons. Autumn begins in earnest around here, and the grey, gloomy skies and chilly weather energize me. There's celebrations to be had in October, and, while I'm not a big Halloween person myself, I get a boost of seeing my friends get excited for the spooky holiday. Yes, there's plenty of reasons to like October.
I've been plenty busy this October, though, and I don't have too much energy left right now, so let me cut to the chase. We have a new section for you this month, with Long John Spaghetti (talk) debuting Turn Right to Go Left, a section which will walk us through Cars: The Video Game. Unfortunately, we're missing a few sections this month, including SIMulation, and Koops, your Emblem is on Fire as a result of packed schedules this month, but do not fret. They will return!
Don't miss the final edition of Dr. Mario World Check-Up this month, where winstein (talk) gives us some reflections on Dr. Mario World, in a fitting end for a section about a game coming to an end.
There's plenty to read this month, so I shall leave you to it! Go and enjoy what our writers have prepared for you!
Section of the Month
We have a bit of a shake-up in our results this month, with Ray Trace's guide on setting your Sims on fire (it had surprisingly thorough documentation!) tying for first place with The Shamancer's guide to Zeraora in Pokémon Unite. Coming in second, Waluigi Time's new section To Infinity and Beyond has made it off to a strong start! Please do congratulate these three, and continue to support all of the writers on the Strategy Wing Team with your votes!
| STRATEGY WING SECTION OF THE MONTH | ||||
|---|---|---|---|---|
| Place | Section | Votes | % | Writer |
| 1st | SIMulation | 4 | 25.00% | Ray Trace |
| 1st | I Choose You | 4 | 25.00% | The Shamancer |
| 2nd | To Infinity and Beyond | 3 | 18.75 | Waluigi Time |
An Ogre Battle Section
Written by: Generalissimo Shoe (talk)
Hello fellow freedom fighters, and welcome back to another An Ogre Battle Section, where I, the great Generalisimo Shoe, will help you form the perfect army. Last month, we looked at the basics, since there are so few things like Ogre Battle. This month, though, we're going to start looking at the units that can fill your army.
The first class we're going to talk about is the most basic class of them all, that being the Fighter class. Mostly seen in the early game, the Fighters are the most basic of soldiers, essentially fresh recruits who are fighting without any specialities. Fairly weak when placed in the front row, Fighters will do two sword strikes. In the back row, they'll do one sword strike.
On the surface, this class might seem fairly useless, and, by itself, it is. With low stats and low health, as a unit they aren't very good, but they do have a lot of options. You see, Fighters basically act as your early game unit-builders, because a Fighter has a ton of things it can turn into, with what it turns into depending on its charisma and alignment. Starting at level 4, and going as high as level 7 (if you have the patience for that), the Fighter begins to unlock different classes that it can turn into, which is a good way to get some early game balance in unit composition. All told, through regular leveling, a fighter can become seven different things, those being (info acquired from the Ogre Battle strategy guide I purchased):
- Ninja Requirement: Level 6 and alignment between 0-50
- Wild-Man Requirement: Level 6 and alignment between 0-50
- Wizard Requirements: level 4 and alignment between 10-50
- Beastman Requirements: Level 5 and alignment between 25-65
- Dollmage Requirements: Level 5 and alignment between 30-70
- Knight Requirements: Level 5 and alignment between 50-100
- Samurai Requirements: Level 7 and alignment between 50-100
There's also two other promotions that are acquired through a wonky method. If a Fighter is slain during either the day or night, then it will have a 12.5% chance of becoming either a Tigerman (day) or Werewolf (night). In the early game, Fighters will be among your most valuable units, entirely because you can mold them into advanced classes that give you better control of how you'd like to form your units. Of course, these units are almost useless after the early game, since you'll already have units formed of advanced classes, but, again, during the early game they're very valuable. In addition to this, there's also a class called Amazon that's basically just the female equivalent of Fighters. The main difference here is that Amazons have a different group of promotions and use a bow, so they have two attacks in the bottom row and one attack in the front row. The promotions for Amazons are the following:
- Cleric Requirements: level 4, Charisma 50+, Alignment 50+.
- Witch Requirements: level 5, Charisma 50+, Alignment 65-.
- Valkyrie Requirements: level 5, Charisma 50+, Alignment 35+.
- Princess Requirements: a Dream Crown item.
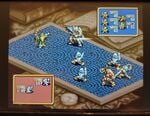
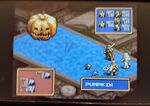
For our next class, we're going to be talking about one of my personal favorites, the terrifying Pumpkinhead. Only found in stage 6, Deneb's Garden, Pumpkinheads are men who have been transformed, by the witch Deneb, into horrifying creatures with pumpkins for heads. Doing one attack in the front row and two attacks in the back, Pumpkinheads have a very interesting gimmick where their only attack, aptly named Pumpkin, always does 50% of the targeted enemy's health. So if the enemy has 300 HP, it will be brought down to 150, and, then, if hit again, it will be dropped down to 75 HP.
Personally, I find this to be one of the most useful abilities in the game, because, since wins are based on total damage done, it's really useful to have an attack that will cut an enemy's health in half. In addition, it's really useful for the purpose of exterminating an enemy unit when you're cutting one of its members' health in half right at the start. You want to keep a Pumpkinhead in the back row, both because it does two attacks in the back and because its stats aren't the best, with it having fairly low health. The best way to maximize Pumpkinhead's damage output is to try to have it attack a unit that's either in the front row or will be easily targeted after being hit. For example, if you have the choice between two back row units but your front can only target the one on the right side, it'll make the most sense to hit the one on the right side. The two biggest downsides to Pumpkinheads is that they can't easily finish off a unit on their own (it's possible, but the enemy has to be at literally one health) and their attack has a tendency to miss, but I think the positives greatly outweigh the negatives. I wouldn't load a unit with Pumpkinheads; instead, I'd probably only keep one in a unit just for support purposes
Pumpkinheads also have a promotion called Halloween, which are even better than Pumpkinheads because they get three attacks from the back row instead of two! Now, how you get these is actually really tricky, because the only way to upgrade them is by giving a Pumpkinhead a Rotten Pumpkin. Depending on how you play through the game, it may be harder or easier for you to get a Rotten Pumpkin. At the end of stage 6, when you defeat Deneb, you are given the opportunity to forgive her, causing her to join your army if you don't execute her (don't worry, as she comes back in future games). If you decide to have her executed, the town of Baljib, on the same map, will give you a Rotten Pumpkin every time you visit it. If you choose to forgive her, you can still get a Rotten Pumpkin, but you can only find it from random enemy drops on the same map. So if you want to pursue the Halloween class, executing Deneb is your best bet.
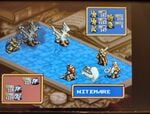
The last class (technically classes, but they're basically the same thing) is the undead Ghost/ Phantom class. These are undead spirits who can be found on multiple maps as wild enemies, and they can be convinced to join the cause for freedom! Ghosts have a very interesting mechanic in this game where they have 0 HP but can also only be affected by holy magic, certain magical swords, and the Sun tarot card. That means, in most cases, if a unit doesn't contain a Cleric or Shaman, that they'll have no ability to hurt these restless spirits. The fun doesn't stop there either, because, let's say they have a Cleric and that Cleric destroys your Ghost... Well, when the battle is over, a Ghost, unlike any other class, simply returns to the battlefield as if nothing happened! In the front row, a Ghost uses the attack Soulflay once, which targets a single enemy. In the back row, they use the attack Nightmare twice, which also attacks a single enemy.
Because they get two attacks in the back row, you'd think that using them in the back would make the most sense. But, really, you can use them either way since they can only take damage from Clerics and Shaman. They're really good in the front row, because any enemy that doesn't have a ranged attack or magic spells will be focusing useless efforts trying to take down your spectral friends. Ghosts are a great defensive unit because you really can throw them anywhere and prevent the enemy from hitting you. I'd recommend either one in the back row to suck up spells and get two attacks, or two in the front row, because, while you'll get less damage output from your side, you'll also take less damage from the enemy. Now you'll notice that I said the Phantom class is basically the Ghost class, and that's because Phantoms are just Ghosts that you find in the wild in later stages. The only difference is that they do two Soulflays in the front and three Nightmares in the back row, so they're basically just an upgraded Ghost. One important thing to note is that, if you fight a unit with a Cleric, a single attack from a Cleric will take out all your Ghosts or Phantoms (it works the same if you're the one with the Cleric). Also, if you're fighting an enemy that has Ghosts and you have a Cleric. you either need to set your target to Best or Weak. If you set it to Strong, instead of attacking the Ghosts, your Cleric will heal your party. The last thing to note about this class is that, if you use the Sun tarot card while in battle with Ghosts or having Ghosts on that squad, the Sun card will wipe out all Ghosts on the field. Try to keep that in mind.
I believe that will be enough troop evaluations for this month. We talked about the primary early game units as well as two of my favorite specialty units. I'm Generalissimo Shoe. Join us next month when we evaluate even more units fighting for the cause of freedom.
Dr. Mario World Check-Up
One of the things that Nintendo announced back in around 2015 that they would do was to develop games for the mobile device, but the twist is that the games are not merely mobile versions of the console games. So for example, the Super Mario game on a mobile is not designed or played like a console Super Mario game would. A few games came out on the mobile this way, and one of these games is Dr. Mario World. This is naturally based on Dr. Mario, and the announcement came as a surprise to me because Dr. Mario is considered a relatively minor series, compared to many of the other series like Mario Kart, Fire Emblem, and Animal Crossing. Much like Nintendo promised, this game does not play like a traditional Dr. Mario game.
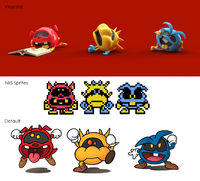
Before this game was fully revealed, a series of Virus Vids were gradually released, showing the familiar red, blue, and yellow viruses in their daily lives while contending with the fact that being eliminated is a fact of life (especially the red virus). Something to note is that their colour scheme is based on the NES game, what with the coloured gloves and shoes, unlike the more modern portrayals. The videos is kind of humorous in a cheesy way, but it is understandably groanworthy for others. What these videos do highlight in regards to the game that they are promoting is that instead of requiring a capsule match to have four-in-a-row for virus eliminations, only three is necessary, due to how viruses tend to disappear if holding a matching colour of their type.
In my opinion, the fact that it is not a traditional Dr. Mario experience is a great thing. The reason being that I felt that the traditional Dr. Mario game felt like old hat, what with the rigid movement of the capsule pieces and the potential long-drawn nature of its versus mode. By utilising the touch controls to the fullest, it invites comparisons to the Virus Buster mode introduced in Brain Age 2 since that mode is also touch-based, but by focusing mainly on it, the control scheme is fully-realised by comparison. For starters, having the ability to control on a mobile device means that faster movements are viable, and this mainly affects the timed stages and versus mode, which immensely benefit from being able to be played quickly.
The touch control isn't the only thing that is different from the traditional Dr. Mario. This game also introduce the concept of selecting one out of the multiple characters, which consist of Mario regular characters except taking a role of the doctor. So not only do you have Dr. Mario and Dr. Luigi, you also have Dr. Toad, Dr. Yoshi, and Dr. Baby Luigi, for example. Each of them also comes with a skill that will help out, and they can also come with assistants, which are there to help out a bit. These characters are mainly there to facilitate the free-to-play nature of this game, where by spending some in-game currency, players can obtain a doctor or assistant, and if they already have them they will level them up. The in-game currency is also used to be spent on items or continues, and perhaps hearts to help out in completing the stages.
Although I am a relatively active contributor to this game, I didn't really get my start from the moment this game was released, since this game is not available to every country in the world unlike more proven hits like Super Mario Run and Mario Kart Tour. That was why I never quite bothered with the game very early on, but it was only when I got a new phone back around the end of February 2020 and was looking for games to download that I somehow managed to downlod this game, since it was from a different app store from Google's Playstore. This means that the game isn't region-locked if you are not in one of the lucky countries that the game can be downloaded from, and as such, I was able to actually play this game. The gameplay loop is captivating when I returned to it after a month of not playing it, and I felt that there must be a way that I can channel this obsession to something meaningful, which is why I started contributing to the Mario Wiki in the best way that I can since there is a surprising lack of interest for this game, and also because prior to this, my contributions are incredibly minor and nothing to write home about.
Because I have been following this game's updates for most of the updates, I have been able to observe the changes that happened throughout this game's life. Things like character changes and game updates are basically among a few of these updates. One such type of change is stage update balance, which means that certain stages have changes done to them to usually render them easier, which is personally not a change I am looking forward to because that meant playing through old stages just to see what changes were made, to keep the wiki's information up-to-date, you see. Character balance updates are exciting mainly because it's fun to see which of the game's various characters become better, since a lot of characters are underwhelming when they were first introduced. Even to this day, I felt that not every character is viable enough. Some of the version updates addressed certain exploits that would break the game, which would be crucial to fix because as a game centered around being free-to-play, using them grants an advantage to the user, not to mention how it renders the need for microtransactions useless. One notable trick is the usage of Shy Guy and Banzai Bill to reduce a character's special gauge to zero, allowing for infinite uses of a skill with certain doctors.
The peak of this game's popularity is inarguably around this game's first year anniversary. Around that time, the Dr. Mario series experienced its 30th anniversary, and players are provided the opportunity to get 8-bit Dr. Mario, a character otherwise unavailable through normal means. The game is also given a promotion from Nintendo account outside the Dr. Mario World to celebrate it, and a brand new update introduced Skill Summit not long later, which provides extra levels to play through and also marks the return of the underappreciated and underrated Dr. Mario 64 songs. The game's outlandish characters were also introduced during this time, where Dr. Goomba Tower was added in the last three months prior to the anniversary (each introduced in one of each month): Dr. Goomba Tower, Dr. Dolphin, and Dr. Baby Wario. Notably, Baby Wario makes a return, which should be pointed out as a character that only appeared in one game, unlike every other doctor/assistant in the game, and thus it garnered the most Likes/Retweets among doctor characters (more than Goomba Tower!).
One interesting thing about this game is how overall lenient it is in regards to 100% completion, since skill plays a factor in stage completion rather than having a huge random element in similar games like Candy Crush Saga. Alongside the lack of coercion in spending money to obtain diamonds, there is not much reason to spend money since free items are given out on a regular basis to help out. The game also introduced several ways to make clearing stages easier, such as the Power Boost Rally (an event where free items are given if you complete uncleared stages in a row without giving up) and stage updates to make many of the stage easier to complete. Despite the lack of persuasion in microtransactions, this is a game that I spent money on to hopefully keep the game going for a bit, since I do like this game. I have to imagine that the game stopped being feasibly profitable to keep it up, given the ease in which the game can be played and more importantly completed 100%.
Eventually, there were signs that the game was winding down, mainly because the updates introduced less new things. For one, new assistants and/or doctors stopped being introduced, and later on the world themes are recycled from past themes except they take place at night. Even the Skill Summit was changed to update every four weeks instead of two, favouring the return of Clinic Events in the weeks that there was supposed to be a new Skill Summit. Dr. Petey Piranha was the last doctor that was added but there were some signs that it was to be a purchasable-only doctor like Dr. Dry Bowser and Dr. King Boo, since its skill is very good and how it was conspicuously not introduced in the regular month schedule. Indeed, the end of the game kind of loomed over some fans, due to the fear that this game is meeting its demise. A comparable game in this case is Miitomo, which was a pretty unique first effort by Nintendo for offering something unique, but the game's overall lack of support in the later months meant that eventually that game was slated to shut down, lasting around two years after its introduction.
It was only around the end of July that the bombshell came about that confirmed the concerns regarding this game: it will eventually be discountinued. My reaction to this is a mixture of sadness due to the game being rendered unavailable, relief of not needing to keep up with the game, and amusement that this is the most attention this game got in a while. Indeed, it's when something is going to cease that a lot of attention is being given to it. When this happened, it isn't possible to make in-app purchases, but at least the developers rewarded those who did so by giving them unlimited hearts for the remainder of the game's lifespan. Not only that, since diamonds can't be purchased any longer, diamonds are given in generous amounts and eventually a free continue is given each day, with the intention to do anything with it, such as obtaining new characters or purchasing items/continues to complete previously-tricky levels. It's certainly a nice gesture, even if that doesn't negate the fact that this game is ending its support. There will be a website called "Dr. Mario World Memories", where nothing is known about it except that it would list down the player's accomplishments and stats.
Now that I have outlined a brief history of the game as well as my history with it, this section is used to outline some of my thoughts on certain aspects of the game.
| Overall Favourite Doctor | Dr. Daisy |
For both stage mode and versus mode, my favourite doctor has to be Dr. Daisy. The reason for this is her skill, which allows her to manually target an object that you want to eliminate, and in versus mode it is very unique because she is the only one that can do this. The manual targeting is incredibly versatile because you can target any place in need for clearing. She gets even better because there are two separate updates that made her great: the first one makes her targeting completely eliminate the target, while the second one makes her skill gauge fill faster than usual and also makes her attack metre fill faster. The latter is notable because it turned her from being hardly viable into one of the best doctors in versus, and I am glad this happened before this game was being shut down. |
| Least Favourite Doctor (Stage) | Dr. Bowser |
In stage mode, the overall viability of every doctor is more balanced. For example, doctors that clear specific objects have their uses if the stage calls for them, and doctors that eliminate objects a certain way are overall useful even if they are not always generally essential. Dr. Bowser falls under the latter category, but there are several factors that make him unfortunately not very good. For one, Dr. Bowser's targeting is completely random so a stray capsule that you don't want to target might be targeted instead, unlike how some doctors prioritise viruses like Dr. Peach and Dr. Boo, and his skill gauge is the second-longest to fill, only beaten by Dr. Dry Bowser. At least with Dr. Dry Bowser, his skill incinerates every target, making him ideal for scrolling stages. Dr. Bowser by comparison felt underwhelming. |
| Least Favourite Doctor (VS) | Dr. Luma |
While Dr. Bowser is not really good in stage mode, at least he is decent in versus mode. Dr. Luma, on the other hand, is very difficult to use. Its skill in pushing viruses down might have some uses, but there are very few applications where this skill comes in handy, and it's not helped by having underwhelming stats except for the best 2-bomb defence. |
| Favourite Stage | 
|
My favourite stages are the final stages in both World 25 and World 31, as well as the Special Stage in World 31. The image provided is from the final stage from World 31, which is a fantastic final stage. The reason for it being that they are long scrolling stages, which gives them a bit of flexibilty on how to clear them because they are designed to be difficult only for the scrolling rather than the stage design. It provided a nice sense of tension and achivement for clearing them. |
| Least Favourite Stage | 
|
The second half of World 27 is notorious for introducing stages that are actually difficult despite not being labelled as a "Hard" stage, and the stage that I highlighted is a big example on this. There are a few other stages within World 28 to World 30 that have this notoriety, where it's as if the developers wanted to make the stages as difficult as possible to make spending diamonds a requirement to 3-star them. |
| Daily Booster Record | 
|
Utilising Dr. Wario's ability to generate more capsules per use of the skill and the activation of both Spiny and Spiny Cheep Cheep (both applies a chance for rapid skill metre increase), I was able to achieve the amount of eliminating 6870 viruses. This daily booster is played after the patch that balanced out Shy Guy and Banzai Bill's effects are applied, meaning that skillful play is now required. I have never beaten this record ever again, and I never bothered to do this because after I obtained every doctor and assistant, there's no reason to play this mode any more. Despite the high number that I have obtained, there's someone else who beaten it, so that's not the limit of how much one can obtain, though it still requires Dr. Wario + Spiny + Spiny Cheep Cheep. |
So with that said, I have to say that I will miss this game given how I spent a lot of time on it, both by playing it and by writing on the wiki about it. This game is a huge breath of fresh air for the Dr. Mario series because it introduced a lot of things for the series, since the actual games are resistant to innovation to a fault. This would be like if Mario Kart never moved past the 3D and remained the 2D plane in Super Mario Kart and Mario Kart Super Circuit, and then suddenly the next game is Mario Kart Tour: the difference would've been night-and-day. In fact, I daresay that Dr. Mario World is the best Dr. Mario game if we can get past its monetisation design, and is the series that got me interested in Dr. Mario. The Dr. Mario series is notably overshadowed by the success of the first games (on NES and Game Boy), where none of the future games came close to the success of those games.
One of Nintendo's hopes with their mobile efforts is to get people interested in similar games on their main consoles, so like Super Mario Run was to be a segue to get people interested in the 2D Super Mario games. Whether or not the other mobile games managed to do this is debatable, but to me, Dr. Mario World is the most successful effort, and I have high hopes that the next Dr. Mario would bring the console experience to the next level. Like for example, before this game, the player hardly have a choice of matter on which characters they can choose (Dr. Mario 64 notwithstanding, making it an outlier as other characters other than Wario are one-off), but this game offers a choice in one of the many familiar Mario characters and this is a huge development for the series. If the Dr. Mario series goes back to the traditional gameplay while ignoring what this game introduced, the contributions that this game made would've been wasted, and that would be a real shame because I felt that the series hardly provided room for innovation.
It was certainly a fun ride while it lasted, and personally speaking, I think following one free-to-play game is enough for a lifetime. Here's hoping the future of the Dr. Mario series is bright!
To finish it off, here's a video of me playing all the special stages with Dr. Daisy (it's quite long, and has 31 stages, so I understand if you are inclined to skip it):
Thank you for reading.
I Choose You
Written by: The Shamancer (talk)
Happy Halloween readers! Due to it almost being Halloween, I'm going with the spooky goblin/poltergeist/whatever it is, Gengar!
Overview
| Tier | A (data gathered from various sources)* |
|---|---|
| Role | Speedster |
| Type | Melee |
| Difficulty | Expert |
| Offense | 7** |
| Endurance | 4** |
| Mobility | 8** |
| Scoring | 3** |
| Support | 2** |
*Note: this tier list data is subject to change.
**Stats are shown differently than previous articles. For example, 7 = 3 ½
Gengar is a B-tier Speedster recommended for Experts. He has a max stat of 24 and haunts the lanes with Melee attacks.
Gengar is one of the Pokémon that felt its glory when it was OP, but has now sank below other favorites. In the past, a combination of Sludge Bomb and Hex would deal massive damage because Hex's power would be increased after using Sludge Bomb. However, Gengar was soon nerfed and replaced with others like Zeraora. He is still viable in present games, though others can quickly outshine him.
Attacks
Gengar starts with Will-O-Wisp and the ever-viable Lick. Will-O-Wisp both deals damage and burns the target, while Lick can draw enemies toward you, allowing you to stop enemies from running away.
Sludge Bomb hurls a giant chunk of well, Sludge, and poisons the victim, while Hex is that one Ex-OP move that allows Gengar to teleport, having at least some other use than causing mass destruction.
We finally found an Unite Move that can actually be something else than a giant area attack. Gengar's Unite Move, Phantom Ambush, has Gengar slink around the shadows and ummm… do a giant area attack. But wait! If used again, it can decrease the movement speed of the surrounding enemy Pokémon.
| Lv 1-3 | Will-O-Wisp, Lick |
|---|---|
| Lv 5 | Shadow Ball/Sludge Bomb |
| Lv 7 | Dream Eater/Hex |
| Lv 10 | Phantom Ambush |
Best Pokemon to Use With and Best Pokemon to Counter
Gengar is actually very frail, so having moves that can shut it down for a while like Slowbro's Telekinesis can easily defeat it. Alternatively, Gengar requires certain moves to hit the target in order to do more damage, so bring in Zeraora who can evade its attacks. Finally, Gengar also needs a ton of XP to actually be able to do some damage, so even competing with it for XP in the Jungle Lane can defeat it.
All in all, Gengar is actually not that bad, as long as a Supporter or Defender can cover for it, or even a Pokémon like Slowbro or Alolan Ninetales that can cut off the other Pokemon's movement and attacks.
How to Get
Gengar can be bought from the UBC for 10,000 Aeos Coins or 575 Aeos Gems.
Gengar requires careful planning, and backup plans in case Gengar isn't able to set up one of its stronger moves to deal damage. However, its movesets are more geared towards inflicting status effects and stopping the opponent Pokémon from escaping.
That’s it for now. Click here if you want to see a certain Pokémon from the roster.
Catch you later,
-- The Shamancer (talk)
On the Origin of Species
Written by: ZelenPixel (talk)
Happy October Spooky Month!!! Boo! I hope I didn't scare you too much with that!!! Anyway, ya girl is back with more Spore, and we continue the adventures of our Stabbies, now a spacefaring nation!
Space Stage
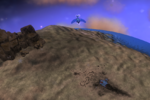
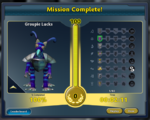
As described at the end of the last issue, we ended the Civilization Stage, made our spaceship - Stabby Spacefarin, and named our captain Lucks, in honor of the simultaneously lucky and unlucky tribe member from the Tribal Stage. The game at this point tries to teach me how to use the spaceship, and, as usual, I skip it! I already know!
In this stage, you control a spaceship, you fly around solar systems and planets, interact with alien empires and set up alliances and wars, terraform planets, collect treasure, and, with the Galactic Adventures DLC, even have your captain land on planets to go on adventures! There's a lot of things to do in this stage, and no real goal to the stage - it's endless! Players may set up their own goal if they choose. Many players, and also speedrunners, have set up their goal as reaching the galaxy core. Strangely enough, despite playing this game all my life, I've never reached it, and I don't know what issue of this section I'll even reach it, if I even do! Definitely not this one. Definitely.
Starting off, we still have access to the City Planner, and now we have even more parts for our outfitter, so we can make cooler outfits for our empire! A lot of building space also freed up in the smaller cities we've had previously, so I set up some turrets and buildings. It's kind of pointless, since our home planet will always have pathetic spice output compared to any of our colonies, but I wanted to do it anyways! We can also edit our captain's outfit, which is pretty much necessary for the adventures they'll be participating in. I won't be able to do much with it, because the complexity meter is nearly full, but hey! Sorry Lucks, guess you're having to be nearly naked for now.
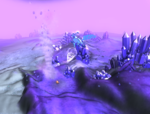
Now that we can travel within our solar system, our current mission is to investigate a certain planet. This sequence of events is something that happens at the start of the Space Stage on every save file! We go to the planet, and our ship's radar caught a spaceship wreck on the planet. The game tells us to investigate it, teaching us the basics of using the Radar and Scan Tool. Or maybe the tutorial I skipped did that too, I don't remember. The scanning activated some sort of transfer beam on the broken down ship. "Missiles and an interstellar drive, which seems to have an unknown star's coordinates programmed into it. The wreck's damage looks like it came from a fight. This ship must have been sent from some other planet to get help."
The interstellar drive we now have lets us leave our solar system. It's very weak for now, and, at the moment, we can only get to the nearby star that the game mentions. We go onto the planet which might have needed our help, and it looks like we're too late (which also always happens). The planet is littered with wrecked cities. The game prompts us to scan the ruins, which came up with nothing, but it activated the colony's defenses! The "Omaux", for some reason, claim we're Grox intruders. Their spaceships are literally Enderman heads I made in 2013 I think! Endermen again! We can either use our new missiles on the spaceships, or leave the planet entirely, which is what I choose to do. They don't follow me out of the system, unlike other hostile ship encounters in the game.
Our empire spokesperson guy says that it's confirmed we're not alone in the universe. They tell us that we can now find alien life, and tell us to set up a colony! The game does pick a nearby solar system and planet to place a colony on, but any planet will do, so I decide to just look around nearby systems first, in hopes of finding rare spice, which is going to be quite important! Oh yeah, every planet has a certain color of spice, and some spice is rarer and pricier than others.
While searching, I found an artifact - The Torch of Chalmers. Artifacts can also sell for a lot of money, so that's always good! I also found a planet with not only green spice but also creatures on it, and, elsewhere, an alien empire. They are robot dragons, and are Diplomats. I also found more planets with yellow radar signals (which indicates a Rare found on it usually), but these were pirates, as just happens sometimes. They try to trick you with the signals and then attack you, but they're very easy to deal with, especially as you progress through the stage!
I set up a colony on the planet Kurelliane. As mentioned, it has green spice, animal life, and its terraforming score is T1. Setting up a colony here counted towards this mission! Having it already be terraformed is nice, as I can start getting some spice right away. I think green spice is sort of in the middle in its rarity; the spice types in order from cheapest to priciest/rarest is Red, Yellow, Blue, Green, Pink, and Purple. There's also the glitched White spice, but I've never encountered it! Apparently it can't be sold, though, and also has the least value of all the spice? This is actually new to me!
Anyway, the home planet tells us to go find an alien empire, which I, uh, already did. They then tell us to sell some spice to another empire, which I can also do. Hurts selling red spice to a planet with red spice (they will not buy it for much in that case), but I waited a bit and didn't get any green spice from my colony, so oh well. I complete the quest and get some other optional quests to do - I pick the one where you search for artifacts and instantly complete it right there and then because I already had an artifact in my inventory! I also take the quest to sell an artifact to another empire, which is also very easy.
Our empire also has another not optional quest suddenly, which makes us go to our first adventure, Becoming a Space Captain. It's very easy, considering all you do is talk to people! Lucks beams down onto Vat Tego, a spaceport with a bunch of people hanging out and sharing tips. Adventures is also why we needed to beef up our creatures before ending the Creature Stage, since the gameplay in adventures is actually pretty similar to that stage, so having a good creature is very important! It saves on having to unlock certain captain parts for certain abilities like Glide or Sneak or good attacks/social abilities too. And I suddenly realised I forgot to put Sneak on mine, which will be an inconvenience in one of the adventures, but I'll live...
We talk to the Head Bot, and they tell us about other people we can talk to, which just teach us the basics about adventures and even the Space Stage itself. The Merchant tells us about the captain parts, which actually have a gameplay importance, and you can unlock one at a time from each rank up. Captain Sunny also shows up and tells us more basics about adventures, and the most important part is that completing a set of parts will unlock an ability of a certain archetype for your ship!
Completing the adventure levels up our rank, and I choose to go for the Shaman parts. They offer unique attacking abilities which cost no energy. There's another attack set which is, i think, stronger but costs energy. Energy also recharges over time and is used for a bunch of captain parts. Anyway, for unlocking all the Shaman parts, your spaceship also unlocks the Shaman ability Return Ticket, which lets you instantly teleport to your home planet from any point in the galaxy. This is incredibly useful and is what I pretty much always go for with my captains! Your archetype does stay the same, worth noting. Lucks now has the Poison Blade, which is a quick, weak-ish weapon that replaces Bite, and it poisons the attacked foe for a short bit, like Spit. I put the part on their back, so now they just punch their foes with poison fists, or something.
I put a few extra buildings onto my colony and obtained the Colonist 1 badge for placing 5 buildings, which upgraded my rank! My title is now Commander. Yeah, there are badges you can earn in this game, for completing various tasks! Most badges have 5 levels, and will give you ship tools. I just remembered I should grind one of them out - the Frequent Flyer badge, which you get for each time you travel to a different solar system. Grinding it is really easy - you can just zoom out and move your camera so two systems are close by to each other (and one of them should be your home system as your home system lets you recharge and heal your ship for free), and then you click between them as fast as possible. Faster than your ship can go, even! Many times! I always forget to do this earlier, but it's actually beneficial to do it before you've finished the tutorial in the stage, as your energy doesn't deplete by this point. You can also highlight a badge to show in the top left corner with the other tasks, so you can keep track of its progress, and that's what I've done!
You should be careful when grinding, because if your energy runs out, your heatlh starts going down, and you can easily just die. I died right away because I forgot to recharge! I guess it's no big deal, since you just respawn on your home planet anyways, but it does waste some time with the respawning cutscene! Anyway, I got both Frequent Flyer 1 and 2 (and got halfway to the third one), and now I've unlocked two Interstellar Drives, which will boost how far I can go from one point! It helps with energy a lot, and lets you access more far away stars.
I currently don't have the money for a drive unfortunately, so I went around in search of more artifacts. The easiest way to look for them is to look for any solar systems you haven't visited yet - from experience, they have a MUCH higher chance of having an artifact or some other sort of rare compared to systems you have visited! It does happen occacionally on visited stars, but it's SO infrequent it's just gonna be a complete waste of time looking into each one. Just look for unvisited planets!
I also got a Collector badge for collecting artifacts! Nice! And then I just clicked on a star and got told that I'm on enemy territory... I'm on Medium difficulty, and so some empires will just dislike me at first, though I can get them to be nicer to me. Visiting a star also got me an Explorer badge, and I earned the title of Commodore, which actually now lets me add a ship to my fleet!!! It's kind of like packs in the Creature Stage. You can pick any empire you're allied to and add their ship to your fleet. Apparently it affects adventures too, but I've never seen in practice because adventures hardly ever use packs in the first place! Ally ships will help you defeat enemies mostly, but they're just nice to have around I think!
I look at the empire that dislikes me and they're actually SO pretty I have to befriend them. Yeah it's a creation I've made and I can say that about my own creations! They're zealots, so they're the followers of Spode. Simply introducing myself nicely made them neutral with me, so I'm going to do some tasks for them. They tell us that there is a priest, Falloha, that needs to be protected while he goes through dangerous territory, trying to reach The Temple of Spode, which is also the name of this adventure. You do need to fight some guys in it, so I hope my offensive capabilities are good!
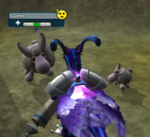
Lucks arrives on the planet, and Falloha is immediately doubting their capabilities, but he follows them on. Soon after, we find a dead villager, and then encounter the Black Claw Zealots, who oppose the way of Spode, or something. I take care of the ones that attack us pretty easily, making sure to attack whoever attacks Falloha too so they fight me instead - I've got more health, and I can heal, so I'll be fine! Lucks still retains their good offensive stats from Creature Stage, plus the Poison Blade, which is spammable and indeed poisons enemies! And actually deals a lot of damage to these guys because, as it turns out, they're really weak!
The Black Claw guys also want to burn down the Temple, so now we have to make sure it survives too, alongside Priest Falloha, but it's hard to fail that! Falloha gets to the temple and we have to ensure he survives for a minute while he prays for Spode's help. This is also pretty easy, because he's surrounded by some Blaharan Defenders, which also attack any Black Claw guys that approach. You can also get to the Black Claw guys before they get a chance to get close to the temple! After a minute, his prayers have been answered, and Spode just casts a whole bunch of lightning onto the enemies, which then spontaneously die. Everyone thanks us for our help, and Falloha says he sees now why Spode sent us here. Or that empire, I guess!
That empire that gave me this task is, uh, somewhat positive now, though still neutral, so I can now trade with them. I hand them an artifact and some spice and get the Interstellar Drive 2 finally, as well as Basic Cargo Hold (increases how much stuff your ship can carry around), the Mini Auto Blaster (attacks enemies on its own alongside your own weapons), and Small Health (boosts your ship's health). I didn't expect to have this much money for all this stuff at once! Our empire is also demanding us to get another colony, which, sure, I'll get to that later! I ask for a mission from the first empire I encountered too, and it, of course, is also an adventure. The first mission you get from a specific empire archetype will always be their archetype specific adventure, if you, of course, have the DLC in the first place. The adventure is Delicate Negotiations, and it says we have to prevent a war, which sounds like a lot for just... how easy this adventure it is. All you do is talk to some people, it's completely mindless!
I like it despite that! It's a parody of Romeo and Juliet. The plot is that the kids of the rulers of opposing factions go missing, and they immediately blame it on each other. Duke Montalette informs us that his son Julio has been kidnapped by Baron Capague, supposedly, and asks us to deliver him a scroll. Along the way you can talk to some people - the guards, shopkeepers, and random passerbies, and did I mention all the dialogue is in rhymes? Most people are complaining about their hand work at the bazaar though, but there's also one guy, Flixxel, bragging about their tall top hat. I also spotted some Spoffits. Maxis adventures, and even some player-made ones, always have a Spoffit somewhere as an easter egg. Typically where they are will have a specific piece of music playing, but I don't hear it around here, probably because they're not really well hidden in the first place!
We finally deliver the scroll to Baron Capague, who has different claims - he says his "fair daughter Romiette is the one that's been seized", and his response in regards to the Duke is, uh, pretty violent. Something's amiss, and the adventure asks us to ask around the bazaar to see what the truth really is. Shopkeeper Luci tells us Romiette came over to buy a "fine bottle of red", Armstrong the Blacksmith tells us Julio asked him to forge a gold band to give to his girl, and Baker Bobb says Romiette purchased a cake here, and then ran off to the Forlorn Lover's Lake. It's blindingly obvious what's going on.
A little pathway opens up, and we follow to this lake as well, and then talk to Julio Montalette and Romiette Capague, who first complain about some guy showing up and messing up their date, but then are concerned after being told about the impending war, and decide to head back to town and confess to their parents. As you, too, come back, you'll see that the rulers are already in the middle of town, with their guards, on the verge of fighting each other. Now that their kids are back safely, though, the dads are relieved, admit they made a mistake, and immediately decide to arrange a wedding for the pair! Completing this adventure also boosted my captain rank, and I choose to get another Shaman Part - Swarm Magnet.
The mission is done! This empire likes us a lot now, and that lets us ally them and add their ship to our fleet. Their ship is just Rainbow Dash, like from My Little Pony, poking out of a TV, which is unfortunate I suppose. It's yet another creation I made years ago and forgot to put a GAprop tag on, which would have prevented it from generating in the actual stages. Oh well! I'm gonna look around for more artifacts, and I also found a star, the name of which translates roughly to "Foam VIII". Also a planet called Quackener. I decide Quackener is just too good to pass up, besides the system has a T2 planet, and so I'm gonna set up a colony there. Unfortunately, it is a little far away from my home system, and these planets only have red spice, but hey! It will be a good source of red spice though. The home planets will always have red spice and also horrible spice production.
I also encountered another empire, who are Warriors and thus also disliked me right away. I'm gonna ask them for a mission later. I haven't estabilished a colony on Quackener per se, instead setting it up on Umielvin, but it was in the same system, so I do now own the system with Quackener in it, and it's safe for the taking later! I need to get another Insterstellar Drive as soon as possible because getting to that system is rather inconvenient at the moment. Time to grind the Frequent Flyer badge, huh... I also upgraded my ship's energy to help with this process!
That's done now, and I also earn the title of Admiral. And I'm now low on money to get the Interstellar Drive in the first place... I've also encountered two more empires, and why do I keep getting warriors and zealots??? They're just mean to me! Come on! I found a trader empire, at least!!! I actually happened to have picked up a Tablet of Prosperity, which I can sell to them for double the price. Each archetype has its own artifact type that you can sell them for more than you can to anyone else! I finally got the Interstellar Drive 3, and also the Medium Cargo Hold. I didn't know what to do, so I went and searched for more artifacts, and also found another trader empire I guess? They introduced themselves by saying "We are in awe! Stabby strides among the stars like a race of giants!" for some reason!
And hey! I found a story book planet! A system will have an incredibly rare chance of spawning a storybook planet, which are typically T3 (though according to a wiki they have a rare chance of having lower T-Scores) and have unique layouts. This storybook planet was Craters, though the actual planet name was Orlow. I took a GIF of it by using the "capturePlanetGIF" cheat code! Yeah, there are cheat codes, accessed with Ctrl+Shift+C. You can type in "help" to get some available commands, or look them up somewhere. Note that some cheats (that you can actually cheese the game with) will make you unable to get achievements! I do remember reading somewhere that you'll be able to get them again once you beat all five stages on one save file, but the wiki says nothing about this, so maybe be careful with that. Cheats like addDNA are also fine to be used in editors outside the actual save games! I know, because I use it all the time!
I went to one of the traders I encountered earlier and decided to do their adventure as well. We are tasked to find the Golden Llama in The Ruins of Doom, where we have to navigate a maze full of dangerous wildlife. This also sounds harder than it really is. I give Lucks the Swarm Magnet, which replaces Spit, and beam down. Apparently these are the Zha'ra Zha'ra ruins. The first thing we do is to look for 25 blue gem piles, and you can just collect them by walking into them, the usual video game stuff. This place is also littered with Tomb Spiders, but they're pushovers, only having 5 HP. For perspective, I'm pretty sure the earliest creatures in Creature Stage had about as much HP, if not more! They're also a bit focused on attacking the Gem Collectors scattered around, which won't attack you, but will steal and carry around random gems. You can still get the gems they're holding by walking into them.
We use the collected gems to open an ancient gate, and the next area (where we have to find 25 more gems) contains a Tomb Hog. These are like epics, considering they make loud noises and stomp around and even breathe fire, but they have only 42 HP and are also barely bigger than you are. This is also my first opportunity to use Summon Swarm - your captain takes a few seconds to charge, and then unleashes a swarm of insects, which will home onto the enemy very quickly and then make them run around for a few seconds, unable to attack back, and they'll recieve a lot of damage in the process. You can see why this is so strong! Something I forgot is that the first area has a breakable wall that explodes if you attack it and reveals a Spoffit behind it! This offers nothing for the adventure, of course, but it sure is an easter egg! For the record, I still am pretty sure Spoffits are in every Maxis adventure, but I don't remember where one is in The Temple of Spode.
We open another gate, which has an inscription warning us that "The Guardian Watches All". The following area is more like a corridor than the more open areas we've had previously, and we still have to collect gems, which you really don't have to look for now because they're just littered through the path. There are more Tomb Spiders, which, by the way, are actually pretty annoying because they can spit at you from a distance and there's also many of them. And Tomb Hogs, naturally, so I send more bugs at them. We cross a simple bridge hanging over some lava, the music gets spookier, and the next gate shows us the Golden Llama! But the music is still spooky, and there are some more scary monster noises coming out of somewhere. As soon as you pick up the llama, the Guardian shows up, which is a big immortal epic, and it wants its treasure back!
Your task is to now run back to where you came from, which isn't all that hard (especially if you have wings like Stabbies do), and we make it out of here with the Golden Llama. Which you don't get to keep for yourself! Of course, it doesn't exist as an artifact within the actual stage, but it's kind of funny how the adventure ends with it saying the llama being another thing to add to your collection of priceless artifacts, only for the empire you got the mission from to claim "Yes! The Golden Llama is finally mine!" I have no idea why I had so much to say about this adventure because it's so simple, like every other adventure!
While we're at it, I also picked up a mission from one of the warriors. Their adventure is Infestation, where the Grox infest a peaceful planet with evil mean bugs in an attempt to transform it. Our mission is to team up with a defense force and take out the Grox Infestation Pod which is converting the planet to be habitable to the Grox, before it's too late. This adventure might be hard with what attacks I have, but I should be fine, hopefully! A thing about this adventure is that there are little holes with respawning Mites scattered all over the place, which will pick up a bomb and will follow you no matter where you go, and then blow up. It's pretty inconvenient, so you better have good mobility! This adventure is pretty straight-forward - you mostly go forwards and attack the bad guys as necessary, and attack the Pod when you get there. If your captain is a little weak, it's better to generally stay out of the way and let the squad take care of most of the threats. They'll be fine, I think.
I move onto attacking the Pod. Gameplay-wise, it's a building with some 200 health, and you just walk up to it and spam all your attacks until it decides to break. So Lucks is repeatedly poison-punching, slashing, and summoning bugs onto a big 'ol pod. Which was pretty easy and short, honestly. I'm also glad some Bovuses that I released out of their pen earlier in the adventure survived, even if the one I'm seeing is at 6 HP! We report to the main guy of the squad and head out. Oh wait, I never talked about the Grox properly, did I? They can make a small appearance in the Creature and Tribe Stages as a spaceship, and are finally prominient in this one. All I'll say for now is that they have MANY solar systems and they're the evilest empire in the whole galaxy and every other empire fears and hates them.
Now that I've finished this mission, I go and take over a planet with Purple Spice, which is the rarest and priciest spice in the game - a good source of money! I'd need to terraform the planet first, though, as T0 planets won't give us any spice. I ask for a terraforming mission from our empire, which will point us to terraform a specific planet, but I just use it to get free stuff for terraforming and run back to that planet I just set a colony on. The planet they sent me to was the same planet that I was supposed to place the colony on first, but I chose another one to put a colony on instead, remember? This planet's system is owned by another empire now, so I'll just get to it at some other point.
Anyway, terraforming is pretty easy. You have to get the planet's temperature and air pressure to the middle with specific Planet Atmospheric Tools, and to lock in a certain T-Score, you have to put some plants and creatures onto the planet. I need to generate some atmosphere and cool the planet, and I have the instruments for that now, so I use those! I place the Atmosphere Generator and Ice Storm, and, as I suspected, that just wasn't enough to get it to T1! I have to buy another one of each! I knew this would happen because it DID, like, many times before on my other save games! I use them again and immediately get the little indicator dot into one of the middle rings, so now I place some plants and creatures that I was given for free for terraforming. For each of the three T-Score levels (not counting T0), you need a small, medium and large plant, two types of herbivores, and one carnivore or omnivore. And I was provided with all of that, so it's easy! Now that I can set some buildings, I put in as many as I could, and now the colony should start producing purple spice.
There are good benefits to terraforming! For each T-Score level from T1 to T3, you get to place one additional city on the planet up to three, put more buildings in the cities for increased spice production, it'll increase it's spice capacity as well, and the planet will generally look nicer too. You'll want all your colonies to be at T3 eventually. I picked up another Ice Storm for the green spice planet I have, which was already T1, but it helps to get the terrascore higher! I earn a badge for getting it to T2, getting promoted to The Celebrated, allowing me to add another ship to my fleet.
I'll see if I can win the favor of one of the zealots I've encountered. They ordered me to get rid of five infected citizens on the planet of an empire that kind of dislikes me, which is more than a little scary! Then I got to one of their cities and I am no longer scared. How can you be scared with these buildings around. Their city hall is literally a bad looking (I can say that about my own creation from like 2012) Bomb from Angry Birds. Seriously! Thankfully, this empire also seems to not mind me zapping their infected citizens with a death laser, for some reason. It's 2021, I know this is definitely not how you deal with diseases! Anyway, I can now ally the empire I got this mission from. Success!
I think I'll cut this here. I already wrote as much as the previous sections, and for just one stage, no less. This section is now kind of a mess! Tune in next month for more Space Stage though!
Racing Like the Staff
Hello readers and welcome to Racing like the Staff, a section where I do 150cc on different Mario Kart games, but the twist is, I take on the Grand Prix by using the combination that a staff and expert staff member used in that Cup. If you're still a little confused, by this I mean if the track is in the Mushroom Cup, then that's the Cup that I race in. Unfortunately, I don't have copies of the Mario Kart games before Mario Kart 7, so it's only that, 8 and Deluxe that will be getting this treatment.
As Halloween fast approaches, and we realise we've covered all the spooky courses of this game, it's time to start thinking about Halloween parties with friends. Dancing the night away in just about thematically-appropriate outfits, and perhaps if you're heading to the clubs you will need to grab the (Super Bell) Subway to get there. And yes, this is the tenuous link I'm using for this section.
The combination for the staff for Super Bell Subway is Pink Shy Guy with the City Tripper, Slim tyres and the Super Glider, and the stats are as follows:
- Speed – Just under three bars
- Acceleration – Four bars
- Weight – Two and a half bars
- Handling – Five bars
- Grip – Just over three bars
Koopa City
Things looked great throughout the race, as I passed Wendy just after exiting the tunnel and started forging a great lead. Behind me, the rest were all swapping places, with Wendy, Yoshi, Koopa Troopa, Princess Peach and Villager all fulfilling the role of second place. I thought I had it all in the bag, but a Spiny Shell allowed Wendy to start catching, and a Red Shell put her ahead of me just before the final Glide Pad. Thankfully, I was able to see off Princess Peach and at least retain second.
Ribbon Road
I may have outsped Wendy, but Princess Peach still got ahead of me, and as I passed her the Green Shell she was holding took me out, dropping me to third. Landing on Villager's Red Shell didn't help, but thankfully Wendy careened into the back of my Green Shell meaning I stayed in third. Villager then drove off the track, and a Mushroom allowed me past Princess Peach. From this point, my lead was steadily increasing, but a Spiny Shell on the final lap nearly threatened it when I spotted it midway across the Glide Pad. Thankfully, we were on solid land when it struck, and Villager was too far behind to make the catch.
Super Bell Subway
There's a reason this is my least favourite DLC track, and yes it had a lot to do with all those trains, which during the course of the race I ran into on four separate occasions. A cacophony of items all throughout the course, not limited to Spiny Shells, Green Shells, Red Shells, Bananas and Fireballs meant no one's place remained stable for long and given I was fifth halfway through the final lap, it's a miracle that Green Shells took out Wendy, Morton and Princess Peach and allowing me to claim second behind Villager.
Big Blue
Wendy was looking to be tough competition, getting ahead, hitting me with items and dropping me down to fourth, but like last time a series of Green Shells helped me get up into second, and then a Red Shell in the water took her out the competition. Despite being hit by another Red Shell, I still kept the solid and took home this win quite well.
I wasn't sure what I would make to the City Tripper, but I can conclude that I actually quite enjoyed it. Super Bell Subway was a terrible race for me, and I can say I probably didn't deserve to win that one, but Koopa City should have been my win as I drove flawlessly for it, and it was only some poor luck on the items that took me out.
To Infinity and Beyond
Written by: Waluigi Time (talk)
Greetings space rangers! Waluigi Time here, continuing my walkthrough of Toy Story 2. Last time we went over the core game mechanics and completed the first level, Andy's House. In the movie, Buzz and the rest of the gang leave Andy's house to rescue Woody from Al, and that's reflected here with the second level of the game, Andy's Neighborhood. It's unlocked after collecting 1 Pizza Planet Token. Like last time, I'll be posting a link to the Andy's Neighborhood theme which you can listen to on YouTube. Not much else to say here, so let's get right into it.
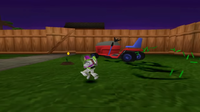
The level starts in Andy's yard (judging by the layout of the level, presumably the backyard). Sarge is standing on the steps into the house, and if you talk to him, he'll ask you to find the rest of his troops scattered around the level. Finding small green men in an outside level sounds like it would be a challenge, but luckily, they constantly shoot off flares so they're easier to see. The first one is right here in the yard, but unlike the other four, you'll have to complete a little puzzle first before you can collect him. There are seven molehills in the yard, and he'll pop out of different ones. When you find the molehill that the army man is standing on, he'll retreat to a different molehill, giving you a brief opportunity to stomp the molehill he was just at. If you do this successfully, it will emit a stream of smoke. Once you stomp six of the molehills, he'll come out of the seventh one and will let you collect him. There's also a lawnmower going around the yard that will damage you if you run into it. There's no one driving it, so whether it's alive or just going haywire, who knows. The weird thing about this lawnmower is that you can't defeat it in any way, but Buzz will automatically target it with his laser, you can spin into it which will briefly stop it, and it can even be selected as a target in visor view. I have to wonder if you were supposed to be able to defeat it earlier but that changed in development, or if it was just programmed in for no reason. The only other thing of note in the yard is a battery you can collect if you need some health. Either way, the only thing you need to get here is the army man, so once you do that, you can leave through the opened fence gate.
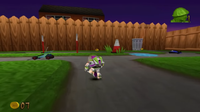
Now you're in what Rex refers to as the garden, although I'm kind of skeptical of that claim since the only plant here besides the grass is a single tree. Speaking of Rex, you can find him if you go all the way to the back and left. This area acts as sort of a hub, and you can access all the other parts of the level from here. Here we're introduced to a new enemy type which I will refer to as the Car-Bot, since once again, I'm unaware of any official names for these guys. The Car-Bot has a very simple attack pattern, charging straight toward wherever you're standing when it attacks before briefly stopping to attack again. For some reason, they've always felt tough to me, but they can be defeated in one hit with a charged laser shot. The Spring-Bots and Copter-Bots both return in this level as well.
RC is here in the garden to challenge you to another race around the racetrack which exists for some reason. Unlike last time, where you pretty much have to actively try to lose, he's a much more formidable opponent this time around. Although you can get an early lead, he'll quickly overtake you, and he's way too fast to catch up with. The intended way to beat this race is to come back later once you've unlocked an item called the Rocket Boots, and Rex even tells you this, but you can actually beat RC on your first time coming through. Like I said, you can get an early lead in this race. If RC bumps into Buzz, he'll be knocked back and briefly stall, so if you manage to stay in front of RC for the entire race and keep causing him to bump into you, then you can stay ahead and beat it without the Rocket Boots and collect a Pizza Planet Token. (This trick also works in the Andy's House race, but it's easy enough without it already.) Like in Andy's House, if you lose, RC will do a victory lap and you can't interact with him, so just walk into one of the other areas and come back and he'll be ready for another race.
Next, head into the hole in the fence all the way to the right side of the level. Just to the left is the laser upgrade of this level, so pick that up and then head towards the car. The car is too high to reach normally, so stomp on the two switches to lower the car to a level where you can reach it from the cement blocks. Head to the back of the car and stomp on the trunk (or the boot for those of you who are more familiar with that terminology) to be catapulted across the yard into a washing machine. You can collect a battery here, and there's a plank that can be pushed over to let you reach the clotheslines. These function just like ziplines so once you jump onto one Buzz will automatically start sliding towards the other end, but the trick here is that the clotheslines have clothes on them that you have to avoid, otherwise you'll fall off. Luckily, there's three clotheslines to jump between to avoid them. Get back to the first clothesline by the end and you'll land in a basket where you can get the second army man. After that, you're done here and can head back to the garden.
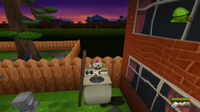
From here, head over to the swing set (you should have seen it during the race with RC) and collect the third army man on one of the swings, along with a battery if you want. On top of the swing set you can collect an extra life. At this point I got 50 coins, and just in time too! Hop onto the tire swing and use the rope to climb up into the tree, where you'll find Hamm. Something weird that happens here is that Buzz will slowly slide on the angled parts of the tree platforms, including while talking to Hamm, so if you don't do anything eventually he'll fall off of the tree while still in Hamm's dialogue menu. Anyway, now we have our second Pizza Planet Token.
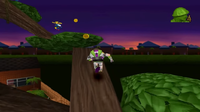
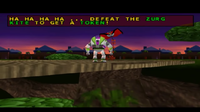
From here, continue platforming up the tree until you reach the first seesaw, then go over to the leaves to the right to collect the fourth army man. After getting past the seesaw, there's a rope to the left that you can jump on which will lower down to the ground, creating a shortcut in case you fall off (although holding the up button waiting for Buzz to reach the top isn't exactly that much fun either). Continue up the tree across the various platforms, seesaws, and poles until you reach the top, where you'll find the boss of this level - the Zurg Kite! Now, whether the Zurg Kite is given life by whatever magical force brings toys to life in this franchise because kites are considered toys or because he has a face is up for debate, but he has a Pizza Planet Token so we have to defeat him. He's a pretty easy boss, just flying around and staying out of reach until you make the first move. Once you shoot him with your laser, he'll do a spin attack for a little bit before going back to flying around, at which point you can hit him again. Like the Tin Robot, only three charged/upgraded laser shots are needed to defeat him, and we have three Pizza Planet Tokens now.
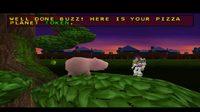
Since there's no fall damage, feel free to hurl yourself off the tree towards the last yard, which is located right next to Andy's yard. There's two things you'll want to do here. First, head to the side of the pool and jump on the air pump multiple times to inflate the rubber duck. Once you've filled it, it will be sent into the pool. Jump onto the duck and then stomp on it, which will cause it to dip down into the water and come back up with enough height to reach the Pizza Planet Token floating above it. After that, jump onto the chair near the hole in the fence and jump over to the potted palm tree, which you can climb up. Then jump over to the bird bath, the second palm tree, then to the pedestal, where you can push a board giving you a shortcut to the third palm tree. Climb to the top of it, then swing across the poles to the fourth and final palm tree, where you'll find the final army man. After collecting him, return to Sarge for the fifth Pizza Planet Token, and exit the level.
So that's the level! After two normal levels, it's time for a change of pace, so next time we'll be facing our first boss level. See you then!
Gameplay screenshots have once again been sourced from Nin's playthrough of this game on YouTube.
Turn Right to Go Left
Written by: Long John Spaghetti (talk)
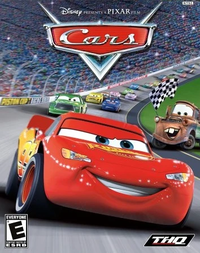
Have you ever played Cars: The Video Game? No? Do you want to? Wait, WHAT DO YOU MEAN, “NO”?! Too bad. My name’s Long John Spaghetti, and this is the start of my strategy wing section, where I provide a basic walkthrough, as well as my general thoughts, on this not so cult classic racing game. Please note that unlike Waluigi Time’s To Infinity and Beyond, this will NOT be a 100% walkthrough. I’ll lead you through the game like I played it as a kid, so no sidequests, ESPECIALLY not that damned postcard fetch quest.
Cars: The Video Game was released on June 6th, 2006, 3 days before the movie, on XBox, Playstation 2, Gamecube, Gameboy Advance, and Nintendo DS, and was ported to the Wii and XBox 360 in 2007. The home console versions aren’t really all too different, with the only real difference being the graphical quality. However, The GBA version is more of a top-down sprite adaptation of the console versions, and the Nintendo DS version is a minigame collection, of all things. Of course, for this section, we’ll be taking a look at the console versions. Please note that while all of the console versions are the same in terms of gameplay and story, the controls may be a little different than the version you’re using.
The plot is an immediate continuation of the movie, taking place during the next Piston Cup Season, where Lightning McQueen is determined to finally win his first Piston Cup. However, his driver, Mack, tells him that before he hits the track again, he needs to practice his skills around Radiator Springs. Kind of a lame reason to have to play through like, 5 hours of a game, but whatever, I won’t complain. At least the game’s fun.
The main campaign forces you to play as McQueen and consists of five chapters, each one consisting of around 4-8 events each. There are 3 types of events- Road Races, Minigames, and Piston Cup Races. Race Races are made up of 3 laps around a sectioned-off portion of the overworld, with 5 contestants each (including you). Minigames require you to complete a certain objective within a time limit, usually collecting a certain amount of a thing. Piston Cup Races are always at the end of a chapter, and consist of pitting you against 12 other Piston Cup racers in a 20 lap race around a 4-turn race course. To progress, you must place within the top 3 (aka ahead of Chick Hicks).
I believe it’s also worth mentioning that the game contains all of the voice actors from the movie. This includes, but is not limited to, Owen Wilson, Paul Newman, and Micheal Keaton. This marks the only time Paul Newman lended his voice to a video game before his passing in 2008.
With that introduction to the game out of the way, we can now get into the walkthrough. Rev up your engine and buckle your seatbelt, ‘cause it’s go time!
The story starts off with narration from McQueen, which is almost word-to-word to his opening narration in the movie. We then cut to the race he’s about to participate in, the Radiator Springs Grand Prix! This serves as a tutorial for the game, so everything you need to know is explained to you through a menu screen right before the race begins. Eh, as far as tutorials go, it’s not that bad. It’s a race down Main Street, a right turn at the courthouse, through some winding backroads and the drive-in theatre, and back down Main Street. Overall, it’s short and easy, perfect for your first race. Oh, but wait! Turns out, the Radiator Springs Grand Prix was all just McQueen’s dream!
Well, at least the race wasn’t for naught, because two new events have opened up! After getting yelled at by Mack, head on over to Flo’s V8 Cafe, because that’s where the next race is! (Oh, about that other event, don’t worry about it. Remember that “damned postcard fetch quest” I was talking about earlier? Yeah, that’s the one. Best to save that one for the post-game). Waiting for you at Flo’s Cafe is a British race car named Fletcher and his little entourage of Brits. Remember them from the movie? You shouldn’t, cause they weren’t in the movie. After McQueen gets utterly confused by their British slang, it’s onto race #2, Radiator Cap Circuit. Don’t worry, this isn’t another dream sequence.
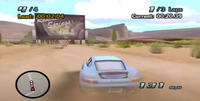
One the race begins, speed down Main Street and turn left at the courthouse. Continue on the big U-shaped curve before the route turns right onto another, smaller, but still sizable, U-shaped curve. Coming out of the curve, you can either stay on the paved road, or take a small shortcut to the right that’s in the dirt. The shortcut shaves a few seconds off of your lap time, but you can win without it. Regardless of whether you take the shortcut or not, you’ll still head up onto the Radiator Cap rock formation, so guess what? Another U-shaped curve! And this one is the biggest one yet, but it’s not so bad, as it’s not as sharp as the other ones you’ve encountered thus far. Getting out of the curve, you’re faced with a large straight away, so this is a good opportunity to make up for some speed you lost in all of those U-shaped curves. After the straight, it’s a large U-turn back onto Main Street. After 3 laps, this race is in the books.
Assuming you won the race, you now have 2 new events you can participate in, Tractor Tipping and Sally’s Sunshine Circuit. You don’t need to go tipping tractors to progress the story, so head on over to the Cozy Cone Motels and talk to Sally to start the next race.
Remember Mia and Tia, those two McQueen groupies? You should, because they were actually in the movie. They pull into Radiator Springs with one thing in mind, taking McQueen out on a date. But, Sally, being McQueen’s girlfriend and all, was already planning on taking him out on a date. So, what are they gonna do about it? Why, race for his heart, of course! This IS a racing game, after all! (Also, Flo’s in the race for some reason. Gotta complete the whole “Girl’s night” schtick).
You play as Sally for this event (and this event only). From the starting line, blaze in the opposite direction down Main Street and hook a sharp left into the drive-in theatre. Don’t worry about the wood planks, you can destroy them just by crashing into them. Overall, this race is pretty much an inverse of the Radiator Springs Grand Prix, so there’s not a whole lot to say here other than “hey it’s the tutorial but in reverse and you play as Sally!!”, so I’m going to skip to the end here.
After winning the race, Sally invites McQueen on a date like she was planning to (this actually comes back up in the story later on, believe it or not). But you don’t have time to go on a date right now. Right now, you need to drive out to Willy’s Butte to meet Doc Hudson for your last event before the Chapter 1 Piston Cup Race: Doc’s Powerslide Lesson.
The only real purpose of Doc’s Powerslide Lesson is to teach you how to powerslide (or, as I will oftentimes call it, “Drift”). However, this lesson isn’t as easy as it first seems. Due to the game’s physics engine, oftentimes your drift will be nowhere near sharp enough to get you through the second turn, tossing you into the cactus and failing the event. However, once you get lucky, all is said and done.
You know how I said Doc’s Powerslide Lesson is the last event before the Piston Cup race? I lied. Kinda. See, as soon as you beat Doc’s Powerslide Lesson, you’re thrust into Doc’s Challenge. This is a one-on-one race between you and Doc, you against your crew chief, as he puts it.
You start off at Willy’s Butte, starting in the iconic two-turn dirt speedway before turning off into the Radiator Springs desert. Hooking a left out of the dirt track, follow the winding guide arrows throughout the desert. Overall, this one is pretty forgettable. I’m not even sugarcoating this. There’s not a lot that makes this event stand out from the rest, but there is the cutscene after the race, where you learn that Chick Hicks has been spying on you...
That’ll do it for Chapter 1! I modelled this after Waluigi Time’s walkthrough of Toy Story 2, only with Cars, since I played this game a whole lot growing up. Of course, I took my own approach to this section with my own style of humor, so feedback would be greatly appreciated! Also, if you were hoping that I would cover the Piston Cup race, I’ll do all 5 of those for the finale!
Special Thanks to Youtuber igcompany, whose playthrough I used for screenshots.
Mach Speed Mayhem
Hello, 'Shroom readers! We're back, and we've got a new trick - well, no, that part's a lie. But either way, happy halloween! There's really not a good way to connect #24: Michael Chain to Halloween or trick-or-treating, so that awkward non-sequitur will have to do instead. Off to the races!
Main Series
In the main series, Michael Chain is one of the overwhelming number of characters who made their debut in F-Zero X! He doesn't bring all that much information with him, but what there is is enough to make fun of him. As the leader of the Bloody Chain gang, Mike drives in the F-Zero Grand Prix to show off his amazing driving skills and impress his gang! ...But he doesn't have amazing driving skills. He keeps losing, instead. So because of that, people are leaving the gang left and right. Good work, team! At least when he comes back for F-Zero GX, the Bloody Chain is doing better - wait, no, they're not. In fact, they're worse off! His GX bio expands on the X information by explaining that the Bloody Chain is a racing gang, rather than just your average street gang, and they used to have over ten thousand members! But with Chain's lack of success, and his failure to make the crew look good, they've slowly been losing members left and right. In fact, if he can't turn this around in some way, he's probably gonna have to break up the whole gang!
On the plus side, he doesn't seem too bothered by this in interviews, at least. If he wins in GX, he's over the moon, happy to boast left and right! Cites the power of his gang and that it means he deserves the best car, offers his rivals a position in the Bloody Chain - working under him, of course - wants a victory parade throughout the whole galaxy! He also intends on using his prize money to bling out his car, covering the Wild Bear in PURE GOLD to create the legendary Golden Boar, for no reason other than he can. The promise of money and women is extended to the Bloody Chain, though Chain is happy to keep playing them up - he says in his interview that he still has 10,000 members, despite losing a lot of that roster. Maybe he's just expecting to gain the numbers back as a Grand Prix Winner? Chain himself just wants fame, money, and power, so he's a pretty simple guy. Though he likes boxing on the side, and rather than raw power, he thinks that guts and focus is what you need to win races. I mean, if he says that as the winner...
In the F-Zero GX story mode, Michael Chain actually gets an entire chapter of his own! At the end of Chapter 3, Captain Falcon hears of a nearby incident going down, and drives off to take care of it. On his way, though, the gangs interrupt him, Michael Chain and his goons pulling up and throwing Falcon around with their attacks. Chapter 4 consists of Captain Falcon, Michael Chain, and 28 gang members driving cheap copies of the Wild Boar, with Falcon needing to take out Chain before reaching the end of the track. His goons are pretty easy to handle, with low health, and are mostly there so you can restore health by destroying them - really, this whole story mode chapter is one big reference to the Death Race mode from F-Zero X. Chain himself is very tough, though, and only falls back - and becomes manageable to KO - either in the last stretch or after his entire gang has been wiped out. If Falcon can take out his machine, though, he'll leave Chain and the entire gang in the dust, because a random ambush is nothing against Captain Falcon!
Chain does get to put in a free appearance at the Chapter 7 30-car race, though. It's his freebie for being from F-Zero X.
On to his machine! The Wild Boar's listed stats are C grip, C boost, and A body - in other words, it's a big ol' tank. F-Zero X bears this out, making it clear that while Chain's machine isn't the best in simple racing terms, it's REALLY good if you need another car off your back. Just an entire car designed to smash others up left and right. In fact, it's even in his machine's bio! The Wild Boar's profile outright says that Chain's preferred driving style is to smash other cars left and right and just tank any damage. He's also modded the car to be extra loud, for no reason other than to be loud. It's the loudest in F-Zero history, and people believe that the four ridges on the top are just to amplify the sound. Michael Chain takes "make some noise" to its logical conclusion. Anyhow, in F-Zero GX, the machine is retooled to focus on top speed. Sure, it's no Fat Shark, but Chain's able to power through races on speed alone!
GP Legend series
In the F-Zero: GP Legend anime, Mike puts in two appearances... and one of the most wasted cameos in the show yet. I'll get to that later, though. His first appearance is in episode 7, aptly named after him as the Trap of Michael Chain. A young man named Truman invites our heroes to his mansion in thanks for saving him from being beaten up by the Bloody Chain, introducing them to his fiance Dream. After some time with the duo, Truman lures our heroes into a trap! But it's not his trap, it was designed by Michael Chain, so as to trap racers and keep them from competing with Chain - the trap of Michael Chain!! Truman, being an ex-member of the Bloody Chain, did this because he expects Michael to let him go scot-free afterwards (he's wrong), and when he finds out the Bloody Chain have no intention of letting him or his fiance out, he undoes the trap. Our heroes make their escape, finally having an in-person meeting with Michael Chain, who attacks with his chain and takes maybe 3 or 4 hits to convince that attacking them is a bad idea. So he just drives off and leaves. Mission success!
Until 30 episodes later, anyway. Episode 37 is all about Chain's latest evil scheme, this time in conjunction with Baba with the promise of joining Dark Million once it's all said and done. The Bloody Chain are causing carnage and mayhem, with Chain dressing up as a legendary gangbanger known only as the Shinigami, who has some strange connection to Jack Levin... as the episode goes on, it becomes clear that Jack WAS the shinigami, and he used to ride with the gangs himself back in the day! Chain is using the disguise to try and coax Jack back into the gang lifestyle, and Jack finally breaks from the Mobile Task Force to take up the mantle... but only to challenge Michael Chain in order to put an end to this particular scheme. Michael takes him up on this, and they proceed to a 1-2 combo challenge.
First part? The race! A game of chicken with a straight shot to the end of a bridge, to see who can make it furthest without falling. Despite Baba's attempt to interfere, he's quickly taken out by Rick Wheeler, leaving it as a proper 1v1 between Chain and Jack. That ends in a draw, neither one falling but neither one edging out the other, and means that round 2 is just fisticuffs. Chain has the size and strength advantage, but Jack's tactical, and nearly knocks Chain off the road before it goes to pieces under them. Even when Michael and Jack are hanging from rebar, Chain calling it quits, Jack's still trying to kick him off the edge - but the Task Force showing up in time keeps him from committing murder, and Michael Chain is just arrested along with the Bloody Chain.
It didn't hold him for long, though! In some group shots in episode 43, it becomes clear that not only did Chain escape, but that he's actually joined Dark Million! How will this affect - oh, he never appears again after this cameo. Good to know! His Climax bio doesn't add much either, just talking about how he's the leader of the Bloody Chain and he races by smashing people apart. So, that's all stuff we knew. Alas.
Other Information
F-Zero X gives every car a total of four paint jobs - the default and three recolors. F-Zero GX does the same, but also recolors the pilots to go along with it. Where this becomes trivia is that Michael Chain is one of the only pilots to have his design change beyond color! His default white shirt and his blue shirt both carry the snake design, but if you switch to green or purple, it changes to a large ram's head design along the center of the shirt. With how rare this is, it's pretty neat - it makes me wonder why Chain got special treatment in that regard. Not much else to say in the way of trivia, though, so go vote for November!
| The 'Shroom: Issue 175 | |
|---|---|
| Staff sections | Staff Notes • The 'Shroom Spotlight |
| Features | Fake News • Fun Stuff • Palette Swap • Pipe Plaza • Critic Corner • Strategy Wing |
| Specials | Awards Analysis • Trick-Or-Treating With The 'Shroom • Wahn Special 'Shroom Song • Waluigi Time's Writer Testimonials |


