The 'Shroom:Issue 136/Strategy Wing
Director Notes
Written by: Meta Knight (talk)
Hey there everyone and welcome to Strategy Wing! We're small in numbers this month, as YoshiFlutterJump (talk) and GMP1000 (talk) have been caught up with obligations in the strange place known as real life. We make up for it here though, as Galactic Expedition is finally here, and it is going out with a bang! I am retiring from the section, but not before giving it a finale that it deserves. I implore you all to please sign up for this team. Anything game-related is welcome here, from game analysis to walkthroughs, to historical analysis, whatever you want! In any case, please enjoy this issue of Strategy Wing.
Section of the Month
Congratulations to YoshiFlutterJump (talk) for winning the Luigi month! Thanks to Yoshi876 (talk) and GPM1000 (talk) for their sections as well!
| STRATEGY WING SECTION OF THE MONTH | ||||
|---|---|---|---|---|
| Place | Section | Votes | % | Writer |
| 1st | YoshiFlutterJump's Tips and Tricks! | 13 | 41.94% | YoshiFlutterJump |
| 1st | Pokédex Power | 11 | 35.48% | Yoshi876 |
| 2nd | Mario Calendar | 7 | 22.58% | GPM1000 |
Galactic Expedition
Written By: Meta Knight (talk)
Metroid II Walkthrough
Current Inventory: 5 Energy Tanks, 250 Missiles, Morph Ball, Bombs, Spider Ball, Ice Beam or Wave Beam or Spazer Beam or Plasma Beam, High-Jump Boots, Varia Suit, Spring Ball, Space Jump, Screw Attack
Metroid Counter: 33 killed, 6 left
Hey everyone! Welcome to the finale of Metroid II! Not only will this be the last section of Metroid II, but I am retiring this section after two years. With Ridley announced as a playable fighter for Super Smash Bros. Ultimate, this is perfect timing and means I totally planned it that way. I actually was planning to do this for last month's summer special, but unfortunately, I had laptop issues that prevented me from working on it, in addition to finishing up the school year. This is a pretty long section, but I do hope you enjoy the last Galactic Expedition (at least until someone else picks it up). Last time, we left off finishing up Area 6. It's been a long ride, but it is finally time to finish Metroid II. Samus's power is at full capacity, so all that is left is to finish this Metroid genocide.
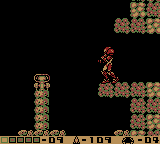
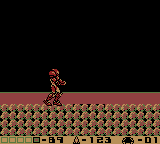
From the Save Station in Area 6, head right. You'll fall down for a little bit and see an open doorway to the right. One thing I'm going to note is that from this point on, there is an extremely long stretch before any Energy or Missile Recharge stations. So if you're ever low on health or Missiles, you'll have to either grind on enemies or backtrack. Please refer to last time to find out where the Energy and Missile Recharge Stations are by the tower. Additionally, it turns out that you can pick up the Ice Beam later, so if you wish to get a different weapon, check the last edition for where that is as well. When you're ready, you'll be in the outside area at the bottom of the tower. Don't even bother going up, and instead just go directly right and through the doorway. You'll be in an extremely short room, but just keep going through this one-way path until you hear the main tunnel music that you're accustomed to. As soon as you hear the tune, drop down. There's a lot of spikes in this room, so be careful. What you want to do is move left and down at the same time. So move a little left and drop down, then rinse and repeat. When you see an open passageway, go through it.
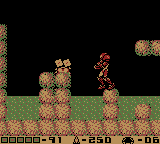
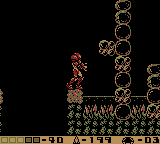
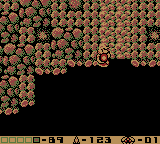
In this room, you'll be in a long corridor with some platforms, and mole-like enemies that rise above the ground try and block you. The liquid in this room is lava, so be careful to not fall down in it. You'll be in another corridor with lava in it that you gotta head left and navigate. From here, you'll be in a room with some spikes on the ceiling. You'll see a doorway on the left, but for now, ignore it. Instead, head up. Keep climbing until you cannot possibly climb anymore, and make your way left. Head around the spikes by proceeding left and up. The walls will have a pebble-like look to them, so you know you're in the right room.
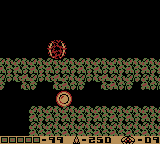
For now, follow the path. You'll have to climb up while moving left. It is a one-way path so keep following it. It'll take you up a tiny vertical room, and then you can proceed right. In this room, you'll be faced with an Alpha Metroid. Getting rid of it should not be any problem, and you'll hear the lava rumble to head to the next area. Head to the right and go through the passageway.
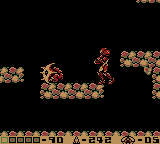
Once again, you're in a one-way path, so drop down and head to the right. You'll eventually be in a long corridor, with several rhino-like creatures on platforms. I highly recommend killing them because they may drop health or ammunition, which is always a plus. Keep traveling on your path to the left into the next room. You'll be back in the room with the spiked-ceiling, but it turns out the lava actually went up instead of down and you're blocked. This also means that this entire path is just a giant loop. Keep heading left to make it back to where you fought the Alpha Metroid. You'll have to be on your toes because you're actually going to be ambushed by an Omega Metroid!
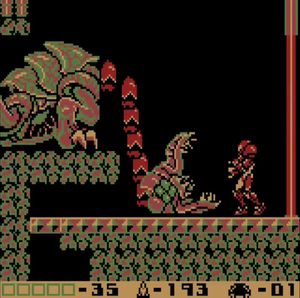
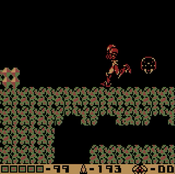
Boss Guide: Omega Metroid
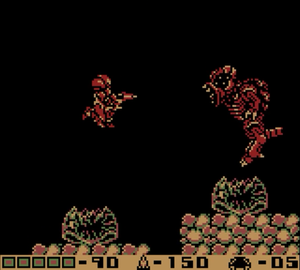
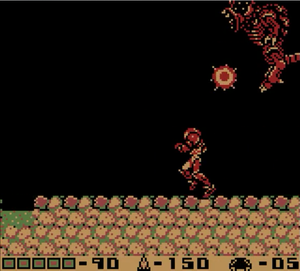
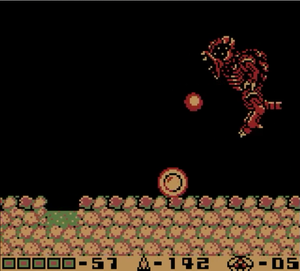
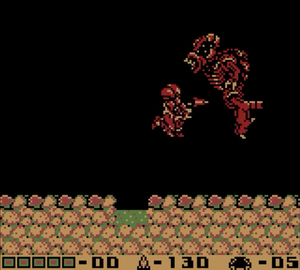
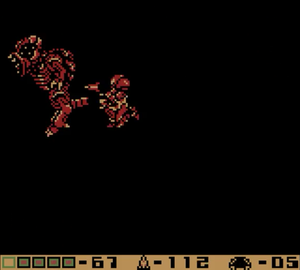
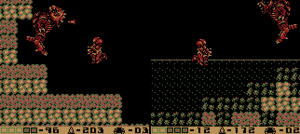
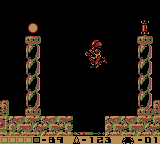
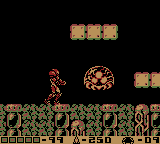
Like the Zeta Metroid, Omega Metroids float in the air back and forth, chasing you across the room. However, they have more powerful fireball attacks that it will shoot to the ground. They also are more bulky, making them tougher to dodge. You cannot hit an Omega Metroid from below, as it will only take damage when you shoot it from the side. You'll have to make quick turns to keep your momentum to run from the Omega Metroid, while also damaging it. A good strategy is to stay on the ground and pace back and forth, jumping up and turning around to hit the Omega Metroid. When you need to turn directions, pass underneath the Omega Metroid. Sometimes being in Morph Ball can help you to slide under the Omega Metroid easier. Take short hops to dodge the fireballs as well. You can also use the Screw Attack to prevent taking damage, but it won't harm the Omega Metroid either. The Omega Metroid is a tough fight and takes a whopping 40 missiles to defeat.
| Image Guide: Omega Metroid |
|---|
Back To Path
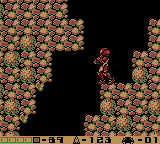
When the Omega Metroid is defeated, the lava will go down again, and this time you won't have to make another loop. Exit either way you like, but if you proceed right you can go back to the room with the rhino-like creatures to get health or ammunition, which you might certainly need. In fact, take out any enemies you see to try to get your health and ammo back up. Don't feel obligated to grind unless you absolutely need to. Keep following the tunnel until you're back in the room with the spiked ceiling. Drop down as much as you can, and head to the left. You'll be in a small shaft with more mole-like creatures. Be careful not to drop down into them.
It's mostly a one-way path from here since there's no side-tracking for pickups or any branching pathways. Anyway, you should be in a room with some lava and small enemies that crawl over the blocks. Use your Space Jump skills to navigate through the room, and be careful not to fall in the lava. Every bit of Energy and every Missile should be conserved. When you enter the next room, you'll be climbing up a long tunnel. There are enemies along the wall that zip back and forth, so don't let yourself get hit by them. When you get to the next room, it's basically the same thing, so just proceed. Eventually, the main theme will silence to be replaced with ominous noises. You'll also see a Save Station that you should probably use.
There's no very few, if not at all. This is a way to showcase just how powerful the later stages of the Metroid evolution is, and how they dominated this planet. Just keep jumping up the large chamber from the Save Station, and head to the next room on the right. Here you'll be in another tall chamber. Climb all the way to the top and take the door on the left. Jump across the corridor avoiding the small spikes on the floor and you'll soon face another Omega Metroid! Use the same strategies as the one you fought before. When he's defeated, go back through the spiked floor, and when you're in the shaft, take the passageway to the right.
You'll be in another long corridor with spikes on the floor. At some point, you'll see a pit that appears to go down. However, just ignore it and keep heading right and go through the entrance. You'll be in a really tall chamber. If you Space Jump all the way to the top, you'll find another Save Station that you're welcome to use. However, down below is a passageway to the right that you need to go through.
You'll be in another chamber with two passageways below you, one on the right and one on the left. There's also some rhino-like creatures you can use to try and gain some extra Energy. Each is one-way corridors that lead to an Omega Metroid. You're free to pick whichever order you want to take down first. The one on the right is in a short room length-wise, so you'll have to Screw Attack more often to get around the Omega Metroid. The one on the left is the same as the other ones you have fought to this point. Additionally, if you defeat one, you can go back to the Save Station to stop yourself from having to fight two in a row if you wish.
With all of the Metroids defeated in the area, the lava will once again rumble, and it'll signify a new area. Remember that pit that I said to ignore before? Go back there. In case you forgot, it's to the left of where that Save Station is that is incredibly high up. If you'd like to save again you're free to do so.
Once again, you'll be on a straightforward path that is a one-way tunnel when you drop down into the pit. First, you'll be woven through a downward stretch. Then, you'll climb up another cavern and it'll wind to the left. After that, you'll be in a long corridor and you'll see some liquid, but this is water and will not harm you.
You'll be in a room with several pools of water, and you'll have to jump around them to head up. When you're at the top, head right to the next screen. You'll be in another long corridor, with some more water. However, be careful if you happen to land in water. There's section of it that is a fake floor, and will send you down. If this happens, just head left and try again. You can avoid falling entirely if you just Space Jump across the whole room. It is hard to tell where the fake floor is, especially on a black and white Game Boy screen.
When you make it across all of the fake floors, it'll be a small chamber. You have to climb up, but there are fake floors as well. Due to the narrow ceiling, it might be a little more difficult to jump around. Fortunately, you can use the Spider Ball as well if you want. However you might get to the top of this room, head left.
You'll be in another room with pools, and once again there are fake floors. Just Space Jump across to save any trouble you could have of falling through them. If you do fall, it drops you all the way down to where the first pools were, so head left through the tunnels and try again in that case. Keep following the path and you'll eventually come across another Save Station. There will be some out of place looking blocks on the ceiling near the Save Station. Jump up in that area to get up to the next screen.
You'll be in a giant pool, and in a giant room. Keep all the way to the right and Space Jump to the very top. There will be no ledges to grab on, but you will see a pathway leading upwards for you to take. If you don't see anything, you moved too far to the right. Jump a little left-wards, but stay in the air to be able to see. In this room, you should find both a Missile Recharge and an Energy Recharge. At this point in the game, and after all of those Omega Pirates, it is certainly worth the wait.
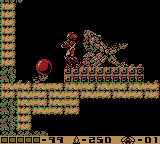
Drop down out of the room, but stay still. You'll land on one of those strange platform creatures that you've seen early in the game. It will lower you slightly, so you can Space Jump off of it. The reason is that you want to stay near the ceiling so you can take the next entrance that leads upward. This time, it will be an empty chamber. Simply Space Jump up again and you'll enter a room. Here, there is a broken Chozo Statue, and in the orb next to it is the Ice Beam. If you don't have the Ice Beam, you must get it here now. But isn't it strange? The Metroids have evolved so much that they destroyed their one weakness deep in their nest. In terms of atmosphere, it is a brilliant piece of subtext that makes visiting this room worth it even if you already have the Ice Beam.
If you want to ever go back to save or recharge, you are absolutely free to do so. This is the final stretch of the game, so tread with caution. When you're ready, there is one more entrance to the left of where the broken Chozo Statue is. Proceed through that one to get to where you need to go. The music will change to high-pitched beeps, and it is reminiscent of Tourian from Metroid 1.
Space Jump through the chamber and take the door on the left. The scenery will change, and you'll find another chamber to climb. When you see the passageway through the ceiling however you'll actually want to use the Spider Ball to pass through. Then, you'll find.... an egg? A screech will play, and the Metroid counter will go up to 9.
Metroid Counter: 38 killed, 9 left
Roll to the right to drop down into the next screen. Be cautious when proceeding forward because you'll be attacked by Metroids! It turns out, the iconic Metroid that most people think of when they picture the creature is actually an infant, and the Omega Metroid is what they can grow into. It makes sense that they are close to the nest. Being an infant though, they are fragile. Freeze them and unload 5 Missiles to destroy one. If a Metroid latches onto you, go into Morph Ball mode and bomb to get it off. From here on out it is just a one way path, so just keep following the tunnels, wiping out each Metroid you come across.
Eventually, the music will shift dramatically, with spikes all across the floor and ceiling. The counter is at 1 Metroid left, a creature is roaring, and that's when you realize that you are about to face the Metroid Queen. If you want to go back to fill up on Missiles, save, or Energy, there's no shame in doing so. When you're ready, you'll have to Space Jump carefully to avoid all the spikes, drop down in the pit to the right, and face your greatest challenge yet.
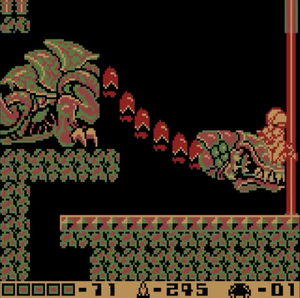
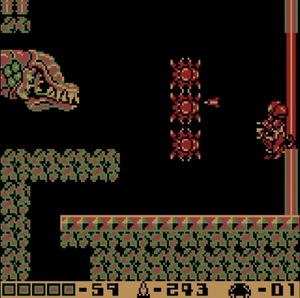
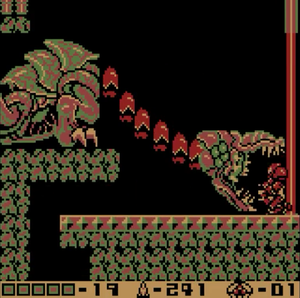
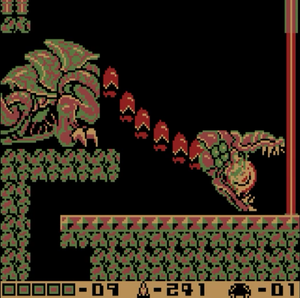
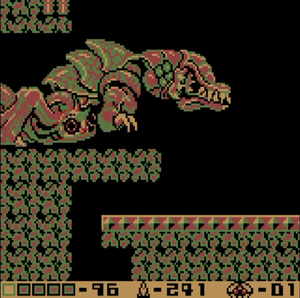
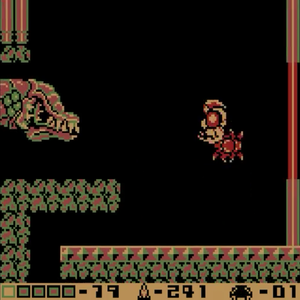
Boss Guide: Metroid Queen
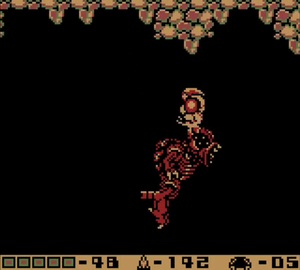
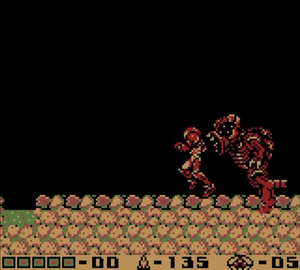
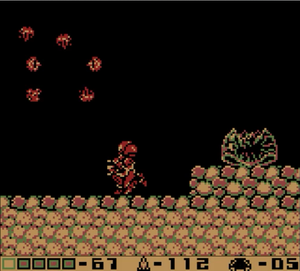
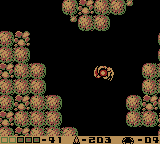
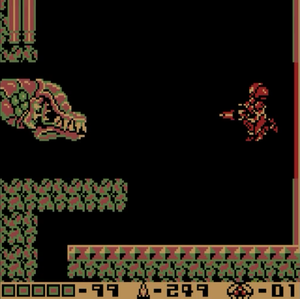
The Metroid Queen is a very difficult boss if you don't know what you're doing. There are also several moments that make it seem like you are just tanking the Queen. The Queen has several attacks. She will try to headbutt you, shoot spiked things, and open her mouth while ramming you. To dodge the projectiles, you can Screw Attack into them. The Metroid Queen is fast though, so you'll have to be quick on your toes to avoid getting hit. She also takes up a lot of room, so there isn't much space to maneuver. Additionally, for whatever reason, you're not allowed to pause the game during this fight. Technically if you're on Virtual Console you can just use the Virtual Console menu, but the in-game pause function will not work. In order to win, you have to shoot 150 Missiles at her head. The logical thing to do would be to just keep unloading Missiles at her head.
However, there is an alternative method. It requires that you take a bit of damage, but it makes the battle much easier. When the Queen opens her mouth, either from trying to attack you or in general, if you shoot a Missile in her mouth, she will be stunned for a brief moment. In this state, if you use the Morph Ball, you can roll into her mouth. She will eat you, but then you can use the Spider Ball to roll into your stomach. When this happens, you can Bomb the stomach. This will do a substantially large amount of damage to the Queen, but it can be difficult to get her stunned without just standing still shooting Missiles. That being said, combining this while shooting the head with Missiles is how you should approach the boss. It is a tough fight, as any final boss should be, but with enough endurance, you should be able to take the Queen down. The counter will be at zero, and your quest will be nearly complete.
| Image Guide: Metroid Queen |
|---|
Back To Path
When the Queen is defeated, instead of an escape sequence like many Metroid games, you'll instead hear a soft melodic tune. When you enter the next room, and the egg from earlier will be flashing and it'll hatch. This is the baby Metroid. The hatchling that plays a large role in future Metroid installments. Samus decides to spare the Metroid, and while the counter in the game says 0, it's actually:
Metroid Counter: 47 killed, 1 left
The baby Metroid will help you break blocks that are otherwise unbreakable. From here on out, it is just a one-way path through some short tunnels. When you start seeing stars, it means that you're all the way back on the Surface of SR388. From this point, head right and you'll face a wall. Space Jump to scale the wall, and walk along the top. When you're at the edge, drop down to find Samus's ship. Jump inside, and your mission will be complete.
Thank you all so much for following this series. Two years ago, I started Galactic Expedition along with Party Trick in an effort to breathe new life into Strategy Wing. I'm so sorry that the schedule has been so sporadic with Metroid 2, but I am thankful that I can retire from this section with closure. Metroid 1 was the first game with a complete walkthrough on The 'Shroom, and now Metroid 2 can be added to that list. If any of you out there want to pick up this section to write your own walkthroughs, for any video game, not just Metroid, please consider joining this team with a section. Strategy Wing is smaller now, and I may try to write another section in the future. If any of you would like a complete version of my walkthroughs of either Metroid 1 or 2, with either links to each part, or a compiled version for one huge edition, feel free to contact me and I can do that for you. I will link them in my user page (talk) as well. Once again, thanks for sticking with me all these years, and keep on exploring.
Pokédex Power
Hello everyone, it's me, Yoshi876 again with a new edition of Pokédex Power, the section written by the person who is quite confused by his Pokémon calendar.
As I'm sure many of you are well aware it is currently July. But instead of having a Fire-type or a Bug-type we have Mimikyu. Now, I like Mimikyu, but I wouldn't really call if a July Pokémon. It's much more of an October Pokémon given how it’s a Ghost-type and Halloween falls in October. What's even more baffling is that October isn't even represented by a Ghost-type Pokémon, instead it is an Alolan Meowth. Now even though Alolan Meowth doesn't have a lot to do with Summer or July, a swap between the two Pokémon would have been a smarter idea.
But we're not going to be talking about Mimikyu, nor Alolan Meowth. What we're doing instead is finishing out the Pokémon types by having our first Fighting-type Pokémon. Yes, we're taking a look at Pangoro. I haven't trained a Pangoro before, but I did train a Pancham on Y for a little bit, so I'm at least familiar with this evolutionary line. However, will Pangoro's Pokédex entries be good enough for me to finally evolve my Pancham? Let's find out.
Generation VI
| Pokémon X | Although it possesses a violent temperament it won't put up with bullying. It uses the leaf in its mouth to sense the movements of its enemies. |
| Pokémon Y | It charges ahead and bashes its opponents like a berserker, uncaring about any hits it might take. Its arms are mighty enough to snap a telephone pole. |
| Pokémon Omega Ruby | Although it possesses a violent temperament it won't put up with bullying. It uses the leaf in its mouth to sense the movements of its enemies. |
| Pokémon Alpha Sapphire | It charges ahead and bashes its opponents like a berserker, uncaring about any hits it might take. Its arms are mighty enough to snap a telephone pole. |
Pangoro gets off to a shaky start with its Pokédex entries. I really don't like the one for X and Omega Ruby. Just because you have a violent temperament, it doesn't mean that you have to put up with bullying. The leaf fact is good enough, however, although it could be expanded as to how it uses the leaf to detect the movement. It can't just be the leaf's existence. As for the entries for Y and Alpha Sapphire, it is much better. The first fact shows how enduring Pangoro is when in a fight, and long-time readers of this section will know much I love a fact that relates the Pokémon to the human world which is exactly what the final fact does.
Generation VII
| Pokémon Sun | It boasts incredible strength. Those who wish to become Pangoro's Trainer have no choice but to converse with their fists. |
| Pokémon Moon | From the slight twist of its bamboo leaf, it deduces its opponent's movements. It's eager to tussle but kindhearted toward its companions. |
| Pokémon Ultra Sun | This rowdy Pokémon boasts great physical strength. Many Trainers are also smitten by its lively character. |
| Pokémon Ultra Moon | Pangoro is the type to talk with its fists. It doesn't say much as it pummels its opponents with enough force to send a dump truck flying. |
Much like with Generation VII, it's the Sun and UltraSun entries that I'm not a fan of, while I like the entries for Moon and UltraMoon. The main I don't like the entry for Sun is because of how it contradicts with the entry for Moon. The latter states how the Pokémon is kindhearted toward companions, while the former says that the only way to properly command Pangoro is to do so with violence. At least we get a repeat of how strong Pangoro is, just without a reference point anymore. The same goes for UltraSun, we hear it is strong, which we already know, and the lively character isn't that interesting a fact, especially since it can end up contradicting with its in-game nature, depending on what it is. Although Moon contradicts with Sun, at least we get more insight on how the leaf detects the movements of enemies, and although it wasn't entirely necessary we also got to find what kind of leaf Pangoro holds. UltraMoon seems to lean more towards Pangoro's violent side, but at least we have a new reference point for Pangoro's strength.
Conclusion Much like last month, Pangoro has poor Pokédex entries for the most part. Although I like the human reference points for its strength, we're not massively clear on what Pangoro's mood is like given how often the Pokedex contradicts itself, and that's just in one generation, god help us when we reach Generation VIII. For Pangoro's entries to improve, we just need some clarification on its temperament, do you have to punch it in the face to command it, or does it actually listen to its Trainer?
| The 'Shroom: Issue 136 | |
|---|---|
| Staff sections | Staff Notes • The 'Shroom Spotlight • Poll Chairperson Election |
| Features | Fake News • Fun Stuff • Palette Swap • Pipe Plaza • Critic Corner • Strategy Wing |
| Specials | Art Contest |

