Director Notes
Written by: Meta Knight (talk)
Hello everyone and welcome to this month's Strategy Wing! I'm pleased to say that this month Strategy Wing is in full power. We have a ton of great sections for you all to read this month. Be sure to vote for your favorites at the bottom, and thanks for your support!
Section of the Month
Thanks to everyone that voted! Congratulations to Yoshi876 (talk)!
| STRATEGY WING SECTION OF THE MONTH | ||||
|---|---|---|---|---|
| Place | Section | Votes | % | Writer |
| 1st | Pokédex Power | 14 | 56% | Yoshi876 |
| 2nd | Mario Kart: Wheel Tips corner | 11 | 44% | Yoshi876 |
Metroid: Meta Knight Returns for the next part of the Metroid II walkthrough!
[read more]
Mario Kart: Wheel Tips Corner
Hello 'Shroom racers! And welcome to Mario Kart Wheel Tips Corner, here I plan to give you just some extra tips to help you with your racing, or just some changes in a track that might catch you off guard if you aren't prepared for them. Lights are out, let's start racing.
Kool Karts
You can't race if you don't have a Kart to do it in, so in this section I'll give you some facts about a Kart, Bike, ATV or even tires and gliders that you can use hopefully for racing success.
In this edition of Kool Karts, we're going to be looking at a piece of history. Although Mario Kart Wii introduced Bikes as something different from Karts, the Zipper is clearly a bike, so technically what we're looking at today is the first ever Bike in the Mario Kart series.
The Zipper is actually a fairly good Kart, as its only bad stat is handling, which is a 5/10. Its speed, acceleration and drift stats are well-rounded at around 6/10, but it's weight and items where it excels. Its weight stat is a 7/10, making it easier to bash other Karts out of the way, and its items stat is a 10/10, making it more likely for you to get items like the Triple Bananas or Triple Mushrooms. But it would probably be better to use those Mushrooms on a straight to catch up, as a high speed + low handling could see you veer off the track instead of overtaking like you intended.
What's Changed?
Retro tracks are now a huge portion of the Mario Kart games, typically amounting to half the courses in the game. But usually these courses change some things up, so in this section I'll help you find out "What's Changed" in the retro tracks.
Koopa Troopa Beach first appeared in Mario Kart 64, before reappearing in Mario Kart 7.
Long time readers of this section will guess what I'm about to bring up here. As always, the graphics were changed and improved. But, like usual there were other changes. Players can now drive fully underwater, and aren't slowed down by it. The two shortcuts have been merged into one now, and the rock pass shortcut has been shorted a little. Other than that, all ramps now either have Boost Pads or allow tricks to be performed off of them, the Blue Shell item box has been replaced by a coin, and interestingly, in American versions of the game, the track name has been shorted to just Koopa Beach.
Ace Shortcut
In this small section I give you a way to shave a few seconds off your time, whether you know about it or not. Be warned, most of these shortcuts will require a Mushroom.
This issue I bring you a shortcut from Grumble Volcano.
This is a pretty famous shortcut. On Grumble Volcano, you need to use a Mushroom, or fire hopping to launch yourself onto a rock near the start/finish line. The rock loops around, and allows you to cross the start/finish line without doing the majority of the track. However, the rock will start to sink at around the 53 second mark, meaning this is pretty much one for Time Trials only. And don't attempt it in Mario Kart 8, as the rock is too steep and your vehicle will fall off.
Isaac Synergies
Written By: DragonFreak (talk)
Hello everybody! DragonFreak here for a post-Awards Isaac section! This section is going to go through a slight change. Instead of focusing on synergies for one item, I’m going to list completely different synergies. The reason for this is, despite there being many, many synergies in the game, only a few items have enough synergies to write an entire section from them. It will also allow me to have more variety. I hope you still like it regardless!
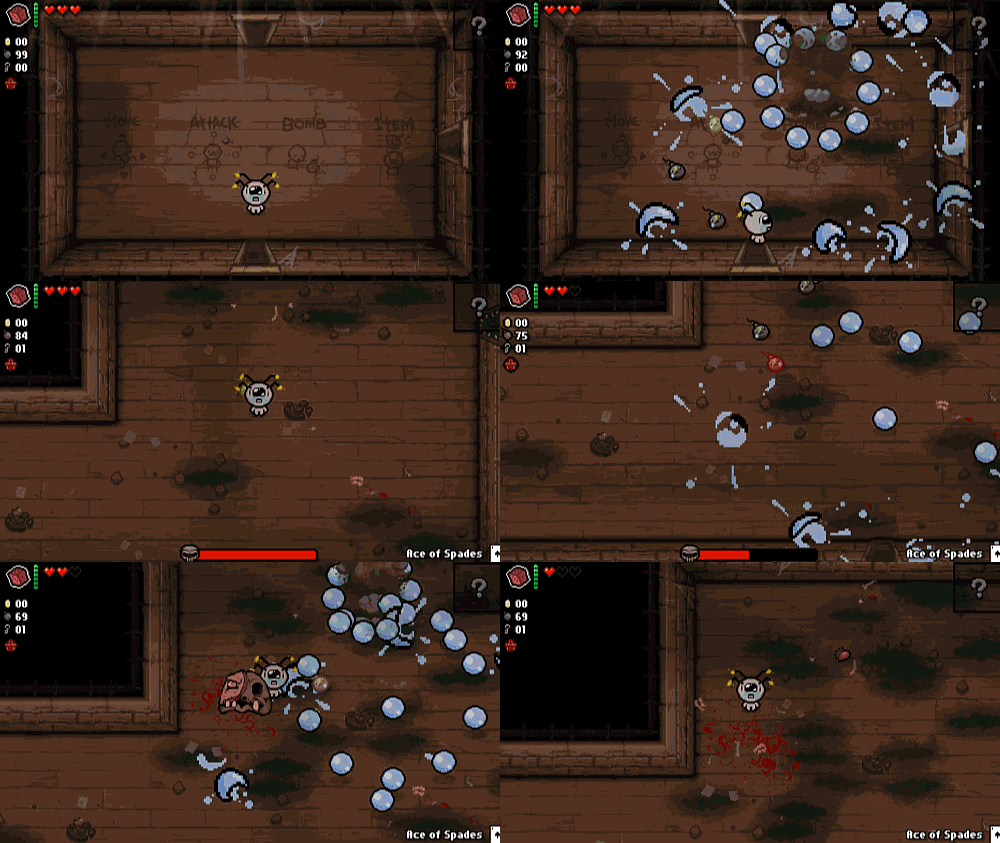
First up is the first synergy I discovered in the new Afterbirth+ DLC. It included the two relatively simple items of Fast Bombs and Sad Bombs. Fast Bombs allows you place bombs on the floor one right after another instead of a short delay you normally have. Sad bombs are a very special and sought after type of bombs. When those explode, it shoots out your exact tears in a similar fashion as Tammy’s Head. With both of them combined, you can deploy powerful tear explosions upon enemies. Combine with high-dealing damage items like Polyphemus and a high bomb count or Golden Bombs and there’s nothing stopping you.
| Fast Bombs + Sad Bombs |
|---|
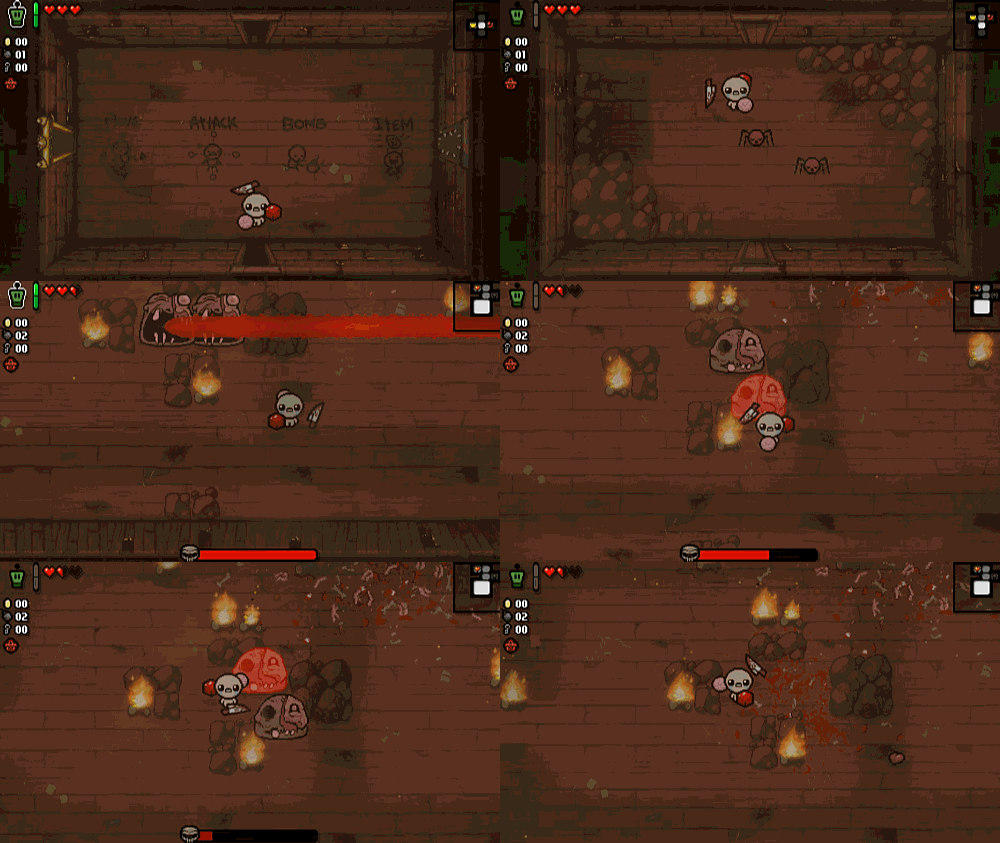
This is another Afterbirth+ synergy. The active item Pause causes the entire room’s enemies to freeze while you can still move. Which is very useful on it’s own for dodging and doing rooms that require stepping on buttons. Only after you shoot any tears (or exit the room) that the pause effect stops. The one thing that makes this item great is that any orbitals you have still work and will deal damage. If you’ve seen my Gnawed Leaf section, you probably know where I’m going with this.Throw in a Sacrificial Dagger or some Cubes of Meat and suddenly you have free reign to deal as much damage as possible.
| Pause with Orbitals |
|---|
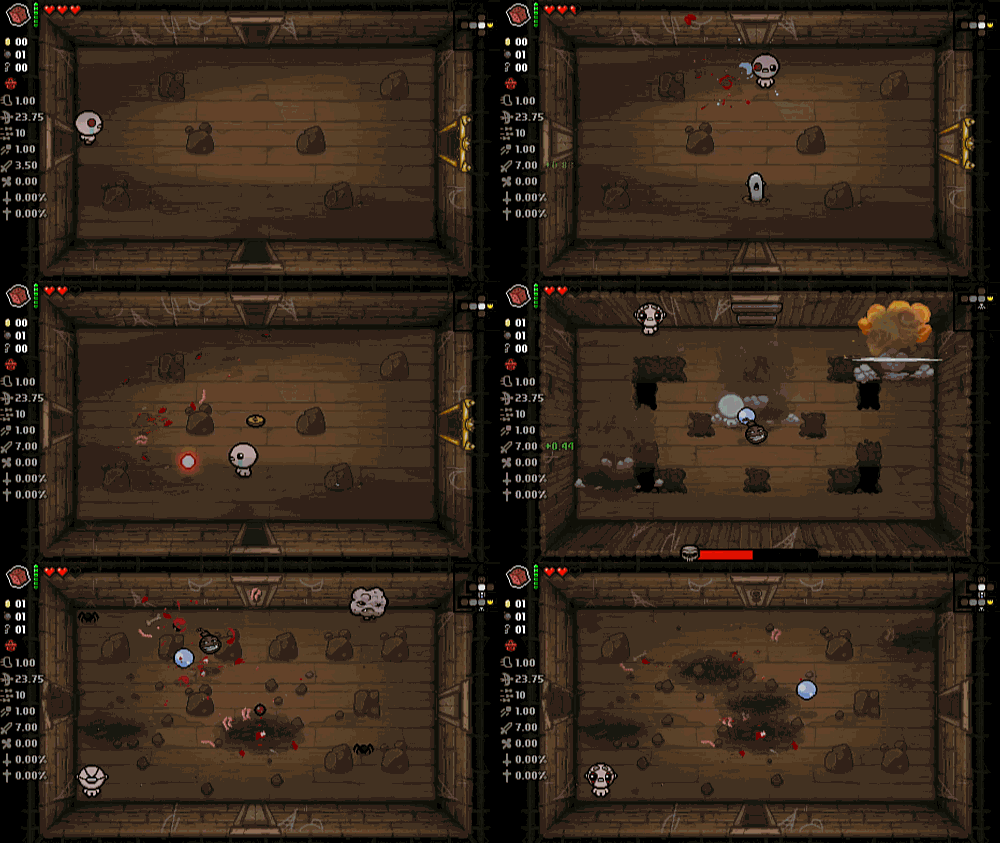
The Ludovico Technique (here on out calling it by it’s short name Ludo) is a very controversial item, as with all items that change your playing style, but I personally love it. Ludo causes your tear to float around in a giant orb which you control manually and never touches the ground. You can do some crazy things with this item, which I will probably show off in later sections. Dead Eye is a very useful item that increases your tears every time you hit an enemy, but resets every time you miss and a tear hits the ground (up to the limit of twice your damage). With Ludo, your Dead Eye can never hit the ground, so you will keep the max damage from Dead Eye for the rest of the run. It’s honestly insanely crazy.
| The Ludovico Technique + Dead Eye |
|---|
I hope you like this new format as it will allow me to cover a lot more synergies now. I hope you have a wonderful day!
Galactic Expedition
Written By: Meta Knight (talk)
Metroid II Walkthrough
Current Inventory: 90 Missiles, Morph Ball, Bombs, Spider Ball, Ice Beam,
Metroid Counter: 6 killed, 33 left
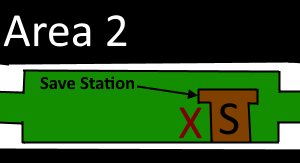
Hello and welcome to this month's Galactic Expedition! I'm excited for Samus Returns as well as Prime 4. It's been a while and that's my bad because I've been really busy, but it's finally time to continue our walkthrough of Metroid II. Last time, we cleared Area 1 and ended at the Save Station in Area 2.
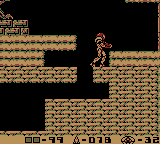
From the Save Station, head outside the room to the right. We want to use the Spider Ball to scale the wall direcly above us. Fortunately there's a small alcove that we can jump on to do this. Climb the wall and you'll eventually be on some ground that leads back left. Continue this way while being careful not to get hit by the enemies and you should come across another wall. Once again, use the Spider Ball to scale upwards. Be careful not to get knocked off, and you should slide in a small tunnel that is used with the Morph Ball. Proceed left inside for another Missile Tank. Exit the tunnel and head back down and left to where the Save Station is.
When you're back at the Save Station, head left. You'll enter a room with these long pipes, but these are merely part of the foreground. You cannot go in them from this room, so just continue left. Be careful not to get shot by the enemies as well. When you get to the next room you'll come across yet another Save Station. Feel free to save if you want, but head left into the next room. You'll be back outside on the other side of the temple. Like before, we want to scale the wall directly above us, so head a little bit left, then jump up to the right so you can land on a small alcove and scale the wall. Be careful not to get hit by enemies or you could fall.
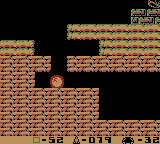
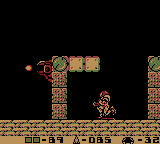
When you get to the top, continue right and you'll find a stone you can bomb. Bomb the block and go into the room on the right. In this room there's another Alpha Metroid! If you need a refresher on how to take care of these baddies, feel free to take a look here. When you defeat the Alpha Metroid, bomb the floor to the left of the Metroid's shell and you can break another block. Head down and to the right. Scale the right wall and you'll eventually head into another room. Here there will be a pipe that you can fall down in.
When you land after falling in the pipe there is something of value both left and right. If you scale the left wall you can find a hidden passage to go through. Bomb some of the blocks that are in the way and you'll come to a red door. Use five missiles to open the door and inside is the Wave Beam! However, like in Metroid 1, beams do not stack in this game. That means if you grab the Wave Beam you will lose the Ice Beam. There are a few other beams in the game as well, and there is an area later with all of them in one place for convenience. Personally, I prefer to just keep the Ice Beam because I think that it is simply more useful. The bosses don't really have different strategies dependent on beams like I showed in the first game, so just pick up whatever beam you want. Head to the right when you're done in this room.
If you don't want the Wave Beam, after falling down the pipe you don't really have to go left at all. Proceed right past where you fell from the pipe into the next room. There will be several breakable blocks that you're able to shoot. Make your way as right most as possible and drop. There are some breakable blocks in front of a wall but you're able to break them and enter through this fake wall to a room on the right.
In this room is a long chamber that's just big drop. When you fall on the ground you'll see a red door on the left. Inside are the High-Jump Boots which are most definitely useful. Below the Chozo Statue slightly to the right is another breakable block that you can bomb. Go down and scale the wall on the left. You'll enter another hidden tunnel. Bomb blocks as needed and inside this room are both another Missile Tank and an Energy Tank, which should give you a breath of relief if you were low on health. Head back to the right past the Chozo Statue and in the tall chamber.
You'll need to climb back up this chamber, so scale up the wall on the left with the Spider Ball to reach the top. When you get to the top go left. Back in the room with several breakable blocks, proceed to the very bottom of the chamber. There is another passage to the left. Head left through the opening. You'll be in a long corridor with some more turret enemies. This room will have two Missile Tanks for you to collect though. More Missiles is always better than less, so it's good to stock up. When you grab the Missile Tanks, continue left and go to the next screen. You should be in a small chamber.. Just head down and to the right and there will be one more Missile Tank for you to collect.
There's nothing else important here so for now head back the way you came. Go all the way back to where you landed from falling down that pipe we saw earlier. You want to go back up the pipe, so you may have to scale the wall on the left to get to the ceiling and eventually inside the pipe. Continue all the way up. Go back left as you pass by the empty Metroid shell so you're back outside and bomb the breakable block. You want to keep moving up along the wall, so plant a bomb, and when it goes off use the Spider Ball to stick to the right and climb up.
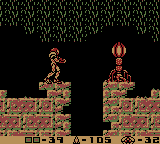
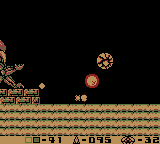
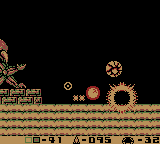
When you get to the roof you can head right past some flower looking enemies and come across a pit. Jump down inside. From here, head left into the red door. There's a Chozo Statue with something inside for you but SURPRISE! There's a boss here to ambush you! You've got to best him.
Boss Guide: Arachnus
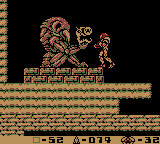
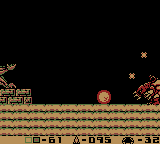
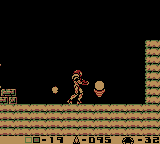
Those of you that had Metroid Fusion as their first game of the series may recognize Arachnus. He's not really too hard. He will spend most of his time rolling around, spitting fireballs, and just in general being somewhat bulky. Your Missiles will do absolutely nothing. Instead what you have to do is go into Morph Ball and plant bombs to blow him up with. I don't really have any clear strategy other than that, I just roll all around and plant bombs everywhere.
| Image Guide: Arachnus |
|---|
Back to Path
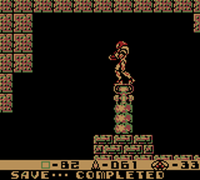
With Arachnus defeated you will be able to collect the Spring Ball! This will allow you to jump while in Morph Ball mode. This will make tasks such as using the Spider Ball a lot easier, as now you can just jump up and use it. That being said, this is actually a good place to stop for now so lets head over to a Save Station. Simply head right and back up that pit, and head to the right. Jump right and go as far as you can. We want to go all the way to the bottom so that we can see an opening on the left. Go back inside and there's a Save Station. Kinda silly that we're stopping this issue in the same place we started, but it's okay because we got a lot of new upgrades and increased are stock. Next time we'll defeat some more Metroids. Take care everyone and I'll see you all next time.
Party Trick!
Written By: ![]() Meta Knight (talk)
Meta Knight (talk)
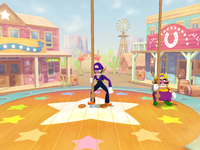
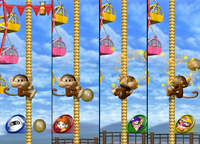
![]() Hello and welcome everyone to this month's edition to Party Trick! My apologies for not having anything last month, I was terribly busy. It's okay though because I didn't have any requests anyway! I still don't so this month lets do the top 3 worst minigames as announced in this year's Awards Ceremony!
Hello and welcome everyone to this month's edition to Party Trick! My apologies for not having anything last month, I was terribly busy. It's okay though because I didn't have any requests anyway! I still don't so this month lets do the top 3 worst minigames as announced in this year's Awards Ceremony!
At third worst was Cheep Cheep Chance from Mario Party DS. In this minigame literally all you do is grab a rope and hope that you get a Cheep Cheep. It's just luck, there's no strategy to it. While we're at it we could bump off Get A Rope from Mario Party 5 as well. This is the only minigame in existence where the title is all you need to know to play the game. Grab a rope and hope you win. In case you didn't figure it out I hate these minigames, especially when they pop up as a Duel Minigame where there can be real stakes. There's not a whole lot I can offer here except pray that you win. There's a lot of other luck based minigames out there but we'll save them for later.
At second worst is Flip The Chimp from Mario Party 8. I hate this minigame too. You hold the Wii Remote vertically like an arcade joystick, and have to tilt it left and right to dodge obstacles that fall down. I recommend looking near the top of the screen so that you can try and see where the obstacles drop, and then use quick movements to get out of the way. The other thing about this game is that it tries to get you to fall for the pattern of alternating sides. You cannot expect it to go left, right, left, right for example because sometimes it will do the same side twice in a row. Just keep an eye out for where things are dropping, and then quickly dodge accordingly.
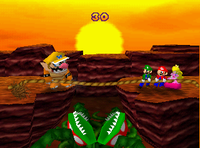
The worst minigame of all time this year was none other than Tug o' War. This is a 1 vs. 3 minigame where the one player is in a Bowser suit and the other three playersare on the other side. In order to win, players have to rotate the analog stick as fast as possible. This is kind of a double-edged sword. It's generally faster to use your palm to rotate the analog, but at the same time your palm will really hurt because the N64 analog stick is uncomfortable. If somehow you have a GameCube analog for it or Wii Classic Controller that will be much better. Hopefully if you have the misfortune of playing this minigame, it isn't the Bowser variety, as the losing party will lose coins.
![]() That's all for this month's Party Trick! Have a minigame or board you'd like me to do? Send me a message on my talk page or message me on the forums and you could be mentioned in next month's edition!
That's all for this month's Party Trick! Have a minigame or board you'd like me to do? Send me a message on my talk page or message me on the forums and you could be mentioned in next month's edition!
Challenger Approaching!
Greetings, beautiful 'Shroom readers! I'm your host, Roserade, and welcome to Challenger Approaching!, where I discuss different video game characters and how I believe they should play it they were in Super Smash Bros.!
I apologize for my absence last month! This summer has taken quite a toll on my schedule, and unfortunately August is no different than July. Rest assured, I am back this month; but, to lighten my load a little bit, I've decided that I'm going to tackle an easier kind of character: a clone character.
Whether you love them or hate them, it's hard to deny that at this point in time, clone characters, or characters that are very similar to another but have differing attributes, are a quintessential part of the Smash Bros. series. But what character do I believe would make for a good clone character?
Daisy!
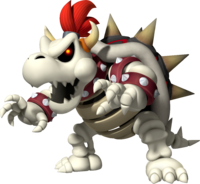
No, I kid. I'll tackle her eventually. Here today, we're going to be looking at Dry Bowser!
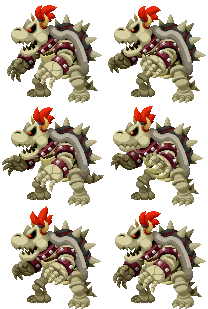
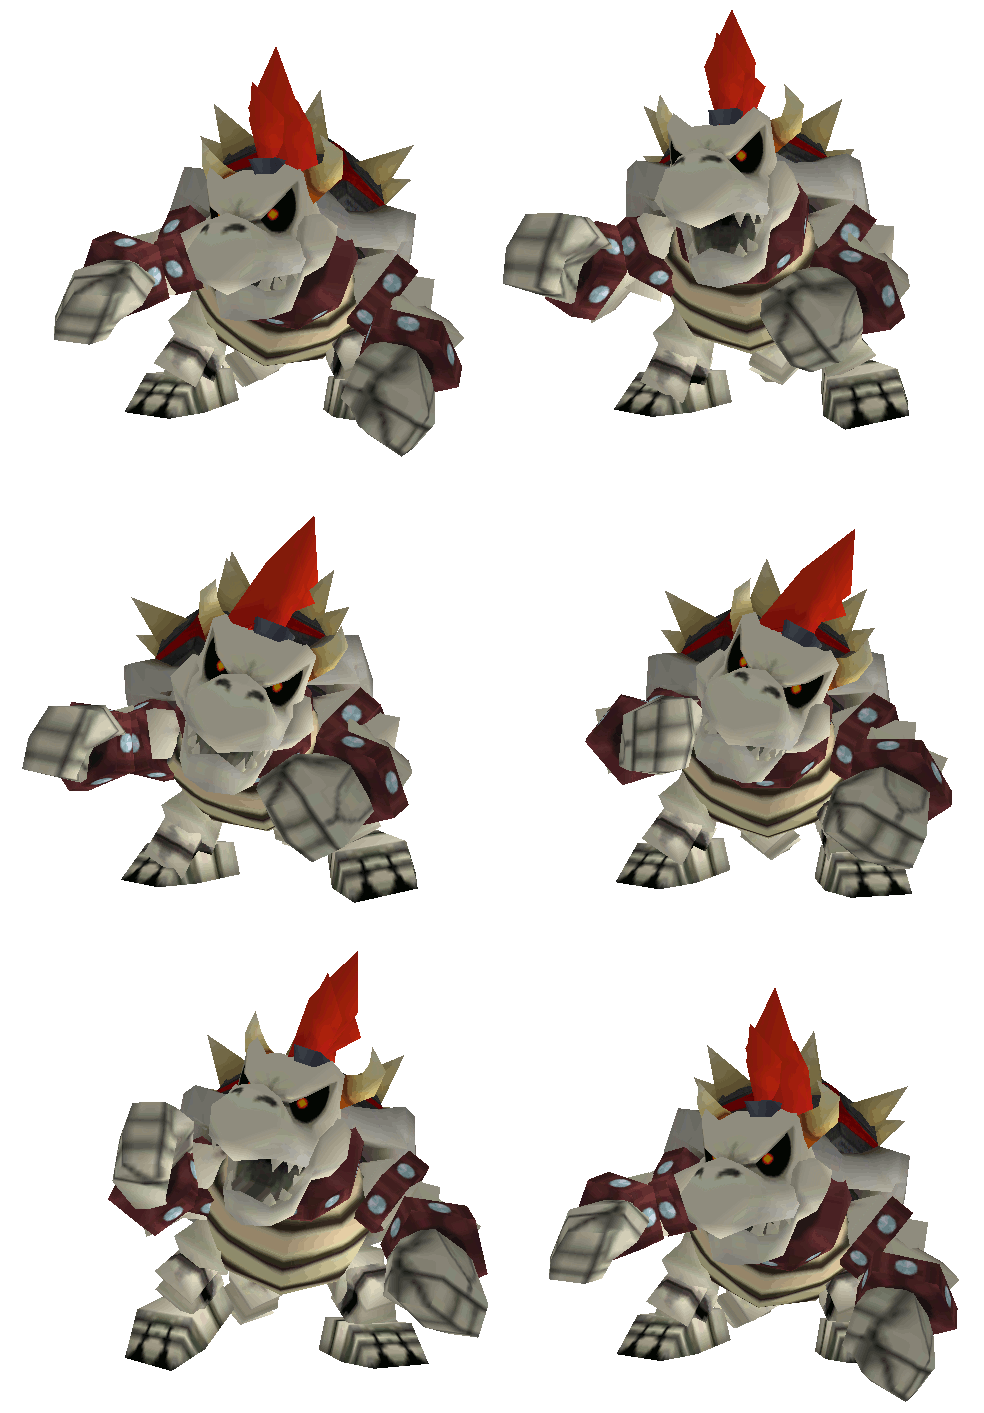
Dry Bowser is a newer addition to the Mario universe, but has made a name for himself with his reoccurrences in the spin-offs and the New Super Mario Bros. series. So how would I want this bone-dry baddie to play in Smash, and how would he be different than the original Bowser himself?
Background
Dry Bowser made his first appearance in New Super Mario Bros., and his backstory is rather interesting. In the first castle of the game, Mario or Luigi encounters Bowser; Bowser is swiftly defeated by the press of a button, causing him to go toppling off the bridge he's fighting on and into the lava below. However, unlike in previous games, where Bowser would simply sink into the lava, he stays animated, with his skin melted away; thus, Bowser becomes Dry Bowser, a new skeletal form of the Koopa King. Mario or Luigi will proceed through the game and finally defeat Dry Bowser in a rematch at the end. After the battle, Bowser Jr. throws the bones into a cauldron, bringing Bowser back to his original form.
I mention that his backstory is interesting because, despite Bowser appearing as he normally is in the most recent Mario games, Dry Bowser is still appearing alongside him, as a separate playable character in different spin-offs or as a secret boss in a few Super Mario titles. How this relation works is unknown, but according to Mario Party: Island Tour, Dry Bowser is a friend of Bowser's, so I guess they're separate entities? Maybe? No matter the circumstance, though, he has certainly become a popular returning character.
Main Ideas and Characteristics
As with any clone character, I want Dry Bowser to be similar moveset-wise to Bowser, but with characteristics that make him entirely unique. Most clone characters satisfy a different playstyle than the original character would, and I want Dry Bowser to be no different. But the difficulty comes with deciding what playstyle to reflect.
Ultimately, Bowser and Dry Bowser are savage, and Bowser's style of obliterating foes with heavy attacks and strong knockback perfectly personifies the character he is. Therefore, I've decided that I'd like Dry Bowser to be savage, but in a different manner. Rather than Bowser's attacks with high damage and high knockback, Dry Bowser is a hunter, chasing down foes and striking them with multiple quick slashes, building up high damage quickly. He can combo and juggle opponents with ease, compared to Bowser's slow setup and payoff.
Due to these changes, Dry Bowser is a heavier middleweight, and is far faster than Bowser is. His characteristics are a perfect trade-off of Bowser's: Dry Bowser is easier to launch, but has an easier time recovering; his Smash attacks aren't nearly as powerful, but make up for it with speed and a lack of lag. His one big weakness is only a few good K.O. moves, but skilled Dry Bowser players would find the perfect opportunity to use these few moves.
Standard Attacks
Dry Bowser's standard attacks are almost all about racking up damage quickly and efficiently. His basic jab is two slashes followed by a bite, which will allow for a quick follow-up aerial attack. His side tilt and down tilt are both slashes that can be used in quick succession, whereas his up tilt is a headbutt, launching the opponent up into the air. The headbutt won't have enough knockback to K.O. but has light armor and allows for some great aerial combos.
Next, we hop on into Dry Bowser's aerial moves. This is where we find two of his K.O. potential moves, as well as some other damage-racking move. His neutral aerial is a quick shell spin, which has some very light knockback and almost no ending lag if you land while using it. His forward aerial has him slashing forward with his claws, knocking them forward and allowing for a follow-up dash grab. To the back, Dry Bowser will rotate his shell, striking the foe with multiple spike slashes.
Now is where his K.O. moves come into play. His down aerial is similar to his back aerial, but you can follow the opponent downwards. If the attack ends while the opponent is in contact with the middle of his shell, they will be Meteor Smashed, causing them to go rocketing downwards. This makes for a great combo finisher. His up aerial has him piercing upwards with his claws. Similarly to Marth's blade, you can sweet spot the attack at the end of his claws, causing ridiculous knockback and a good chance of a K.O.
His Smash attacks don't have nearly the power of regular Bowser, but his forward Smash does have some good knockback to it. Dry Bowser bodyslams into anybody in front of him, being able to K.O. at high percentages. His up Smash, meanwhile, is a multihit lunge upwards that allows for aerial combos once he lands, and his down Smash is a spin which sucks any nearby opponents in. Throw in some easily-comboed throws, and this rounds out Dry Bowser's standard attacks.
Special Moves
Dry Bowser's Special Moves are not as devastating as Bowser's, but they allow for some nice diversity. His Neutral B is Fire Breath, but rather than just breathing out the fire in a continuous stream, Dry Bowser will shoot out a fireball that will move slowly and catch any opponents in its path. Once it reaches the end of its reach, it will explode, making the move have some very good combo-finishing potential. Once a new fireball is ready to fire, blue flames will momentarily engulf his mouth.
His Side B is a bit different than Bowser's. Dry Bowser will dash forward with his claws extended in front of him. If he makes contact with an opponent, he will continuously hack at them while moving forward, launching them at the end. At low percentages, this move is great for some quick damage; at high percentages, this move is great for a quick K.O. However, there is plenty of lag both before and after using the move, so be weary of that.
Dry Bowser's Up B is now Whirling Cyclone. Similarly to Bowser, he gets into his shell and spins upwards. However, rather than hitting the opponent multiple times, he will launch any opponent nearby up into the air, negating any attacks they had. This move has plenty more vertical range than Bowser's Whirling Fortress, and can be used to launch any projectiles upwards as well.
Dry Bowser's Down B still retains the Bowser Bomb, but with a twist. Like Bowser, Dry Bowser will rise up into the air and then slam into the ground, just doing the latter when in the air. However, power is sacrificed in this Bowser Bomb for versatility. After Dry Bowser hits the ground, two bones will break off of his body and go flying. These bones can potentially cause a K.O. if a foe is hit at the right point, and once they hit a wall or floor, they will become items capable of being picked up and thrown. Using this move strategically when an opponent is knocked offstage can have some extraordinary results.
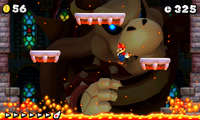
Finally, we come to Dry Bowser's Final Smash. Rather than just turning into Giga Dry Bowser (which would be ridiculous with a name like that), his Final Smash is ripped straight from New Super Mario Bros. 2. Dry Bowser hops into the background and grows huge (with a possible Kamek or Koopalings cameo). From there, he can choose what vertical line of the stage to slash with his claws. His claws have some great horizontal range, and can be hard to avoid if there's not enough attention being payed. He can slash the stage five times or until the timer on the Smash runs out.
Overall Analysis
Dry Bowser is a truly savage character, but in an entirely different way than Bowser. With many different combos, strategic finishers, good recovery, and fast ways to rack up damage, Dry Bowser proves that the undead can still be King.
And that's my concept for a Challenger Approaching!. Thanks for reading!
Pokédex Power
Hello everyone, it's me, Yoshi876 again with a new edition of Pokédex Power, the section written by the man who despite having about three shiny Pokémon on Pokémon Y has only trained one of them. In my defence, I didn't' see the need of training another Heracross, and neither did I need a Zubat. However, despite my mention of both of these Pokémon, neither are being covered in this month's addition, although it is at least a Bug-type that we are covering.
When Summer comes to mind, initial thoughts go to the sun, and the sea. However, I've covered both Fire and Water types in my previous two additions, so I didn't feel the need to revisit that typing. My other main thought with Summer goes to bugs, mainly because of the Animal Crossing series, so that's how we ended up with this month's Pokémon.
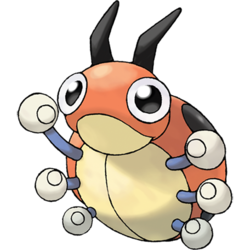
I don't have much experience with Ledyba, as I don't have many memories of Generation II, and I haven't used it in any of the other generations were it's a native Pokémon. Ledyba seems nice enough, but despite its interesting typing, I couldn't imagine me deciding to train one. Looks a bit too easy to crush for my liking...
Generation II
| Pokémon Gold | It is very timid. It will be afraid to move if it is alone. But it will be active if it is in a group. |
| Pokémon Silver | When the weather turns cold, lots of Ledyba gather from everywhere to cluster and keep each other warm. |
| Pokémon Crystal | It is timid and clusters together with others. The fluid secreted by its feet indicates its location. |
| Pokémon Stadium 2 | It is very timid. It will be afraid to move if it is alone. But it will be active if it is in a group. |
So, how does Ledyba's introduction to the Pokédex fare? It's not the worst, but it could probably be a lot more interesting. The majority of entries focus on its timidness, and how it prefers to be in a group. However, there are some questions about this. By group, does it mean a group of Ledyba, or is it happy in any form of group? And if it's so timid, why would a Ledyba ever be on its own? Silver gives a reason to why they're in groups, being that to keep it warm, however I do have issues with this entry. Surely the group of Ledyba it's already in is sufficient enough to keep it warm. Also, it says that Ledyba come from all over, but what does it mean? Does it mean from all over that specific region, or does it mean the world? And if it's the latter, why don't they just migrate during the colder months? Crystal is probably the best entry, mentioning both timidness and a fluid that Ledyba secretes, and even gives a reason for it. Perhaps this is how Ledyba travel in groups, if one's alone, it secretes the fluid and another herd of Ledyba can show up to pick it up. What would have been nice, however, is if the Generation II games made further use of this, and gave Ledyba an attack using the fluid, the only thing I can find that could be this is the TM Toxic, but in my opinion, it would have been better to have a natural fluid move.
Generation III
| Pokémon Ruby | Ledyba secretes an aromatic fluid from where its legs join its body. This fluid is used for communicating with others. This Pokémon conveys its feelings to others by altering the fluid's scent. |
| Pokémon Sapphire | Ledyba secretes an aromatic fluid from where its legs join its body. This fluid is used for communicating with others. This Pokémon conveys its feelings to others by altering the fluid's scent. |
| Pokémon Emerald | Ledyba communicate using a fluid they secrete from where the legs join the body. They are said to convey feelings to others by altering the fluid's scent. |
| Pokémon FireRed | When the weather turns cold, lots of Ledyba gather from everywhere to cluster and keep each other warm. |
| Pokémon LeafGreen | It is very timid. It will be afraid to move if it is alone. But it will be active if it is in a group. |
FireRed and LeafGreen offer no new information, but the other three games do. Ruby, Sapphire, and Emerald all focus on Ledyba's fluid, which I like, becsuse I feel like there's room for further explanation on it. All three of the entries lend evidence to my theory that Ledyba uses the fluid to alert nearby groups to it being alone, as it confirms that the fluid is how the Pokémon communicates with one another. It also says that the scent can be altered to show the Pokémon's feelings, so I'm certain that it could alter this scent to alert others to it being alone. However, all is not good as the entries all contain a direct contradiction to the Generation II entries. Those entries state that the fluid comes from the Pokémon's feet, but here it's where the legs join the body. I understand that sometimes biology seems to be one thing, but turns out to be another, but the feet and where the legs join are fairly different, and I can't see a confusion between the two arising.
Generation IV
| Pokémon Diamond | It is so timid, it can't move if it isn't with a swarm of others. It conveys its feelings with scent. |
| Pokémon Pearl | It is so timid, it can't move if it isn't with a swarm of others. It conveys its feelings with scent. |
| Pokémon Platinum | It is so timid, it can't move if it isn't with a swarm of others. It conveys its feelings with scent. |
| Pokémon HeartGold | It is very timid. It will be afraid to move if it is alone. But it will be active if it is in a group. |
| Pokémon SoulSilver | When the weather turns cold, lots of Ledyba gather from everywhere to cluster and keep each other warm. |
Sadly, this is the part of the section where things begin to get boring. Although Diamond, Pearl, and Platinum might seem like it's offered a new entry, it just feels like a reworded one from Generation II. We don't learn anything new about Ledyba from any of these entries.
Generation V
| Pokémon Black | It is so timid, it can't move if it isn't with a swarm of others. It conveys its feelings with scent. |
| Pokémon White | It is so timid, it can't move if it isn't with a swarm of others. It conveys its feelings with scent. |
| Pokémon Black 2 | It is so timid, it can't move if it isn't with a swarm of others. It conveys its feelings with scent. |
| Pokémon White 2 | It is so timid, it can't move if it isn't with a swarm of others. It conveys its feelings with scent. |
Generation V is a carbon copy of the Generation IV Pokédex entries, so in other words, nothing new to see her folks, let's just move along.
Generation VI
| Pokémon X | When the weather turns cold, lots of Ledyba gather from everywhere to cluster and keep each other warm. |
| Pokémon Y | It is timid and clusters together with others. The fluid secreted by its feet indicates its location. |
| Pokémon Omega Ruby | Ledyba secretes an aromatic fluid from where its legs join its body. This fluid is used for communicating with others. This Pokémon conveys its feelings to others by altering the fluid's scent. |
| Pokémon Alpha Sapphire | Ledyba secretes an aromatic fluid from where its legs join its body. This fluid is used for communicating with others. This Pokémon conveys its feelings to others by altering the fluid's scent. |
Yep. Nothing new to see her either. Sorry folks.
Generation VII
| Pokémon Sun | They are timid and grow uneasy when not in a swarm with others of their kind. The pattern on their backs differs slightly from one to another. |
| Pokémon Moon | They communicate with one another using bodily fluid that give off odors. When they're angry, their odor smells sour. |
After a three generation lull, we finally get some new entries, so let's see if they actually offer up anything else interesting. The simple answer is not really. Moon is quite lacklustre, and just goes back to focusing on the scents that Ledyba gives off, and clarifying what one emotion might smell of. Although, it is quite interesting to imagine what smells the other emotions might give off. Sun goes back to the old timidness thing, but it does seem that our Ledyba have grown braver since they were first introduced, as now they only feel uneasy. This does give the impression that are able to move on their own if alone. It also answers one of my original questions from the Generation II entries, in which it states that Ledyba only feel comfortable when in a swarm of other Ledyba, so good luck training one on your own... The final thing to come out of this entry is a brand new thing: the spots on its back. It's slightly interesting, and at least it means we know that we can tell one Ledyba apart from the others, but I feel like that should have been on a much sooner entry.
Conclusion
Ledyba's Pokédex entries never really reach a high. Generation II leaves too many questions about its behaviour. Although Generation III's entries about the fluid are fairly interesting, the contradiction does slightly annoy me. Generations IV through to VI are just the old ones, and Generation VII isn't bad, but I feel like they could have been a lot better. It would have been nice to have had some explanation for the whole "Five Star" thing as well, as that typing just seems utterly random. What would also have been nice to see is, again, some real-world comparisons. Ledyba is based off of a ladybird (or ladybug), and as such it's reasonable to assume they'd be similar in eating habits and whatnot. Ladybirds are often favoured by gardeners as they eat bugs that eat plants, and seeing as in Generation VI you find Ledyba in flowery fields, it would have been nice to see that have a nod to in the Pokédex.
| The 'Shroom: Issue 125 | |
|---|---|
| Staff sections | Staff Notes • The 'Shroom Spotlight |
| Features | Fake News • Fun Stuff • Palette Swap • Pipe Plaza • Critic Corner • Strategy Wing |
| Specials | Awards 2017 Art Contest Results |


