The 'Shroom:Issue 117/Strategy Wing


Director Notes
Written by: Meta Knight (talk)
Merry Christmas and Happy Holidays everyone! I hope yo uall are enjoying this holiday season. I too have something for you this issue. I have provided a few guest sections this month. Feel free to check them out and don't forget to vote in the poll at the bottom of the page. Thanks again to Yoshi876 (talk), Superchao (talk), and Paper Yoshi (talk) for working so hard on their sections. On another note, Superchao is resigning from Let's Play Showcase after this issue. As always, if you feel like writing for Strategy Wing, feel free to send us an applicaton! We take franchises of any kind.
Once again, thanks to all of our readers and writers. We couldn't do it without you. Happy Holidays, and enjoy the last issue of Strategy Wing for 2016.
Section of the Month
| STRATEGY WING SECTION OF THE MONTH | ||||
|---|---|---|---|---|
| Place | Section | Votes | % | Writer |
| 1st | Galactic Expedition | 9 | 47.37% | Meta Knight |
| 2nd | Mario Kart: Wheel Tips Corner | 5 | 26.32% | Yoshi876 |
| 3rd | Party Trick! | 3 | 15.79% | Meta Knight |
Yoshi876 chills by the track as he looks over Ice Ice Outpost and more!
[read more]
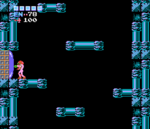
Meta Knight goes hunting for prehistoric monsters as he continues his Metroid 1 walkthrough.
[read more]
Paper Yoshi takes a look at the delightful games released on a day in December.
[read more]
Mario Kart: Wheel Tips Corner
Hello 'Shroom racers! And welcome to Mario Kart Wheel Tips Corner, here I plan to give you just some extra tips to help you with your racing, or just some changes in a track that might catch you off guard if you aren't prepared for them. Sadly, I've covered a lot of the snow-themed courses, and so I can't really do a Christmas themed one, but enjoy anyway! Lights are out, let's start racing.
Kool Karts
You can't race if you don't have a Kart to do it in, so in this section I'll give you some facts about a Kart, Bike, ATV or even tires and gliders that you can use hopefully for racing success.
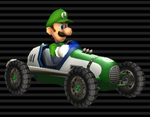
This month's Kool Kart is the Classic Dragster, a Kart that is available to all medium characters in Mario Kart Wii. The Classic Dragster is pretty much an all-round Kart, having no real strengths or weaknesses. The only real thing to note about it is how the Kart has higher acceleration than speed, so you'll nip off quick enough, but on long straights, you might get caught easily.
What's Changed?
Retro tracks are now a huge portion of the Mario Kart games, typically amounting to half the courses in the game. But usually these courses change some things up, so in this section I'll help you find out "What's Changed" in the retro tracks.
We're back to basics here with Luigi Raceway, and surprisingly this simple track hasn't had a lot of things changed. The graphics were majorly improved, but other than that only two other things actually got changed. The hot-air-balloon that used to give out a Spiny Shell has now been changed to be a random item, and a Mii character has been added in the basket. Also, there are now some inclines that allow you to drive on some platforms by the track.
Ace Shortcut
In this small section I give you a way to shave a few seconds off your time, whether you know about it or not. Be warned, most of these shortcuts will require a Mushroom.
This issue I bring you a shortcut from Ice Ice Outpost.
Just before the final corner, the player can steer to the right and leap across some icebergs to cut the final corner.
Let's Play Showcase
Hello, 'Shroom readers! It's ya boy Superchao, here with the last edition of LP Showcase you can expect from me! That's right, much to your disappointment (or delight), I'm stepping out of this spot after this issue. But there's one last person I can bring you an introduction to, and that is raocow! Probably the longest-lasting LPer on this list, he's been doing this for years now, quite probably before all four of my others started Let's Playing. He's done some classics, often notably in the 2D Mario vein - whether it be the actual game or just one of the many hacks, I'd say the 2D Marios are what really put him in the map.
So I'm not going to talk about them at all!
Instead, I'll indulge myself by telling you about two of his exceptional Touhou LPs, struggling through difficult fangames for our entertainment. The first is of Fantasy Explorer Nitroid, a Metroidvania-esque puzzle platformer. Raocow's stuck playing through it, and it's a prime example of his usual trends. Goofy voices for the characters, a long tangental rambling style, and trying and trying until he gets it right. It's one of the best games to watch for that, too - it's reasonably difficult but not absurdly so (at least until you watch the extra world), and it's a nice solid introduction.
Of course, if you want to see struggling, there's a Let's Play for that, too! The one that introduced me to Raocow to begin with, the Super Marisa World LP! A huge parody/love letter to Mario games of all stripes (or at least the ones before 2007 because this is an ooold game), Super Marisa World features the same style of raocow talking. Really, it's more about seeing his reaction to the game and the way he tries to make it through each of the painful levels. He struggles mightily along the way, but manages to make it through - and the whole time, there's a lot of entertaining commentary.
However, raocow is one of those people where if you don't enjoy the commentary's specific nature, you probably won't enjoy the LPs as a whole. The tangental, rambling style most of all; he often delves into unrelated subjects, spouts out random commentary, and has plenty of long, long run-on sentences. There's a lot of people who don't like that style, and if you're one of them, then you shouldn't watch this (but at least it prevents dead air). Still, though, I think he's worth watching, and unless you're absolutely dead-set against it, I'd say you should give it a try. Watch the first few episodes, at least. That's how I got introduced, and it was worth the decision for me!
Well, that's it for Let's Play Showcase, at least from me. I hope you enjoyed the five profiles I gave you, and I hope you've learned of at least one new player you're interested in. If that's the case, I'll consider it a success!
Galactic Expedition
Written By: Meta Knight (talk)
Metroid 1 Walkthrough
Current Inventory: 5 Energy Tanks, 160 Missiles, Morph Ball, Morph Ball Bombs, Long Beam, Ice Beam or Wave Beam, High-Jump Boots, Screw Attack, Varia Suit
Bosses Defeated: Ridley
Goals: Kill Kraid
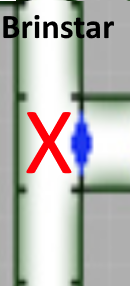
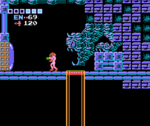
Hello everyone and welcome to this month's Galactic Expedition! I know this is normally a bi-montly section, but it's the holiday issue so I want there to be something for it. Last time, we defeated Ridley and got a whole bunch of Energy Tanks, Missiles, and more. For this issue, we're going to go kill Kraid. You should be in the tall blue chamber of Brinstar, and to the right is where there is a tall yellow chamber. To get to Kraid, head all the way back down the blue chamber, and take the door on the left.
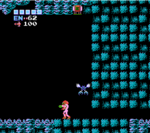
From here, continue left. Use the Morph Ball to get through the narrow tunnel. If you have the Ice Beam, there's actually an Energy Tank right here that you can get. It's located in the ceiling. There are a few ways to get it, but all of them involve freezing an enemy and jumping into it. The Energy Tank is on the ceiling two blocks left from the point at which you can exit Morph Ball mode. To get it, you'll have to freeze a Skree or lure a Rio over to get it. Additionally, keep in mind that if you jump sideways into it and activate the Screw Attack, you'll end up killing the enemy and will have to try again. It's best to freeze the enemy below the Energy Tank, then jump straight up over to it, and finally jump straight up again to get the Energy Tank. Getting this Energy Tank will give you the maximum amount of Energy Tanks you can possibly carry, but there are still two left to find. These won't increase your health capacity, but they will still replenish your health. If you have the Wave Beam, there's nothing you can do to get this right now.
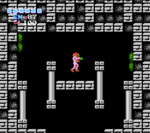
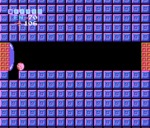
When you're ready to move on continue left. You should be in a room with several breakable blocks. Simply enter Morph Ball and move in there to break them. Continue down and enter the door on the right. You'll see another beastly looking design over an elevator. This will take you to Kraid's Lair. Descend into the gray abyss. Kraid's lair has a lot of gray, and there are several large chambers. When the elevator goes all the way down, you should be in a large tall gray chamber with several doors on each side. Some of these are completely unnecessary.
Go down and enter the first door on the right. Jump across the platforms and get yourself a Missile Tank. Now it looks as if you can go to the right, but don't. In Metroid 1, this leads to nothing of interest and is just a big loop. There are valuable things in Metroid Zero Mission, but in this game there's nothing. Just go back left to the central chamber.
If you have the Wave Beam and couldn't get the other Energy Tank, don't fret! Just go down in the central chamber and take the next red door on the right. There is an Energy Tank here as well. If you already got the Energy Tank mentioned earlier, you can just ignore this for now. It's better to get any remaining Energy Tanks when you're low on health that way you can replenish your energy quickly. Anyway, to get this Energy Tank, head right until you get to a fake wall. Stand on the platform and shoot right to reveal a breakable block, then bomb yourself through the narrow space.
When you get to the other side, jump up onto the first grey platform. Don't jump again because you will not be able to get up there on the second platform. Instead, go into Morph Ball and hold right when the Zeela is out of the way. Inch your way over to get under the Energy Tank, and jump up to get it. To get back out, move right until you get to the wall. Jump on the platforms to make your way back left. Go into Morph Ball mode and place a bomb right before the crevice. Then hold left. When the bomb goes off, you'll be propelled down all of the platforms back to where you need to be. Then move back through the fake wall. One thing to note is that there is a hidden tunnel directly on the ground, but this leads to a dead end. You bomb yourself up to the altitude to get to the fake tunnel that you used to get into this room. Alternatively, you can stand on the first grey platform, go into Morph Ball mode and just hit left. You can get yourself to land in the right tunnel this way.
When you're back in the central chamber, you actually want to head back up. Instead of going right though, go left into the blue door. Move left and pass through the fake wall. You can go ahead and grab yourself a Missile Tank. Keep going left and go through the door. You should be in another tall gray chamber. What you want to do is fall all the way down. Keep going down, fall through the fake acid and pass the Rippers. Take the door on the right.
Go through this purple room, and through the red door in the next room. You'll be in another long corridor that looks very similar to others. Go ahead and grab the Missile Tank. When you get it, you're actually going to backtrack again. Go back left into the purple room. Go next to the blue door on the left, but don't go in it. Instead, bomb the block underneath it. Go through this hidden tunnel and the scenery will change to green.
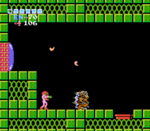
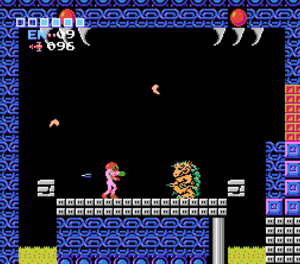
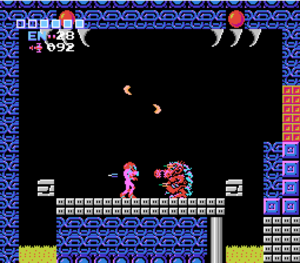
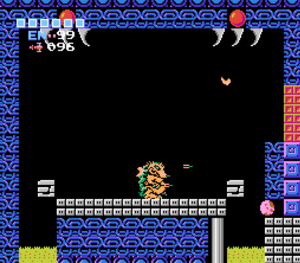
Take the door on the right, and you will encounter Kraid! Well, it's not actually the real Kraid. This is a fake. His fighting style is similar to the real Kraid, but you don't need much firepower to take him out. Shoot him with one missile and he's gone. Sounds simple, but you have to hit him when his belly is exposed. If you hit a spike, it will do nothing. If you have the Ice Beam, be careful not to freeze the spike on his chest, or you'll have to wait. The real Kraid has a similar fighting style, but he takes longer to fight. We'll take a look at him in more detail when we get there.
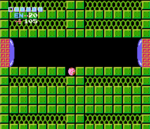
When fake Kraid is defeated, continue right. Theoretically you could just ignore him, but you should at least try to kill him that way you have some practice for the real deal. When you go through the door, you'll be in a small room. Make your way to the center and bomb. You'll reveal a fake block, and when you fall through the tunnel, take the red door on the left. It's time to take this lizard down, it's time to fight Kraid!
Boss Guide: Kraid
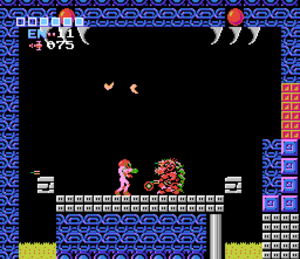
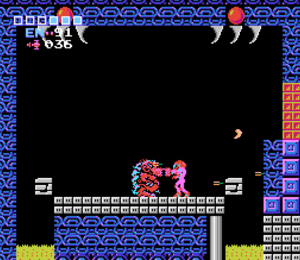
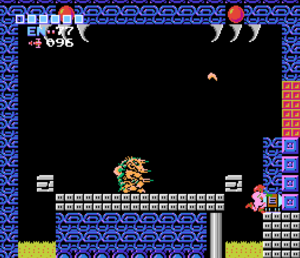
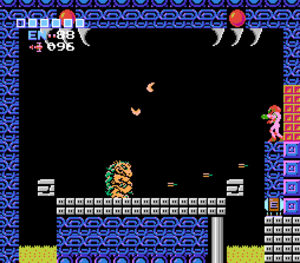
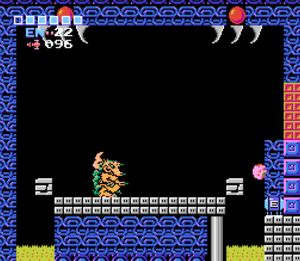
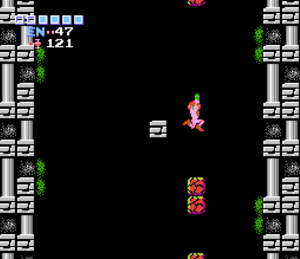
The first thing to know about Kraid is that he's a lot harder than Ridley. Technically you can go after Kraid first, but I usually don't because by the time I have defeated Ridley, there is a lot more to work with in my arsenal, as well as more missiles, Energy Tanks, etc. Another thing about Kraid is that there's an Energy Tank in his very room. If you get low on health and need a boost, you can try to get it. I say try because you will probably take damage when getting it. You have to go into the acid on the right, and shoot the block where it is. Then, quickly jump up to where the door is and Morph Ball. Then, move left to fall, but hit right as soon as your off to get yourself into the little space. You have to be fairly quick, before the block returns to cover the Energy Tank. You also still have to be wary of Kraid's attacks. I would not recommend getting this Energy Tank while you have full health like I did for the demonstration below. Kraid is hard and will likely dish out a lot of damage.
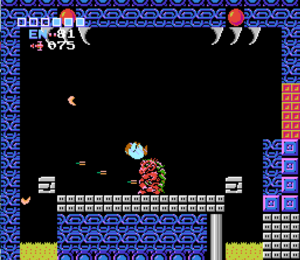
His attack pattern is easy to recognize, but difficult to maneuver around. He has three spikes on his body. One on his head, one on his chest, and one on his legs. Additionally, he will throw two boomerang-shaped objects in an upward curve. All of these projectiles can be frozen with the Ice Beam. However, as mentioned earlier, you have to be careful when freezing with the Ice Beam. Missiles will not damage Kraid if they hit a spike instead of his body. Another property of Kraid, is that his spikes will always face the side you're standing on, even if you're frozen. This means that even if you freeze a spike and jump over him, you still won't be able to hit him because the spikes will block your attack. Fortunately, when standing on the main area, the missiles will only aim for his chest. This means that if you can freeze the middle spike off of his body, this will buy you a lot of time to unload missiles at him. You will take a lot of damage, but you should have enough Energy Tanks to be able to outlast him. To summarize, with the Ice Beam, freeze his middle spike when he shoots it at you so it isn't on his body, then jump in front of the spike and start whaling on him with missiles. You could freeze other projectiles as well, but there's a lot of them. By the time you freeze everything else, the middle spike will get unfrozen, and you'll have to wait for it again. Kraid is a big tank. You'll have to have even more endurance than him.
If you have the Wave Beam, it's much of the same. The only difference is that now you can't freeze any projectiles. One method to defeat him with the Wave Beam, is to simply attack him with just the beam. Then, use the Screw Attack to jump over spikes and the boomerang-like projectiles. If you're in the Screw Attack, his projectiles won't harm you. You can also even jump into Kraid with the Screw Attack and it will cause some damage. Another way is to get close to him and bombard him with missiles, even if he has a spike blocking it. A lot of Kraid is just being able to outlast him, and to dish out more damage to him first before he can kill you. There might be a lot of ways you can take him out, but all of them involve some sort of gorilla-warfare. When you get a good combo on Kraid, he should go down fairly quickly. Defeating Kraid will earn you another 75 missiles.
| Image Guide: Kraid |
|---|
Back to the Path
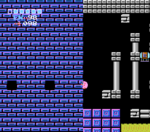
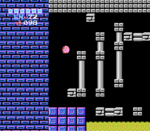
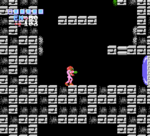
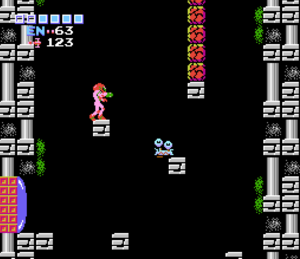
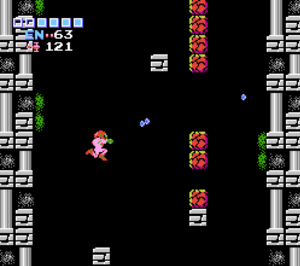
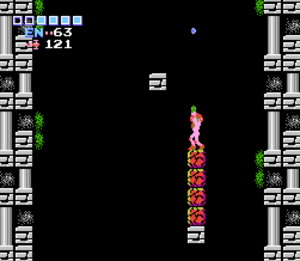
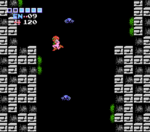
If you haven't already, go ahead and grab the Energy Tank that is in Kraid's room mentioned earlier. It will be good because it will replenish all of your health. Now that Kraid is out of the picture, head right. You'll be in a tall gray chamber. You'll need to climb up, but how you climb up is pretty annoying. Back in Issue 114, I mentioned that there is a room that looks similar to how to get the Ice Beam, but below it is nothing but a beginner's trap. Well, here in Kraid's Lair in this very room is identical in how to get out of here.
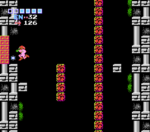
What you have to do, is you have to juggle the blocks in a sense to be able to climb up. Get on the gray platform that is up and to the left. Now, jump up and keep tapping the fire button to break as many of the blocks as you can. Then, jump into the area where you just opened so that you're where the blocks used to be. Keep shooting up to break blocks, and at the same time jump so that you can try to land on the blocks you previously destroyed. It takes a while to get used to. You'll have to repeat this to make your way all the way up, and if you fall, you'll have to start all over again.
| Image Guide: Climbing the wall of breakable blocks in Kraid's Lair |
|---|
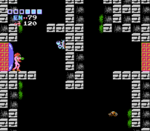
On your way up, you'll see a door on the left. Go through it to obtain yourself the final Missile Tank. Your missile capacity should now be the most it can possibly be, at 255 missiles! Go back right in the gray chamber, and climb up the wall of breakable blocks to get to the very top. Go through the door on the left. Continue through the corridor so you're back in the main gray chamber.
Your goal is the elevator at the top, but you're going to have to fall down. If you have the Ice Beam, freeze the Rippers and use them as platforms to climb back up. Be careful not to destroy them with the Screw Attack if this is what you do. Additionally, have them be near the left side of the wall, since this is the side that will let you climb all the way back to the elevator. Ride the elevator up to get back to Brinstar.
If you have the Wave Beam, or you accidentally killed one of the Rippers with the Screw Attack, don't sweat! You can still get out of here. Take the door on the left at the very bottom of the gray chamber. Move along through this purple corridor and go through the door. In this small gray chamber, go ahead and jump up to the very top, and take the door on the right. Continue through another purple corridor and when you enter the door you will be back on the other side of where you fell down from defeating Kraid. Climb up all the way to the top and ride the elevator to get out of Kraid's Lair.
Now that Kraid resides in his grave, this is a good place to end this expedition. Next time, we're aiming to finish the game by defeating the Metroids and Mother Brain. We're so close to finishing the game, as we've collected every power-up, both the mini-bosses are defeated, and more. Thank you very much for joining me, and I'll catch you all next time.
Party Trick!
Written By: ![]() Meta Knight (talk), and
Meta Knight (talk), and ![]() RandomYoshi (talk)
RandomYoshi (talk)
![]() Hello and welcome to this month's Party Trick! Pi is once again, still busy so it's just me again. This month, it's the holiday issue as I'm sure you're all aware and I've probably mentioned in some of my other sections, but for now let's take a look at some minigames throughout the series that have a snow/winter theme to it.
Hello and welcome to this month's Party Trick! Pi is once again, still busy so it's just me again. This month, it's the holiday issue as I'm sure you're all aware and I've probably mentioned in some of my other sections, but for now let's take a look at some minigames throughout the series that have a snow/winter theme to it.
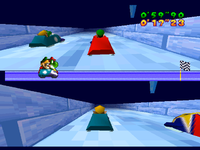
The first minigame on our list is from the original Mario Party. Bobsled Run is a 2v2 minigame where players will team up to try and race their bobsled down the mountain to get to the finish line. At the beginning of the minigame, tap the A button as fast as possible so that you can get in the bobsled quickly. You're going to have to be aware of when you get in the sled as well, you can't just look at the controller to see how much you're mashing. When you get in the sled, pushing the joystick fowrard will allow the bobsled to speed up, but at the same time it becomes harder to turn. Pushing the joystick down will cause you to slow down. Along the pathway, there are speed panels that give you a short boost. You should try hitting as many of these panels as you can. The other aspect of this game, is that if you are on a team with an actual human, you can communicate with them to make turning a bit easier. When you are playing with a computer, there's not a lot you can do to make sure they're on the same page with you. In Mario Party 1, there are a lot of guard rails on the edges to keep you safe from falling off. However, if you fall off it's game over, and the other team will win. It's possible to try and push your opponent off the edge, but most of the time it's not worth it because it costs precious time. This minigame also makes a return in Mario Party 2.
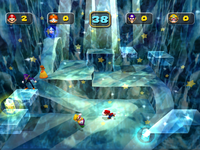
The next minigame on our list is Frozen Frenzy from Mario Party 5. In this minigame, there are five crystals scattered around the map. There is one in each corner, and one near the center of the room. Players need to jump across obstacles in order to get them. That's not all, you can also steal crystals from other players! If you need another crystal to get in the lead, go after somebody with more crystals. Jumping on them, punching them, and ground pounding on them are all effective ways to take them. However, you can't just hit them. When someone gets hit, the crystal will fly up and you will have to quickly run to get it. On the flipside, if you are the player in the lead, other players will likely be ganging up on you to try and steal them. It will be helpful to keep them busy by running around. Be careful to not run into spikes as this will also cause you to lose a crystal. All in all, this minigame is similar to many of the other brawling minigames, but here you have to be careful to get as many crystals as possible too.
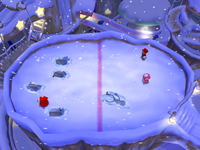
The final minigame on our list is Snow Brawl from Mario Party 6. This is a 1v3 minigame is one big snowball fight. The goal is fairly simple, hit the other players with a snowball. The one player side will have Shy Guy or Ukiki allies to aid them. If you're on the three player team, you do not need to worry about hitting all of the enemies, just hit the player and your team will win. One other thing to keep in mind is that you have to make a snowball, and this can leave you vulnerable. If you're on the one player team, take cover behind your allies so that you can safely make a snowball. If you're on the three player team, watch for moments where the one player doesn't have a snowball. Additionally, if you're on the three player team, it can be helpful to take out some of the Shy Guys or the Ukikis, but if time is running out just go after the player. Snow Brawl is pretty fun, and captures the feel of a snowball fight.
That's it for this month's Party Trick! See you all next time where we'll be in the new year of 2017!
Robotic Rush
Written by: Meta Knight (talk)
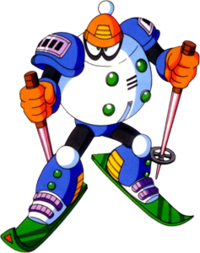
| Blizzard Man | |
|---|---|
| |
| Name | Blizzard Man |
| First Appearance | Mega Man 6 |
| Weakness | Flame Blast |
| HP | 28 |
| Weapon | Blizzard Attack |
Hello everyone and welcome to Robotic Rush! In this section, I'll be taking a look at a robot from the Mega Man series (or you could do any of the sub-series this is just a guest section anyway). Since it's the holiday season, let's take a look at a robot master who knows the meaning of let it snow. Let's look at Blizzard Man!
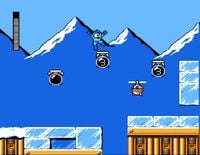
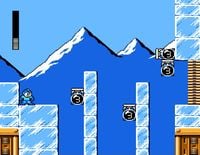
Blizzard Man's stage takes place in Canada, so as expected there is a snow setting. Walk right and take out the robotic seal enemies. When you see the first bottomless pit, you'll see an extra life as well. It's blocked by ice that can only be melted with the Flame Blast, so unless you have that it's probably best to just forget it. One mechanic of Blizzard Man's stage aside from ice physics is the fact that there are mine-like platforms. When you jump on one, the counter will go down, and when the counter reaches zero, it explodes. As a result, its best to not stay still on them. Shortly after you see the first one, there is a sort of chain of them that lead up to a top pathway. If you make it to the top, to get past the other mine platform you'll have to walk into it, walk back a bit, then proceed. If you end up taking the bottom path, don't fret. There really isn't much of a difference at all. When you make your way to the end, drop down. If you veer all the way to the left while you drop, you might be able to land on a platform on the next screen. However, unless you have the Power Adapter to break the block, there isn't much purpose.
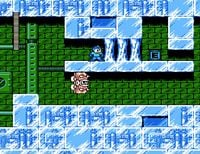
When you land on the ground you'll be on an ice floor with little snow robots. You'll need to navigate your way through the room carefully to not hit them. Additionally, there are a lot of those spiked enemies that quickly move back and forth, and can only be hit on the backside. Position yourself and time your jumps so you can get rid of them. If you want to be risky, you can try sliding under them. However, this can be dangerous especially in combination with the little snow robots. There are also some blocks that are cracked, indicating that they can be broken with the Power Adapter. Although if you don't have it you won't be able to break them. You'll also see some more ice that can be melted with the Flame Blast, but if you don't have it just stick to the bottom path and ignore the E-Tank. When you make it to the end of the screen, take the ladder and drop down. In this room there is just a robotic squid for you to defeat. It will throw missiles that can circle and try to hit you. It also can shoot ice blocks that slide on the ground. Time your jumps and keep shooting it to defeat it. When it's defeated go down the other ladder.
Here you've made it to the checkpoint. Jump across the gaps to make your way right. You should be in a long corridor with an airship mechanism that moves up and down, with spikes on the ceiling. You're going to have to watch the movement of the ship, and time your jumps so that you don't jump into the ceiling and die. Additionally you'll have to shoot some enemies that are using turrets as well. This corridor can be challenging, but with a bit of practice you can get a rhythm for when to proceed and when to wait for the right altitude. You'll notice some health powerups and an E-Tank as well along the way, but unless you have the Power Adapter you cannot get them. Even if you do have the Power Adapter, you'll have to be quick grabbing the powerups, because the airship goes below the spikes, and you will get killed if you touch the spike. If you're getting really close to the ceiling and feel like you aren't going to make it, you can also try sliding as a last resort.
When you get to the end of the ship, carefully jump across the mine platforms to reach the ladder up. You'll be in a quiet room with only two mine platforms. Climb the ladder and jump across the platforms to get to the ladder on the left. If you trigger both mine platforms and miss the jumps, you'll have to climb down the ladder on the right off screen, then come back to make them respawn. When you climb up the ladder on the left to the next screen you should be in a room with another squid robot. Dodge the projectiles it shoots at you and destroy it so you can proceed to the next screen.
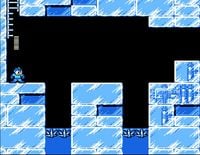
This last room can be a bit tricky if you aren't careful. The ice physics makes the room slippery. There are four mine platforms, one in the first pit, one in the second, and two above the boss door. Jump on the first mine platform to let you get up on the ice block directly next to it. Then, jump over the mine platform in the second pit to land on the ice platform there. Be careful not to slip off. Then, you have to jump up and touch the mine platform thats facing sideways, and veer yourself back onto the ice platform. This is why I like jumping over the second mine platform, because when you have to veer left back onto the ice platform, it gives you a bit of leeway. You won't have to worry about falling off. You can land on the mine platform then jump back off. Of course, you don't have to be on the second platform at all, but it helps. When the mine platform that is sideways explodes, you'll have to jump onto the fourth platform. Do not just stand on that platform, you have to jump back onto the ice block once again. If you stay on the platform, you'll take knockback damage and die, so don't think you can just veer to the right. When you finally get past all that, it's time to take on Blizzard Man himself!
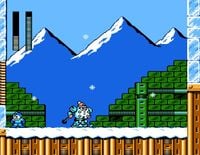
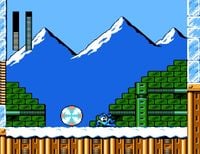
Blizzard Man's pattern is fairly predictable. One of his attacks is the Blizzard Attack. There will be a sound effect that sounds like a whistle chime. When this happens, he'll just stay in one spot and dance on his skis while the ice shard projectiles sort of float around. You'll have to be careful to dodge the projectiles. His other attack is also easy to spot. When he jumps up, he will turn into a ball and try to roll into you. Simply jump over him to dodge this. However, it is a good idea to slide as soon as you hit the ground after jumping over him. This is because he will hit the wall and bounce back, and he can bounce back relatively far. It's best to jump over him and get to the other side of the screen when possible. That's really all there is to his attacks. When he shoots his ice shards, each individual one doesn't change direction, so you'll have to analyze the patterns on it. Fortunately the ice shards don't do much damage either, only 3 HP. If you have the Flame Blast from Flame Man's stage, this fight will be over really quick, but if you don't have it, Blizzard Man still isn't too hard. Defeat him and you'll acquire the Blizzard Attack. This weapon is fairly useful if you need to attack an enemy that is in front and below you.
Mario Calendar
Written By: Paper Yoshi (talk)
Hello, everyone, and welcome to the December issue of Mario Calendar!! Things haven't changed at all around these parts, so it's time to check all the Mario, Yoshi, DK and Wario games released during the last month of the year!
| Abb. | Console/Store |
|---|---|
| NES | Nintendo Entertainment System |
| SNES | Super Nintendo Entertainment System |
| N64 | Nintendo 64 |
| N64DD | Nintendo 64DD |
| GCN | Nintendo GameCube |
| Wii | Nintendo Wii |
| Wii U | Nintendo Wii U |
| GB | Game Boy |
| VB | Virtual Boy |
| GBC | Game Boy Color |
| GBA | Game Boy Advance |
| NDS | Nintendo DS |
| 3DS | Nintendo 3DS |
| WiiVC | Wii Shop - Virtual Console |
| 3DSVC | Nintendo eShop (3DS) - Virtual Console |
| WiiUVC | Nintendo eShop (Wii U) - Virtual Console |
| Abb. | Region |
|---|---|
| NA | North America |
| JP | Japan |
| EU | Europe |
| AU | Australia/New Zealand |
| KO | Republic of Korea |
| CN | People's Rep. of China |
| HK | Hong Kong, China |
| TW | Republic of China (Taiwan) |
- December 1st
- 1995 (JP): Virtual Boy Wario Land: Awazon no Hiho (VB)
- 1999 (NA): Game & Watch Gallery 3 (GBC)
- 2005:
- (JP): Super Donkey Kong 3: Mystery of Kremis Island (GBA)
- (AU): Mario Power Tennis (GBA)
- 2006 (AU): Yoshi's Island DS (NDS)
- 2011 (JP):
- Top Street Wii (Wii)
- Mario Kart 7 (3DS)
- December 2nd
- 1998 (JP): Mario no Photopi (N64)
- 2004 (JP):
- Super Mario 64 DS (NDS)
- Sawaru Made in Wario (NDS)
- 2006 (JP):
- Odoru Made in Wario (Wii)
- Donkey Kong (NES-WiiVC)
- Donkey Kong Jr. (NES-WiiVC)
- Super Mario 64 (N64-WiiVC)
- Super Mario Bros. (NES-WiiVC)
- Super Mario World (SNES-WiiVC)
- 2010:
- (AU):
- (JP): Mario vs. Donkey Kong: Mini-Land Assault! (NDS)
- 2011 (EU): Mario Kart 7 (3DS)
- December 3rd
- 2001 (NA): Super Smash Bros. Melee (GCN)
- 2009:
- (JP): New Super Mario Bros. Wii (Wii)
- (KO): Mario & Sonic at the Olympic Winter Games (NDS)
- 2010 (EU):
- 2011 (AU): Mario Kart 7 (3DS)
- 2015 (JP): Mario & Luigi RPG: Paper Mario MIX (3DS)
- December 4th
- 1991 (JP): Yoshi no Tamago (NES)
- 2006 (NA): Donkey Kong Jr. (NES-WiiVC)
- 2010 (HK/TW): Super Mario Galaxy 2 (Wii)
- 2011 (NA): Mario Kart 7 (3DS)
- 2014 (KO): Yoshi's New Island (3DS)
- 2015 (EU): Mario & Luigi: Paper Jam Bros. (3DS)
- December 5th
- 2003 (EU/AU): Mario Party 5 (GCN)
- 2005 (NA):
- Super Mario Strikers (GCN)
- Mario Tennis: Power Tour (GBA)
- 2011 (NA): Fortune Street (Wii)
- 2013:
- (JP): Mario & Sonic at the Sochi 2014 Olympic Winter Games (Wii U)
- (NA): Donkey Kong 3 (NES-3DSVC)
- 2014 (NA):
- NES Remix Pack (Wii U)
- Captain Toad: Treasure Tracker (Wii U)
- Ultimate NES Remix (3DS)
- December 6th
- 1999 (EU/AU): Donkey Kong 64 (N64)
- 2004 (NA): Mario Party 6 (GCN)
- 2007 (AU): Mario Party DS (NDS)
- 2012:
- (JP): Paper Mario: Super Seal (3DS)
- (KO): New Super Mario Bros. 2 (3DS)
- (EU/AU): Wario Land 3 (GBC-3DSVC)
- 2013 (HK): Paper Mario: Super Sticker (3DS)
- 2014 (JP): Great Melee Smash Brothers for Wii U (Wii U)
- December 7th
- 2000 (JP): Mario Party 3 (N64)
- 2006 (AU):
- Donkey Kong (NES-WiiVC)
- Donkey Kong Country (SNES-WiiVC)
- Mario Bros. (NES-WiiVC)
- Super Mario 64 (N64-WiiVC)
- Wario's Woods (NES-WiiVC)
- 2012:
- (HK/TW/CN): Super Mario 3D Land (3DS/iQue 3DS XL – CN)
- (EU): Paper Mario: Sticker Star (3DS)
- (CN): Mario Racing 7 (iQue 3DS XL)
- 2013 (KO): Donkey Kong Returns 3D (3DS)
- December 8th
- 2005 (JP): Mario Kart DS (NDS)
- 2006 (EU):
- Donkey Kong (NES-WiiVC)
- Donkey Kong Country (SNES-WiiVC)
- Mario Bros. (NES-WiiVC)
- Super Mario 64 (N64-WiiVC)
- Wario's Woods (NES-WiiVC)
- 2011 (JP): Mario & Sonic at the London 2012 Olympic Games (Wii)
- 2012:
- (JP):
- New Super Mario Bros. U (Wii U)
- Nintendo Land (Wii U)
- (AU): Paper Mario: Sticker Star (3DS)
- (JP):
- December 9th (JP):
- 2004: Yoshi's Universal Gravitation (GBA)
- 2010: Donkey Kong Returns (Wii)
- December 10th
- 1992 (EU): Mario Paint (SNES)
- 1994 (NA): Wario's Woods (NES & SNES)
- 1999 (JP): Donkey Kong 64 (N64)
- 2015:
- (AU): Mario & Luigi: Paper Jam Bros. (3DS)
- (EU): Game & Watch Gallery Advance (GBA-WiiUVC)
- December 11th
- 1999 (JP): Mario Artist: Paint Studio (N64DD)
- 2007 (JP): Super Mario Bros. 3 (NES-WiiVC)
- 2008 (JP): Wii de Asobu Donkey Kong Jungle Beat (Wii)
- 2010 (KO): Super Mario 25th Anniversary Special Edition (Wii)
- 2013 (JP): Yoshi's PanePon (GB-3DSVC)
- 2015 (AU): Game & Watch Gallery Advance (GBA-WiiUVC)
- December 12th
- 1983 (JP): Donkey Kong Jr. Math (NES)
- 1991 (JP): Yoshi no Tamago (GB)
- 2003 (JP):
- Donkey Konga (GCN)
- Super Donkey Kong (GBA)
- 2006 (JP):
- Super Donkey Kong (SNES-WiiVC)
- Mario Bros. (NES-WiiVC)
- Wario's Woods (NES-WiiVC)
- 2010 (NA): Super Mario All-Stars Limited Edition (Wii)
- 2013 (EU/AU): Donkey Kong 3 (NES-3DSVC)
- December 14th
- 1995 (EU): Donkey Kong Country 2: Diddy's Kong Quest (SNES)
- 1996 (JP): Mario Kart 64 (N64)
- 2001 (JP): Super Mario Advance 2 (GBA)
- 2002 (KO): Super Mario Sunshine (GCN)
- 2011 (JP): Super Mario Land 3: Wario Land (GB-3DSVC)
- December 15th
- 2008 (NA): Game & Watch Collection (NDS)
- 2009 (CN):
- Bird and Beans (DSiWare)
- Paper Plane Challenge (DSiWare)
- 2011 (AU): Game & Watch Collection 2 (NDS)
- December 16th
- 1993 (EU/AU): Super Mario All-Stars (SNES)
- 2004 (JP): Donkey Kong Jungle Beat (GCN)
- December 17th
- 1992 (EU): Mario & Yoshi (GB)
- 1999:
- (JP): Mario Party 2 (N64)
- (AU): Super Smash Bros. (N64)
- 2015 (EU): New Super Mario Bros. (NDS-WiiUVC)
- December 18th
- 1998 (JP): Mario Party (N64)
- 2013 (NA/EU/AU): NES Remix (Wii U) – Nintendo eShop
- 2015 (AU): New Super Mario Bros. (NDS-WiiUVC)
- December 19th
- 1996 (EU/AU): Donkey Kong Country 3: Dixie Kong's Double Trouble! (SNES)
- 2006 (JP): Mario no Super Picross (SNES-WiiVC)
- 2013 (JP): Famicom Remix (Wii U) – Nintendo eShop
- December 20th (NA):
- 2010: Mario Party 2 (N64-WiiVC)
- 2012:
- Mario Tennis Open (3DS) – Nintendo eShop
- Wario Land II (GBC-3DSVC)
- December 21st
- 1997 (JP): Yoshi's Story (N64)
- 2009 (NA): Super Smash Bros. (N64-WiiVC)
- December 22nd, 2006 (EU): Donkey Kong Jr. (NES-WiiVC)
- December 23rd, 2011 (EU): Boom Street (Wii)
- December 24th
- 2007 (NA): Donkey Kong Country 3: Dixie Kong's Double Trouble! (SNES-WiiVC)
- 2008 (JP):
- Tori to Mame (DSiWare)
- Chotto Dr. Mario (DSiWare)
- Kami Hikoki (DSiWare)
- Utsusu Made in Wario (DSiWare)
- 2010 (EU/AU): Mario Party 2 (N64-WiiVC)
- 2015 (EU):
- Super Mario RPG: Legend of the Seven Stars (SNES-WiiUVC)
- Super Mario 64 DS (NDS-WiiUVC)
- December 25th
- 2003 (CN): Mario Kart 64 (iQue Player)
- 2006 (NA): Super Mario Bros. (NES-WiiVC)
- 2007 (EU/AU): Donkey Kong Country 3: Dixie Kong's Double Trouble! (SNES-WiiVC)
- 2013 (JP): Super Mario Bros. 3 (NES-WiiUVC)
- 2014:
- (NA):
- Super Mario Bros. Deluxe (GBC-3DSVC)
- Super Mario World: Super Mario Advance 2 (GBA-WiiUVC)
- (NA/EU): Mario Party Advance (GBA-WiiUVC)
- (NA):
- 2015 (AU):
- Super Mario RPG: Legend of the Seven Stars (SNES-WiiUVC)
- Super Mario 64 DS (NDS-WiiUVC)
- December 26th
- 2013:
- (NA): Mario Tennis (GBC-3DSVC)
- (EU/AU): Super Mario Bros. 3 (NES-3DSVC/WiiUVC)
- 2014 (AU): Mario Party Advance (GBA-WiiUVC)
- 2013:
- December 27th, 2012 (NA/EU/AU): Super Mario Bros.: The Lost Levels (NES-3DSVC)
- December 29th (JP):
- 2005: Mario & Luigi RPG 2x2 (NDS)
- 2015: Super Mario Advance 4 (GBA-WiiUVC)
- December 30th
- 1992 (EU): Mario & Yoshi (NES)
- 2008 (KO): Mario Bros. (NES-WiiVC)
- December 31st, 2013 (NA): Dr. Luigi (Wii U) – Nintendo eShop
- December 1990 (NA): Dr. Mario (GB)
- December 1993 (NA): Mario's Time Machine (SNES)
- December 1994 (NA):
- Super Mario All-Stars + Super Mario World (SNES)
- Tetris & Dr. Mario (SNES)
And that's all for the 2016 Mario Calendar!! I wish you all have a great time during the Holidays!! See you in 2017!!
Pokédex Power
Written by: Meta Knight (talk)
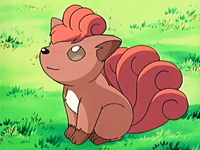
Hello everyone and welcome to this guest section based around Pokémon! In this section, I'll be taking a look at the history of Pokédex entries throughout the series for a particular Pokémon, and see how it changed over time, if it adds any backstory, relevant info, etc. Should we take the Pokédex seriously? Is it even true at all? Is Professor Oak just making everything up in it? Stay tuned, and we'll dive into this crazy gadget. Our first Pokémon is something I've been really loving lately. It's a cute Fire type that's been around since Generation I, but in the hotest new games Sun and Moon, it's been given a fresh cool new look. Let's take a look at Vulpix!
Generation I
| Pokémon Red | At the time of birth, it has just one tail. The tail splits from its tip as it grows older. |
| Pokémon Blue | At the time of birth, it has just one tail. The tail splits from its tip as it grows older. |
| Pokémon Yellow | Both its fur and its tails are beautiful. As it grows, the tails split and form more tails. |
The main thing all of this generation hints at, is that it tells us what Vulpix looks like at birth, and how it grows. It's a shame none of this is seen in the game. It also brings up a question, if a Vulpix never evolves, would its tail still split into nine? Maybe that's how Vulpix evolves. It makes for a lot of inconsistencies though. Also, since Generation I has no breeding, there isn't actually any way to prove/disprove the fact that a Vulpix at birth only has one tail. One other thing to wonder according to the Pokédex is that if a Vulpix is born with just one tail, does that mean that the tuft on its head is also just one? Maybe its hair splits as well.
Generation II
| Pokémon Gold | As it develops, its single white tail gains color and splits into six. It is quite warm and cuddly. |
| Pokémon Silver | If it is attacked by an enemy that is stronger than itself, it feigns injury to fool the enemy and escapes. |
| Pokémon Crystal | As its body grows larger, its six warm tails become more beautiful, with a more luxurious coat of fur. |
Generation II tells us more about the tail at birth. However, this game has breeding, and the ability to hatch eggs. This is probably the point where a Vulpix is born. So why is it that Vulpix is born how you usually see it? Is this how a Vulpix develops while inside the egg? I do have to agree though, that Vulpix does look very warm and its tails look nice. Although if the Pokédex is supposed to be this thing for factual evidence of Pokémon, why does it use words like beautiful? I'm not going to deny that Vulpix has some lovely tails, but that would be like if I looked in a biology book and it told me the cell membrane looks cool. We also learn about the behavioral patterns. Silver's dex entry makes it seem like Vulpix plays possum; faking an injury and then getting away.
Generation III
| Pokémon Ruby | At the time of its birth, Vulpix has one white tail. The tail separates into six if this Pokémon receives plenty of love from its Trainer. The six tails become magnificently curled. |
| Pokémon Sapphire | Inside Vulpix's body burns a flame that never goes out. During the daytime, when the temperatures rise, this Pokémon releases flames from its mouth to prevent its body from growing too hot. |
| Pokémon Emerald | It can freely control fire, making fiery orbs fly like will-o'-the-wisps. Just before evolution, its six tails grow hot as if on fire. |
| Pokémon FireRed | While young, it has six gorgeous tails. When it grows, several new tails are sprouted. |
| Pokémon LeafGreen | When it is born, it has just one snow-white tail. The tail splits from its tip as it grows older. |
Generation III repeats a lot about how it's tail is, but it still doesn't answer any questions. Ruby says how it has one white tail. Again, once a Vulpix hatches from an egg it looks just like any other. Ruby also talks about how the tail separates if it gets love from its trainer. What about the Vulpix in the wild? Does this mean that all the Vulpix in the wild were loved by trainers then they were abandoned? That would be depressing because who would want to abandon a cute little Vulpix? Sapphire mentions how Vulpix releases flames from its mouth to prevent its body from becoming hot. There was an anime episode where Vulpix blew fire in Misty's face when she picked it up. Does this mean that Vulpix was too hot? Another thing to wonder is how does Vulpix control fire? Surely it can breathe fire, but does it use paws? Is Vulpix secretly part Psychic type? FireRed and LeafGreen are more or less repeats of the info from Generation I. Although I'm sure that Alolan Vulpix really is born with a snow-white tail.
Generation IV
| Pokémon Diamond | It controls balls of fire. As it grows, its six tails split from their tips to make more tails. |
| Pokémon Pearl | It controls balls of fire. As it grows, its six tails split from their tips to make more tails. |
| Pokémon Platinum | It controls balls of fire. As it grows, its six tails split from their tips to make more tails. |
| Pokémon HeartGold | As it develops, its single white tail gains color and splits into six. It is quite warm and cuddly. |
| Pokémon SoulSilver | If it is attacked by an enemy that is stronger than itself, it feigns injury to fool the enemy and escapes. |
Again, this mentions that Vulpix can control balls of fire. We still don't know how it controls the fire. Now I'm imagining Vulpix juggling the flames in its paws. I wish we could see something like this in the games. In the Pokémon contests it would be sure to impress the judges. Heartgold and SoulSilver are pretty much copies from the original. Vulpix does look warm and cuddly though, so it's hard to complain about that. The other thing that this mentions is that the tails split from the tip. If it starts with one tail, then splits into two, shouldn't those two split into four, etc.? If this is how it were to split, it would get more than six right away. In the end though, it's probably best not to think too deep about it since a lot of the Pokédex entries don't add up.
Generation V
| Pokémon Black | It controls balls of fire. As it grows, its six tails split from their tips to make more tails. |
| Pokémon White | It controls balls of fire. As it grows, its six tails split from their tips to make more tails. |
| Pokémon Black 2 | As each tail grows, its fur becomes more lustrous. When held, it feels slightly warm. |
| Pokémon White 2 | As each tail grows, its fur becomes more lustrous. When held, it feels slightly warm. |
Black and White is the exact same as Diamond, Pearl, and Platinum. Nothing new to add there. However the sequels to these games bring up something interesting about Vulpix. When the tail grows, the fur has more shine. Is this all of the fur on Vulpix or the tail only? If it's the former, then it is interesting beause when Vulpix evolves into Ninetales, the fur is a brighter color. According to the Pokédex, since the fur gets more shiny over time as a Vulpix grows, this probably means that the fur also gets softer. Maybe the tails on Vulpix have some sort of shampoo effect. If this is true, then trainers must have an easier time brushing the fur as well.
Generation VI
| Pokémon X | When it is born, it has just one snow-white tail. The tail splits from its tip as it grows older. |
| Pokémon Y | While young, it has six gorgeous tails. When it grows, several new tails are sprouted. |
| Pokémon Omega Ruby | At the time of its birth, Vulpix has one white tail. The tail separates into six if this Pokémon receives plenty of love from its trainer. The six tails become magnificently curled. |
| Pokémon Alpha Sapphire | Inside Vulpix's body burns a flame that never goes out. During the daytime, when the temperatures rise, this Pokémon releases flames from its mouth to prevent its body from growing too hot. |
Everything keeps mentioning the one white tail at birth. Maybe there's something in the atmosphere of Sun and Moon that make it so that the Vulpix stay white. Omega Ruby and Alpha Sapphire have the same entries as their original counterparts. Something I missed before is that there's an internal temperature inside Vulpix. What would happen if it tried to drink some water? Would it suddenly get too cold? If this flame never goes out, then Vulpix must get by pretty well in the winter time. Y states that when it grows, several new tails are sprouted. It seems like the Pokédex can't seem to make up its mind on how the tails on Vulpix form. Some say they split, and then now this one says they grow. The tails do have a magnificent curl though I'll give it that.
Generation VII
| Pokémon Sun | Its beautiful fur and tails have made it very popular. As it grows, its tails split to form more tails. |
| Pokémon Moon | From its mouth spew flames that seem to resemble the spirits of the deceased. Some people mistakenly think this fire is a ghost. |
Vulpix is definitely pretty popular, but I'm sure that other factors have made it more popular too such as the anime. Here Sun mentions the splitting of tails again, so it's likely that this is the real way that the tails grow. There probably won't ever be a way to know for sure though, especially since when hatching something right away there isn't a way to view the growth process of a Pokémon egg. Moon's Pokédex entry is pretty interesting. I wonder if children in the villages use Vulpix to pull Halloween pranks on people to scare them and make them think it's a ghost.
Alolan
| Pokémon Sun | It exhales air colder than -58 degrees Fahrenheit. Elderly people in Alola call this Pokémon by an older name—Keokeo. |
| Pokémon Moon | In hot weather, this Pokémon makes ice shards with its six tails and sprays them around to cool itself off. |
These entries are for Alolan Vulpix, the new form that is also an Ice type. As a result, these entries step away from the tail formation, and focus more on how Vulpix is cool. Although when an Alolan Vulpix hatches, its tail actually is white. Its cold breath is -59 degrees Fahrenheit (or -50 degrees Celsius). I wonder if this can be used to theorize the temperature of its fire breath. It also mentions that elderly people call it Keokeo. According to Google Translate, KeoKeo is Japanese for "bad". Does this mean that elderly people think that Vulpix is bad? I hope not because Alolan Vulpix looks pretty sweet. It also essentially has the power of an ice-cube dispenser. The ice shards seem like a convenient way to cool off.
Conclusion
Well there's not much variation throughout the years. Most of the Pokédex entries either mention how it has one tail that splits into six, and how it starts out white, etc. Unfortunately, there isn't anything that can be found in the games to back it up. When you hatch a Vulpix egg, it does not have one white tail, they're already split into six. Overall, we can conclude from reading this that for Vulpix, the Pokédex is a bunch of nonsense. Fortunately, that doesn't change the fact that Vulpix is still pretty adorable.
| The 'Shroom: Issue 117 | |
|---|---|
| Staff sections | Staff Notes • The 'Shroom Spotlight • End-of-the-Year Awards • Director Election |
| Features | Fake News • Fun Stuff • Palette Swap • Pipe Plaza • Critic Corner• Strategy Wing |
| Specials | Ultimate Music Battle • Paper Sham, Sour Jam |
