Temple Tempest
Template:DKClevelbox Temple Tempest is the fourteenth level of Donkey Kong Country, as well as the sixteenth level in the game's Game Boy Advance remake. It is also the fourth level of the Vine Valley area in the original and Game Boy Color versions, and the sixth and final level of Vine Valley in the Game Boy Advance version.
This is the second level to take place inside an ancient temple. Similar to Millstone Mayhem, this stage hosts many Gnawties riding huge rocky wheels in order to crush the Kongs. However, this time, they chase the Kongs throughout the whole level, until they are blocked by a wall. Donkey and Diddy must swing on ropes and avoid Kritters, Zingers and other Gnawties to escape being crushed. The Gnawties move fast, so the heroes can not dawdle. Expresso the Ostrich appears in this temple level to aid the primates on their adventure through the level, but he can only be found in a Bonus Level.
Overview
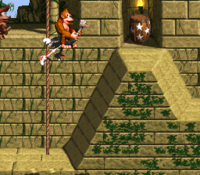
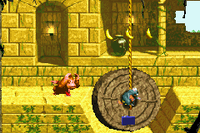
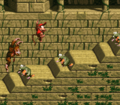
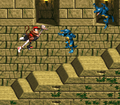
At the beginning of the level, the Kongs exit a tunnel and encounter a few Gnawties, who walk down several stair-like structures. A rope hangs over an abyss after here that the primates can swing along to grab the letter K and reach the other end of the obstacle, where a DK Barrel, a Gnawty, and a millstone are located. If they pass the millstone, it begins to chase them along the flat pathway. After crossing a small gap and climbing up a ledge, the heroes reach an area safe from the millstone, where they can find a wide abyss that they can cross by swinging on a nearby rope. They can find another millstone on the other side of the pit that chases them down a few small, stair-like structures when passed under.
They can find a wide abyss that they are able to cross with the aid of a rope after the stair-like structures. A ledge follows the pit, and once they climb to the top of it, they are safe from the millstone. A third millstone is located immediately after here, and it pursues the primates down more stair-like structures with Gnawties walking along them. After passing these foes, the Kongs reach an abyss that is wider than the previous pits. They must swing along two ropes located within it to cross. As they jump between the two ropes, they approach the letter O. Once the pit is crossed, the primates encounter more Gnawties marching up stair-like structures. A tall, raised piece of ground is ahead of here that the heroes can climb to the top of with a nearby rope. The level's Star Barrel stands on top of the raised area.
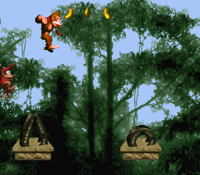
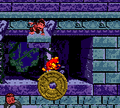
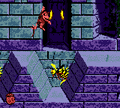
After passing the special barrel, the Kongs reach a second DK Barrel and a few more small, stair-like structures that several Kritters hop along. At the top of the stairs, they can find a millstone inside of an alcove with a rope above it. With the help of the rope, the duo is able to jump over the millstone and progress to a small pit that they can cross with a rope. As they travel through this area, the millstone found in the abyss passes them. It continues to pursue the two friends as they head over two smaller alcoves, both containing Zingers. Once they jump over the gaps, they find another wide abyss with three ropes dangling above it. The rope in the center of the pit is surrounded by many bananas that form the shape of an arrow pointing downwards. The primates can use the rope to cross the abyss and then progress towards a tire that can help them bounce onto a tall piece of ground. The millstone ceases to chase them when it runs into this raised area. A pathway with several small, stair-like structures along it is ahead, and many Kritters hop down these structures. The Kongs can pound on a piece of the ground in this area to reveal the letter N. Once they walk all the way across the stair-like structures, they find a small pit that they can cross with the help of a platform that supports a tire. Another tire is located ahead of here on a flat stretch of land. It can be used to reach a platform positioned above another millstone that begins to chase the heroes when they jump to the other side of it.
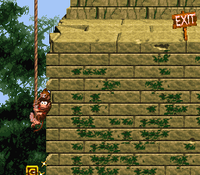
As it pursues them, the duo travels over a wide abyss that contains two small platforms, both carrying bouncy tires. On the other side of the abyss, the heroes can find a tire in the center of the area that they are able to use to reach a Banana Bunch placed high in the air. Farther ahead of the tire, a wide abyss can be found, and it holds two small platforms that both support a tire. A Zinger flies between them. Once the heroes cross the pit, they find a large, triangular alcove with another tire in it. Once the millstone reaches this alcove, it falls inside of it and remains there. If the primates travel to the east from here, they find several stair-like structures and a sign that indicates that the level is near complete. A millstone is located in a small pit ahead of here. Once it is passed, it chases the heroes up more stair-like structures that are infested with Kritters. Using a rope, the primates can cross a wide abyss near here that the millstone falls into when it reaches it. An exit sign is located on the other end of the pit. If they enter the tunnel ahead of here, they complete the level.
Hidden collectibles and objects
K-O-N-G Letters
- K: The letter K hovers in the center of the level's first abyss.
- O: The primates swing towards the letter O as they cross the final abyss before the Star Barrel of this level.
- N: Shortly after the Star Barrel, the Kongs approach a group of Kritters, who bounce near a piece of the ground that appears slightly different than the rest of it. If they jump on the piece of ground from the raised piece of land nearby, they can break it open to reveal the letter N.
- G: Once the primates finish swinging over the level's final abyss, they should drop from the bottom of the rope to fall towards the letter G. Afterwards, a Barrel Cannon catches them and shoots them back onto the rope.
Bonus Levels
- After the Kong find the letter K, they discover a DK Barrel. They should pick it up and carry it past a few enemies. When they reach the first wall, they must throw the barrel at it to create an opening. If they walk into it, they are lead into a Bonus Level. There, they must head east and cross a large abyss. To cross it, they need to bounce off of a multitude of Neckies that fly in a straight line across the area. After jumping off of the final Necky, the Kongs land on solid ground, where they can find a crate with Expresso the Ostrich inside. They can get on the Animal Friend, and then exit the area to a passage on the right. A banana bunch exists offscreen over said passage.
- Shortly after the Star Barrel, the heroes climb across three ropes, one having a formation of bananas around it, making the shape of an arrow pointing downwards. They should follow this arrow and drop down on the center rope to land in a barrel. It takes them to a Bonus Level, where they must jump on a Klaptrap to earn Banana Bunches. Each time this foes is hit, the group is granted with one bunch of bananas, worth a total of ten bananas each. Once the enemy is defeated, the duo is awarded with an Animal Token and then end up back in the main level. They are also immediately forced out of the bonus if the Klaptrap hits them before it is defeated.
Photograph (Game Boy Advance version only)
- A camera icon is hidden in front of the first millstone from the Star Barrel. The Kongs should move in front of the millstone to make it move out of the way, and then travel back to its original spot to collect the icon, which gives them a photograph of a Chomps Jr. on the second page of their scrapbook.
Gallery
The level in the Game Boy Color version
The level in the Game Boy Advance version
Names in other languages
| Language | Name | Meaning |
|---|---|---|
| Japanese | ノーティのいせき2 Nōtī no Iseki 2 |
Gnawty's Ruin #2 |
| German | Bembel Tempel (SNES) Tempo-Tempel (GBA) |
Tempo Temple (GBA) |
| Italian | Tempio Tremendo |
Terrible Temple |
| Spanish | Templo Tempestad |
Literal translation |
