Squawks's Shaft (Donkey Kong Land 2)
Template:Levelbox Squawks's Shaft, misspelled as Squawk's Shaft in an Australian Nintendo Magazine System issue,[1] is the tenth level of Donkey Kong Land 2 and the fifth level in Krem Cauldron.
Summary
It has been requested that this section be rewritten.
As its name suggests, Squawks's Shaft features Squawks the Parrot, who first appears in the level. It is the second level to take place in a mine shaft.
The level begins with a walking section. Diddy Kong and Dixie Kong must go up the mine shaft while dealing with the typical members of the Kremling Krew that patrol mines; Klomps, Neeks, and Krooks. While they are relatively easy to deal with, the initial part of the level also contains some barrel cannon blasting. The duo will have to launch themselves from barrel cannons into other cannons, and with proper timing and positioning they can reach the top. Shortly after the monkeys reach the Star Barrel, they can enter an Animal Barrel to transform into Squawks.
Squawks has two main abilities that are quite useful for this level; he can fly, by continuously pressing the A button, and spit coconuts from his mouth by pressing the B button. Squawks' coconut projectile shoots in an upwards arc, and can hurt all enemies found in the level including the Zingers. The latter half of the level is using Squawks to get higher up the shaft, exploring for hidden collectibles such as Banana Coins and KONG Letters, and avoiding Zingers, Krooks, and a Kannon. At the very top of the level there is a No Animal Sign, and to the right of the sign is the exit.
Layout
At the beginning of the level, the Kongs can find a Klomp, a Neek, and a DK Barrel near a raised platform that they must climb up to in order to find a Barrel Cannon that rotates when they enter it. They must use it to shoot to a higher platform with a Krook on it and an Auto Fire Barrel above it. This cannon is able to shoot them straight into the air, where they must shift either left or right to land in a barrel. To the left, they can find a barrel that is able to shoot them to a platform near the letter K and a Bonus Barrel, while to the right, they can discover a different Auto Fire Barrel that is able to blast them onto a higher platform. Another Barrel Cannon is near here that can blast the heroes onto a platform northwest from here. If they enter the Barrel Cannon above this platform, they can shoot themselves onto a small platform with an additional Barrel Cannon above it. This barrel is completely stationary, and the Kongs are able to activate it themselves. However, a Zinger flies back and forth above the barrel, so they must wait for it to move before they shoot. After they pass this enemy, they enter another stationary Barrel Cannon that can be used to blast them onto a higher platform. A Barrel Cannon is above this platform, while an Auto Fire Barrel is to the right of it.

If the primates jump into the Auto Fire Barrel, they are shot towards many Barrel Cannons, which can shoot them to some bananas and to a Banana Coin. If they jump into the Barrel Cannon to the left of this Auto Fire Barrel, they can shoot to another Barrel Cannon, which can then be used to fire them towards a few Auto Fire Barrels. The Auto Fire Barrels are only able to blast them upwards, so they must shift to the right after shooting out of them to reach the next barrel. The third Auto Fire Barrel, found next to a Zinger, can blast the heroes onto a platform that holds a Banana Bunch and a DK Barrel. A small platform is above it that can assist the duo in reaching a Barrel Cannon, which they must use to shoot to a longer platform with a Krook on it. To the right of this foe in the air, the primates can find a hook with the letter O and a Banana Bunch near it against the side of the area. An additional Barrel Cannon follows the Krook, and it must be used to shoot to another Barrel Cannon, which can then blast them to a stationary barrel that they must activate themselves. If the do so, they are shot to an Auto Fire Barrel, which then fires them northwest into a Barrel Cannon that they must use to shoot past a Zinger and to an additional Barrel Cannon. They must use this cannon to shoot them to another Barrel Cannon, which can then send them onto a platform slightly under the level's Star Barrel.

To the left of here, the primates can discover a Barrel Cannon that is guarded by a Zinger. They can use this Barrel Cannon to shoot to an Auto Fire Barrel that can send them to an additional Barrel Cannon that is positioned under a Flitter. They must shoot past this foe to reach a Barrel Cannon that can fire them onto a platform. A platform that supports two Klomps and a Krook is to the right of here, and an Animal Barrel containing Squawks is above it. When the heroes enter this barrel, they are turned into Squawks, who must then fly northwest to progress. Here, he can find a Zinger, a Banana Coin, and a small opening between two platforms that he must fly through. On the other side of the platforms, he can find a trail of bananas leading up to two more Zingers. To the left of these foes, the parrot can discover a platform that is guarded by another two Zingers. The letter N is above this platform. If Squawks heads north from the previous pair of Zingers, he can find a gap between two platforms that he must head through to find a passage between another set of long, wooden platforms. In the passage, there is a Zinger and a Banana Bunch, along with two gaps that the bird can fly up through to progress. The first gap is placed near a group of bananas that form that shape of an arrow pointing upwards, while the second gap is located around a Zinger.
After the Animal Buddy flies through these gaps, he reaches two platforms with one Krook on the end of each of them. If he manages to dodge the hooks thrown by these foes and heads farther north, he comes up to a few Flitters and some more platforms with gaps in them that he must travel through. On the other side of these gaps, he can find even more Flitters, along with a DK Barrel in the top-right corner of the area. In the top-left corner of this part of the level, Squawks can find another gap between two platforms, which two Zingers fly under and above. The area ahead of here contains a few more Zingers, one of which that guards a Bonus Barrel. An additional gap between two platforms is ahead of here, and on the other side of the gap, the parrot can find another Zinger and the letter G, which is hidden in the far right side of the area. One final gap between two platforms is above here, and a Zinger circles through it. Once the bird heads through this gap, he reaches a No Animal Sign that, when passed, turns him back into the Kongs, who are given a Banana Coin for successfully leading him to the sign. Diddy and Dixie can find a kannonball-shooting Kannon ahead of here, and once they pass it, they reach a spring that they must bounce on to complete the level.
Enemies
Items and objects
- Banana Coins: 3
- DK Barrels: 3
Secrets
K-O-N-G Letters
- K: The letter K is next to the first Bonus Barrel, and it can be reached by blasting from a Barrel Cannon near the start.
- O: The Kongs must blast up from the first Barrel Cannon after the second DK Barrel to find a hook and the letter O to the right.
- N: Shortly after the Kongs turn into Squawks, he must fly to the top-left corner to find the letter N near some Zingers.
- G: The letter G is in the rightmost side of an area located right before the No Animal Sign and above the second Bonus Barrel
DK Coin
After exiting the first Bonus Level, the Kongs must enter a Barrel Cannon to the left to blast to a platform at the upper-left. The Kongs must drop down from it below and continue left to the DK Coin.
Bonus Levels
| Image | Type and description |
|---|---|
| Destroy Them All! After the Kongs shoot up from the second Barrel Cannon, they must direct their fall to the left to land into a Bonus Barrel. In the Bonus Level, the Kongs have 20 seconds to defeat six Neeks, which they can find by going across a few long platforms. The Kongs can travel from one platform to the next by using Barrel Cannons along the sides. After Diddy or Dixie defeat every Neek, the Kremkoin appears at the top of the arena. | |

|
Destroy them All! Near the end of the level, in an area shortly before the No Animal Sign, Squawks can find a Bonus Barrel to the right of a wide room. In the Bonus Level, Squawks has 20 seconds to defeat four Zingers by spitting a nut at each of them. After he defeats every Zinger, a Kremkoin appears at the top of the area. |
Gallery
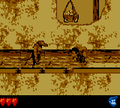
Dixie encounters a Klomp at the start
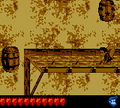
Dixie stands under a Star Barrel
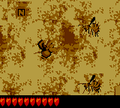
Squawks finds the letter N near two Zingers
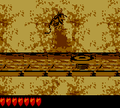
Diddy reaches the End of Level Target


References
- ^ Nintendo Magazine System (Australia) issue 47, page 48.