Mainbrace Mayhem (Donkey Kong Country 2: Diddy's Kong Quest)
Template:Levelbox Mainbrace Mayhem is the second level of Donkey Kong Country 2: Diddy's Kong Quest and the second level of the first world, Gangplank Galleon. It is unlocked by clearing Pirate Panic, and is the first level to take place on a ship's mast. Diddy and Dixie Kong must climb multiple ship masts and yards in order to progress, using vertical and horizontal ropes to reach the top of each one. Unlike Donkey Kong Country, the Kongs cannot swing from these ropes.
Alongside Neeks and Klomps, two new enemies are introduced in the level: Klingers, who climb up and slide down the ropes throughout, and Click-Clacks, beetles who walk on the yards throughout. Mainbrace Mayhem also introduces the Kannon and Kannonball as obstacles.
Layout
The level begins on a yard with a Click-Clack and a few bananas on it. There is a tilted yard just ahead with a pair of Neeks and a barrel on it. A DK Barrel shakes in front of a nearby rope that leads up to a higher yard and the letter K. A Click-Clack is on this yard, and two more of these blue insects are on the following yard to the left. A crate also sits on the yard. Ropes are above here, and a Klinger slides along them, guarding a Banana Coin. The ropes can be used to reach a yard with another Click-Clack on it. A set of ropes floats near here with the letter O and another Klinger on it. Two yards are located around these ropes. The one on the left holds two Banana Coins, while the one to the right leads to some ropes. A Click-Clack is on this yard. Once the Kongs climb the ropes, they find themselves on a higher yard with a barrel. The Star Barrel is also above them here.

Neeks march down a tilted yard just ahead. Ropes are right after the mob of foes, holding a DK Barrel. When the Kongs climb the rope, they can find a yard with two Klomps and a crate on it. They can either travel along this yard or continue along the rope, which leads above the Kremling enemies. Many bananas are along the long rope. At the end of the rope and the yard, the heroes can find two sets of ropes, both of which that are infested with Klingers. The letter N is next to the second set of ropes, which can be climbed to reach a yard with a Klomp, a DK Barrel, and a kannonball. There is a tilted yard nearby to the west, which has a pair a Click-Clacks marching along it. A flat yard is at the end of this one, which holds a cannon that can shoot the primates to a Bonus Level if the kannonball found previously is inserted into it. Some ropes with a Klinger on them are above here. The Kongs can climb along the ropes to reach a second set of ropes with two Klingers on them. A yard is hidden to the left of here with a Bonus Barrel located above it. Soon, the heroes climb farther along the ropes, which lead straight to a yard with the End of Level Target. The end prizes include a Banana Bunch, Banana Bunch Coin, or a red Extra Life Balloon.
Enemies
| Sprite | Name | Count |
|---|---|---|
| Click-Clack | 8 | |
| Neek | 10 | |
| Klinger | 8 (main level) 5 (second Bonus Level) Total: 13 | |
| Klomp | 3 |
Items and objects
| Name | Amount |
|---|---|
Banana |
166 |
Banana Bunch Coin |
3 |
Barrel |
3 |
Crate |
2 |
DK Barrel |
3 |
Extra Life Balloon |
1 |
Kannon |
1 |
Kannonball |
2 (1 of which is in a Bonus Level) |
K-O-N-G Letters
| Letter | Location |
|---|---|
| At the top-right of the first rope, hovering between a square. | |
| Located on the third set of ropes, to the left of a Klinger. | |
| After the Star Barrel, the Kongs must climb a few more sets of ropes. The letter N is next to the second Klinger, on the right. | |
| After the Kannon, the Kongs must climb up a rope, go horizontal, and then straight down to find the letter G hanging at the bottom of a rope. |
Collectibles

| Item | Location |
|---|---|
DK Coin |
From the yard beneath the third Bonus Barrel, the Kongs must use Team-up to reach an uppermost yard. They can also land on it by exiting the third Bonus Level. From the level's uppermost yard, the Kongs must continue forward and jump to another yard to the right and collect its DK Coin. |
Golden Feather (GBA version) |
To find the Golden Feather, the Kongs must be on a grid-shaped series of ropes with the letter O. They must jump left to land on a hidden yard with two Banana Coins and the Golden Feather. |
Warp Barrel
| Sprite | Location |
|---|---|
| At the very start, Dixie must jump off the first yard and then use Helicopter Spin to continue hovering left and below the yard. Almost midway, Dixie lands into a Warp Barrel. This leads her and Diddy into a small warp room (which still retains the level's rigging theme) that only consists of a group of bananas arranged in the shape of an exclamation point. |
Bonus Levels
| Image | Type and description |
|---|---|

|
Find the Token! The first Bonus Level is near the start of the level. From the start, the Kongs must continue forward until they find a group of bananas in the shape of a right arrow. They must travel across the gap below (either from Diddy's cartwheel or Dixie's Helicopter Spin) to reach a grid-shaped rope. They must then jump into a Bonus Barrel on the right. The Bonus Level's objective is for Diddy and Dixie to collect the Kremkoin at the top within 20 seconds. To do so, they must climb up a series of three vertical grid ropes, with individual bananas being placed along the way. After climbing up the third rope, the Kongs can jump to the platform on the right for the Kremkoin. |

|
Destroy Them All! Past the Star Barrel, after the letter N, the Kongs find a kannonball. They must pick up the object, pass a Klomp and two Click-Clacks along the way, and throw it into the nearby kannon to activate it. By entering it, the Kongs are sent to the second Bonus Level. Here, the Kongs must defeat five Klingers, each one having their own rope to climb up then slide down. The Kongs have options on how to attack the Klingers: they can obtain either a crate or barrel from the left or right side respectively, although both items break upon single use. From a yard at the bottom-center, the Kongs can pick up and use a kannonball, which doesn't break after the first hit. Lastly the Kongs can use Team-up to attack the Klingers. After every Klinger is defeated, a Kremkoin spawns just above the center of the bottom yard; the Kongs must collect it within the remaining time. |

|
Collect the Stars! After the kannon, the Kongs must climb up a grid-shaped rope, then move across horizontally, and finally move all the way to the top. They must jump left to land on a yard. From there, they must use Team-up to enter a Bonus Barrel at the upper-left. Here, the Kongs must collect 75 stars within 35 seconds, by climbing up and around the grids of a single large set of ropes. After collecting every star, the Kremkoin appears above the upper-right yard, and the Kongs must collect it within the remaining time. |
Gallery
Super Nintendo Entertainment System
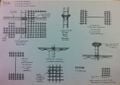
Concept artwork of the level's rigging theme
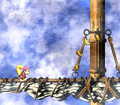
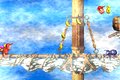
Dixie at the start of the level
Dixie using Helicopter Spin to hover to a rope grid just before the first Bonus Barrel

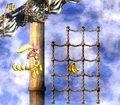
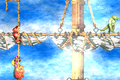
Dixie holding on to a rope left of the first Bonus Barrel
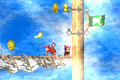
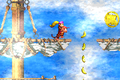
Dixie carrying a kannonball to a Click-Clack on her path to second Bonus Level.
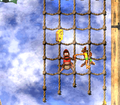
Location of the letter O
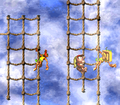
Location of the letter N
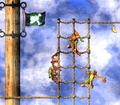
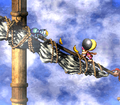
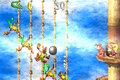
The Kongs climbing to the side of two Klingers, near the end of the level.
Diddy using Team-up to throw Dixie up into the second Bonus Barrel (leading to the third Bonus Level).


Game Boy Advance
The Kongs at the start of the level
The Kongs climbing up a vertical rope
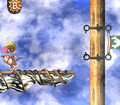
The location of the Golden Feather
The Kongs defeat a Klinger with a kannonball in the second Bonus Level
The Kongs move toward the DK Coin


Names in other languages
| Language | Name | Meaning |
|---|---|---|
| Japanese | メインマスト クライシス Meinmasuto kuraishisu |
Main-Mast Crisis |
| Italian | Orde di Corde! |
Hordes of Ropes! |