List of Not-Bottomless Holes in Paper Mario: The Origami King
From the Super Mario Wiki, the Mario encyclopedia
Jump to navigationJump to search
It has been requested that more images be uploaded for this article. Remove this notice only after the additional image(s) have been added.
This article is under construction. Therefore, please excuse its informal appearance while it is being worked on. We hope to have it completed as soon as possible.
This is a list of Not-Bottomless Holes in Paper Mario: The Origami King.
Not-Bottomless Hole locations
Earth Vellumental Temple
| After the first Save Block, on one of the pillars | |
| To the right of the Earth Vellumental-like platform | |
| Near the ? Block after fixing Not-Bottomless Hole #2 | |
| After being pushed off by the pushing pillars | |
| On the pillar that gets the player back up from the pit | |
| After passing the pushing pillars | |
| Before the Save Block, on the right side of the ledge | |
| Two are before the double fire trap | |
| On the floor before the stronger fire trap | |
| After avoiding the gigantic shell | 
|
Autumn Mountain
Chestnut Valley
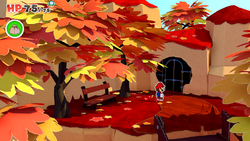
| There are three Not-Bottomless Holes at the start of the level - two in the wall and one in the ground. |
| There are two Not-Bottomless Holes in the wall between the second and third sections. |
| There is one Not-Bottomless Hole in the wall behind the Galoomba tree. |
| There is another Not-Bottomless Hole in the cliff wall near the end of the slope. |
| There are two Not-Bottomless Holes in the cliff wall at the start of the final slope section. |
| There are two Not-Bottomless Holes in the cliff wall at the end of the final slope section. |
Sea Tower
| Sea Tower | |
|---|---|
| Three Not-Bottomless Holes are found after crossing the pillars: one on the ground near the Earth Vellumental room, one in the middle on the stairs, and one on the right wall. | |
| A Not-Bottomless Hole is on the pillar in the Earth Vellumental room and must be filled in the progress. | |
| A Not-Bottomless Hole is on the wall near one of the pillars. | |
| At the end of the bridge leading to the Fire Vellumental and Ice Vellumental room is a Not-Bottomless Hole. | |
| In the Fire Vellumental and Ice Vellumental room, two Not-Bottomless Holes can be found. One is left of the Save Block and the other is on the back wall. | |
| Six Not-Bottomless Holes are in the sliding puzzle area, with some being hidden under clumps of snow. | |
| A large Not-Bottomless Hole is on the back wall of the small puzzle reset room. | |
| A Not-Bottomless Hole is on the back wall of the Fire Vellumental Cave room. | |
| The Sea Tower's final Not-Bottomless Hole is on the wall outside after the second floor. | |
