List of Mario Kart Tour pre-release and unused content
It has been requested that this article be rewritten and expanded to include more information. Reason: More beta mechanics unused in the final release
This is a list of pre-release and unused content for Mario Kart Tour.
Closed beta

On April 23, 2019, Nintendo opened applications for participating in a closed beta test of Mario Kart Tour to Android users in North America and Japan, which began on May 22, 2019 and ended on June 4, 2019.[1] The following lists the features included in the beta version of the game.[2] Several of the characters, karts, and gliders listed were not made available in the final game at launch.
General
- Rubies were originally emeralds.
- An element seen in other free-to-play games that was included in the closed beta was a stamina bar consisting of five hearts total. One heart would be consumed every time a player raced, and once the stamina was depleted, players would not be able to play until it recharged. Players would replenish hearts when they leveled up, if they waited out the timer, or if they purchased hearts with emeralds. This element was removed in the final game at launch, with players instead being able to play indefinitely.
- Originally, there was no way to speed up the unlocking process for the cups restricted by timers.[3] In the final game, this can be done using quick tickets.
- The classes "Common", "Rare", and "Super Rare" in the beta were renamed to "Normal", "Super", and "High-End" respectively in the final game.
- The names of the four bonus challenges "Rocket Start!", "Race through the rings", "Don't crash", and "Beat Up Goombas" in the beta were changed to "Ready, Set, Rocket Start", "Ring Race", "Steer Clear of Obstacles", and "Goomba Takedown" respectively in the final game.
- The Daily Selects Shop had only six items, as opposed to nine.
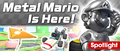
- Players could receive Metal Mario, the B Dasher, and the Gold Glider in the final tour gift, which was the first spotlight pipe.
- Combo bonuses were not implemented.
- Higher tier karts originally increased speed, while higher tier gliders only increased item luck.
- The items on the character selection screen were Mushrooms. In the final game, they are Green Shells instead.
- The maximum level for each driver, kart, and glider was 10, while in the final game, it was decreased to 6 (later increased to 7 in the Snow Tour and again to 8 in the 2022 Mii Tour).
- Music and sound effects were different from the final game.
- The menu music had a different arrangement.[4]
- The jingle when acquiring a Normal item or a Grand Star was different. In the final game, this jingle is instead used in the ranked cup results when the player places 4th or lower.
- The countdown sound effect was taken from Mario Kart DS (this was also the sound effect used in Mario Kart Wii and Mario Kart 7). In the final game, the sound effect is instead taken from Mario Kart 8.
- The text signifying the last lap originally read "FINAL LAP!"; in the final version, it instead reads "2/2" ("3/3" for 3DS Rainbow Road and GCN Baby Park T, and "5/5" for every other GCN Baby Park variant).
- The rearview button was placed in the top right corner of the screen, below the options button.
- In the Coin Rush menu, the description read "Speed through a course containing over 400 Coins! Gold Mario can really rake them in."; in the final version, it instead reads "Over 300 coins are waiting for you on this course! Gold Mario will draw them in as he gets near."
- Completing a bonus challenge originally rewarded three Grand Stars immediately, and reaching certain requirements granted bonus coins.
- Tour gifts were immediately claimed upon reaching the required number of Grand Stars.
- In the beta, each challenge from the Tour Challenges set gave out three to five Grand Stars when completed. In the final version, each challenge from the Tour Challenges set only gives out one or two Grand Stars when completed.
- Shortcut ramps were reflected on the minimap in all courses that had them. In the final game, these were all removed.
Drivers
Most of the drivers retain their special items in the final game; however, Baby Peach, Baby Daisy, Baby Rosalina, and Lemmy's special items are replaced by the Bubble, Morton's special item is replaced by the Giant Banana, Larry's special item is replaced by the Boomerang Flower, King Boo's special item is replaced by the Lucky 7, and Ludwig's and Rosalina's special items are replaced by the Dash Ring. Additionally, in the beta, both Rosalina and King Boo were classified as High-End drivers, whereas in the final version, they are classified as Super drivers instead. The Triple Bananas, which were Larry and Lemmy's special item, went unused until the London Tour, where they were properly introduced as Waluigi (Bus Driver)'s special item. Additionally, Daisy's artwork used in the beta is taken directly from Mario Kart 7, whereas in the final version, she uses new artwork that resembles her artwork from said game, but with darker hair and different shading.
Common


Rare


Super Rare


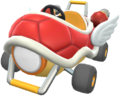
Karts
Most of the karts retain their rarities in the final; however, in the beta, the Soda Jet, Super Blooper, and Bolt Buggy were all classified as Normal karts, and the Blue Seven was classified as a High-End kart, whereas in the final, they are all classified as Super karts. The Koopa Dasher had a sprite used in the beta with Pipe Frame tires equipped instead of the tires the Turbo Yoshi had. The Gold Standard was a selectable kart to race with in the beta, whereas in the final game, it was exclusive to the Coin Rush mode until the 2022 Mario vs. Luigi Tour.
Common
Rare
Super Rare
Gliders
None of the gliders' rarities changed from the beta to the final game.
Common
Rare
Super Rare
Tour
The beta only featured one tour, named Beta Test (Beta Test Tour in the news section). There were no T variant or R/T variant courses featured in the beta and only four of the thirteen courses in the beta had R variants.

|
Duration: May 22, 2019, 11:00 p.m. (PT) – June 4, 2019, 10:59 p.m. (PT) | ||||||||||
| Week | Ranked cup | Spotlights | |||||||||
|---|---|---|---|---|---|---|---|---|---|---|---|
| 1 | Driver | Kart | Glider | ||||||||
| Metal Mario | B Dasher | Gold Glider | |||||||||
| 2 | Driver | Kart | Glider | ||||||||
| Rosalina | Bumble V | Cloud Glider | |||||||||
Cups
Toad Cup |
SNES Choco Island 2 |
3DS Toad Circuit |
GCN Dino Dino Jungle |
 Rocket Start! "Pull off a Rocket Start!" Toad, 3DS Mario Circuit[5] |
|---|---|---|---|---|
Mario Cup |
SNES Mario Circuit 1 |
N64 Kalimari Desert |
3DS Mario Circuit |
 Race through the rings "Clear 10 rings." Mario, 3DS Toad Circuit[2] |
Luigi Cup |
DS Luigi's Mansion |
SNES Mario Circuit 1 |
3DS Toad Circuit |
 Do Jump Boosts "Do 15 Jump Boosts." Luigi, SNES Choco Island 2[2] |
Koopa Troopa Cup Ranked cup (week 1) |
N64 Koopa Troopa Beach |
GCN Dino Dino Jungle |
SNES Choco Island 2 |
 Don't crash "Try not to crash." Koopa Troopa, DS Luigi's Mansion[2] |
Peach Cup |
3DS Daisy Hills |
3DS Mario Circuit |
N64 Kalimari Desert |
 Glider Challenge "Glide at least 400." Peach, 3DS Daisy Hills[2] |
Shy Guy Cup |
3DS Shy Guy Bazaar |
SNES Choco Island 2 |
DS Luigi's Mansion |
 Race through the rings "Clear 30 rings." Shy Guy, 3DS Shy Guy Bazaar[6] |
Toadette Cup |
3DS Toad Circuit R |
3DS Daisy Hills |
SNES Mario Circuit 1 |
 Do Jump Boosts "Do 10 Jump Boosts." Toadette, N64 Koopa Troopa Beach[7] |
Bowser Cup |
GBA Bowser Castle 1 |
N64 Kalimari Desert |
N64 Koopa Troopa Beach |
 vs. Mega Bowser "Aim for 1st place!" Any character, GBA Bowser Castle 1[8] |
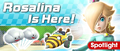
Rosalina Cup Ranked cup (week 2) |
SNES Rainbow Road |
DS Luigi's Mansion |
3DS Shy Guy Bazaar |
 Break Item Boxes "Hit 15 Item Boxes." Rosalina, SNES Rainbow Road[9] |
Donkey Kong Cup |
N64 Kalimari Desert R |
3DS Mario Circuit |
GCN Dino Dino Jungle |
 Smash Small Dry Bones "Smash 5 opponents." Donkey Kong, N64 Kalimari Desert[10] |
Yoshi Cup |
3DS Rock Rock Mountain |
N64 Koopa Troopa Beach |
3DS Toad Circuit R |
 Beat Up Goombas "Hit 30 Goombas." Yoshi, GCN Dino Dino Jungle[11] |
King Boo Cup |
DS Luigi's Mansion R |
GBA Bowser Castle 1 |
N64 Kalimari Desert R |
 vs. Mega King Boo "Aim for 1st place!" Any character, DS Luigi's Mansion[12] |
Daisy Cup |
3DS Daisy Hills |
SNES Rainbow Road |
3DS Rock Rock Mountain |
 Do Jump Boosts "Do 15 Jump Boosts." Daisy, 3DS Mario Circuit[13] |
Wario Cup |
3DS Shy Guy Bazaar |
N64 Kalimari Desert R |
DS Luigi's Mansion R |
 Don't crash "Try not to crash!" Wario, GBA Bowser Castle 1[14] |
Metal Mario Cup |
3DS Rock Rock Mountain |
SNES Rainbow Road |
3DS Toad Circuit R |
 Race through the rings "Clear 30 rings." Metal Mario, 3DS Rock Rock Mountain[15] |
Dry Bowser Cup |
DS Luigi's Mansion R |
GBA Bowser Castle 1 |
SNES Rainbow Road R |
 vs. Mega Dry Bowser "Aim for 1st place!" Any character, N64 Kalimari Desert[16] |
- Names in other languages
| Language | Name | Meaning |
|---|---|---|
| Japanese | β テスト β Tesuto |
β Test |
Multiplayer betas
Nintendo held two multiplayer beta tests: one exclusive to Gold Pass members from December 18, 2019, 11:00 p.m. (PT) to December 26, 2019, 9:59 p.m. (PT),[17] and one for all players from January 22, 2020, 11:00 p.m. (PT) to January 28, 2020, 9:59 p.m. (PT),[18] the latter of which allowed players to play with each other in their immediate vicinity based on their device's location data. The player could either join a random lobby or create their own to play with friends. The cup played rotated every 30 minutes instead of 15.
The music playing in the multiplayer's menu was the same music as the game's menu in the two betas. The icon was also different, being a globe instead of Toads.
Unused content
Drivers
IDs relating to the rest of the recolors for Yoshi, Birdo, Shy Guy, and Toad (Pit Crew) were found in the game's files.[19]
Karts

Some karts have specific files for their positions. Most of these karts are in the game, but there are references to several unused karts, including the Mario Kart 8 appearance of the Blue Falcon (BFalcon8). Several kart models can also be found in the game's files, including a light-blue Comet Tail with a yellow stripe in the middle, which was added in the Vancouver Tour along with the Comet Tail itself. Textures for a gold variant of the Apple Kart, files relating to a yellow variant of the Cheep Charger, and the rest of the Turbo Yoshi colors can also be found.[19]
Gliders
Files relating to recolors of the Peach Parasol and a Valentine's-themed variant of the Glitter Glider can be found in the game.[19]
Courses
Several text strings referencing objects of courses not yet in the game can be found in the files, though some of these objects have been used in courses other than the ones they were originally created for, such as the Skating Shy Guys (HeyhoSkateRed and HeyhoSkateBlue), which are used in Vancouver Velocity 2 but originate from GCN Sherbet Land. Note that while several other courses, both new and returning, are also hinted at in the files, whether or not they actually pertain to the returning courses in question and the themes of the new courses is largely up to speculation, and thus, these are not listed with a few exceptions.[20] Additionally, courses can be added without unique objects specifically referencing them as long as their elements can be sourced from other tracks in the game, or if they do not require unique track objects at all.
Additionally, GCN Waluigi Stadium appears in a banner for the Mario Kart 8 Deluxe – Booster Course Pass found in the base game's files, which is comprised of artwork from Mario Kart Tour. An environmental file for SNES Ghost Valley 3 was also found in the files during the Wario vs. Waluigi Tour, though it was later removed. Additionally, there are numerous strings in the files tied to brand-new courses; as an example, the unique fence and fence arrow objects for Mobmd indicate it is likely to be a city course (potentially Madrid, Spain), though it may be a non-city course with variants like Piranha Plant Cove.
Within the game's data, every track has numerous IDs referencing the renders used for them in-game. This list gets refreshed each tour and after most game updates. There are four individual numbered lists, with every ID in each list sharing a prefix:[21] "Classic" for classic courses, "New" for new courses, "Remix" for remix courses, and "Battle" for battle courses (including both classic and new courses). Within these lists the IDs are sorted alphabetically and are numbered starting from 101000. Every track has up to five IDs that are visible in the list, ending with "_BG" (the first ID for a track), "_sub" (the last ID for the normal variant), "R_sub" (the last ID for the R variant), "RX_sub" (the last ID for the R/T variant) and "X_sub" (the last ID for the T variant). While the IDs for unreleased tracks are not visible, they are still present in the list. Normally, the "X_sub" ID of a course and the "_BG" ID of a course after it are numerically after one another (for example, if "Track1X_sub" is numbered 1010050, "Track2_BG" should be numbered 1010051). When an unreleased track is present between two courses, it creates a larger difference between the ID numbers which is commonly referred to as a "gap". Since the IDs are ordered alphabetically, these gaps can be used to determine potential upcoming tracks. For example, the gap between "Gwii_CoconutMall" and "Gwii_DKSummit" implies that Wii Daisy Circuit is present under the name "Gwii_DaisyCircuit". The size of the gap, when it is increased, and the amounts in which it is increased can be used to estimate when a track in it may debut and how many courses are present within it. Pre-existing courses being increased can also help determine the themes of upcoming tours, such as how increases to all routes of Tokyo Blur, Singapore Speedway, and Bangkok Rush starting in the second Peach vs. Bowser Tour foreshadowed the 2023 Winter Tour.[22]
New courses
- "Mobmd" - FenceMobmd, FenceMobmdArrow, TentMobmdA, TentMobmdB
- "Mobmu" - EnclosureMobmuTest, StartGateMobmuTest
- "Mobnu" - MorayMobnuTest1, MorayMobnuTest2
- "Mobdk" - GlideFloorMobdk, HPBoardMobdkN, HPBoardMobdkR
- "Mobbr" - JumpMobbr, JumpStickyMobbr
Classic courses
- N64 Mario Raceway - M_N64mr_Skybox.txt (used in DS Mario Circuit)
- GBA Cheese Land - WanwanFork (leftover from Mario Kart 8, unclear if it will be used)
- GBA Luigi Circuit - AirShipLC and PuddleLC
- GCN Waluigi Stadium - PakkunWall, WallDokan, FireRing
- Wii Grumble Volcano - RoadGuraGuraTest, RockVolcano (may also be used in used in Lakeside Park, though it is unknown whether the course will return in Mario Kart Tour)
- 3DS Wuhu Loop - ClownWuhu
- 3DS Music Park - BlockNote, Piranha Plant animations (leftover from Mario Kart 8, unclear if animations will be used)
- 3DS Maka Wuhu - RockWuhu
- 3DS DK Jungle - GoldenBanana, AirShipDK, BarrelDK
- Wii Block Plaza - BlockRedTest, BlockBlueTest, BlockGreenTest, BlockYellow
List of ID gaps for courses
An (*) asterisk means that the course is already in the Booster Course Pass or had at least specific text strings for its course elements found. A ^ marks courses that do not have every object of theirs from previous installments present in the files of Tour, indicating that they are less likely to be added - this includes a few tracks that have specific text strings indicating they will eventually come to Tour, but are missing at least one object from the original as of Version 3.2.0. The (*number*) sign is for the number of slots in the gap.
- Between GBA Bowser's Castle 4 and GBA Cheep-Cheep Island (2) - GBA Bowser's Castle 4 (T and R/T), GBA Broken Pier
- Between GBA Cheep-Cheep Island and GBA Peach Circuit (43) - GBA Cheese Land*^, GBA Lakeside Park, GBA Luigi Circuit*, GBA Mario Circuit
- Between GCN Mushroom Bridge and GCN Yoshi Circuit (26) - GCN Mushroom City*, GCN Peach Beach^, GCN Rainbow Road, GCN Sherbet Land^, GCN Waluigi Stadium*, GCN Wario Colosseum
- Between N64 Luigi Raceway (LuigiCircuit) and N64 Royal Raceway (PeachCircuit) (18) - N64 Mario Raceway* and/or N64 Moo Moo Farm
- Between Wii Maple Treeway and Wii Mushroom Gorge (26) - Wii Mario Circuit, Wii Moo Moo Meadows^, Wii Moonview Highway
- Possibly after Wii Rainbow Road - Wii Toad's Factory^, Wii Wario's Gold Mine^
- Between Athens Dash 2 and Bangkok Rush (16) - Athens Dash 3
- Between Bangkok Rush 3 and Berlin Byways (17) - Bangkok Rush 4 or "Mobbr"
- Between Berlin Byways 3 and Merry Mountain (HillClimb) (18) - Berlin Byways 4, "Mobdk"
- Between Los Angeles Laps 3 and New York Minute (50) - Los Angeles Laps 4, "Mobmd", "Mobmu"
- Between Paris Promenade 3 and Singapore Speedway (53) - Paris Promenade 4, likely an unknown new course with variants due to the gap's size being larger than most city variants
- Possibly after RMX Vanilla Lake 1 - RMX Vanilla Lake 2
- Possibly after Paris Promenade B - Singapore Speedway B, Sydney Sprint B, Tokyo Blur B, Vancouver Velocity B, any Mario Kart 64, RMX, Super Mario Kart, or Mario Kart Wii battle course
Additionally, prior to the 1st Anniversary Tour, a size-4 gap existed that could have fit either N64 Banshee Boardwalk or N64 Bowser's Castle. This gap subsequently vanished and has never resurfaced in the files.
Items
Despite Gold Mario being playable only in Coin Rush, he has an unused special skill item known as "Coin Vacuum" with the description "Vacuum up nearby coins while racing on favorite courses." When hacking Gold Mario to be playable in the normal game, the item can only be used on favorite courses and acts similarly to when attracting coins in Coin Rush but with a smaller radius. The Frenzy for the item is similar to a coin Frenzy but with the coins being attracted. The item's icon is missing from the item roulette and it uses the coin icon during a Frenzy.[23][24]
Tires

The StdR_Red tires can be found in the game's files, but are currently unused.[25]
Sprites
When the Para-Wing was added in the London Tour, a sprite was added in the files which appears to be identical to the kart, except it has the Pipe Frame's tires on it, which are also used by the Koopa Dasher. Starting with the Super Mario Kart Tour, sprites of every colored variation of the Pipe Frame with the Gold Blooper's tires equipped can be found in the files.[26]
The unused Para-Wing icon
Icons
Some unused icons known as BoostItem, ItemExchange, PartsScoreUp, and PartsSkillUp can be found in the game's files. The BoostItem icons also have icons of them on a ticket.
The first unused BoostItem icon

The second unused BoostItem icon

The third unused BoostItem icon
The fourth unused BoostItem icon
The first unused BoostItem icon on a ticket
The second unused BoostItem icon on a ticket
The third unused BoostItem icon on a ticket
The fourth unused BoostItem icon on a ticket
The unused ItemExchange icon
The unused PartsScoreUp icon

The unused PartsSkillUp icon


Sounds and music
Several unused voice clips exist for when a driver finishes 5th or below, indicating that drivers were originally going to have voice clips for losing. Some drivers from Mario Kart 8 and Mario Kart 8 Deluxe retain their losing voice clips from said games, while Peachette and Pauline have newly recorded losing voice clips.[27] Later non-Mario Kart 8 / Mario Kart 8 Deluxe drivers added in the game lack unused losing voice clips.
An alternate version of the Singapore Speedway theme that lacks synth and percussion can be found in the files, but it is currently unused.
| File info |
Event token obtaining method
In the in-game news for version 2.10.0, Nintendo announced that the player could obtain event tokens by keeping combo bonuses. This method has yet to be used in the game.[28]
Course icons
Several in-game course icons have been altered, either to reposition the character depicted in them or to change the screenshot shown to be accurate to what is really in the game. The table below documents the differences between previous and updated versions of these icons.
| Previous version | Updated version | Pertinent to | Difference in the previous version |
|---|---|---|---|
| New York Minute R/T | Pauline is positioned slightly more to the left. | ||
| Tokyo Blur T | Peach (Kimono) is positioned slightly more to the right. | ||
| SNES Mario Circuit 2 | Lakitu is positioned slightly more to the left. | ||
| SNES Mario Circuit 2R | Metal Mario is positioned slightly more to the left. | ||
| SNES Mario Circuit 2T | Lakitu is positioned slightly more to the left. The Kanaami Road is flatter. The course's background is higher. The green pipe is out of frame. | ||
| RMX Mario Circuit 1 | The Mario Mii Racing Suit's artwork is different. | ||
| SNES Mario Circuit 1 | Mario is positioned slightly more to the right. | ||
| SNES Mario Circuit 1R | Peach is positioned slightly more to the right. | ||
| SNES Mario Circuit 1T | The course is framed differently. The further ramp is less pronounced. | ||
| SNES Choco Island 2T | The Piranha Plants lack pipes. | ||
| SNES Ghost Valley 1R | The Piranha Plants are absent from the course, some coins near the Glide Ramp are absent, some of the ramps look different, and the course's thumbnail is shown more to the right. | ||
| SNES Rainbow Road | Two green turn signs are absent, the leftmost coin in the distance is not aligned with the other two nearby, and there is only one Star Thwomp in the distance. | ||
| SNES Rainbow Road R | Green turn signs are absent and Lemmy's artwork is positioned so his ball is out of frame. | ||
| SNES Rainbow Road T | Two green turn signs are absent. | ||
| N64 Koopa Troopa Beach T | The ramp near the Noshi is different. | ||
| N64 Kalimari Desert R | The ramp is narrower and Wario is positioned lower. | ||
| N64 Kalimari Desert T | Baby Daisy is positioned more to the left. | ||
| GBA Bowser's Castle 1R/T | Dry Bones is positioned more to the left. The ramp is angled differently. | ||
| GBA Bowser's Castle 1R/T | The tall ramps are narrower and have Dash Panels, as well as having a lower path. | ||
| GBA Sky Garden | The Luigi Mii Racing Suit's artwork is different. | ||
| GBA Cheep-Cheep Island T | The Peach Mii Racing Suit's artwork is different. | ||
| GCN Yoshi Circuit | The Red Mii Racing Suit's artwork is different. | ||
| GCN Yoshi Circuit R | The course is centered differently. | ||
| GCN Yoshi Circuit T | The course is centered differently. | ||
| GCN Dino Dino Jungle T | A Kanaami Road that does appear in-game is visible above the starting line. | ||
| DS Waluigi Pinball | The Donkey Kong Mii Racing Suit's artwork is different. | ||
| DS Waluigi Pinball T | The bumper section lacks transitioning ramps, there is a Kanaami Road that does not appear in-game, and there are more Dash Panels on the road. | ||
| Wii Mushroom Gorge | The Mii Racing Suit's artwork is different. | ||
| 3DS Daisy Hills | Daisy uses an older version of her artwork and is positioned more to the left. | ||
| 3DS Daisy Hills T | Baby Daisy is positioned more to the right. | ||
| 3DS Shy Guy Bazaar R | Dry Bowser is positioned slightly more to the left. | ||
| 3DS Mario Circuit | Peach is positioned slightly more to the right. | ||
| 3DS Mario Circuit T | Daisy is positioned more to the right. |
Gallery

Diddy Kong and a pre-release Barrel Train from the game's first trailer. Note that in the final version, the Barrel Train has Off-Road tires equipped instead.
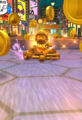
Gold Mario on a golden Pipe Frame equipped with Gold Tires used for New York Tour's Coin Rush. In the release version, Gold Mario is riding on a Gold Standard (equipped with Gold Tires) instead.

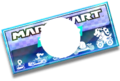
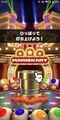
The beta app icon
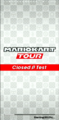
Closed beta title screen
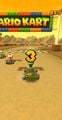
Luigi in an early version of the countdown
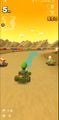
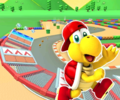
Luigi racing in SNES Choco Island 2. The UI is different from the final version.
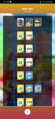
Early version of the main menu
Early version of the menu
The banner of the Beta Test Pipe 1
The banner of the Beta Test Pipe 2
Early version of the High-End pipe
Early Tour Gifts screen
An unused course icon for SNES Mario Circuit 1R/T featuring Red Koopa (Freerunning)


References
- ^ Romano, Sal (April 24, 2019). Mario Kart Tour Android closed beta test set for May 22 to June 4. Gematsu. Retrieved May 22, 2019.
- ^ a b c d e TaoaceyusTM (May 22, 2019). Deutsches MARIO KART TOUR Gameplay! YouTube. Retrieved May 24, 2019.
- ^ Machkovech, Sam. (May 22, 2019). Mario Kart Tour beta hands-on: Microtransactions land like a nasty blue shell. Ars Technica. Retrieved May 23, 2019.
- ^ Sarah Mii. (September 27, 2020) (Beta Version) Lobby Music || Mario Kart Tour | Music Soundtrack YouTube. Retrieved October 8, 2020.
- ^ Ziphonix (May 22, 2019). 15 Minutes of Mario Kart Tour Gameplay! YouTube. Retrieved May 24, 2019.
- ^ Phoenix King Gaming (May 23, 2019). Mario Kart Tour Android Closed Beta Races Episode 5 YouTube. Retrieved May 31, 2019.
- ^ Phoenix King Gaming (May 23, 2019). Mario Kart Tour Android Closed Beta Races Episode 6 YouTube. Retrieved May 31, 2019.
- ^ Phoenix King Gaming (May 24, 2019). Mario Kart Tour Android Closed Beta Races Episode 7 YouTube. Retrieved May 31, 2019.
- ^ Phoenix King Gaming (May 24, 2019). Mario Kart Tour Android Closed Beta Rainbow Road Episode 8 YouTube. Retrieved May 31, 2019.
- ^ Phoenix King Gaming (May 24, 2019). Mario Kart Tour Android Closed Beta Races Episode 9 YouTube. Retrieved May 31, 2019.
- ^ Phoenix King Gaming (May 24, 2019). Mario Kart Tour Android Closed Beta Rock Rock Mountain Episode 10 YouTube. Retrieved May 31, 2019.
- ^ Phoenix King Gaming (May 24, 2019). Mario Kart Tour Android Closed Beta Races Episode 11 YouTube. Retrieved May 31, 2019.
- ^ Phoenix King Gaming (May 28, 2019). Mario Kart Tour Android Closed Beta Races Episode 12 Daisy Cup YouTube. Retrieved May 31, 2019.
- ^ Phoenix King Gaming (May 30, 2019). Mario Kart Tour Android Closed Beta Episode 13 Wario Cup YouTube. Retrieved May 31, 2019.
- ^ Phoenix King Gaming (May 30, 2019). Mario Kart Tour Android Closed Beta Races Episode 14 Metal Mario Cup YouTube. Retrieved May 31, 2019.
- ^ Phoenix King Gaming (May 30, 2019). Mario Kart Tour Android Closed Beta Dry Bowser Cup + Final Boss YouTube. Retrieved May 31, 2019.
- ^ Real-Time Multiplayer Beta Test - Mario Kart Tour. Nintendo. Retrieved March 2, 2020.
- ^ Multiplayer Test - Mario Kart Tour. Nintendo. Retrieved March 2, 2020.
- ^ a b c [1]
- ^ Tweet by Mario Kart Tour News
- ^ Track ID list
- ^ Spreadsheet showing ID increases between tours
- ^ Tweet by Mario Kart Tour News
- ^ Gold Mario & Coin Vacuum! - Mario Kart Tour Hack - YouTube
- ^ HalfHydra YouTube. Retrieved February 21, 2022.
- ^ Tweet by Mario Kart Tour News
- ^ [2]
- ^ Unused Event Token Obtaining Method The Cutting Room Floor. Retrieved January 4, 2021.