Kannon's Klaim (Donkey Kong Land 2)
Template:Levelbox Kannon's Klaim is the seventh level in Donkey Kong Land 2 and the second level of Krem Cauldron.
Kannon's Klaim takes place in a mine shaft with numerous Auto Fire Barrels. Diddy and Dixie must blast from the barrels to progress higher into the level and to move across gaps. Two enemies reappear from previous levels, including Neeks, who patrol along the ground, and Zingers, who guard the Barrel Cannons. Kannon's Klaim introduces three enemies: a Flitter, a Mini-Necky, and Kannon. Despite the name of the level, there is only one Kannon, and it appears shortly before the End of Level Target.
Layout

The Kongs begin the level on a platform under a DK Barrel. A Neek and an Auto Fire Barrel are ahead of here, and the barrel can be used to shoot up onto another platform that holds an additional Auto Fire Barrel. This barrel, along with another barrel near it, can be used to blast towards a third platform with another Auto Fire Barrel above it. This barrel can help them reach a larger platform with a Neek marching along it. An Auto Fire Barrel is to the right of the platform, and it can blast the heroes to an additional Auto Fire Barrel that is aimed to a barrel in a higher area.
This Auto Fire Barrel can blast them to two more Auto Fire Barrels, which are useful in helping the primates reach a platform with another Neek on it. They can find another Auto Fire Barrel near the Neek, and they can use it to reach some more barrels that they are able to use to reach a platform. A Zinger is placed next to the last barrel before this platform, which is followed by two more platforms. The last of the platforms holds a Neek and is located under an Auto Fire Barrel that can help them reach some barrels farther upwards. As they blast to the west with these barrels, they come up to a Flitter that flies in their way. Shortly after passing the foe, they reach an Auto Fire Barrel in a higher part of the level, and it can send them onto a long platform with a Neek on it and a DK Barrel at the end of it in the air. Two hooks are to the right of the DK Barrel, and the letter O floats under them. If the primates jump to the small platform to the left of here, they can find a Star Barrel.
A hook is located to the right of the Star Barrel, and it can help them reach a platform with three more hooks above it. They can use the hooks to reach an Auto Fire Barrel, which they must activate themselves to safely pass a moving Zinger. After they shoot through this barrel, they reach some more barrels that automatically blast them through the area and onto a platform that supports a Neek. A hook is hidden above one of the Auto Fire Barrels to the right of this platform, and if the heroes drop down from the right of it, they can reach a hidden platform with a DK Coin on it. If the heroes head left from where the hidden hook is located, they can find another Auto Fire Barrel. Some more of these barrels is below this platform, and they can blast the heroes to the letter N and then to some previous Auto Fire Barrels that can blast them back to the platform. If the primates enter the Auto Fire Barrel above this platform, they are able to reach a smaller platform with another Auto Fire Barrel over it.
They can use the barrel to shoot towards some more Auto Fire Barrels, some of which that are guarded by Zingers. The barrels can help them reach a platform with a Mini-Necky above it, who swoops down at the duo when they approach. Another platform follows the enemy, and it holds a Neek and the letter G, which is placed directly under a nearby Banana Coin. A small platform is above here to aid the primates in reaching a platform in a higher area that is located next to an Auto Fire Barrel. This barrel can blast them to another Auto Fire Barrel, which can then send them onto a platform that holds a kannonball-shooting Kannon and a Banana Coin. If the Kongs access the Auto Fire Barrel placed above this enemy, they can blast onto a platform with a spring on it. The level is completed successfully if they bounce on this spring.
Enemies
- Flitter: 1
- Kannon: 1
- Mini-Necky: 1
- Neek: 7
- Zinger: 4
Items and objects
- Banana Coins: 3
- DK Barrels: 3
K-O-N-G Letters
- K: When the Kongs enter the third Auto Fire Barrel in the level, they should blast northeast into a higher barrel. Diddy and Dixie must then shoot to the right, and if the Kongs continue over the next Auto-Fire Barrel in the are, they fall towards a hidden platform with the letter K above it.
- O: Located under two hooks to the right of the second DK Barrel in the level.
- N: Shortly after the DK Coin, the Kongs must go left and pass a Neek to find an Auto-Fire Barrel above. Instead of going inside it, Diddy or Dixie must go below the platform to blast through some hidden Auto Fire Barrels. The last Barrel Cannon shoots them down to the letter N.
- G: After the Kongs pass the letter N and blast up using several Auto-Fire Barrels, they reach an area of platforms with a Mini-Necky around them. The letter G is on the edge of the next platform, left of a Neek.
DK Coin
| Image | Type and description |
|---|---|

|
Shortly after the Bonus Barrel, the Kongs must jump into a Barrel Cannon to blast between a few more. When the last Barrel Cannon blasts them onto the platform below, Diddy or Dixie must jump across to the right to grab on a hook, which is above a Barrel Cannon, and jump to the very right to fall down onto a small platform with the DK Coin. |
Bonus Level
| Image | Type and description |
|---|---|

|
Find the Token! After the Star Barrel, Diddy or Dixie must jump to a hook on the right and then on a platform to the left. They are caught into a hidden Bonus Barrel, which sends them to a Bonus Level. In it, the Kongs have 20 seconds to blast from some Barrel Cannons and reach the Kremkoin hovering over the topmost platform. |
Gallery
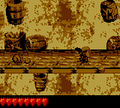
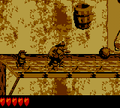
Dixie at the start of the level
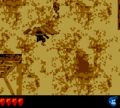
The letter O
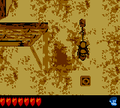
Dixie jumps up to a hook
The letter G
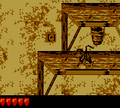
Diddy standing behind a Kannon


