Hornet Hole (Donkey Kong Country 2: Diddy's Kong Quest)
- This article is about a level in Donkey Kong Country 2: Diddy's Kong Quest. For a level in Donkey Kong Land 2 of the same name, see Hornet Hole (Donkey Kong Land 2).
Template:Levelbox Hornet Hole is the seventeenth level of Donkey Kong Country 2: Diddy's Kong Quest. It is also the first area of Krazy Kremland.
Before they even enter the park, Diddy and Dixie Kong have to travel through a Zinger hive. Since many of the walls are coated with sticky honey, the Kongs are able to climb them. However, any areas on the floor that are covered with honey are too sticky for them to walk across (unless if they are mounted on one another, or riding an Animal Friend). Although Zingers are the main threat here, Krooks, Spinies, and Click-Clacks can also be found in this hive. If the Kongs keep their eyes peeled, they can find the ever-so-useful Squitter near the level's Star Barrel.
Level layout
At the start of the level, the heroes need to travel east down several high ledges. However, they can also grab onto a nearby hook at the hive's entrance to be able to climb to a hidden area that contains some honey-covered walls to climb with. At the top of this hidden area, they can find a trio of hooks that are positioned above two Banana Bunches and a Banana Coin. A few entryways leading into Bonus Levels are also here. Once the primates begin to head to the east from the entrance of the hive, they come up to a DK Barrel and a few spots on the ground which are splattered with honey. It is too sticky to walk across, so they must jump through it. There are also Click-Clacks and a Zinger on the way over. Soon, they approach a wall of honey that they must hop on. It is sticky enough for the Kongs to hang on and climb to the next ledge. Another wall of honey is near this ledge that leads to the top of a structure with a Banana Coin on it.
Continuing east from here leads the heroes to a few Zingers hovering over some honey. A barrel rests near here, and it is followed by a Spiny and another Zinger above some honey. The group must then climb another wall of honey nearby, passing a lone Zinger on the way up. The letter K is also on the way up. At the top of the honey wall, they must begin to travel west to discover more honey with Zingers and Spinies above and around it. At the end of the path, the heroes have to jump across a small abyss to land onto a third wall of honey. A Zinger waits at the bottom of the honey. When the primates get to the top of this wall, they must continue to travel through the gooey honey all over the ground. They can find a DK Barrel on the way across this area. There are also some Spinies marching in a line on the way to dodge, and one of these Spinies is in possession of a photograph, found exclusively in the Game Boy Advance version of the game. After they are passed, the Kongs reach the nearby Star Barrel. An Animal Crate containing Squitter is located on a structure above this barrel.

At this point, the Kongs must continue forward and climb up yet another honey-splattered wall. At the bottom of this wall, there is a Zinger who guards an Auto Fire Barrel. If the heroes have Squitter, they can defeat this Zinger to access the barrel and shoot to the top of the honey wall. As they travel to the top of this wall, they come up to a Zinger that surrounds a Banana Coin. Additionally, if they continue up the right side of the wall, they can reach a DK Barrel and the letter O. When they get to the top of the wall, they discover a few more Zingers hovering above the sticky honey. After they climb a few ledges, they reach a hook with a lone Zinger circling it. The hook can help them reach a ledge placed nearby, where there is a path leading to the east with a Spiny on it. Some sections of this path are covered in honey, and a Krook waits at the end of one of the honey piles. The honey pile following this is located under a Zinger that flies between a DK Barrel and a Banana Bunch. After passing a few Spinies ahead of here, the Kongs reach a small pit with a hook above it. As before, a Zinger surrounds it, so they must watch for the foe.
Several ledges coated with honey are on the other side of the pit, and Spinies walk along them. At the bottom of the ledges, there is a thin gap with a Zinger on top of it. If they defeat this foe, they can safely enter the gap to find a hidden area that contains an Auto Fire Barrel and a wall of Zingers that block a room consisting of many bananas and a DK Coin. They can exit this secret area with the use of the nearby Auto Fire Barrel. Outside of this gap, the primates can find another Auto Fire Barrel being guarded by a Zinger. They can use this barrel or the nearby honey wall to reach a ledge with a Krook positioned on it. The letter N floats above this enemy's head. Another wall of honey is to the left of here, and as they climb up this, a fast-moving Zinger, who flies over another DK Barrel, gets in their way. If they travel west at the top of the wall, they come across more Spinies that walk over gooey honey. A ledge with a Bonus Level ahead of it is hidden at the top of this area, and it is guarded by a Zinger. To the west of here, there is a small pit that can only be crossed with the use of a hook that is surrounded by a Zinger.
On the other side of the pit, the group can discover a honey wall with a Zinger at the bottom of it. Once they reach the top of the wall, they encounter a Krook, who stands in front of a barrel. A large structure that can be reached with a hook is hidden above this foe, and it is covered in bananas. If they do not head along this structure, they must instead travel across a pile of honey with a Spiny walking along it. Two Zingers also hover over this honey. There is another pit ahead of here with a small section of honey just before it. A pair of hooks above this pit must be used to cross. As they use the hooks, the Kongs must watch for a Zinger that hovers under them. After they manage to cross, they come up to a No Animal Sign. If they reach this sign with Squitter, they are given a red Extra Life Balloon. A honey wall is near here, and if the primates climb it, they can find a ledge with the level's End of Level Target on it. The level is complete when this target is hit. Additionally, if the Kongs jump on the target from a high part of the honey wall, they can find a prize, such as the letter G.
Enemies
| Sprite | Name | Count |
|---|---|---|
| Click-Clack | 3 | |
| Zinger | 33 | |
| Spiny | 17 | |
| Krook | 3 |
Items and objects
| Name | Count |
|---|---|
Banana Bunch |
6 |
Banana Bunch Coin |
4 |
DK Barrel |
5 |
Barrel |
2 |
Treasure Chest |
1 |
Extra Life Balloon |
1 (green) 1 (red) |
End of Level Target prizes
| Name | Count |
|---|---|
Banana Bunch |
2 |
Letter G |
1 |
Banana |
1 |
Secrets
Bonus Levels
| Image | Type and description |
|---|---|

|
Find the Token! At the start of the level, a hook can be found above the Kongs, which they can reach with their Team-up move. There are some walls splattered with honey above this hook, and the primates can use the honey to climb to the top of the area, where there is a trio of hooks with some collectibles under them. The hooks can be used to reach a ledge with an entryway ahead of it. The entryway leads to a Bonus Level, where they must release a Kremkoin from a treasure chest within the time limit of 25 seconds. To break open the treasure chest, the heroes must throw it at the eight Zingers scattered throughout the area. Once they defeat the final Zinger with the treasure chest, the Kremkoin drops out of it to collect before the remaining time runs out. |
| File:Hornet Hole Bonus Area 2 GBA.png | Find the Token! The Kongs must drop down from the ledge that holds the entrance to the first Bonus Level to land on another ledge with the entrance to the second Bonus Level on it. In the Bonus Level, the primates must climb up a long wall of honey in order to reach a Kremkoin at the top of the area. They have 10 seconds to find and collect the coin, otherwise, they will be sent back to the main level. |

|
Find the Token! Shortly after the Kongs climb to the top of the wall with the final DK Barrel in the level next to it, the group must use Squitter to build webs up to a hidden ledge northeast of where they are standing. They meet a Zinger here, who is guarding the entryway to the Bonus Level. Once they pass the Zinger, they can enter the Bonus Level, where they must use Squitter's webs to reach the Kremkoin at the top of a tall, thin area. They have a total of 15 seconds to find and collect the coin. If they fail to collect it within the time limit, they are sent back into the main level. |
K-O-N-G Letters
| Letter | Location |
|---|---|
| Between the second pair of honey-covered walls that must be climbed. | |
| The Kongs can find two walls of honey after the Star Barrel. If they climb along the right side of the pair of walls, they can progress to the letter O. | |
| Above a Krook found immediately before the final DK Barrel. | |
| One of the prizes given when landing on the End of Level Target at the end of the level. |
Collectibles
| Item | Location |
|---|---|
DK Coin |
Near the end of the level, the heroes should find a Zinger above a tiny gap. If they have Squitter with them, they must use him to defeat the enemy and drop down into the small chamber. Here, they can find two Zingers blocking their path. They should defeat them with Squitters webs to reach a room full of bananas and a DK Coin, which they can reach with the spider's web platforms. |
Golden Feather (GBA version) |
To find this level's Golden Feather, the primates must stand at the edge of the ledge that is to the right of the Star Barrel. From there, they must jump through the air and move towards a banana. When they touch it, a hidden hook appears. Some hooks are ahead, which they must use to climb to the east, where a Golden Feather is hidden. |
Photograph (GBA version) |
After the primates pass the second DK Barrel in the level, they come up to a group of Spinies, one of which who sports a camera icon above its head. If they defeat this foe, they are given a photograph of a Spiny for the seventh page of their scrapbook. |
Gallery
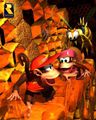
Artwork of Hornet Hole.
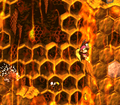
The Kongs hang on a honey wall
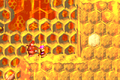
Diddy and Dixie stand near a Bonus Level in the Game Boy Advance version.


Names in other languages
| Language | Name | Meaning |
|---|---|---|
| Japanese | ハニー アドベンチャー Hanī adobenchā |
Honey Adventure |
| German | Wespen Falle (SNES) Wespenfalle (GBA) |
Wasp Trap |
| Spanish | Nido de Avispas |
Wasps' Nest |