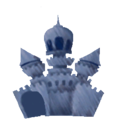
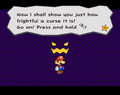
Hooktail Castle
Template:Location-infobox Hooktail Castle is a location that is found during the events of Paper Mario: The Thousand-Year Door in Chapter 1. Although not explicitly stated, it is the first major dungeon in the game, as it takes place in a closed location. Like Koopa Bros. Fortress from Paper Mario, it features many traps and enemies, a boss at the top of the castle, four keys to unlock four doors, and a quest reward at the end. It is the castle where Hooktail, the dragon who is terrorizing Petalburg, is fought and resides. Mario, and his partners — Goombella and Koops — travel here to defeat Hooktail and collect the Diamond Star. The castle is full of many traps and enemies that Mario and his partners must avoid and defeat. The enormous rooms in the castle provide a resting place for some of the Koopas that have fallen victim to Hooktail's ways — however, not all of the skeletons found throughout the castle remain in an eternal rest.
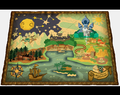
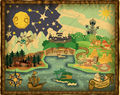
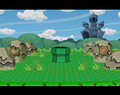
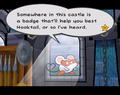
The in-game map description reads, "A massive castle built to accommodate Hooktail's bulk. It's full of lethal traps."
History
Background
Though not much is known about the entire history of Hooktail Castle, some backstory was revealed throughout Paper Mario: The Thousand-Year Door in stories and rumors talked about amongst the many creatures Mario meets along his travels. According to some stories told by Grifty, Hooktail Castle was built long ago in order to harbor one of the Crystal Stars. Despite Hooktail Castle being created to contain one of the Crystal Stars — which were scattered across the world in order to keep the Shadow Queen at rest — Hooktail was the guardian of the castle as well as one of the Shadow Queen's pets. It is unknown if the castle was originally created vacant, and then later taken over by Hooktail by purely coincidental means, if it was taken over by Hooktail purposely to guard the Crystal Star in hopes of somehow helping the long-dormant Shadow Queen, or if Hooktail was specifically put into the castle to guard the Crystal Star, although this seems the most likely as the Map states the castle was built to "accommodate Hooktail's bulk".
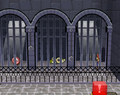
It is presumable that Hooktail Castle was once inhabited by beings other than Hooktail quite some time ago, as the castle features some torture devices including the Rack, a flail, and a ball-and-chain. Many of the rooms are filled with the corpses of Koopas, but it is unknown as to how long they were there. There were also some prison cells found in the castle, similar to those found in castles from fourteenth-century Spain and Scotland; one of these prison cells has the skeletal remains of a Koopa residing behind it.
Paper Mario: The Thousand-Year Door
It has been requested that this section be rewritten.

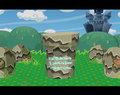
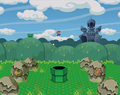
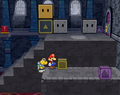
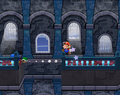
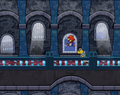
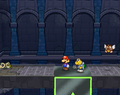
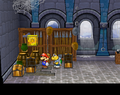
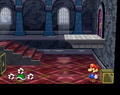
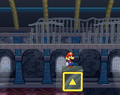
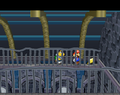
Mario and his partners can enter Hooktail Castle via a pipe that leads them into the background where the castle is structured, unless they placed the Sun and Moon Stones (from Shhwonk Fortress) in the proper slots in the first part of Petal Meadows. Upon first entering the castle, they find a Recovery Block and a spring that leads them to a plane panel. Below the plane panel is a garden with a broken bridge that hovers above a moat — at the end of this moat, they can also collect an HP Plus badge (when using Koops). As they soar across the moat, they reach a tall set of purple doors that lead them into the heart of the castle.
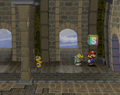
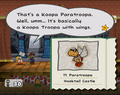
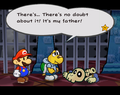
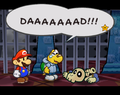
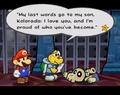
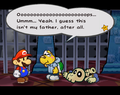
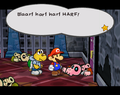
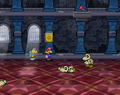
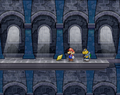
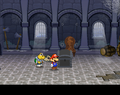
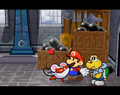
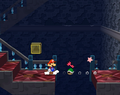
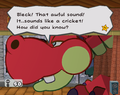
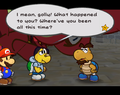
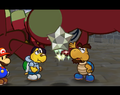
Immediately after entering this part of the castle, they encounter many Koopa Troopas and Koopa Paratroopas that are ready to attack. They can also find the Power Bounce badge within a red ? block here. In the next room, they find many skeletons of Koopas that fell victim to Hooktail along their travels, including the remains of Kolorado's father (which Koops mistakes for his). His skeleton is found clutching a note addressed to his son, Kolorado, as a warning about Hooktail and her weaknesses. The note contains his last words, as he wrote it while dying. In this note, Mario and his partners discover that finding something that begins with a 'cr' and ends with an 'icket' will help them defeat Hooktail.
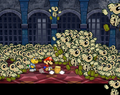
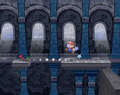
At the far end of the room, they find a Red Bones guarding the doorway to the next room. Once they awaken it, the room quickly becomes flooded with countless Dull Bones, which push Mario and his partner away from the door. After Mario uses his hammer to whack his way to the Red Bones, they engage in battle. Mario eventually wins, gaining access to the next room.
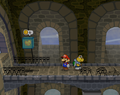
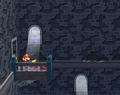
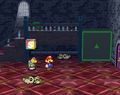
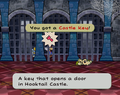
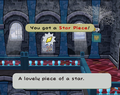
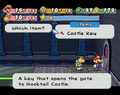
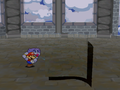
Through the next few rooms, Mario and his partners encounter many more Dull Bones, collect the first Shine Sprite in their path and reach the first locked castle door. The red Castle Key is on a high platform that can be accessible from the yellow and purple switches which make the arrow-imprinted blocks go up and down. Mario can use Koops' Shell Toss ability to hit the switches while he jumps up the stairs. If Mario jumps on the purple block, it will take him to the square-shaped hole in the wall with the Star Piece on a ledge. Mario can jump on two Stone Blocks to reach the big black/yellow block that can take Mario to a wall ledge to jump across and reach a Star Piece. With the black and yellow block up, Mario can use Koops to hit a red ! Switch to flip the staircase to the other side and use Koops' shell to grab the key and unlock the door to the next room. They reach the fourth room with a Save Block and a large green block that goes up.
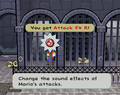
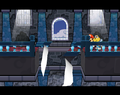
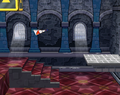
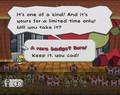
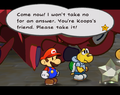
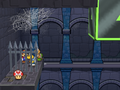
After some travel, they eventually reach a room with a few Dull Bones and a Paragoomba. The player can use Koops to raise the cell by pressing a red ! switch. The cell leads them to another room with a mysterious black chest, which is identical to the previous one. They quickly move to the room in the right and collect the Black Key in a chest. As they attempt to make their way out of the room, spikes pop out of the ground forming a maze. To Mario and his partners' dismay, the ceiling is also covered in sharp spikes and is lowering quickly towards the ground, which will crush the heroes if they do not escape within 50 seconds. The protagonists escape the treacherous room and insert the black key into the chest. The demon that resides in the chest then curses Mario - from then on, he can turn paper thin and squeeze into even the narrowest of spaces by pressing and holding ![]() . Mario and his partners makes their way back, collecting a red badge called Attack FX R in the left prison cell. This badge is the secret weakness of Hooktail mentioned by Kolorado's father and Ms. Mowz.
. Mario and his partners makes their way back, collecting a red badge called Attack FX R in the left prison cell. This badge is the secret weakness of Hooktail mentioned by Kolorado's father and Ms. Mowz.
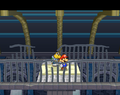
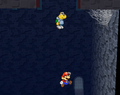
As Mario and his two partners progress farther and farther up the castle, they elevate themselves up to the second level by the big green block in the fourth room. They can find the second locked door; the second key is in the cell room with Kolorado's dead father behind bars and requires Paper Mode. The trio arrive up to the third room's second level with a Recovery Block. There is a switch that makes the first bridge appear so that they can cross over a gap. Mario can use Koops to hit the second switch and create another bridge, then head to the third gap with no switch. This time, they can use the window that does not have any bars on it, which is low enough to jump through, and a Star Piece can be found behind the windows at the start. He can jump through the other window and enter the west door. They enter a room with many Dull Bones and another large green block on the ground. Mario can use Koops again and elevate up to the third level. A Life Shroom can be seen on a ledge on the left wall and can be collected if Mario drops down from the third level in front or behind the bars.
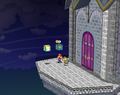
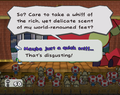
Mario and his partners eventually enter a treasure room (that was guarded by a Dull Bones) and encounter a mysterious thief named Ms. Mowz, who had come to the castle to steal rare badges, but leaves out the window after chatting with Mario and giving him a kiss. In that same room, Mario and his partners found a Mushroom, a Honey Syrup, and the third key in all three of the four chests. They unlock the door in the green elevated block room and progress further up the castle. They then enter room with a few Dull Bones at the bottom and a plane panel at the top. Mario can use the big black and yellow block to elevate up to the two ceiling ledges. While on the ceiling, Mario can obtained the last Star Piece at the east end. Mario can glide his way down to the door's ledge. Mario and his partners come down the steps a little to collect the last red key. To obtain the last key, Mario can hit the yellow block to remove the large black and yellow block downward, then Koops can be shot at the key. If Mario goes down the gap, he can obtain the Last Stand P badge. Mario can open the last (big) locked door and collect the last Shine Sprite.
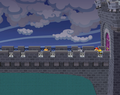
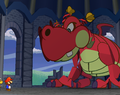
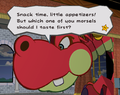
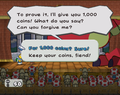
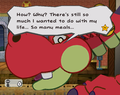
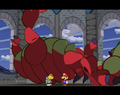
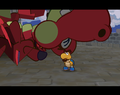
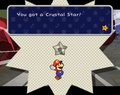
After going up two flights of stairs and traveling across the outside ledge of another room, Mario and his partners eventually reach a long bridge high in the air. This bridge is infested with Koopas and lead up to an extremely high tower with a Spiky Goomba on duty. At the top of this tower, Mario and his partners encountered a Save Block, Recovery Block, and an enormous pair of purple doors that led into a large circular dormitory. Through these doors, Mario and his partners encounter Hooktail. After a long battle, the dragon is defeated. The gang celebrated and continued to find the Crystal Star. Suddenly, the red dragon regurgitates a blue shell out of her stomach. The blue shell reveals to be Koopley, Koops's long lost father. Koopley gives Mario the Diamond Star, something he had found in Hooktail's belly and had kept as a souvenir.
Once Hooktail is defeated, Koopook will post a trouble at the Trouble Center asking participants to find him in Hooktail Castle. If Mario locates him on the ledge near the green elevator block, he will reward Mario with the Special Card. After Chapter 5, Merlon will be awaiting for Mario outside his shop in Rogueport. He tells Mario and his partners of a fortune he had received; this fortune told of a room hidden in Hooktail Castle. If Mario and his partners return to the room with the spikes and head to the right wall of the room, they will discover a large crack in the wall that Admiral Bobbery can blast through. In the secret room, they discover the Up Arrow, an item that helps Merlon power up Mario's partners to Ultra Rank.
Enemies found in Hooktail Castle
| Enemy | HP | Attack | Defense |
|---|---|---|---|
| Dull Bones | 1 | 2 | 1 |
| Goomba | 2 | 1 | 0 |
| Paragoomba | 2 | 1 | 0 |
| Spiked Goomba | 2 | 2 | 0 |
| Koopa Troopa | 4 | 2 | 1 |
| Koopa Paratroopa | 4 | 2 | 1 |
Bosses
| Enemy | HP | Attack | Defense | Status |
|---|---|---|---|---|
| Red Bones | 5 | 3 | 1 | Mid-Boss |
| Hooktail | 20 | 5 | 1 | Chapter 1 Boss |
Formations
For enemy formations in Hooktail Castle, see here.
Items found in Hooktail Castle
| Item | Icon | Found In |
|---|---|---|
| Attack FX B (as a special item) | Inside the chest covered by a piece of paper at the center of Hooktail's room while doing Ms. Mowz's trouble. | |
| Attack FX R | In the storeroom in the right of the first floor, it is in the first cell. | |
| Black Key | In the spiky room in the right of the first floor, it is in the chest in the middle. | |
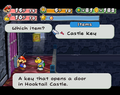
| Castle Key | In the second room on the first floor, it is in the right of the area behind the cells. | |
| In the third room on the first floor, it is on a low ledge on the north wall. Accessible from the flippable stairs. | ||
| In the storeroom on the third floor, it is in the chest in the far-left. | ||
| In the stair area on the third floor, it is across a gap in the south. Requires Koops. | ||
| Diamond Star | Found by Koopley in Hooktail's stomach. Given to Mario after Hooktail is defeated. | |
| Honey Syrup | In the storeroom on the third floor, it is in the chest in the front-left. | |
| HP Plus | Outside the castle, it is to the right under the broken bridge. (Requires Koops) | |
| Last Stand P | In the stair area on the second floor, it is on top of the high platform in the southeast. Accessible with the yellow block from the third floor. | |
| Life Shroom | In the room with a block to the third floor, it is on a ledge by the left wall. | |
| Mushroom | In the storeroom on the third floor, it is in the chest in the middle. | |
| Power Bounce | In the first room on the first floor, it is in the red ? block. | |
| Shine Sprite | In the third room on the first floor, it is by the north wall. | |
| In the storeroom on the third floor, it is above the left chests. | ||
| In the stair area on the fourth floor, it is in front of the window by the door to the outside. | ||
| Special Card | In the room with a block to the third floor, it is given by Koopook for doing his trouble. | |
| Star Piece | In the second room on the first floor, it is under a panel behind the leftmost cell. | |
| In the third room on the first floor, it is on a high ledge on the north wall. Accessible from the yellow block or the window area on the second floor. | ||
| To the right of the third room on the first floor, it is on a high ledge through a hole on the wall. Accessible from the purple block. | ||
| In the window area on the second floor, it is in the right of the area behind the windows. | ||
| In the airplane room on the third floor, it is on the right of the north ledge. | ||
| Up Arrow | To the right of the spiky room on the first floor, it is inside a chest that appears after hitting the ! block. |
Area Tattles
- This is the entrance to Hooktail Castle. Not bad... There's a garden up ahead. There's a Save Block here, too, so we'd probably better use it, don'tcha think?
- This is the Hooktail Castle garden. Looks like the bridge has been out for a while. Even so, this castle just seems so... majestic, y'know? It's so big, and... strange.
- This is a corridor in Hooktail Castle. Can't say I'm a fan of the bone-pile decor. I don't really wanna have my bones end up here, Mario. How about we move on?
- I guess that's a dungeon beyond us... Ick... There are bones scattered everywhere. Mmm... Mold and dust... Great. You could totally choke on the stench in this place. HAAAAAACK!
- This must be the great hall of Hooktail Castle. I'd say it's the center of the castle. This place is so full of traps and dangers... It's kind of hard to get around, huh? If we could just walk to a window and look at the sky, that might clear our heads...
- This is Hooktail Castle. You feel that upward-moving draft in here? Wow, sure is a big castle. Who do you think built it? So many questions!
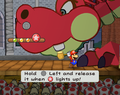
- These are the dungeons of Hooktail Castle. I don't think they're in use, but... yuck. Hey, y'know, I was meaning to ask... Have you mastered Koops's "Hold" move yet? When Koops is with you, just press and hold
 to make his shell stop ahead of you. You can even move around while it stays there! Try it out in different areas!
 - What a totally weird room. There's just gotta be something hidden here. Then again, EVERY room in this castle is totally weird.
- This is Hooktail Castle. There's an upward-moving draft in this room, too. Of course, tons of bones lying around, too. This place needs a decorator, STAT! You never know which bones are gonna attack, so careful where you walk, OK? Oh, and if you want to ride that green block, remember, Koops is the MAN!
- This is Hooktail's treasure room. Ms. Mowz was looking for something here, but I don't think there's anything left.
- This is Hooktail Castle. The door up on that platform to the right is hard to reach. I wonder if the switch on the right might control the block that could get us up there... Looks like a job for Koops...
- Mario, take a look at this! It's like you could reach out and touch the sky, huh? Looking out from the heights makes my head go goomby... I mean... I mean goony!
- This is Hooktail's lair. Yup, the highest chamber in the castle! Now, where's Hooktail, huh? Hmmm... Y'know, maybe we should be glad it's not around at the moment...
- This is a hidden room in Hooktail Castle. Who knew there was a room in here? Well... I guess secret rooms are supposed to be secret...
Gallery

Hooktail Castle in the sun
Diamond Star revealed
Hooktail Castle as it appears on the map
Sprite of the castle
The secret entrance to Hooktail Castle
Mario jumping to Hooktail Castle in the background

Goombella tattling the first corridor of Hooktail Castle
Goombella tattling a Koopa Paratroopa
The dead body of Kolorado's father on the ground.
Koops mistakes the Dull Bones for his own father.
The Dull Bones swarm
Mid-boss battle
The first Shine Sprite
Mario getting the Star Piece in the high platform after taking the purple block
Mario getting the Star Piece on the wall ledge after taking the big black and yellow block
The first key
The ! Switch and various blocks
The spiked ceiling is about to lower down.

The spike room
The Black Chest Demon explaining how to use Paper Mode

Mario slipping past the bars in Hooktail Castle.
Mario obtains the Attack FX R badge, the key to defeat Hooktail.
The second key
Koops being shot at a switch
Mario getting the Star Piece behind the windows in the third area.


Encountering Ms. Mowz
Mario meets Ms. Mowz.
Mario gets kissed by Ms. Mowz.

The third key
The second Shine Sprite
Mario is unlocking the third castle door
Mario gets elevated up to the plane panel
Mario getting the Star Piece in the upper-north-east corner of the plane room
The fourth key
Mario and Koops are falling down the fourth area
Mario and Koops next to the last Shine Sprite on the fourth floor
Mario opened the fourth castle door
The bridge
Hooktail's lair
Mario and Koops encounter Hooktail
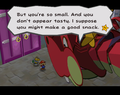
Hooktail threatens to devour the heroes.
Mario prepares to swing his hammer at Hooktail
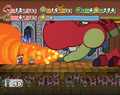
Hooktail breathing her "stinky, fiery breath" at Goombella and Mario
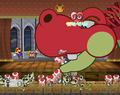
Hooktail gobbles the Toads in the audience and restores 10 HP.
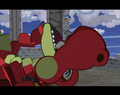
Hooktail faints.
Hooktail defeated.
Hooktail spitting Koopley's shell out
Koopley

Koopook Trouble Center mission
Mario using Flurrie to blow away the "sheet" and reveal a chest containing the Attack FX B badge


Names in other languages
| Language | Name | Meaning |
|---|---|---|
| Japanese | ゴンババ城 Gonbaba Jō |
Hooktail Castle |
| German | Lohgards Burg |
Hooktail's Castle |
| Spanish | Castillo de Gombaba |
Castle of Gombaba |