Glimmer's Galleon (Donkey Kong Country 2: Diddy's Kong Quest)
It has been requested that this article be rewritten.
Template:Levelbox Glimmer's Galleon is the twelfth level in Donkey Kong Country 2: Diddy's Kong Quest and the second level of Krem Quay. It takes place in the flooded cargo of a dark, submerged galleon. For nearly the entire level, Diddy Kong and Dixie Kong are assisted by the titular Glimmer the Angler Fish, who follows them around, lighting the path forward. The Kongs encounter four types of underwater enemies: Flotsams, Puftups, Shuris and Lockjaws. A Klomp appears near the start, walking underwater, and a Spiny appears at the very end, when the Kongs exit the cargo. It is the only underwater level without Enguarde the Swordfish, meaning the Kongs cannot defeat the enemies and should avoid them instead. As with earlier underwater level, there are certain parts of the wall that Diddy and Dixie can swim through: this is required for them to obtain the DK Coin.
In the Game Boy Advance version, Glimmer's Galleon has a brighter appearance because original models of the handheld do not have a backlit screen. Since the player can make out their surroundings more easily, Glimmer's role is optional. The remake also adds an Invincibility Barrel, which the Kongs are required to use to defeat a certain enemy and obtain its photograph.
Layout

At the beginning of the level, the Kongs can find a passage among several large crates and barrels that they must swim through. If they swim north through the passage, they come up to a hidden room that contains an open crate that they can enter to access a Bonus Level. The Kongs can heads through some crates above the entrance to the bonus to reach another room that contains two Banana Bunches and a group of bananas that form the shape of the number three. An additional hidden area is above here on the other side of some crates, and it holds a DK Coin and bananas that form the shape of the number four. The primates can travel no farther in this direction, but if they head south from the passage found at the beginning of the level, they come up to a DK Barrel and a trail of bananas that they can follow to head over a pile of large crates and barrels that support a Klomp. If the primates follow the trail farther into the level, they soon reach a Flotsam and a thin channel that they must swim through. As they approach the Flotsam, Glimmer appears to light up their way. On the other side of the channel, they can find some more Flotsams and a hidden channel that leads into a small room with a Banana Bunch in it.
There is an additional passage in this room that the heroes must travel through to progress to a fork-in-the-road. They can either head through an area to the north, or a different area to the south. Both areas meet up at the same point, but they contain different obstacles and objects. In the upper path, the heroes can find a Lockjaw, some bananas in a small alcove, and a large barrel that they can swim through to find a hidden opening among the crates that holds a Banana Coin. The lower path consists of a Lockjaw and some Flotsams, as well as two alcoves full of bananas. At the meeting point of the two separate passages, the primates can find some more Flotsams and a small channel that leads to another pair of passages. The lower passage holds a Flotsam and a DK Barrel, as well as a small crate that the Kongs can swim over to access the upper passage. The upper passage leads to another passage that the heroes must swim through to reach a slightly larger area that contains a Lockjaw and a Banana Bunch. A channel above here leads into another small section with a crate in it that the heroes can swim through reach a hidden passage that consists of two Banana Coins, some bananas, and, in the Game Boy Advance version of the game only, a photograph. The passage also serves as a shortcut through the underwater level, helping them reach a room found shortly after the letter O.
If the primates do not take this passage, they instead proceed upwards past an arrow pointing north that is formed by bananas and to a smaller area that holds two Lockjaws and four bananas in an alcove. An area much larger than this is to the north of here, and a few Flotsams thrive in it. The letter O is hidden in an alcove behind a crate in this room, which is followed by a channel that that heroes must swim through to reach a similar room to the west. As they head through the channel, they swim over an arrow directing them to the west that is formed by multiple bananas. Once they reach the room on the other side of this channel, they can find a Puftup in the center of it that, when approached, explodes and shoots spikes across the room. A passage is below this room, and two different areas branch off of it. The first area leads the Kongs through a safe area that is void of obstacles, but the lower area contains a Lockjaw and a Banana Bunch in an alcove, as well as a crate that the duo can swim through to reach a Banana Coin. The two separate areas connect in the location of a single Flotsam with two thin channels above it. The two channels are both thin and straight, and they lead to the same part of the level, which also holds a Flotsam, along with an alcove that consists of some bananas. Another thin passage is to the left of this Flotsam, and on the other side of it, there is a wider area that contains a Star Barrel and a trail of bananas leading downwards.

If the trail is followed, the two friends head down towards a channel leading to the west, which holds a DK Barrel. An arrow, which is formed by a group of bananas, is placed below this channel, and it must be followed to progress into another room to the west. This room is very large, but it only contains a single Shuri and a Flotsam. The Kongs can find another large room above here that holds a Puftup in the center of it, who explodes and releases spikes when approached. An alcove with a Banana Bunch in it is also in the left end of this area, while a Shuri waits for the primates in the lower right corner of it. A passage that contains a trail of bananas is directly above the Shuri, and a crate that, exclusively in the Game Boy Advance version of the game, can be swum through to reach an Invincibility Barrel, is to the right of them. If the primates continue to the wide room above here, they can find a Lockjaw and a few Shuris, one of which that, in the Game Boy Advance version of the game alone, holds a photograph. To the west of here, the Kongs are able to discover an additional room with a Puftup in the center of it that explodes and shoots spikes when approached. After the heroes head through the small passage above this foe, they reach a smaller area that contains a Lockjaw and a pair of alcoves that hold a Banana Bunch and the letter N.
They can find a narrow channel to the north of here that leads to a DK Barrel and past an arrow pointing upwards that is formed by bananas. A few large barrels are ahead of here, and they are positioned under a Lockjaw that patrols that area, which also holds a small alcove with some bananas in it. The primates can find a several Shuris in a wider area to the right of here. As they head through the large area, the Shuris charge at them and a Flotsam swims in their way. The curvy path full of Shuris, which also contains an alcove with the Golden Feather in it, soon leads the heroes to an area with a Puftup that explodes and shoots spikes when approached. This foe blocks a narrow passage, which is located next to another two passages that lead up and down. If the passage leading upwards is taken, the heroes find a Lockjaw and a small area above it that holds a Banana Bunch. There is a wider section to the right of here, which is connected to the previous path that the Puftup blocks. If the Kongs take the lower passage from where this puffer-fish enemy stands, they can find a slightly wider area that contains a Lockjaw and a hidden channel that leads to an open crate, which the heroes can enter to access a Bonus Level.
The upper and center passages both connect to a vast room that carries a few Flotsams and a Puftup, who explodes and releases thorns when encountered. A small passage branches off of this room, and a Lockjaw patrols it. The lower passage mentioned previously connects to a smaller room below here, and it also contains a few Flotsams. A passage branches off of both of these rooms, and they both connect in front of another room that contains three Puftups, two of which that explode and project spikes when encountered, and another that simply swells up and rises over an alcove that holds a Banana Coin. In the bottom-right corner of this area, the two friends can find an arrow that is formed by a group of bananas. The arrow directs them upwards through a thin channel, which they must swim through to reach an Auto Fire Barrel that shoots them on the deck of the ship when accessed. An End of Level Target is here, and it is guarded by a Spiny. If they jump on it from the ground, they simply complete the level, but if they jump on it from the nearby large barrel, they can also win prize, either a Banana, Banana Bunch, Banana Bunch Coin, or a Red Balloon.
Enemies
| Name | Count |
|---|---|
Flotsam |
Green: 9 Blue: 12 Total: 21 |
Klomp |
1 |
Lockjaw |
13 |
Puftup |
8 |
Shuri |
10 |
Spiny |
1 |
Items and objects
| Name | Count |
|---|---|
Banana Bunch |
14 |
Banana Bunch Coin |
10 |
DK Barrel |
4 |
Invincibility Barrel |
1 (GBA version) |
Red Balloon |
1 |
K-O-N-G Letters

| Letter | Location |
|---|---|
| After encountering Glimmer, the Kongs must swim up past a few Flotsams. As they continue northeast, Diddy and Dixie encounter a Lockjaw. The Kongs can obtain the letter K from an alcove to the upper-right. | |
| Shortly after the letter K, the Kongs must swim up a vertical passage with some Lockjaws. At the end of it, they must swim to the right and pass through a crate to obtain the letter O. | |
| When the Kongs encounter the second Lockjaw after the Star Barrel, they can swim below to find two alcoves. The alcove on the right has a Banana Bunch while the left alcove has the letter N. | |
| After the letter N, the Kongs must swim past numerous Shuri, then three Flotsams, and a Puftup. By swimming up, Diddy and Dixie can find two Lockjaws. The letter G is in the middle alcove above them. |
Collectibles
| Item | Location |
|---|---|
DK Coin |
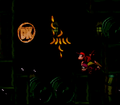
Above the first Bonus Level's entrance, Diddy and Dixie can swim through the crates. This takes them into a hidden room with bananas shaping the number 3. A Banana Bunch appears in each corner of the room except the upper-right, where the Kongs can swim through the crate above to enter another room which has bananas in the shape of the number 4. The DK Coin appears to the very left. |
Golden Feather (GBA version) |
After the letter N, Diddy and Dixie must swim past three Shuri. They must then swim straight up to find the Golden Feather in an alcove. |
Photograph (GBA version) |
There are two photographs in the level:
|
Bonus Levels
| Image | Type and description |
|---|---|

|
Find the Token! At the start of the level, the Kongs must swim directly above to enter a spacious room. They must follow a trail of bananas which take them to a large opening of a crate that leads into the first Bonus Level. In it, the Kongs must swim through a curvy path of crates and barrels. They have 40 seconds to obtain the Kremkoin at the end, which is at the top-right of the area. |

|
Find the Token! After the letter N, the Kongs eventually come across a group of bananas arranged as a right arrow. Instead of going the specified direction, Diddy and Dixie must swim below, where they encounter a Lockjaw. A narrow path is below the Lockjaw, and like the first Bonus Level, a trail of bananas lead the Kongs into an open crate to the second Bonus Level. The second Bonus Level is similar to the first one, except the Kongs have only 35 seconds to obtain the Kremkoin. Bananas appear throughout the Kongs' path, although they must avoid following the bananas, which lead them to dead ends. The Kremkoin is at the top-right of the area. |
Gallery
Super Nintendo Entertainment System
- Glimmers Galleon DKC2 art.jpg
Artwork of the Kongs in Glimmer's Galleon
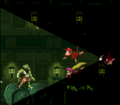
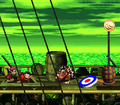
The Kongs and Glimmer look behind at the underwater Klomp

The Kongs swim down to a path at the start of the level
The location of the DK Coin
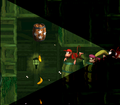
The Kongs and Glimmer approach the Star Barrel
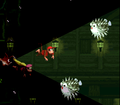
The Kongs encounter some Puftups
The Kongs return to the surface, next to the End of Level Target


Game Boy Advance
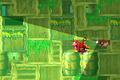
A hidden area near the start that has bananas in the shape of a 2

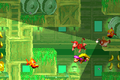
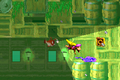
The Kongs travel through the level
The letter K
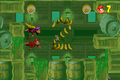
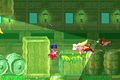
The Kongs encounter two Lockjaws
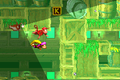
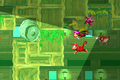
The Kongs and Glimmer go through a hidden path
The letter O
Shuri's Photgraph
The Golden Feather


Names in other languages
| Language | Name | Meaning |
|---|---|---|
| Japanese | くらやみダイビング Kurayami daibingu |
Diving in the Darkness |
| German | Glimmers Galeone |
Glimmer's Galleon |
| Spanish | Atisbo de Galeón/Galeón de Glimmer |
Glimmer of Galleon/Glimmer's Galleon |