Fouling Up the Whole Works!
- “Feel the burn! Smell that sulfur! This must be Sweatmore Peak! I'm gonna make that Cannoli pay for sending me to this stinky place!”
- —Wario, Wario: Master of Disguise
Fouling Up the Whole Works! is the seventh episode of Wario: Master of Disguise. It takes place in Sweatmore Peak. Wario spends the majority of this episode traveling through the magma. The Sweatmore Hotpants are needed to avoid taking damage in the magma. Snackerals inhabit the magma and will steal Wario's Hotpants if they come in contact with him. If they do, red chests will be replaced with purple chests containing a replacement for him.
Plot
Wario arrives at the volcano searching for Count Cannoli, who told him to meet him there if he wanted to know where the next Wishstone piece was. However, Cannoli never shows up. Instead, Wario meets a mysterious girl there. She warns him not to continue, mentioning that a machine is causing the volcano to behave abnormally. Wario ignores her warning and gets the Sweatmore Hotpants so he can enter the magma and get through the volcano.
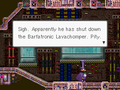
After traversing through the magma, Wario comes across the Barfatronic Lavachomper, a large head-like device that controls the lava. The Lavachomper was what had caused the increased volcanic activity. Once it is defeated, Wario moves on to Blowhole Castle. Afterward, Cannoli is seen talking with the ally he made two episodes ago about Wario's current progress. Cannoli then leaves, planning his next move.
Layout

Wario starts near the entrance to the magma, which has three red blocks over it. Before going inside, he needs to get the Sweatmore Hotpants. He can obtain them by going to the right until he finds a purple treasure chest, which contains the Hotpants. On the way, he will encounter five Sir Lance-A-Lots and four Bombats. Wario can also crawl through a hidden passage on the far right to find two Sir Lance-A-Lots guarding a green chest with a Vita Mighty inside. After having left the room where the Sweatmore Hotpants were after obtaining them, the purple chest will be replaced with a red chest containing the Amazing Massage Chair. Wario can now return to the beginning, destroy the red blocks, and enter the magma. Upon doing so and going to the right, Wario will be introduced to Snackerals, a robotic fish that can steal Wario's Hotpants. In addition to the Snackeral he just saw, Wario will also encounter three RoboUrchins before moving on to the next room, which has four Battle Salmon and two spots where flames fly in an arch. Under the first arch is a red chest containing the Nifty Wario Poster, and on the far right is a green chest, which holds the Captain Mastery Gem. This gives Wario the ability to turn into a submarine, allowing him to move through the lava more easily. He can also fire torpedoes, which will destroy the rocks blocking the way downward. Wario can now go back to the first room and torpedo the rocks (he will encounter two extra Battle Salmon on the way back) and find a red chest, which holds the Cutie-Pie Hypno Specs.
Going down, Wario will find two Battle Salmon and four RoboUrchins. To the left of an intermittent stream of fire is a wall of rock blocks that need to be torpedoed, before Wario can move on; on the other side is another fire stream and two Snackerals. The path on the left leads to a tall room with many fire streams and RoboUrchins that Wario must weave through. A pair of breakable blocks on the left leads to another tall room, which has three rotating Fire Bars. At the bottom is an area with a narrow corridor that large flames periodically pass through. The magma down here is more intense, and the Sweatmore Hotpants will not protect Wario from it. However, there is a purple chest in here that contains the Sweatmore Superhotpants, which lets Wario survive in the deepest magma depths. However, if he continues to the right, he will find a gate in the way. Back in the vertical room with the fire streams, Wario will find a red chest containing the "Rare" Collectible Figurine, as well as a path leading to the right. In the next room, there are three Battle Salmon, two Fire Bars, two Snackerals, and a hat switch. At the top left of the room, Wario can torpedo two rock blocks to find a purple chest, which contains a map of the volcano. There are also two red chests on the right; they yield the Hilarity Machine and the Titanium Chef Hands. After going through the room on the right and avoiding more Fire Bars, Wario will encounter a Cyborca and two Snackerals. Near them is a button with some rock blocks on top of it; by destroying the blocks and hitting the button, the gate that previously blocked the way forward opens.

Wario must now return to the gate. On the way back, there will be a red chest with the Train Window Painting in it where the Sweatmore Superhotpants used to be. Wario will encounter Battle Salmon, RoboUrchins, and a Snackeral in the narrow corridor in addition to needing to dodge the large streams of fire that pass through; there are small alcoves throughout the corridor to assist with this. Beyond the gate, there are smaller streams of fire that travel vertically, as well as a Cyborca. The next room has three RoboUrchins and two flames that erupt in an arch, followed by pairs of Snackerals and Cyborcas. On the far right, Wario will find a room with another Cyborca and a red chest with the Failed Teenage Romance Diary inside. Going up takes Wario to a tall room where Wario must weave around large, horizontal fire streams, as well as a Snackeral and two Battle Salmon. At the end, there is a hat switch and a red chest containing the Rich Man's Ice Cream. After breaking the rock blocks in the way, Wario can proceed to the Barfatronic Lavachomper's room. Destroying it completes the episode.
Enemies
| Sprite | Name | Count |
|---|---|---|
| Sir Lance-A-Lot | 7 | |
| Bombat | 4 | |
| Battle Salmon | 17 | |
| Snackeral | 11 | |
| RoboUrchin | 20 | |
| Cyborca | 5 |
Treasure chest locations
| Treasure | Worth | Location | |
|---|---|---|---|
| Sweatmore Hotpants | Replaces all red chests until it is obtained. | ||
| Amazing Massage Chair | $100 | In the uppermost area of the volcano, in the third room from the left. | |
| Vita Mighty | In the room to the right of where the Sweatmore Hotpants are, accessed through a hidden passage. | ||
| Spooky Haunted Seaweed | $34,901 | Replaces the Vita Mighty during subsequent runs of the episode. | |
| Nifty Wario Poster | $8,355 | In the magma pool below where the Sweatmore Hotpants are obtained. | |
| Captain Mastery Gem | In the same area as the Nifty Wario Poster, in the bottom-right corner. | ||
| Forbidden Cheat Sheet | $320 | Replaces the Captain Mastery Gem during subsequent runs of the episode. | |
| Cutie-Pie Hypno Specs | $4,341 | On the far left near where Wario first enters the magma, accessible after obtaining the Captain Mastery Gem. | |
| Sweatmore Superhotpants | In the bottom-left corner of the volcano. | ||
| Train Window Painting | $7,901 | Replaces the Sweatmore Superhotpants after obtaining them and leaving the room. | |
| "Rare" Collectible Figurine | $145 | At the bottom of the tall room with the rising fireballs and RoboUrchins. | |
| Sweatmore Peak Map | In the upper-left corner of the room to the right of the one where the "Rare" Collectible Figurine is. | ||
| Hilarity Machine | $809 | In the upper-right corner of the room with the map. | |
| Titanium Chef Hands | $135 | In the bottom-right corner of the room with the map. | |
| Failed Teenage Romance Diary | $8,364 | In the small room at the bottom-right corner of the volcano. | |
| Rich Man's Ice Cream | $171 | In the room right before the boss room. |
Gallery

The opening cutscene

Wario next to a Fire Bar

The Barfatronic Lavachomper's bomb attack

The Barfatronic Lavachomper's weak point revealed
Count Cannoli speaking with his offscreen ally at the end of the episode


