Donkey Kong Country: Tropical Freeze
Template:Infobox Donkey Kong Country: Tropical Freeze, known in Japan as Donkey Kong Tropical Freeze (ドンキーコングトロピカルフリーズ), is a side-scrolling 2.5D platform game developed by Retro Studios and Monster Games for the Wii U. It is the fifth game in the Donkey Kong Country series. Dixie Kong and Cranky Kong appear as playable characters, in a role similar to that of Diddy Kong in Donkey Kong Country Returns, who is again available to play as. Each of these characters have unique abilities which they exploit to proceed in difficult situations. The main antagonists of the game, the Snowmads, are based on stereotypical Vikings and appear as antropomorphic, (sub)polar animals ranging from penguins and walruses to owls and hares.
The game was originally slated for release during November 2013 before being pushed back to December 6; it was later pushed back again to February 2014.[1] It can be purchased at retail stores, or digitally from the Nintendo eShop, with the digital version requiring 11300 MB (approx. 11.3 GB) of memory to be installed. Standard set Wii U consoles do not have enough internal memory to have this game downloaded on them without an external storage device, but deluxe set Wii U consoles do.
Story
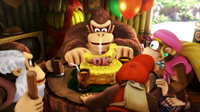
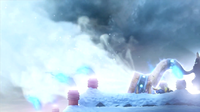
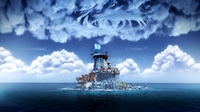
The story begins at Donkey Kong's hut, where the Kongs are celebrating his birthday. Suddenly, one of the balloons flies off the Kong house and over the sea, where Snowmad ships are stationed. Far away from the island, a Pointy Tucks watches over them, locating the Kong house and relaying info to their leader, shrouded in a dark silhouette. Upon the leader nodding their approval, the Pointy Tuckses bring him a horn which he blows, creating a large amount of wind, as well as an ice dragon.
Just as he is about to blow the candle out, Donkey Kong notices a mysterious snowflake appear and put out the candle on his birthday cake. He turns away with a frustrated look on his face as he hears an uproar, and he and the other Kongs exit the house. The ice dragon from earlier flies toward Donkey Kong Island, turning the sea under it to ice. The Kongs are then blown away from the island by the ice dragon's intense winds, landing on the Lost Mangroves island. Afterwards, a large ship stations itself where the Volcano from Donkey Kong Country Returns used to be, and the Snowmads seize Donkey Kong Island for their own, turning it into a frosty area with continuous snowfall.[2]
After traversing across 5 islands with each posing its own threats, the Kongs finally arrive at Donkey Kong Island under control of the Snowmads. The Kongs make their way through the frozen fortress until they encounter the leader of the Snowmads, Lord Fredrik, who challenges the Kongs to a final battle deep in the depths of the volcano. After a long battle, Donkey Kong delivers the final punch to Lord Fredrik, which sends him flying out through the roof of the Snowmad's ship, destroying it in the process. The Kongs wander out of the remains of the ship and look out from the mountainside to see the end of Lord Fredrik's fall. Lord Fredrik crashes into the remainder of the Snowmad ships out in the seas of the island, defeating the entire Snowmad clan and freeing the island from their control. Donkey Kong then notices the horn that was used to freeze their island fell out of Lord Fredrik's hands during his fall, which he catches and blows into, producing a breeze of flowers that carries the Kongs to the bottom of the island. The Kongs watch and rejoice as the breeze of the flowers flutter around the island, melting all of the ice and snow, returning Donkey Kong Island to its former glory.
Gameplay
Returning elements
Basic gameplay
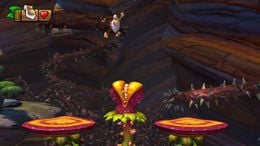
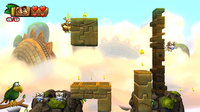
The gameplay of the title is very similar to that of its predecessor, Donkey Kong Country Returns. The Kongs are able to walk, run, jump, roll, pound the ground, as well as climb vines and ropes. By jumping, the Kongs can stomp on various enemies and defeat them; however, some enemies cover their top sides with shields or sharp objects, making them troublesome or dangerous to stomp on. Stomping on at least three enemies in a row grants the player one Banana Coin for each enemy stomped thereafter. The players start earning Extra Life Balloons if they achieve a combo of eight or more enemy stomps.
The Kongs can perform Ground Pounds in various places to break unsound structures (such as crates and cracked blocks), revealing items or secret paths underground. If executed near some foes, they will become dizzy and unable to attack or damage the Kongs for a short time. Likewise, ground pounding can be used to empty item containers, which are found in the immediate background.
The Kongs can also roll to knock enemies over from the side. Donkey Kong can perform this move on a short distance. Nonetheless, rolling can confer higher momentum than usual running; if Donkey Kong jumps while rolling, his jump will cover a longer distance than usual. If the ape rolls over the edge of a platform, he can quickly hop in mid-air and continue going forward, provided he lands on another platform; these speeding-up tricks are especially useful in Time Attack gameplay.
Diddy Kong returns as a playable partner for Donkey. He is the first Kong partner in the game to be encountered. With the small Barrel Jet mounted on his back, he can help Donkey Kong hover across pits and obstacles for a short time. Diddy wields a popgun which can fire peanuts. Upon getting shot out of the weapon, they bounce off the ground swiftly until smashing into a wall or an enemy. In the latter case, the enemy usually gets stunned for a brief moment after getting hit by the projectile; on the other hand, there are tougher enemies which are not affected by Diddy Kong's peanuts.
Vehicles
In specific levels of the game, Donkey Kong and co. are able to ride different vehicles. Firstly, the Mine Cart, which carries the heroes along railtracks which cannot be trod by foot. As the Mine Cart moves automatically, the Kongs can duck inside the vehicle or jump with it in order to dodge obstacles. Secondly, the Rocket Barrel, which is necessary to fly across wide chasms and normally has to be navigated through a series of hazards and enemies. It can be risen up or let to fall down. Lastly, Rambi the Rhinoceros (who is categorized as a "vehicle" in the game's instruction manual[3]), a powerful Animal Friend who can charge into enemies and defeat them. Otherwise invincible to most enemies even when standing still, he is still vulnerable to lightnings, fire enemies, or any other object protected by flames.
Health
The Kongs' health is measured in hearts. Donkey Kong naturally has two hearts – two more if he carries a partner with him, as well as an additional one if a Heart Boost is equipped. Each time the Kongs get damaged, they lose one heart from their health meter. If all of their hearts have been depleted, they lose one life. Hearts can be found along the way and are used to replenish the primates' health bar. Extra Life Balloons add more tries to the game. If all lives are lost, the players receive a game over and are prompted to restart the game from where their progress was last saved.
Level map and bonuses
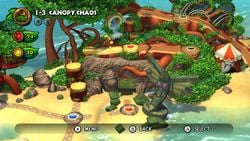
The game features a total of 63 levels (including boss and Hidden Kong Temple stages and excluding Funky's Fly 'n' Buy stations), grouped in seven island maps. Every island map is displayed from an aerial viewpoint and connects a system of paths, allowing players to take on different routes in order to reach a certain level. Once players complete a level, they open a new path or crossroad. Paths are navigated on foot, but Auto Fire Barrels are sometimes used on the way; Donkey Kong Island's map navigation, on the other hand, is entirely provided by Blast Barrels. Warping from an island to another is always released through Auto Fire Barrels.
On the map, non-boss levels are marked by circular pads, whilst boss stages are associated with star-shaped pads. Level pads light in several colors on different conditions: red pads mean their levels have not been completed yet; blue pads mean their levels have been finished at least once. Additionally, green pads relate to levels which have been completed on Hard Mode. Unlit/black pads are inaccessible, and switch to red when the paths that lead to them are unlocked.
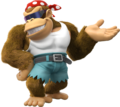
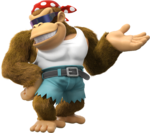
On each island, the Kongs eventually encounter a shop run by Funky Kong, which is always marked with white pads. The shop, Funky's Fly 'n' Buy, offers items that can turn helpful for the Kongs, in exchange for Banana Coins. The price for each item stays the same on the course of the game. Alongside items, which include Extra Life Balloons, Buddy Barrels, and Heart Boosts, the shop also displays a Toy Capsule Machine, which contains collectable toy figures representing characters from the game. Each of them costs five Banana Coins and can be obtained by chance. As the players progress through the game, more toy figures become available in the shop.
An uneven number of Puzzle Pieces (5, 7, or 9), as well as four K-O-N-G Letters, are spread in each level, excluding boss levels for both and Hidden Kong Temple levels for the latter. Puzzle Pieces unlock various concept artworks for the game, while K-O-N-G Letters are mandatory for unlocking Hidden Kong Temple stages; each world aside from the last one contains one of these stages. While some Puzzle Pieces are scattered throughout a level in different areas, some appear only after collecting a certain group of items. Bonus stages dedicated to collecting these items are oftenly featured within levels, and yield Puzzle Pieces after completion. These bonus stages can be accessed through hidden Blast Barrels.
Finishing all the levels of the game (including the Hidden Kong Temple ones) and acquiring every Puzzle Piece are amongst the mandatory requirements for full, 200% completion of the game.
New features
Kong partners
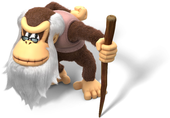
Donkey Kong Country: Tropical Freeze features more playable characters than Donkey Kong Country Returns. These are Dixie Kong and Cranky Kong. The former Kong can execute the Helicopter Spin with her ponytail in order to propel herself up in midair. Cranky harnesses the Cane Bounce by using his iconic rigid cane to combat or overcome some obstacles otherwise (potentially) dangerous to stomp on, such as urchins and thorns; the Cane Bounce can be seen as a substitute to Dixie Kong's Helicopter Twirl, as Cranky can bounce off the ground with his cane and take off to increased heights. With the inclusion of more than two playable characters in the game, a premiere feature in the series, the variety of Buddy Barrels has been invigorated. Players can stumble upon Diddy, Dixie, or Cranky barrels, with each displaying their name abbreviations – DD, DX, and CK respectively. These barrels are usually found separated from each other, while other constantly rotate and change their content, each time indicated by the cited abbreviations. In the standard mode of play, Donkey Kong can only carry one partner at the time; after freeing a completely new partner while transporting another one, the latter will cast itself out and make room for the other on Donkey's back. If the character in the chosen barrel is already seated on Donkey Kong, the primates can regenerate their health bar upon destroying such an item.
Underwater mechanics
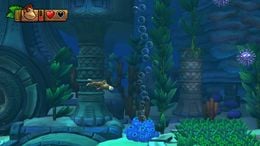
The game also presents ice and underwater levels, which were absent in Returns. The Kongs' ability to swim has been restored, even though it is altered from the Mario-styled swimming controls present in the original trilogy. In effect, the swimming mechanics are similar to those of the New Play Control! version of Donkey Kong Jungle Beat, where instead of pressing the jump button to gain momentum, the player has to move the stick /
buttons. The Kongs are now given limited air while underwater, requiring them to seek out air bubbles to survive. A Corkscrew attack has been added, with which the player can defeat certain enemies or collapse less durable structures while underwater.
Plucking ability
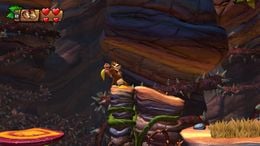
In a vast number of areas in the game, players can encounter orange handles fixed on the surface of platforms. The Kongs can pull these handles to uncover their roots from under the ground, which can be either bonuses or Barrel Cannons that launch them to other places. Upon plucking some of these objects, the Kongs are bound to assist to certain phenomenons that manipulate the contacted environment in some way or another.
The plucking function can help transport several objects, such as items, where the possibility to be carried and thrown exists - barrels, DK Barrels, and Watermelon Fuse Bombs are the most common items to be transported. Some can be taken directly from the ground, but other are buried under it and obtainable only by plucking handles. The player can actually haul even enemies, specifically those that are relatively small and wear orange helmets, like Tuff Fluffs and Tuff Tuckses. Portable items and enemies are sometimes necessary in order to destroy hinderances, bags with precious content, and tough foes.
Producer Kensuke Tanabe stated that the ability to pick up enemies and throw them, and overall the plucking capability, was inspired from Super Mario Bros. 2, which he directed.[4]
Camera movement and Kong POW
For the first time in the series, the camera angle can change dynamically in some levels where Blast Barrels or minecarts are found, showing more areas and perspectives of the scenery. A new feature in this game is the Kong POW attack, which turns all enemies on-screen into items. This move can only be performed when 100 bananas have been collected, as well as when there is a partner by Donkey Kong's side.[5]
Time Attack
A mode originating in Returns, Time Attack of any level can be accessed only after the player has hit the Slot Machine Barrel at the end of it at least once. It is available on single player and is a completely optional mode, meaning it does not unlock extra content in the game, nor contribute to its completion percentage.
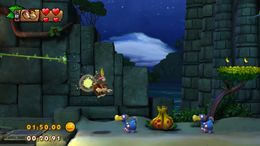
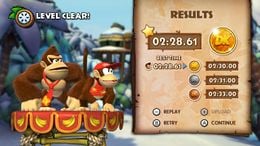
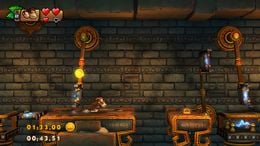
Before entering Time Attack, players are given the option to select a type of Buddy Barrel for the course of the chosen stage. During Time Attack, players have to guide Donkey Kong and, eventually, his partner to the level's finish barrel in the fastest time possible. Three time limits are set during the course, each corresponding to one of the gold, silver, and bronze medals. Should the heroes reach their destination before the stopwatch count surpasses one of these time limits, they are rewarded with the medal accordingly. The primates start off every race against time with a stopwatch count set to zero displayed on the screen and a chance of winning a gold medal; as the count advances and time elapses, the gold medal eventually switches to silver and, ultimately, to bronze, unless the players time the Kongs' movements so they reach the goal before one of the medal's time limit is struck. A special shiny gold medal can be obtained if the Kongs manage to reach the finish barrel at a particular time within the standard gold medal time limit. The milestone times for shiny gold medals are never displayed nor made clear.
It is to be noted that, unlike in other modes of the game, the Kongs do not lose a life after their health bar has been drained completely during Time Attack, further proving that exploring the game this way has no virtual effect on general gameplay.
While the aspects described above were previously present in Donkey Kong Country Returns, a noteworthy difference in Donkey Kong Country: Tropical Freeze is marked by the absence of Checkpoint Booths during the Time Attack mode. In the former game, if the Kongs would have lost all of their hearts from the health bar while racing in a level, they would be transferred back to the last checkpoint reached, with the stopwatch resuming its count and their health bar refilled. With the lack of checkpoints in Time Attack of Donkey Kong Country: Tropical Freeze, the heroes are prompted to restart the whole stage with the count reset to zero every time they fail progressing.
Additionally, in Donkey Kong Country: Tropical Freeze, if the Kongs finish a level in Time Attack mode without taking damage, their achieved medal will be accompanied by a heart icon. This icon is permanent until they achieve a better time.
Despite Checkpoint Booths being unavailable during Time Attack, Professor Chops retains his role as referee. During every race, he first shows up at the beginning, waving a small green flag in the rhythm of the countdown. After the Kongs break the finish barrel, he springs on the scene with a chequered flag, indicating the race has been terminated.
Time Attack Leaderboards
If connected to the Internet and signed into Nintendo Network, players are granted the possibility to upload their Time Attack records on a worldwide leaderboard. These records are associated to their Nintendo Network IDs. The global Time Attack rank of any level in the game can be accessed by selecting the "LEADERBOARDS" section on the Time Attack menu. The rank displays other player's time records on the said levels, as well as the Kong partner used and, occasionally, a replay of their progress to be observed.
Hard Mode
When players have collected all the K-O-N-G Letters in the game and have subsequently completed every level, an additional game mode, Hard Mode, is unlocked. Hard Mode can only be played with one Kong, marking the only occasion in the game aside from multiplayer sessions when one can take full control of Diddy, Dixie, or Cranky. Nevertheless, the characters are given a single heart to go along the selected level, and have to reach their destination without taking damage at all in order to complete the stage. Layout differences during Hard Mode are established by the removal of checkpoints. In order to complete the game 200%, every level in the game has to be finished in Hard Mode. During Hard Mode, the K-O-N-G Letters of each level are recolored from red to blue. Collecting them again in this mode replaces the red star icon next to a chosen level's name (marking that all letters have been previously obtained there) with a blue one, although it is not necessary for 200% completion and does not unlock anything.
Controls
The game can be played with either the Wii U GamePad, the Wii Remote alone and held horizontally, or the Wii Remote held vertically and connected to a Nunchuk. Below is a list of all controls that trigger the actions in the game, each for every style of playing.
Note that the moves marked with the color blue are abilities that are only utilised underwater.
 Wii U GamePad (primary controls)
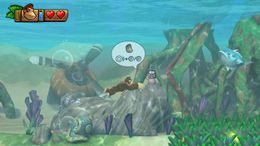
Solo & Co-op modes
- Left
– walk, run, crouch, swim
 or
or  – jump, Barrel Jet hover (button should be held while playing as/having Diddy), Helicopter Spin (button should be held while playing as/having Dixie), Cane Bounce (button should be pressed before landing on a platform, playing as/having Cranky), Swim Boost, Jet Blast (while playing as/having Diddy), Ponytail Propeller (while playing as/having Dixie), cane attack (while playing as/having Cranky)
 ,
,  – Ground Pound (while standing), Roll Attack (while moving), Kong Roll (while moving and having a partner), shoot popgun, Corkscrew
 or
or  – grab (enemies, objects), transport (button should be held - if released, the element transported will be thrown), pluck (handles)
 or
or  – Kong POW
 or
or  – enter pause menu
– enter HOME Menu
Co-op mode only
![]() or
or ![]() – carry partner (for player 1), mount/dismount Donkey Kong (for player 2)
– carry partner (for player 1), mount/dismount Donkey Kong (for player 2)
 Wii U GamePad (secondary controls)
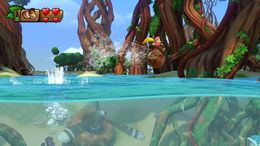
Solo & Co-op modes
- Left
– walk, run, crouch, swim
 or
or  – jump, Barrel Jet hover (button should be held while playing as/having Diddy), Helicopter Spin (button should be held while playing as/having Dixie), Cane Bounce (button should be pressed before landing on a platform, playing as/having Cranky), Swim Boost, Jet Blast (while playing as/having Diddy), Ponytail Propeller (while playing as/having Dixie), cane attack (while playing as/having Cranky)
 or
or  – grab (enemies, objects), transport (button should be held - if released, the element transported will be thrown), pluck (handles)
 ,
,  – Ground Pound (while standing), Roll Attack (while moving), Kong Roll (while moving and having a partner), shoot popgun, Corkscrew
 or
or  – Kong POW
 or
or  – enter pause menu
– enter HOME Menu
Co-op mode only
![]() or
or ![]() – carry partner (for player 1), mount/dismount Donkey Kong (for player 2)
– carry partner (for player 1), mount/dismount Donkey Kong (for player 2)
 Wii Remote (held horizontally)
Solo & Co-op modes
 – walk, run, crouch, swim
 – grab (enemies, objects), transport (button should be held - if released, the element transported will be thrown), pluck (handles)
 – jump, Barrel Jet hover (button should be held while playing as/having Diddy), Helicopter Spin (button should be held while playing as/having Dixie), Cane Bounce (button should be pressed before landing on a platform, playing as/having Cranky), Swim Boost, Jet Blast (while playing as/having Diddy), Ponytail Propeller (while playing as/having Dixie), cane attack (while playing as/having Cranky)
- Shaking
 – Ground Pound (while standing), Roll Attack (while moving), Kong Roll (while moving and having a partner), shoot popgun, Corkscrew
  – Kong POW
 or
or  – enter pause menu
 – enter HOME Menu
Co-op mode only
![]() – carry partner (for player 1), mount/dismount Donkey Kong (for player 2)
– carry partner (for player 1), mount/dismount Donkey Kong (for player 2)
 Wii Remote (held vertically) and
  Nunchuk
Solo & Co-op modes
 – walk, run, crouch, swim
 – jump, Barrel Jet hover (button should be held while playing as/having Diddy), Helicopter Spin (button should be held while playing as/having Dixie), Cane Bounce (button should be pressed before landing on a platform, playing as/having Cranky), Swim Boost, Jet Blast (while playing as/having Diddy), Ponytail Propeller (while playing as/having Dixie), cane attack (while playing as/having Cranky)
 or
or  – grab (enemies, objects), transport (button should be held - if released, the element transported will be thrown), pluck (handles)
- Shaking
 and
and  – Ground Pound (while standing), Roll Attack (while moving), Kong Roll (while moving and having a partner), shoot popgun, Corkscrew
  – Kong POW
 or
or  – enter pause menu
 – enter HOME Menu
Co-op mode only
 or
or  – carry partner (for player 1), mount/dismount Donkey Kong (for player 2)
Characters
Playable characters
| Character | Description | Kong POW Ability |
|---|---|---|
|
|
N/A |
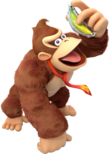
| Donkey Kong | ||

|
|
Turns enemies into Red Balloons, which add lives. |
| Diddy Kong | ||

|
|
Turns enemies into Gold Hearts, which allow extra hits from enemies. |
| Dixie Kong | ||
|
|
Turns enemies into Banana Coins, which can be used to purchase items in Funky's Fly 'n' Buy. |
| Cranky Kong |
Supporting characters
| Character | Role | ||
|---|---|---|---|
 Funky Kong |
Runs the Funky's Fly 'n' Buy shop, which sells various items in exchange for Banana Coins, similarly to Cranky Kong's Shop from the previous installment. | ||
 Professor Chops[6] |
Runs the checkpoint booths in each level as he did in Donkey Kong Country Returns. | ||
 Rambi the Rhino |
Rambi retains his role as the sole ridable Animal Friend. He can bash into enemies easier than the Kongs and can break some walls or other big objects that the Kongs cannot normally break. He can also defeat enemies by just walking into them. He is effective to lightning and runs away as he bumps into enemies. | ||
 Squawks the Parrot |
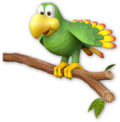
Squawks retains his role as a purchasable item, and will warn the player if Puzzle Pieces are nearby during a stage.[7] | ||
Bosses
The bosses of this game are each faced at the end of every world. Below is a list of all bosses in the game, with their respective level and the world they are encountered in mentioned inside parentheses.
- Pompy, the Presumptuous (Big Top Bop, Lost Mangroves)
- Skowl, the Startling (Mountaintop Tussle, Autumn Heights)
- Ba-Boom, the Boisterous (Triple Trouble, Bright Savannah)
- Fugu, the Frightening (Fugu Face-Off, Sea Breeze Cove)
- Bashmaster, the Unbreakable (Punch Bowl, Juicy Jungle)
- Lord Fredrik, the Snowmad King (Volcano Dome, Donkey Kong Island)
Enemies
Snowmads
Below is a table containing all the minion sub-species enrolled in the Snowmad army, classified into categories. They are followed by a brief description on their behavior and combat. The first and final in-game level appearances of each enemy is also mentioned.
| Tuckses | ||||
|---|---|---|---|---|
| Name | Description | First level appearance | Last level appearance | |
| Tucks | A short, hunched penguin foe that simply roams around ground areas. It can be defeated by any mean of attack, including stomping and rolling, but it can grant damage to the Kongs in one flipper smack. | Mangrove Cove | Crazy Clouds | |
| Speedy Tucks | A variant of Tucks that heads for the Kongs whenever they are in proximity of it. Speedy Tuckses can be downed with any attack. | Twilight Terror (seen in the background, loading fish with a Tucks) Shoal Atoll (encountered as an obstacle) |
Slippy Spikes | |
| Tuff Tucks | A hunched penguin enemy that wears a winged helmet on its head. Should the Kongs jump its helmet, the enemy will turn dizzy and fall on its back, becoming ready to get picked up, carried, and hurled by the heroes when necessary. This way, they become weapons against other enemies; they can also break fragile walls which hide secrets. | Mangrove Cove | Rocket Rails | |
| Pointy Tucks | A penguin Snowmad that wears a viking helmet. This helmet has very sharp horns pointed upwards, which make run-of-the-mill stomping on the enemy impossible. Nevertheless, the Pointy Tucks can be rolled into, hit with a thrown object, or crushed with Rambi. | Shipwreck Shore | Icicle Arsenal | |
| Trench Tucks | A derivative of Pointy Tucks that carries a viking-esque shield. This shield prevents any roll attack from the Kongs that could be applied to the enemy's front side, and since its helmet's spikes also prevent them from stomping the penguin, its only vulnerable place is the back side, whereinto the Kongs can roll. | Frantic Fields | Meltdown Mayhem | |
| Archy | A penguin warrior that transports fish in a quiver. The warrior uses the fish as projectiles for its bow, and therefore as weapons against the Kongs. After being shot, the fish follow a straight horizontal trajectory in the air, and can be jumped on as from platform to platform in order to reach far cliffs. Then, the Archy can be also stomped on or rolled into in order get defeated. | Canopy Chaos | Icicle Arsenal | |
| Boom Bird | A red-colored penguin that holds a Watermelon Fuse Bomb on its back. The penguin itself is not very different from the weakest kind of Tucks, as it perishes no matter what attack technique the Kongs use on it. However, it drops the bomb after getting defeated, and the bomb, whose fuse has already begun to burn, can be used as projectile to defeat strong enemies or unveil certain secrets. | Cannon Canyon | Icicle Arsenal | |
| Painguin Tucks | A penguin-like foe that tries to stab the Kongs with the spear it holds - the spear is, in fact, a long stick decorated with the sharp bones of a dead fish. Both ends of the spear are sharp and dangerous, and so, the only unprotected place of the Painguin Tucks is its head. | Mangrove Cove | Rocket Rails | |
| Papa Painguin | A Painguin Tucks wearing a helmet just like that of a Pointy Tucks. At first, it seems entirely protected from all physical encounters with the Kongs (even though Rambi's powerful horn or a barrel thrown at the Papa Painguin can defeat it instantly) due to its spear and its spiky helmet. Nonetheless, the Kongs can do a ground pound near the foe, so that it gets dizzy for a moment and drops its spear, leaving his front and back sides unprotected and prepared to be rolled into. | Deep Keep | Rocket Rails | |
| Soary | An aviator penguin capable of flying. Soaries are gathered in groups and soar towards the Kongs in a straight line. They can be simply defeated with a stomp. | Alpine Incline | Slippy Spikes | |
| Bouncy Tucks | Tuckses that bounce on springy surfaces are called Bouncy Tuckses. They can be defeated with a jump, but they usually stomp on the Kongs instead, in their attempts to fly. | Windmill Hills | Jelly Jamboree | |
| Big Sphen | A massive penguin Snowmad which carries a blowing horn, and uses it to shoot icy fish at the Kongs. These fish slide down their paths and can be stomped on. Likewise, it is possible to defeat a Big Sphen with three stomps or three roll attacks. | Big Top Bop | Slippy Spikes | |
| Fluffs | ||||
| Name | Description | First level appearance | Last level appearance | |
| Fluff | Fluffs are hare Snowmads, pertaining to the most generic soldiers along with Tuckses. They constantly leap from side to side. Fluffs can be defeated with any attack technique. | Mangrove Cove | Dynamite Dash | |
| Tuff Fluff | A Fluff enemy that wears an orange helmet, identical to that of a Tuff Tucks. It can be distinguished from the common Fluff due to its lighter fur colorition. If the player manages to stomp on a Tuff Fluff while the enemy is hopping around, it will fall on the ground, ready to get picked up and tossed into other hazards. | Horn Top Hop | Volcano Dome | |
| Harey | A white-furred, overweight Fluff that pounds the ground and creates sharp ice waves, dangerous to the Kongs. Hareys can perish if the player stomps on them three times. | Reckless Ride | Homecoming Hijinxs | |
| Harold | Similar to the Harey, Harold is overweight, but its attack method is different. It continuously throws Watermelon Fuse Bombs at the player's character in an attempt to blow him up. However, before they detonate, the bombs can be passed back at the Harold, which is the simplest way to defeat such a monster. | Sea Stack Attack | Rocket Rails | |
| Hootz | ||||
| Name | Description | First level appearance | Last level appearance | |
| Hootz | Hootz are owl-like enemies with irritated looks on their figures. They fly around in set patterns and can be defeated in any way, the most efficient one being stomping. By stomping on a row of Hootz, the player can advance over large chasms. | Trunk Twister | Crazy Clouds | |
| Hot Hootz | An orange Hootz that engulfs itself periodically with fire, and conveys it in a fireball that gets sent towards the Kongs' current position. Hot Hootz are best to be avoided, since they are quite imprevisible when catching fire. Other than this, they appear to be standard Hootz that can be downed with any attack method. | Swinger Flinger | Crazy Clouds | |
| Puffton | An overweight Hootz that obviously occupies more space than any regular Hootz. It can be defeated with three normal stomps on its head, but a stomp from Rambi can be decisive to it. | Windmill Hills | Crazy Clouds | |
| Tuffton | Tufftons are Pufftons wearing plate orange helmets. They serve not only as shield against the player's stomps, but also as handy platforms for them. One of the few attacks that is effective to them is Cranky Kong's Cane Bounce, which, performed three times on their helmets, can down the foes. | Windmill Hills (seen in the level's introduction) Horn Top Hop (encountered as an obstacle) |
Slippy Spikes | |
| Blue Hootz | A tiny owl-resembling creature covered in blue flames all the time. Only attacks from the distance, such as barrel throwing, are productive in defeating a Blue Hootz. | Zip-Line Shrine | Crazy Clouds | |
| Waldoughs | ||||
| Name | Description | First level appearance | Last level appearance | |
| Waldough | A large walrus foe who stutters and tries to harm the Kongs. It can be jumped on (or rolled into) three times before its defeat. Waldoughs can also be crushed with Rambi the Rhinoceros, or downed with a thrown carriable object. | Mangrove Cove | Meltdown Mayhem | |
| Walnut | A walrus enemy almost identical to the Waldough, with the only element that distinguishes it being the orange helmet on its head. The helmet prevents absolutely all stomp attacks (except Cranky's Cane Bounces), and thus the Walnut can only be defeated with three roll moves onto his front or back side. | Frantic Fields | Meltdown Mayhem | |
| Walbrick | A walrus warrior covered in armor, including a Walnut's helmet. The enemy also wields a large, round wooden shield that protects the Walbrick from the Kongs' roll attacks. Albeit its back is not covered, the Walbrick turns around if the Kongs are behind it. The economical method to defeat the walrus is to stomp on its helmet so it becomes dizzy, and while it stands in one place, it can be attacked one time from behind. The action needs to be repeated two more times in order to proceed defeating the enemy. | Mountain Mania | Blurry Flurry | |
| Chum Chucker Charlie | A guerilla walrus that holds a basket with fish. It throws the fish at the Kongs, and these fish are actually harmful. The player must play safe around a Chum Chucker Charlie and try to destroy it with three hops on its head. | Fruity Factory | Icicle Arsenal | |
| Fish Poker Pops | The only horned helmet-wearing member of the Waldoughs, Fish Poker Pops is dangerous to be jumped on. It carries and uses a large dumbbell weapon, with spiky pufferfish tucked into its ends. While it raises the powerful weapon in the air, the Snowmad foe can be rolled into three times to inflict damage. | Spinning Spines | Rocket Rails | |
| Other | ||||
| Name | Description | First level appearance | Last level appearance | |
| Lemmington | As the singleton of its category, Lemmington is some kind of hybrid between a hamster and a walrus. It rolls a spiky wheel that clings to any surface and charges into the Kongs. The only way to defeat a Lemmington is to pound the surface its wheel is on. | Horn Top Hop | Icicle Arsenal | |
| Ice dragon | A powerful and rabid monster made of ice. Ice dragons are released through Lord Fredrik's horn and fly out, but plummet on the ground shortly after. As they crash, they freeze the patch of ground they fell onto, creating a slippery surface. | Volcano Dome | Volcano Dome | |
Other enemies and obstacles
Along with the mischievous Snowmads, there are also many other foes, as well as obstacles, the Kongs have to fight or avoid throughout their adventure. Some enemy species, which otherwise act the same, change in appearance. Below is a table with all of the enemies and obstacles not related to the Snowmads.
| Enemies which are not specific to any island | ||||
|---|---|---|---|---|
| Name | Description | First level appearance | Last level appearance | |
| Chomp | One steadfast carnivorous plant that can be usually found hanging down from the thicket, plunging towards the Kongs in an attempt to devorate them. Chomps can only be defeated if a carriable object, such as a barrel, is thrown at it. | Mangrove Cove | Bramble Scramble | |
| Finley | Finleys are regular fish enemies that follow set patterns when swimming. They are harmful if touched, but vulnerable to Corkscrew attacks or Cranky Kong's cane swipes. Finleys come in light-blue and red variations, with the former being more calm in temper. | Mangrove Cove | Rocket Rails | |
| Gargantuan Gills | A family of enormous fish predators that can only be encountered in vehicle-riding sequences of the game. Most of them roam around savannah waters while keeping their dorsal sides over the surface, potentially crashing their upper appendages into the Kongs. Other jump out of the water in attempts to gobble up the heroes before plunging back. Some munch the primates' railtrack, and one specimen even tries to hunt the Kongs down a waterfall. | Twilight Terror | High Tide Ride | |
| Gordo | A fish fiend that is considerably larger and tougher than a Finley, but otherwise behaves the same. It can only be destroyed with three consequent Corkscrew moves, or three cane swipes from Cranky. | Shipwreck Shore | Rocket Rails | |
| Snaggles | Snaggles resemble great white sharks and are quite menacing enemies, despite their goofy look. They try to take a snatch from the Kongs, and are even capable of doing so outside water by jumping real high in the air. Under water, Snaggles pursue the heroes trying to attack them. Snaggles can be defeated with throwable objects or with Cranky's cane swipes, but never with a simple Corkscrew move, as this can have bad results. | Shipwreck Shore | Rockin' Relics | |
| Yellow Snaggles | An ochre-colored variation of Snaggles that is not able to leap from the water, unlike its cousin. Nonetheless, it functions the same underwater, as it tries to bite the Kongs; Snaggles enemies cannot be cast out with a Corkscrew move, but Cranky's cane is an efficient weapon against them. | Shoal Atoll | Panicky Paddles | |
| Lost Mangroves enemies | ||||
| Name | Description | First level appearance | Last level appearance | |
| Dozy | A bird foe that walks from side to side. The Kongs can get damage from this enemy if they simply head into it. Dozies are not difficult to defeat, since any attack method can bring their doom. They are identical in behavior with simple Tuckses. | Mangrove Cove | Busted Bayou | |
| Mimic | A mysterious enemy hiding inside a bush and waiting for its prey - the Kongs. Upon setting its target, Mimics walk in the direction of the heroes, but soon turn out to stroll aimlessly. They can be defeated by any attack method possible on dry land. | Busted Bayou | Busted Bayou | |
| Large Mimic | Merely a bigger variation of Mimic. It can be defeated by any mean of attack. | Busted Bayou | Busted Bayou | |
| Monocle Monica | What looks like a pink dragonfly wearing a monocle is called a Monocle Monica. It is very similar to Hot Hootz, in that it also flies in set trajectories. However, its moves are more sudden and rapid, like that of flying insects. Monocle Monicas can be downed by stomps and thrown objects. | Shipwreck Shore | Busted Bayou | |
| Punchy Paddy | A grasshopper foe that hops up and down in a strictly vertical line. While it jumps quickly, the enemy only descends slowly. It can be defeated with any attack method, but can also be dangerous if it happens to land on the Kongs. | Mangrove Cove | Busted Bayou | |
| Sour Dodo | A blue-colored enemy modeled after Dozy, only that it deliberately runs into a Kong upon spotting him. It is vulnerable to any attacks, and can be compared to Speedy Tuckses. | Mangrove Cove | Busted Bayou | |
| Thug Slug | A slug enemy. It sticks to any platform, crawling on all of its sides. Thug Slugs can be defeated anyhow. | Canopy Chaos | Trunk Twister | |
| Wild Wendell | A turtle-resembling foe that wears aviator goggles. When on dry land, should the player stomp this enemy, it retracts within its shell, which can afterwards be transported and hurled into other foes. Wild Wendells can also be found floating on water; in this stance, they can be defeated with a Corkscrew move from the beneath the surface of the water. | Mangrove Cove | Canopy Chaos | |
| Autumn Heights enemies | ||||
| Name | Description | First level appearance | Last level appearance | |
| Cheesy Chester | Rat enemy with an attitude: it can be first seen strolling on its back feet, but after noticing the Kongs, the Cheesy Chester begins walking on all its feet, moving considerably faster. Cheesy Chesters grant damage to the Kongs when coming in usual contact with them, but are also vulnerable to any attack. | Windmill Hills | Rodent Ruckus | |
| Schnautzel | A fiery wild boar. After setting their aim for the Kongs, Schnautzels shoot fireballs from their huge snouts at them. Three stomps (or, alternatively, three carefully timed roll attacks), as well as a barrel roll, are effective against these pigs. | Windmill Hills | Horn Top Hop | |
| Bright Savannah enemies | ||||
| Name | Description | First level appearance | Last level appearance | |
| Buffaloafer | A massive and strong buffalo that rams into the heroes in an attempt to harm them with its large horns. It will fling the Kongs up into the air if they simply hop on its back. Despite this, there are several strategies that bring an end to this enemy: firstly, it can be lured into an abyss; secondly, it can accidentally hit a wall (or collide with the Kongs' roll attacks) and turn upside down, leaving its vulnerable spot, the belly, unprotected; lastly, Cranky's Cane Bounce can make the Buffaloafer instantly disappear after three bounces on its back. | Baobab Bonanza | Bramble Scramble | |
| Flaming Falling Totem Pole | A dormant stone pillar that suddenly awakens when the Kongs get close to it. After this, it collapses on the ground and passes out, being very dangerous to the Kongs if they stay right in the place where the pillar is supposed to fall. The primates can climb on the now fallen enemy and pound it to break it. | Scorch 'n' Torch | Scorch 'n' Torch | |
| Porcupal | A fire-attributed porcupine enemy that engulfs itself in flames and startles its bristles to defend itself from the Kongs. Porcupal's flames eventually go out, and its bristles settle down its back, becoming vulnerable to any attack the Kongs can perform on dry land. Even while under the fire, Porcupals can be knocked out with water balloon fruits. | Frantic Fields | Bramble Scramble | |
| Swooper Dooper | A peculiar flying flamingo foe that swoops continuously, trying to attack the Kongs. It can be destroyed by any manner of attack. | Grassland Groove | Bramble Scramble | |
| Sea Breeze Cove enemies | ||||
| Name | Description | First level appearance | Last level appearance | |
| Fritz | A sneaky underwater enemy that resembles an eel. Fritz releases shock waves around itself, and then swiftly teleports to another close area. Considering the enemy's attacks negligible, it can be destroyed by any attack method that can be approached underwater, including a Corkscrew move. | Deep Keep | Shoal Atoll | |
| Green Fish | The spikeless blowfish that Fugu summons during his battle. Green Fish are exhaled by the big boss, who approaches several attempts to hurt the Kongs by doing so. However, they can be deflected with Corkscrew moves or cane swings and sent back to their master, who gets hit and subsequently damaged. | Fugu Face-Off | Fugu Face-Off | |
| Jellyfish | Almost invulnerable enemies that can be found swimming either vertically or around stones. They are not affected by any of the Kongs' direct attacks, and will instead shock them with electricity upon contact. Jellyfish only perish if the heroes perform a Kong POW nearby. | Deep Keep (seen in the level's introduction) Amiss Abyss (encountered as an obstacle) |
Amiss Abyss | |
| Mama Saw | A small, chubby sawfish enemy that swims from side to side. Its spiky frontal saw is harmful for the Kongs, but its rear is not - a Corkscrew attack can be performed there, had the player proof the patience to wait for the Mama Saw to turn around. | Irate Eight | Shoal Atoll | |
| Pufftup | A pufferfish that inflates itself periodically, as expected. In this state, the spikes on its body are revealed, which can sting the Kongs and bring them nothing more than damage. While inflated, the Pufftups are still helpless against Cranky's powerful crane. They eventually deflate themselves, getting exposed to any attack coming from the Kongs. | Amiss Abyss | Shoal Atoll | |
| Sea Urchin | Simply an urchin foe with two cartoonish and seemingly confused eyes. Sea Urchins usually get driven by underwater currents, and can form a rather nasty danger for the Kongs. Due to its ever-lasting, not safe to be touched spikes, the only way to destroy a sea urchin is to swing Cranky Kong's cane into it. | Big Top Bop | Fugu Face-Off | |
| Squiddicus | A legendary-sized kraken that impedes the Kongs in the level, Irate Eight. Its lethal tentacles are covered in spikes, and, as the monster tries to slip them through tight gaps and tunnels, the primate heroes need to dodge Squiddicus with careful movements underwater. The creature also leaves a deadly cloud of ink, which the Kongs have to save themselves from. | Irate Eight | Irate Eight | |
| Juicy Jungle enemies | ||||
| Name | Description | First level appearance | Last level appearance | |
| Bouncelisk | A lizard foe that slithers on its path while transporting an overgrown and bouncy round fruit with its tail. The Kongs can use this fruit as improvised trampoline, in order to reach high areas or items. Although, unlike other enemies, they can actually aid the Kongs, Bouncelisks are still dangerous reptiles. A quick roll attack can solve this problem. | Harvest Hazards | Jammin' Jams | |
| Bucky | A yellow caterpillar enemy that clings to any surface, in the manner of Thug Slugs. Buckies leave trails of toxic gas behind, and when hanging down the ceiling, they release big, dangerous bubbles that descend slowly. Any attack method is effective against these enemies, but only when they are encountered normally; just barrels are apt to defeat upside down Buckies. | Harvest Hazards | Harvest Hazards | |
| Buzzy | A grouchy bee that flies towards the Kongs when tempted to do so. It is a potentially dangerous enemy indeed, but it can be jumped on. | Spinning Spines | Beehive Brawl | |
| Chompasaurus | A beastie resembling a carnivorous plant that is capable of walking. Aside from marching on the ground, Chompasauruses can also be found sticked to ceilings. In either case, they project their long and very stretchy tongues at the Kongs. If the primates do not dodge their organs in time, they get stuck to it and find their way inside the plants' mouths. Hope is not even then lost, as the Kongs can beat the monsters up from inside, if the player presses |
Reckless Ride (seen in the background) Fruity Factory (encountered as an obstacle) |
Beehive Brawl | |
| Punch Piranhas | Small predator fish encountered in the jungle's punch ponds. They quickly hunt anything dropped in their waters, including the Kongs. Punch Piranhas cannot be defeated. | Punch Bowl | Punch Bowl | |
| Toucan't | An innocent and small toucan-like foe that constantly rolls a spiky and seemingly stinky fruit down the path. From time to time, Toucan'ts stop and leap unreasonably from their fruit, letting the Kongs pass beneath them, provided they mind the spiky fruit on the ground. A single stomp can defeat a Toucan't. | Harvest Hazards (seen in the level's introduction) Panicky Paddles (encountered as an obstacle) |
Jammin' Jams | |
| Donkey Kong Island enemies | ||||
| Name | Description | First level appearance | Last level appearance | |
| Electroid | A small, electric enemy. Electroids follow conductible wires, but can also oftenly be found standing underneath pressure platforms, waiting to electrocute the Kongs. Electroids are invincible. | Frozen Frenzy | Frozen Frenzy | |
| Snowballs | Hazards usually encountered in mid-air, as they are shot by bombards. They also spring in the air when their platforms get flipped by large objects. They are dangerous and have to be dodged. | Blurry Flurry | Blurry Flurry | |
| Snowflake | Icy obstacles cluttered in rows. They drop down from the sky and float along a set path in the air. While dangerous to touch, they can be destroyed with any projectile or with a Cane Bounce. | Forest Folly | Forest Folly | |
Objects
Below is a table containing all collectables and projectiles found in the game. What goes under the name of "collectable" is a gameplay element which can be collected and stored to a specific counter. Usually, when this counter reaches a certain number or magnitude, a special gameplay-related event will take place. A projectile represents an item which can be picked up and used as weapon.
Mechanisms are objects which trigger actions or uncover items after the Kongs affect them. Vehicles refer to certain apparatuses that are used as mandatory ways of locomotion during select levels of the game.
| Collectables | ||||
|---|---|---|---|---|
| Item | Description | |||
| Banana | Bananas are the most profuse items in the game. They are usually found floating in the air and arranged in straight or circular rows. However, a smaller amount of them can be revealed upon snatching Item Handles. It is sometimes mandatory to collect bananas, specifically those placed in more complex arrays and in more difficult level segments (as well as in the trail of a Flying Banana), in order to unlock Puzzle Pieces and other items, provided the player aims to fully complete the game. Bananas are simultaneously conveyed in diverse ways: when a total of one hundred is acquired, the player earns an extra life; also after collecting one hundred bananas, the Kongs become eligible to perform a Kong POW. The main target of Bonus Areas is collecting items, mostly including bananas. | |||
| Banana Bunch | A cluster of bananas, sometimes worth five bananas, other times worth ten, depending on their constitution. Although common, they are more rare than singular bananas. | |||
| Banana Coin | Banana Coins represent the currency in the game. They are rather frequent and can be obtained either by usual ways, or by performing a task such as collecting a set of bananas. Likewise, stomping three or more enemies in a row also grants the players Banana Coins. Using Banana Coins, the player can purchase goodies from Funky Kong's shop. | |||
| Heart | Hearts compose the Kongs' health meter. If they get damaged once and therefore lose one point from their meter, they can replenish it with one heart found along the way. | |||
| Extra Life Balloon | As the least common items in the game, Extra Life Balloons grant supplementary tries for the player. A few can be found floating in the air, but they can mostly be acquired by performing tasks, as how the player needs to do for some Banana Coins or Banana Bunches in the game. After the player's character stomps on eight enemies in a row, he stops receiving Banana Coins and gets awarded Extra Life Balloons instead. | |||
| K-O-N-G Letters | These are precious square pieces, each having one of the letters "K", "O", "N" and "G" printed on them. In conclusion, there are four of these items in each level of the game (excluding bonus and boss levels), and are placed orderly in each stage to spell the word "KONG". Their sole role in the game is to unlock the bonus levels of each world, given that all the K-O-N-G Letters of the respective world are collected. | |||
| Puzzle Piece | Puzzle Pieces, as items, do not affect gameplay in any way, and only unlock concept artwork available by accessing the "Extras" menu. As challenge creators, they are a great factor of gameplay, as they are usually placed in the most secretive zones - for example, behind walls that stand between the player and actual paths; they also appear after completing a bonus stage, or after collecting occasional sets of bananas. | |||
| Air Bubble | Air Bubbles are generated underwater by sunken diving helmets. The Kongs can pop these to gain air, necessary for respiration. In other words, Air Bubbles fill up the Kongs' air meter. | |||
| Mysterious Relic | Mysterious Relics are similar to Rare Orbs from the previous game; they are required to access a secret world, Secret Seclusion. Six of them are obtained by completing the temple levels in the game, while the seventh and final one is obtained after beating the game. | |||
| Projectiles | ||||
| Item | Description | |||
| Barrel | Donkey Kong's signature object is present in this game. It can be heaved and carried by any Kong until the player decides to let it loose, which means to make the Kong throw it. After being thrown, the barrel rolls on the ground and knocks out every foe in its path until it smashes into a wall. | |||
| Buddy Barrel | Buddy Barrels are more common than regular barrels. In the standard game mode and Time Trial mode, Buddy Barrels contain either Diddy, Dixie, or Cranky Kong, each character having unique powers. If Donkey Kong lacks a partner, he can redeem him by throwing and breaking such barrels (otherwise, these barrels are empty) if he encounters them. As weapons, Buddy Barrels function differently from regular barrels, in that they break instantly upon contact with any platform, without rolling. In Hard Mode, since the player can only make use of one character, all Buddy Barrels are empty and useful only as weapons. | |||
| Watermelon Fuse Bomb | Bombs that take the form of spherical melons are called Watermelon Fuse Bombs. After pulling certain Item Handles, the Kong extracts such explosives from the ground; enemies called Boom Birds, as well as Harolds, wield these bombs and can be considered sources of explosives too. Watermelon Fuse Bombs can be carried and hurled just like barrels, but they detonate after several moments of fuse burning. Their explosions can take out groups of enemies and/or cracked surfaces and blocks. | |||
| Water Sack | Water Sacks are found in stacks on the ground. They can be picked up and thrown one at a time. As such, they hurt any enemy that gets hit, but they also extinguish firey enemies or spots due to being water holders. | |||
| Miscellaneous | ||||
| Item | Description | |||
| Containers | These are objects that work on the same principle, even though they borrow distinct appearances and names, depending on the level theme they pertain to. Such objects are initially background props whose accessibile terrains can be approached and ground pounded; if so done, these objects will receive the pounding shock and collapse to reveal collectables of great diversity (Banana Bunches, Extra Life Balloons etc.). | |||
| Collapsible Underwater Grass | Underwater grassy patches of ground whose plants retract their stems to reveal items. This happens whenever the Kongs approach them. | |||
| Spinning Platform | A rotatable surface hidden amongst usual ground. Spinning Platforms hide pits that transport the heroes either into bonus areas or merely into hidden areas that contain loot. They can be worked with a simple ground pound. | |||
| Item Handle | Item Handles are lever mechanisms that are always encountered on the ground. They can be pulled upwards, but not all of them have the same role. Most of them keep items of all sorts underground, and after the Kongs exert a force on them, they reveal the items. Nevertheless, other handles are essential to the gameplay, since they bring about events such as the creation of platforms. | |||
| Burlap Hanging Sack | A heavy sack made of cloth that lies hanged with a long rope. The rope's upper end is never seen. Hanging sacks can be broken open with projectiles to reveal treasures. | |||
| Vine-Triggered Platform | A platform that normally stays in a vertical position, but drops horizontally whenever the Kongs tension its vine connected underneath. The platform reveals collectables whenever it drops down. It is timed, however, and will go back to its vertical position after a while. | |||
| Jelly Block | Jelly Blocks are very large and highly elastic objects whereon the Kongs can bounce. When they are encountered in rows, they usually contain items. To get them out of a Jelly Block, the Kongs have to bounce on any other adjacent Jelly Block. These bouncy mold objects come in three colors: purple (regular), green (with a higher elasticity, thus offering better bouncing capabilities), and blue (causing a moving structure to work when pressed). | |||
| Vehicles | ||||
| Item | Description | |||
| Minecart | Minecarts make up the main gameplay gimmick in a few levels, as they transport the Kongs on railtracks. Players can jump over dangerous gaps or other obstacles while their character is in the minecart. It moves forward automatically, and thus the only possible thing the player can do to keep the Kongs safe is to have them dodge every hazard on the way. | |||
| Rocket Barrel | An aerodynamic machine very similar in concept with the minecart, the rocket barrel moves forward at a constant velocity. It transports the Kongs throughout very steep tunnels or over wide chasms, using its fuel power. It can only be controlled to ascend or descend (or move from left to right, in case of vertical transportation). | |||
Worlds and levels
The game has seven total islands, consisting of six "main" islands and one secret island (Secret Seclusion), which serve as the game's worlds. Though the course of each world, the Kongs can visit Funky's Fly 'n' Buy item shop, where Funky Kong sells life balloons and other balloons, portable partner barrels, Banana Juice, Heart Boosts, Crash Guards, and figurines of characters in the game that can be obtained through a capsule toy machine.
The table below lists all of the worlds and levels in the game, including their respective music theme and number of Puzzle Pieces. Since not every musical composition in the game has been given a name, several of the ones shown are either described as covers from the past Donkey Kong games, or merely marked as conjectural with a pointy line.
Note that the titles of the musical themes which are succeeded by an asterisk (*) in the following table are stated in Super Smash Bros. for Wii U.
| Worlds and levels | ||||
|---|---|---|---|---|
| Lost Mangroves | ||||
| Level number | Level name | Number of Puzzle Pieces in the level | Music theme | |
| 1-1 | Mangrove Cove | 9 | "Mangrove Cove" "Mangrove Cove Underwater" | |
| 1-2 | Shipwreck Shore | 9 | "Shipwreck Shore" | |
| 1-3 | Canopy Chaos | 7 | "Mangrove Swing" | |
| 1-4 | Trunk Twister | 5 | Template:Conjecturaltext | |
| 1-A | Zip-Line Shrine | 5 | A cover of "Jungle Hijinxs" from Donkey Kong Country Returns, very similar in tone to "Jungle Jitter" from the Game Boy Advance version of Donkey Kong Country 3 | |
| 1-B | Busted Bayou | 9 | Template:Conjecturaltext | |
| 1-K | Swinger Flinger | 5 | A cover of "King of Cling" from Donkey Kong Country Returns | |
| 1-Boss | BOSS LEVEL: Big Top Bop | 0 | Template:Conjecturaltext | |
| Autumn Heights | ||||
| Level number | Level name | Number of Puzzle Pieces in the level | Music theme | |
| 2-1 | Windmill Hills | 9 | "Windmill Hills" | |
| 2-2 | Mountain Mania | 7 | Template:Conjecturaltext | |
| 2-3 | Horn Top Hop | 5 | Template:Conjecturaltext, with several variations depending on the location of the player in the level | |
| 2-4 | Sawmill Thrill | 5 | "Sawmill Thrill" | |
| 2-5 | Alpine Incline | 5 | "Alpine Incline" | |
| 2-6 | Wing Ding | 5 | Template:Conjecturaltext | |
| 2-A | Crumble Cavern | 7 | Template:Conjecturaltext | |
| 2-B | Rodent Ruckus | 5 | "Rodent Ruckus" | |
| 2-K | Bopopolis | 5 | "Swinger Flinger" * | |
| 2-Boss | BOSS LEVEL: Mountaintop Tussle | 0 | Template:Conjecturaltext | |
| Bright Savannah | ||||
| Level number | Level name | Number of Puzzle Pieces in the level | Music theme | |
| 3-1 | Grassland Groove | 9 | Template:Conjecturaltext | |
| 3-2 | Baobab Bonanza | 7 | "Baobab Bonanza" | |
| 3-3 | Frantic Fields | 5 | Template:Conjecturaltext | |
| 3-4 | Scorch 'n' Torch | 7 | "Scorch 'n' Torch" | |
| 3-5 | Twilight Terror | 5 | A cover of "Stickerbush Symphony" from Donkey Kong Country 2 "Twilight Terror" | |
| 3-6 | Cannon Canyon | 5 | "Savannah Pop" | |
| 3-A | Rickety Rafters | 5 | "Savannah Pop" | |
| 3-B | Bramble Scramble | 7 | "Savannah Pop" | |
| 3-K | Precarious Pendulums | 5 | A cover of "King of Cling" from Donkey Kong Country Returns | |
| 3-Boss | BOSS LEVEL: Triple Trouble | 0 | Template:Conjecturaltext | |
| Sea Breeze Cove | ||||
| Level number | Level name | Number of Puzzle Pieces in the level | Music theme | |
| 4-1 | Deep Keep | 7 | "Deep Keep" "Funky Waters" "Aquatic Ambiance Returns" (DKC:TF version) | |
| 4-2 | High Tide Ride | 5 | A remixed version of the title screen theme | |
| 4-3 | Amiss Abyss | 9 | Template:Conjecturaltext "Funky Waters" | |
| 4-4 | Irate Eight | 5 | A cover of "Lockjaw's Saga" from Donkey Kong Country 2 "Irate Eight" | |
| 4-5 | Sea Stack Attack | 7 | "Mangrove Swing" | |
| 4-6 | Current Capers | 5 | "Aquatic Ambiance Returns" (DKC:TF version) | |
| 4-A | Rockin' Relics | 9 | A cover of "Lockjaw's Saga" from Donkey Kong Country 2 | |
| 4-B | Shoal Atoll | 5 | "Aquatic Ambiance Returns" (DKC:TF version) | |
| 4-K | Spinning Spines | 5 | "Swinger Flinger" * | |
| 4-Boss | BOSS LEVEL: Fugu Face-Off | 0 | Template:Conjecturaltext | |
| Juicy Jungle | ||||
| Level number | Level name | Number of Puzzle Pieces in the level | Music theme | |
| 5-1 | Harvest Hazards | 7 | "Swing Juice" | |
| 5-2 | Reckless Ride | 5 | "Swing Juice" A cover of "Mine Menace" from Donkey Kong Country Returns | |
| 5-3 | Fruity Factory | 5 | "Juicy Groove" | |
| 5-4 | Panicky Paddles | 9 | "Swing Juice" An underwater cover of "Swing Juice" | |
| 5-5 | Jelly Jamboree | 7 | "Fruit Bounce" | |
| 5-6 | Frosty Fruits | 5 | "Frosty Fruits" A cover of "In a Snowbound Land" from Donkey Kong Country 2 | |
| 5-A | Beehive Brawl | 7 | "Fruit Bounce" | |
| 5-B | Jammin' Jams | 5 | Template:Conjecturaltext | |
| 5-K | Platform Problems | 5 | A cover of "King of Cling" from Donkey Kong Country Returns | |
| 5-Boss | BOSS LEVEL: Punch Bowl | 0 | Template:Conjecturaltext | |
| Donkey Kong Island | ||||
| Level number | Level name | Number of Puzzle Pieces in the level | Music theme | |
| 6-1 | Homecoming Hijinxs | 9 | "Snowmads Theme" | |
| 6-2 | Seashore War | 5 | "Seashore War" | |
| 6-3 | Aqueduct Assault | 5 | Template:Conjecturaltext | |
| 6-4 | Blurry Flurry | 7 | A cover of "Mine Menace" from Donkey Kong Country Returns | |
| 6-5 | Forest Folly | 5 | "Freezie Breezie" | |
| 6-6 | Cliffside Slide | 9 | "Snowmads Theme" | |
| 6-7 | Frozen Frenzy | 5 | "Frozen Frenzy" | |
| 6-8 | Meltdown Mayhem | 5 | "Snowmads Theme" | |
| 6-A | Dynamite Dash | 5 | A remix of Template:Conjecturaltext | |
| 6-B | Icicle Arsenal | 5 | "Freezie Breezie" | |
| 6-K | Slippy Spikes | 5 | "Swinger Flinger" * | |
| 6-Boss | BOSS LEVEL: Volcano Dome | 0 | Template:Conjecturaltext | |
| Secret Seclusion | ||||
| Level number | Level name | Number of Puzzle Pieces in the level | Music theme | |
| 7-1 | Levitation Station | 5 | An extended cover of the ending theme from Donkey Kong Jr. | |
| 7-2 | Rocket Rails | 5 | An extended cover of the ending theme from Donkey Kong Jr. | |
| 7-3 | Crazy Clouds | 5 | An extended cover of the ending theme from Donkey Kong Jr. | |
Gallery
Staff
- Main article: List of Donkey Kong Country: Tropical Freeze staff
Donkey Kong Country: Tropical Freeze notably marks the return of long-time Donkey Kong Country composer David Wise, whose last soundtrack for the series was for the Game Boy Advance version of Donkey Kong Country 3: Dixie Kong's Double Trouble! in 2005. Wise was specifically brought on board by Retro Studios president Michael Kelbaugh.[8]
Executive Producers
Producer
Assistant Producer
Supervisor
Pre-release and unused content
Early footage of the game, specifically the one from the E3 trailer, showed heads-up display that was a bit different from the current version. The place where the life counter is did not feature anything behind the hearts; in the final version, there is a wooden plank icon. There was also no possibility to see whether the player can perform the Kong POW move, as the banana bar was missing.[9]
Glitches
Template:Conjecturaltext
In Levitation Station, if DK jumps towards a block as it is forming, he may hang in the air beside it until it is ready to return to the background.
Template:Conjecturaltext
When a player finds a Schnautzel near a Tuff Fluff in Horn Top Hop they need to make sure they that it's slightly facing the background and keep rolling into it. If done correctly, the Schnautzel will be knocked out falling into the background instead of the foreground.
References to other games
- Donkey Kong: Donkey Kong's 8-bit sprite, holding a Wii U GamePad, appears at the end of Aqueduct Assault stage.
- Donkey Kong Jr.: The levels in Secret Seclusion feature music that originated from this game.
- Donkey Kong 3: At the second checkpoint of Fruity Factory, the background features a replica of the first stage.
- Super Mario Bros. 3: A tank resembling those from Bowser's military forces, originating in the said game, can be seen in the background of Frosty Fruits.
- Donkey Kong Country: The music theme "Aquatic Ambience"[10] is covered. In the Canopy Chaos level, Cranky's record player from this game can be found and when ground pounded in front of it, it plays this games' title theme.[11] The music theme "Jungle Groove" has two covers: one during the loading screens between levels and another during some levels. Part of the music in the level Frozen Frenzy contains a cover version of the music theme "Fear Factory". Part of the music in the Crumble Cavern level contains a cover version of "Cave Dweller Concert" from this game.
- Donkey Kong Country 2: Diddy's Kong Quest: Dixie Kong returns from this game which marked her first appearance. Bramble levels, swamp levels and beehive levels return. The music theme Lockjaw Saga is covered.[12] Part of the music in the Frosty Fruit level contains a cover version of "In a Snowbound Land" music from this game. The music theme Stickerbush Symphony is covered. Part of the music in the level Frantic Fields contains a cover version of "Run, Rambi! Run!" from this game. One of Dixie Kong's idle animations in multiplayer involves her playing some air guitar could be a possible reference to her playing her electric guitar from this game. [13]
- Donkey Kong Country 3: Dixie Kong's Double Trouble: Water skipping returns.
- Mario Kart Wii: Funky Kong's logo from this game reappears on a plane in the background of Big Top Bop.
- Donkey Kong Country Returns: The levels in Secret Seclusion have a remix of the music from the single Golden Temple stage in this game (which itself was remixed from Donkey Kong Jr.). Also, the design of Donkey Kong Island is based off its appearance in this game; all of the worlds from this game can be seen. Finally, a number of sound effects from this game are used. In the level Blurry Flurry, Mega Squeekly has a cameo still alive in the background while frozen solid in an iceberg.[14] The giant Eyeball from Handy Hazards makes a cameo in the background of the level "Frozen Frenzy" frozen in place.[15] Mugly makes a cameo in the diorama of Donkey Kong Island frozen under the ground. Also, one of the logos seen in the cockpit of the plane Donkey Kong crashes into in the beginning of the game has the logo for this game. Snaps, an enemy from this game, makes a cameo on the title screen.
- Super Mario 3D Land: One of the games Donkey Kong plays on his Nintendo 3DS during his idle animation is this game. During the animation, he can be heard passing a Goomba and collecting a coin.
- Mario Kart 7: Donkey Kong sometimes plays it during his idle animation. He is heard playing as himself, picking up a Super Leaf item, and avoiding a Green Shell.
- Donkey Kong Country Returns 3D: The Crash Guard, Green Balloon, and Portable DK Barrels originated in this game. Also, this is one of the games Donkey Kong plays on his Nintendo 3DS during his idle animation. He is heard in Cranky Kong's Shop, as well as activating a secret path in a level.
References in later games
- Super Smash Bros. for Wii U: A number of Snowmads appear as Trophies. Additionally, the music that plays in Mangrove Cove and in every second Kong Temple level are playable in the Jungle Hijinxs stage under the names "Mangrove Cove" and "Swinger Flinger".
Trivia
- The name "Tropical Freeze" is a pun on the term "tropical breeze".
- Donkey Kong's idle animation shows him playing a Nintendo 3DS with one of the following games: Super Mario 3D Land, Mario Kart 7, Animal Crossing: New Leaf, and Donkey Kong Country Returns 3D.
- Funky Kong makes a The Legend of Zelda reference for the Crash Guards (very similarly to how Cranky Kong does in Donkey Kong Country Returns 3D with the DK Barrels) by saying, "Vehicle troubles? It's dangerous to go alone - take one of these!"
- This is the only installment in the series that has yet to receive a handheld port.
- This is the first title in the series since Donkey Kong Country 3: Dixie Kong's Double Trouble! in which the Banana Hoard does not appear.
- The game's plot bears a strong resemblance to that of Donkey Kong in: Banana Day 24, a Club Nintendo comic released exclusively in Germany.
External links
- E3 2013 Trailer
- Extended E3 2013 Trailer
- Official North American website
- Official United Kingdom website
- Official Japanese website
References
- ^ Donkey Kong Country: Tropical Freeze delayed - GameSpot
- ^ http://www.youtube.com/watch?v=7oGQioVTjo0#t=52
- ^ Donkey Kong Country: Tropical Freeze instruction manual (PDF). Rambi is listed as a vehicle at file 15.
- ^ Wii U Developer Direct - Donkey Kong Country: Tropical Freeze @E3 2013, retrieved August 6, 2015
- ^ http://www.nintendo.com.au/index.php?action=news&nid=3097
- ^ http://www.ign.com/videos/2013/12/18/donkey-kong-country-tropical-freeze-homecoming-hijinks-gameplay
- ^ https://www.youtube.com/watch?v=7YtBdw87YG8
- ^ Terry, Stefan (March 05 2014). David Wise Explains How He Got His Job on Tropical Freeze. Gamnesia. Retrieved December 20, 2014)
- ^ E3 trailer. Notice the different HUD for the health counter.
- ^ https://www.youtube.com/watch?v=rbCM1XMa-Ew
- ^ http://www.youtube.com/watch?v=1rqLtJbofQk
- ^ http://www.youtube.com/watch?v=tNU24BWDdUY
- ^ http://www.youtube.com/watch?feature=player_detailpage&v=nwlLKpmlhpE
- ^ https://www.youtube.com/watch?v=OLSZnXbBMOE
- ^ https://www.youtube.com/watch?v=dn70PCdGIJE
Template:DKC:TF Template:DKGames
