Bramble Blast (Donkey Kong Country 2: Diddy's Kong Quest)
- This article is about a level in Donkey Kong Country 2: Diddy's Kong Quest. For the level in Donkey Kong Land 2 of the same name, see Bramble Blast (Donkey Kong Land 2).
Template:Levelbox Bramble Blast is the sixteenth level of Donkey Kong Country 2: Diddy's Kong Quest and the sixth area of Krem Quay.
This is the first bramble level of the game, and in it, Diddy and Dixie Kong must navigate through the thorns via many series of Barrel Cannons. The barrels of this level, unlike most other Barrel Cannons, constantly make 90 degree turns when accessed, and they sometimes do not aim in all four directions. One wrong move can blast them into the brambles, so they must watch their timing. Klampons, Zingers, Click-Clacks and Flitters also impede on the Kongs' progress. Squawks the Parrot is located near the end of the level, and he can help the Kongs nab a DK Coin, as well as reach a Bonus Barrel, if he is found.
The background music for this level, and the other bramble levels in the game, was originally intended as a water or clouds theme, but was repurposed due to the final game lacking those.[1] The song's title in the SNES version's sound test is "Brambles," while the official soundtrack labels it "Stickerbush Symphony." The Game Boy Advance remake's sound test, however, spells this as "Stickerbrush Symphony." An arrangement of the theme appears in Super Smash Bros. Brawl, under the name "Bramble Blast," while the same arrangement is titled "Stickerbush Symphony," its soundtrack name. In a tweet, David Wise stated that the official name of the theme is "Stickerbush Symphony (Bramble Blast)," but that he likes the names "Stickerbrush Symphony" and "Brambles."[1] A different arrangement appears in the Donkey Kong Country: Tropical Freeze level Twilight Terror.
Level layout
The Kongs begin the level on some wooden boards that carry them over the sharp brambles. A Banana Bunch is above the entrance to the level, and it can be reached with their Team-up move. If the primates travel to the east from here, they reach an Auto Fire Barrel that shoots them into an area full of Barrel Cannons. They must use these many barrels to shoot to the top-right corner of the area, where another Auto Fire Barrel is located. Before the heroes access this Auto Fire Barrel, they are able to shoot to a Banana Bunch in the bottom-right corner of the area and also to a DK Barrel near the top-left corner of the same area. Once they reach the Auto Fire Barrel, they are shot into another section of Barrel Cannons. A Zinger and the letter K are among these many barrels, which must be used to send the Kongs into the top-right corner of the area. Here, they can find a narrow passage containing a Zinger, and they must shoot through it to reach a larger area of Barrel Cannons. As they shoot towards the top of the area by using these barrels, they come up to some bananas, a Banana Bunch, and the letter O, which are all surrounded by the many cannons.

Eventually, the heroes reach a passage that they must shoot through to access another Barrel Cannon that is guarded by a Zinger. This Barrel Cannon is placed in a narrow passage among the brambles. While trying not to shoot into the brambles, the Kongs must fire themselves southwest from here in order to access another Barrel Cannon in a wider area that contains more Barrel Cannons. These cannons are positioned on the perimeter of the area, and the heroes must shoot around the section to reach another curved passage among the brambles. Four Barrel Cannons are placed throughout this passage, and they must be used to shoot over the brambles. However, all four of them rotate when accessed, so the heroes must aim carefully. If they manage to reach the fourth barrel and then shoot northwest, they land inside of another Barrel Cannon in the fifth section of barrels. Most of this section consists of Barrel Cannons, but a few Auto Fire Barrels are also mixed into it.
After the primates shoot the correct way through the barrel maze, they reach an Auto Fire Barrel that fires them along a trail of bananas and into another Auto Fire Barrel, which can then send them into another wide area that contains only three Barrel Cannons. The first Barrel Cannon simply tilts left and right towards the two Barrel Cannons below it. The lower two barrels make full rotations when entered, and they can be used to reach a Banana Coin hidden high above the barrels. One of these Barrel Cannons can also be operated to blast the heroes towards a narrow passage that contains two more Barrel Cannons that rotate when accessed. The last of these Barrel Cannons is able to fire the Kongs along a trail of bananas and to an Auto Fire Barrel that can blast them down to a Star Barrel, and then into another Barrel Cannon.
This Barrel Cannon tilts from left to right as it holds the Kongs, so they must shoot out of it when it leans to the right in order to shoot to another Barrel Cannon near here. This Barrel Cannon tilts just like the previous barrel, and it hovers under the letter N and next to a DK Barrel, which is followed by another Barrel Cannon. The heroes must shoot to this barrel to arrive in the sixth section of Barrel Cannons. Here, the cannons are placed along the perimeter of the diamond-shaped area. A single Auto Fire Barrel is also placed among these Barrel Cannons, but shooting into it does not help them progress, as the barrel simply shoots them back to the beginning of the barrel section. As the two friends shoot through this section of barrels, they must watch out for a Zinger that flies in the center of the area. Soon, they make their way into a curvy, thin passage that contains a few Barrel Cannons that rotate when accessed.

As they shoot through the thin passage with these barrels, they, in the Super Nintendo Entertainment System version of the game, come up to a red Extra Life Balloon that quickly floats away if they do not move fast enough. Eventually, the primates fire themselves into a slightly wider part of the passage, where they can find two more rotating Barrel Cannons and some more Barrel Cannons that simply tilt from left to right when accessed. As the primates fire through the area with these barrels, a few Zingers stand in their way, and they must avoid the enemies in order to reach an Auto Fire Barrel that can shoot them upwards towards some wooden planks that support a Klampon. The Kongs must dodge this foe while avoiding the brambles only slightly above their heads in order to reach a trail of bananas that lead them into a narrow, square-shaped passage. Three Barrel Cannons are placed along this square-shaped area, and they rotate when the Kongs are inside of them. With precise aim, the duo must shoot around the square-shaped passage with them in order to reach another section of wooden planks. These planks, as the ones before, help carry the Kongs, along with two Click-Clack enemies, over some brambles.
A rather small area of Barrel Cannons follows the wooden planks, and while the duo shoots through the section with these barrels, they come up to a Banana Bunch, some bananas, and an Auto Fire Barrel that can blast them into a larger area of barrels. Here, the primates can find a mixture of Barrel Cannons and Auto Fire Barrels, along with bananas and, in the Game Boy Advance version of the game, a Golden Feather. Once the heroes reach the bottom-right corner of the area, they can find an Auto Fire Barrel that is able to fire them through a thin passage and towards a trio of Barrel Cannons with bananas around them. The first two of these barrels rotate when loaded, so the Kong must watch their aim to avoid shooting into any brambles. The last of the three Barrel Cannons tilts from left to right when accessed, and it can be used to shoot into a nearby Flitter that the heroes must bounce on to reach an Auto Fire Barrel. This barrel automatically fires the heroes into a quadruplet of Flitters, who Diddy and Dixie must bounce on in order to cross over the brambles. Some wooden planks are ahead of here, and they support an End of Level Target, which must be jumped on to complete the level. A Rotatable Barrel with only five seconds on it is above this target, and the heroes can win a prize from the End of Level Target if they shoot to it from this barrel.
If the primates bounce into the gap found before the previously-mentioned quadruplet of Flitters, they land in an Auto Fire Barrel that is able to shoot them into another Auto Fire Barrel in a hidden part of the level. This barrel can blast the Kongs into Squawks, who is able to carry them through the hidden area. To the right of Squawks's location, the group can find a Banana Bunch in the corner of the area around some brambles. To the left of here, the heroes can find a DK Barrel in a small alcove and some bananas that are followed by a wide passage leading to a small area that contains a DK Coin, which is guarded by a Zinger. A pair of red Zingers are farther into the area to the right, and they both move back and forth in a vertical path. They are followed by a curvy path with a few Banana Bunches in it. After the heroes pass the second Banana Bunch, they reach a wider area with a red Zinger circling the inside of it. If they head down a small passage below this foe, they can find an Auto Fire Barrel that can shoot them into a Bonus Barrel. Once they finish playing in the Bonus Level it leads to, they lose Squawks and are fired into the letter G, which is located in a narrow passage near here. The Rotatable Barrel with four seconds (five in the Game Boy Advance version) located above the End of Level Target is at the bottom of this passage.
Enemies
- Zingers: 6
- Click-Clacks: 2
- Klampons: 1
- Flitters: 5
Secrets
K-O-N-G Letters

- K: Near the beginning of the level, the heroes reach a large group of barrels with a Zinger among them. If they blast into the Barrel Cannons near the bottom of this area, they can find the letter K, which they must blast to in order to collect.
- O: In the third area of Barrel Cannons, which is located shortly after the letter K, the Kongs can find the letter O between two of the Barrel Cannons, which they must shoot between to grab the letter O.
- N: Immediately after passing the Star Barrel, the heroes are shot into a Barrel Cannon with the letter N, which they can shoot to, above it.
- G: After the primates complete the second Bonus Level of Bramble Blast, they are shot to the letter G, and then into a Barrel Cannon above the End of Level Target.
Bonus Levels

- In the fifth section of barrels, which is located shortly before the Star Barrel, the heroes must shoot via many barrels to reach the far-west side of the area, where they can find a lone banana floating near them. If they shoot to it, they make their way into a Bonus Barrel, which is able to send them to a Bonus Level, where they must use a multitude of Barrel Cannons to reach the rightmost side of the area, where a Kremkoin is located. Most of the barrels do not aim the Kongs in the correct direction, so they must move through the cluster of barrels in a certain way to reach the end. If they access the end of the bonus within the time limit of 40 seconds and without hitting any brambles, they can find a Kremkoin to grab before the remaining time runs out.
- Starting from where the DK Coin is located, the primates must travel east with Squawks while dodging some red Zingers, who cannot be defeated. Eventually, they make their way through a thin passage that holds a Barrel Cannon, which can fire them into a neighboring Bonus Barrel. This special barrel takes them to a Bonus Level when accessed, where they need to simply fly around the bramble obstacles with their parrot buddy to reach the end of the stage within the time limit of 25 seconds. Bananas are placed throughout the area to direct them on where to go. Once the group reaches the end of the bonus, they pass a No Animal Sign, causing their Animal Buddy, Squawks, disappear, and also making a red Extra Life Balloon appear. The sign is followed by a Kremkoin, which they must collect within the remaining time. The Bonus Level ends in a loss if the Kongs hit into any of the brambles.
DK Coin
- If the primates land in the gap found immediately before the final three Flitters in the level, they land in an Auto Fire Barrel that shoots them into an additional Auto Fire Barrel, which can then send them to Squawks the Parrot. Once they grab onto the bird's talons, they are able to safely fly to the west, where they can find a long path leading past a DK Barrel and to a Zinger that guards the level's DK Coin, which they must touch to collect.
Golden Feather (Game Boy Advance version only)
- In the final section of barrels, the Kongs should travel through the barrels in the right side of the area to find a Golden Feather between a Barrel Cannon and an Auto Fire Barrel. By blasting into another Auto Fire Barrel near here, the primates can shoot to the Barrel Cannon next to the Golden Feather. This barrel can then send them into the feather and to the Auto Fire Barrel across from it.
Gallery
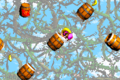
The Kongs fire out of barrels in the Game Boy Advance version.

Names in other languages
| Language | Name | Meaning |
|---|---|---|
| Japanese | とげとげタルめいろ Togetoge taru meiro |
Spiky Barrel Labyrinth |
| German | Affen Action (SNES) Affen-Action (GBA) |
Monkey Action |
| Italian | Labirinto di Rovi! |
Brambles Maze! |
| Spanish | Rompezarzas |
Bramblebreaker |