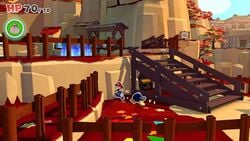
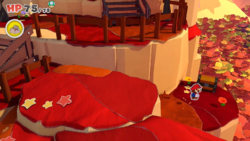
Autumn Mountain
It has been requested that more images be uploaded for this article. Remove this notice only after the additional image(s) have been added.
- “Woo-hoo! We're here! Autumn Mountain! The leaves are such a bright shade of red. It's so beautiful!”
- —Olivia, Paper Mario: The Origami King
Autumn Mountain is a location in Paper Mario: The Origami King, a forest filled with autumn-colored trees and tall, grassy fields. It is the first area of the blue streamer district, first entered via the tram in Overlook Mountain. During the tram ride to Autumn Mountain, Mario and Olivia meet up with a special Bob-omb who is set out on a quest to restore his memories. This is the first area explored in which they travel together. However, Bob-omb ends up being a bit of a nuisance, getting lost quite often and having to get rescued from Chestnut Valley to unlock the Water Vellumental Shrine.
Layout
Right after Mario, Olivia, and Bob-omb get off the tram, Olivia comments on its aesthetic beauty as the perfect place to make memories. Behind the tram is a pile of 100-Coins. As they travel along the way, they reach a dried-up river. Bob-omb becomes excited and runs off. Olivia tries to warn him, only for Bob-omb to come back to correct his name. Despite this, she continues to name him incorrectly, now calling him "Bobby" for the rest of their adventure. When Mario and Olivia follow him down the stream, they reach a few boulders blocking the way. They decide to travel back up the stream only to find a dried-up lake. They find a boat they can use to travel to the blue streamer, but it cannot be used due to the lake being drained.
Mario must travel off to the right, crossing a field of dry, tall, patchy grass where several enemies and Toads can be found. When they get out, it is discovered that Bob-omb became lost somewhere along the way. Olivia decides he must have gotten excited and run off like last time. Moving on, Mario and Olivia finally reach the Water Vellumental Shrine, but if Bob-omb is not with them, it cannot be entered as the door requires two people standing on the tiles to open. Fortunately, Bob-omb can be found on an area just off the dry field, hanging out with a Sombrero Guy. As they try to cross the bridge, a Paper Macho Goomba appears on the other side. Thinking it is friendly, Bob-omb runs toward him and ends up getting knocked off the bridge. Mario must jump off the bridge (which he previously was unable to do as Olivia would warn him not to jump as he may fall off if an attempt to jump is made) and locate Bob-omb several times in Chestnut Valley.
After rescuing Bob-omb, Mario and Olivia can enter the shrine. However, Bob-omb stays outside, not interested in exploring the shrine and finding the Water Vellumental. After the Water Vellumental is defeated and Olivia gains its abilities, they can all return to the dried-up lake and use the Magic Circle to restore water to both the lake and the stream. However, as none of them can use the oar to row the boat, they must first find the oarman, who is actually in disguise as the origami monkey atop a stack of cans. Mario must follow him around and hammer him to rescue the oarman, allowing them to use the boat to reach the Eddy River.
Hidden Toads
| Autumn Mountain | |
|---|---|
| Right off the tram is a crumpled Green Toad who runs the tram. | 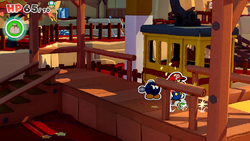
|
| On the platform just off the tram is a Blue Toad disguised as a flopping blue fish. Hammering it will reveal Sea Captain Toad. | 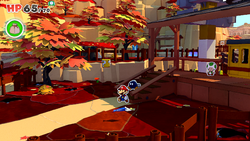
|
| Right behind the tram is a pile of 100-Coins. There is also a Yellow Toad disguised as a yellow leaf in the northeast corner. | 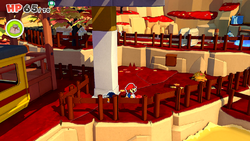
|
| On the edge of the dried-up lake is a crumpled Red Toad next to the sign. | 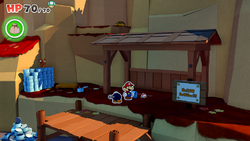
|
| To the right end of the patch of tall, dry grass is a secret entrance to a small cave with a Red Toad stuck in the ground. Pulling him out rescues him and earns Mario a MAX UP Heart, earning him five extra health points. | 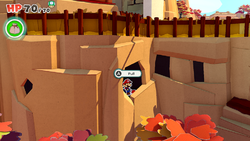
|
| There is another Red Toad hidden in the tall, dry grass, to the left of the stairs. This Toad is recommended to be found with use of Toad Radar. | 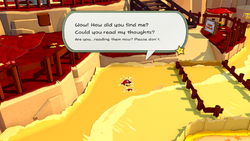
|
| There is a different Red Toad hidden in the tall, dry grass, just in front of the gap in the fence in the foreground. This Toad is recommended to be found with use of Toad Radar. | 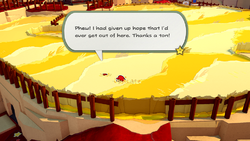
|
| There is yet another Red Toad hidden in the tall, dry grass, on the right end of the field, near the exit leading to the bridge and the inward curve in the fence. This Toad is recommended to be found with use of Toad Radar. | 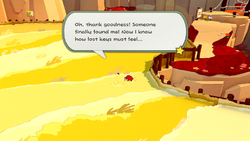
|
| On the platform across the bridge is a tree Mario can hammer to drop down a red leaf, revealed to be a Red Toad. | 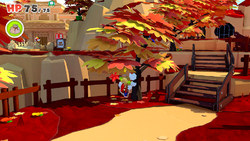
|
| On the adjacent platform is a Not-Bottomless Hole in the wall shaped like a mushroom. When repaired, it is revealed to be a door to an office. In the center is a Red Toad stuck in a fax machine. Pulling him out both rescues the Toad and unlocks fax travel to the charging station and offices. | |
| On the left side of the Water Vellumental Shrine is a small, narrow cave. Mario must walk into and up to a large stone. Hitting it pushes it off the ledge, proving a platform to reach and rescue a Red Toad taped to the wall. | |
| On the right side of the shrine, on the ledge where the shortcut pipe is, Mario must hammer the tree to drop down a Red Toad disguised as a red leaf. | |
| Upon entering the shortcut pipe, Mario reaches a high area with a Red Toad disguised as a red dragonfly. | |
| Mario must drop off the shortcut area on the shack, where there is a Red Toad disguised as a red beetle on the wall. Mario must hammer a nearby shrub to reveal a Magic Circle, then use the 1,000-Fold Arms to knock him off. | |
| While crossing the shrine bridge and avoiding origami Cheep Cheeps, Mario may spot a Red Toad disguised as a red origami fish leaping in and out of the water between the middle platform. | |
| After refilling the lake, Mario can reach the tree next to a pile of boats. He can then hammer the tree to drop down a trio of Red Toads, each disguised as a leaf. | |
| Next to this tree is a pile of boats with a crumpled Red Toad under them. | |
| On top of the pile of boats and a few crates is a yellow leaf revealed to be a Yellow Toad. | |
| In the hidden area behind the tram is a small pile of leaves with a Toad trapped inside. | |
| There is an origami monkey atop a stack of tuna cans. He cannot be reached or rescued until after an extensive story mission. First, Mario and Olivia must pick up a can of tuna, walk into the field of dry grass and locate the Spike, then locate the Bone Goomba in a conga line. After that, he must lead them to a small, secluded area outside of the field where the Sombrero Guy awaits. Finally, Mario must give the Bone Goomba the can of tuna. After it pops it open, Mario simply needs to give the opened can to the monkey, luring it off its ledge and allowing Mario to hammer it to rescue the last Toad. | |
Not-Bottomless Holes
| Autumn Mountain | |
|---|---|
| There are four Not-Bottomless Holes in the area near the tram - one in the fence in the foreground, two in the ground near the tree, and one tucked away in the wall behind the tree. | |
| At the end of the hidden cave underneath the dry field is one Not-Bottomless Hole Mario must repair to get out of the cave. | |
| There are a few Not-Bottomless Holes on the cliff wall near the Sensor Lab door. The door is also a Not-Bottomless Hole that must be repaired to enter the Sensor Lab. | 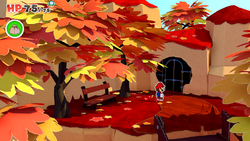
|
| Two Not-Bottomless Holes are found on the side of the mountain. | |
| There is a Not-Bottomless Hole on the right side of the cliff wall, near the bridge. | |
| The shortcut pipe on the right side of the shrine leads to a secluded area with a Not-Bottomless Hole on the wall. | |
| The last Not-Bottomless Hole can be found on the ledge adjacent the lake, left of the treasure chest in the middle. | |
Collectible Treasures
? Blocks
| Autumn Mountain | |
|---|---|
| Right next to the tram is a ? Block containing a 100-Coin. | 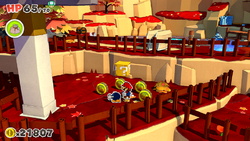
|
| Behind the tram, in the secret area with a circle of 100-Coins, Mario must jump in the center to reveal a Hidden Block containing a Shiny Hammer. | |
| In the field of dry grass, there is a gap in the fence on the north end Mario can walk through to reach a ? Block containing a Fire Flower. | 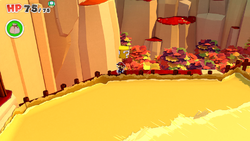
|
| In front of the cliff is a ? Block containing a sack of coins. | |
| On the left side of the shrine is a small patch of land with a ? Block containing a 100-Coin. | |
| At the end of the path along the lake is a ? Block containing a Hurlhammer. | |
Gallery
Names in other languages
| Language | Name | Meaning |
|---|---|---|
| Japanese | モミジ山 Momiji yama |
Maple Mountain |
| Chinese (simplified) | 枫叶山 Fēngyè Shān |
Maple Mountain |
| Chinese (traditional) | 楓葉山 Fēngyè Shān |
Maple Mountain |
| Dutch | Bonteblaadjesberg |
Multicolored-Leaves Mountain |
| German | Herbsthöhe |
Autumn Heights |
| Italian | Monte Autunno |
Autumn Mountain |
| Spanish | Monte del Otoño |
Autumn Mountain |
