The 'Shroom:Issue 181/Strategy Wing
Director Notes
Written by: Hooded Pitohui (talk)
TEN-HUT! Welcome back to Strategy Wing, troops. I'm your director, Generalissimo Shoe. Following the rousing success of last month's issue, the 'Shroom Staff has appointed me permanent Strategy Wing Director with full carte blanche to whip this unit into shape as I see fit. For the writers, now under my full command, there's going to be some changes around here. I'm going to scrutinize, homogenize, and synchronize this unit until it is worthy of hoisting the banner of Strategy Wing!
Hey! Hey! What are you doing in here? Who gave you the keys to this office? I swear, if Superchao left the door unlocked again...
Uh, uh, uh, no one... I THOUGHT THIS WAS THE SUPPLY CLOSET! *runs off*
Get back to your post, general! Don't forget who your commander-in-chief is here!
Oh, good, he's gone. I step out for a moment to run through the playbook with the team, and I come back and have to reclaim control of my office. What kind of world are we living in? Ah, it's all over now, though. I'll just leave this note here to make sure I ensure that my dictation machine didn't pick up this little scuffle before we go to print, and all will be well.
Now, moving on and getting to the Strategy Wing news, I have the pleasure of welcoming a new writer to the Strategy Wing team. Kinger (talk) is joining us with Getting that Payday, section primed to teach us the ins-and-outs of Payday 2. If you're interested in learning the tools of the trade you'll need to commit virtual crimes, be sure to give it a read!
In addition to our new section, we have our usual assortment of sections. Shoey has switched things up slightly this month, taking a look at the Nintendo 64 title Person of Lordly Caliber in An Ogre Battle Section, and two sections - Pitohui's Pokémon Academy and SIMulation - have themed themselves around this month's fitness theme. Be sure to check out all of the sections we have here in Strategy Wing this month!
I'll let you get to doing just that momentarily, but, first, I want to take a brief opportunity to give some special thanks to Yoshi876 (talk). You likely have already read about how he has been the Spotlight Manager for one-hundred issues, but, in his time with the paper, he has also been a prolific writer. He holds, even, the record for the most sections written by a single writer, with over 700 sections to his name. Among those 700 sections, there are 115 Strategy Wing sections, or just a bit over a quarter of all of the sections written in Strategy Wing to date. He's been a huge supporter of the Strategy Wing team, and an excellent, dedicated writer (and colleague on the staff) who has always been a pleasure to work with. Thank you so much for all of your contributions, 876!
Are you ready to begin making your own contributions to the Strategy Wing team? Head over to the sign-up page and send an application in so you can join our team! Whether you're wanting to cover the history of a topic in detail, as Superchao does with Mach Speed Mayhem, or provide us with a guide to elements of your favorite games, as Shoey and Kinger do, or even want to share a let's play, as Koops does, we can find you a place on the team!
Section of the Month
Give Ray Trace (talk) a round of applause for taking first in the Section of the Month poll. It turns out people are interested in how to give their Sims a death by chickens! Thank you, voters, for showing your support with your votes, and thank you, writers, for continuing to fill Strategy Wing with your sections!
| STRATEGY WING SECTION OF THE MONTH | ||||
|---|---|---|---|---|
| Place | Section | Votes | % | Writer |
| 1st | SIMulation | 8 | 44.44% | Ray Trace |
| 2nd | Pitohui's Pokémon Academy | 3 | 16.67% | Hooded Pitohui |
| 3rd | The Greatest Quest | 2 | 11.11% | Mustard Machine |
| 3rd | On the Origin of Species | 2 | 11.11% | ZelenPixel |
An Ogre Battle Section
Written by: Generalissimo Shoe (talk)
Welcome back to another edition of An Ogre Battle Section, a section that goes over classes and units in SNES cult classic Ogre Battle: March of the Black Queen. Last month we did something different and looked at recruitable characters in March of the Black Queen. I promised at the end of the last section that we'd return to regularly scheduled programming this month. Well, it turns out that I lied! Instead, we're actually going to talk about some of the new features in the sequel to March of the Black Queen, the N64 classic (and one of only like 4 RPGs on the damn system), Ogre Battle 64: Person of Lordly Caliber.
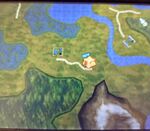
The first feature we're going to talk about is probably the most important one, and that feature is the brand new stamina system. As you know, you have to actually march your soldiers into battle, making them cross over all sorts of terrain. While terrain was a feature in March of the Black Queen, it was a mostly peripheral feature, because, for the most part, it really only factored into how fast your units would march. Well, the new stamina system makes terrain a much bigger factor. See, the way the stamina feature works is simple. The longer a unit marches, the more tired they get. This can have a couple different effects, the first of the two most important being that, if the tiredness bar maxes out, the unit will stop and camp, putting all its members to sleep. If your troops are caught sleeping, they'll be asleep for the first turn of battle. The other big effect is that, if the bar gets to about 90% filled, your units will, while not being tired enough to camp out, become tired enough to lose effectiveness in combat.
There are a couple different ways to regain stamina. The easiest way is to capture a town, because your unit regains both health and stamina as long as they are stationed at a town. Camping is another option, and it's convenient because it can be done at basically any time, but it can be dangerous because it can allow the enemy to get the jump on you. Finally, you can regain stamina by using either a Power Fruit or the superior Angel Fruit. The cool thing about the stamina meter is that the enemy has the same stamina meter you do and, just like you, if they march too long, they'll also have to camp, allowing you to sneak attack them! Terrain plays a very big role in the stamina system because each type of leader class has a specific type of terrain they march best on. For example, a knight marches best in the plains and will march slowly in the mountains, but the Hawkman, who can fly, has no problem leading a unit over the mountains. The stamina system is a cool little system that can lead to tense moments like accidentally overextending yourself trying to capture a town.
The next thing we're going to talk about is the new grid system. In Person of Lordly Caliber, the grid has been expanded from a 3x2 grid to a 3x3 grid, creating a new middle row. This, by itself, isn't actually that big of a deal because very few units actually take advantage of the new system and there's very few that get any big bonus in the the new middle row. It does help somewhat if you're trying to work with large units such as dragons and golems, since you need to keep a certain amount of space between a large unit and a small unit, but the most important thing the new middle row adds is interdimensional combat. In Person of Lordly Caliber, the way your units will face off in combat depends on which direction your unit is facing. If you get hit from the side, the placement of your characters will be different than if they got hit in the front. This can really mess up your plans, because, depending on which part of the grid your characters are on, your characters may be limited in what they do and what they can do. You can end up getting into a situation where you're fighting a battle from a suboptimal position, or, if you successfully flank your opponent, you'll be the one mopping up the unprepared enemy!
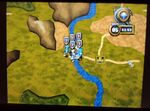
The last thing we're going to talk about is probably the most interesting (proving that interesting does not mean good) feature, a feature called "legions". A legion in this game works like this. You basically take one unit and you put them in the center and then you can place up to four units around them, making, basically, a vanguard for yourself. Sounds cool, right? Well, here's the thing. First, only certain characters can become legion leaders, those being Magnus, Liea, Dio, Ankiseth, Destin and Debonair. The other flaw is that the legion leader has to to be surrounded by foot soldiers, AKA the weakest unit in the game, and the amount of foot soldiers you have determines the amount of units you can have around you (so, basically you'll always have four). In theory, this should be cool, but in practice it's just not worth it.
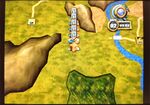
Legions are massive creatures, so if you come up against an enemy that one part of the legion would be better against and that part isn't in position, good luck getting it into position before you fight. Not only that, but just a crossing a bridge is agonizing because you'll need the units in your legion to get back in position immediately after crossing. They're just so annoying. They're constantly having to get back in position, you doom five of your units to move in a single direction when you only get to deploy like eight units, and, to top it all off, legions are still affected by the stamina meter!
If they run out of stamina, all five of the units camp out! Also, again, that main unit in the legion can only have the weakest unit in the game around them, making it completely worthless! Legions are a cool concept in theory, but, in practice, they're just not better then just having five individual units.
That's all for this special edition on Person of Lordly Caliber. It's a pretty good game. I'm not sure if it's better than March of the Black Queen, but it's still a really good game, especially on the RPG-starved N64. Maybe another month we'll take another look at Person of Lordly Caliber, but, next month, we should be returning to our regular format!
Getting That Payday
Hello folks, and welcome to the first Getting That Payday, a Payday 2 strategy guide! Payday 2 is a co-op first person shooter about doing a lot of heists, across banks, yachts, and the damn White House! Today, we'll be talking about the Stoic Perk Deck. Perk Decks are sets of bonuses that you can equip on any character and rank up to get new perks, although you can only have one at a time. Stoic is one of the strongest perk decks in the game, allowing you to tank ridiculous amounts of damage and come out on the other end just fine.
Sweet Liquor Eases The Pain
The Stoic Perk Deck is themed around and was introduced for free alongside the playable character Duke, the art-loving thief who is an alcoholic, apparently. Stoic, at tier one, will give you a 75% damage reduction, causing you to only take a quarter of the hurt that the cops dish out. However, the 75% of damage isn't really gone, rather giving it to you over a 12 second period.
It will also give you and auto-equip the Hip Flask, an alcohol filled canteen and throwable (even though you don't throw it, you just drink it) that, when used, will remove the built up damage, letting you keep pushing without having to fall back. It does have a cooldown of 10 seconds, but each kill removes a second of that cooldown.
At tier three, all of your armor (basically a second health bar) gets turned into health, which, gameplay wise, is incredibly useful, since it means you can survive for longer, as health is easier to recover than armor with this deck. Lorewise, however, it is incredibly concerning, because I don't think kevlar is supposed to become an extra layer of skin! But it's useful, so who really cares?
Tier five makes it so that if you're out of combat for four seconds, you remove any of the awaiting damage. This works pretty much the same way as armour, but with health.
Starting at tier seven, killing an enemy when under 35% health will remove two seconds of the cooldown for the Hip Flask. If you bring something that is effective at eradicating cops, you can theoretically keep going forever, constantly chugging from the flask and recovering health.
At the final tier, tier nine, any time you use the flask, you heal extra health, equal to half of the damage you negate. With this, you can gain back more health then you lose, meaning that taking damage on purpose can be useful.
As far as a build for the deck, I recommend the Bulletstorm skill with an lmg or the micro/minigun, giving you infinite ammo and letting you tear through waves of the police, giving you constant flask uses with all of the kills. Also, use the Rivertown Glen Bottle as a melee, since it's funny to hit people with a whiskey bottle while drinking ungodly amounts of liquor.
With this, you now know how to ignore bullets with the power of alcoholism. I hope you enjoyed this knowledge, because next month, we're learning how to become the best cowboy on crime.net with the gunslinger skill tree. Hope you like revolvers! With that, this is professional heister Kinger, signing off.
Pitohui's Pokémon Academy
Written by: Hooded Pitohui (talk)
Welcome back, trainers. It's good to see some familiar faces in the lecture hall. I'm glad I haven't already scared off too many of you. I've been informed by the department chair that the higher-ups requested we incorporate a fitness component in our course. You might have had your fill of fighting-types now, as I'm certain all of your other classes have exposed you to plenty of them, so I thought we could do something different and incorporate some dance into today's lecture. Dance is a good form of exercise, right? Right, then.
We'll get there momentarily, though. First, I'd like to remind any students who missed our first lecture to pick up the condensed notes on the syllabus. If you aren't yet familiar with this class, do make sure you read up on these notes.
First, a Smogon University course, this course is not. No, this academy's lessons are designed to get trainers of any stripe thinking about how they can raise their Pokémon, and, as a result, aren't designed to keep up with the widely-accepted metagame for the series. In some cases, the way I've raised my Pokémon may even flies in the face of conventional wisdom. If you're looking for top-tier strategies, do check out Smogon, but if you merely want to get a little deeper into raising Pokémon while still doing things your own way, feel free to use this section as a reference.
Secondly, know that, unless otherwise noted, these builds assume these Pokémon were raised in the seventh generation of Pokémon games (Sun, Moon, Ultra Sun, and Ultra Moon). Generation VIII cut some moves out of the games, and I'm not keen on changing the movesets for Pokémon I raised a few years ago.
Please note, also, that I'm having to guess at the effort value (EV) spreads of some of these Pokémon. Again, I raised these years ago, so I'm using stat calculators and working backwards to figure out their EVs in some cases.
Finally, since we all know the importance of citing our sources, I need to credit the design of some of the tables used in these lectures to Crocodile Dippy, author of the Pocket Handbook which can be found in early editions of Strategy Wing.Those of you who need a refresher on some of the terms we'll be using, particularly as regards stats, will want to take a look at this second handout. If there's any confusion on terms not covered, let me know before our next session, and I'll update the handout to accommodate you.
Base Stats: Base stats are the values associated with a particular Pokémon species, and are the same across every individual Pokémon of a given species. You have no influence on them. You can think of them as traits tied to a species. A chimp isn't ever going to be able to get as good as digging as a mole will be, and, likewise, an Abra is never going to have the defensive prowess a Shuckle has.
Individual Values (IVs): Individual values, as their name implies, are associated with individual Pokémon. They range from 0 to 31 in each stat, with 31 being considered a "perfect" IV and higher numbers corresponding to different stats. Magikarp A and Magikarp B will have the same base stats, but they may very well have different IVs. To stick with the animal analogy, one mole may be born with larger claws than another mole, and that first mole is probably going to have an easier time digging through dirt than the latter. Individual values are set in stone, strictly speaking, but you can use Hyper Training (from Generation VII onwards) to functionally get a perfect IV in a stat.
Effort Values (EVs): Effort values are the one thing you can easily change. A Pokémon can earn, primarily through battling, but also through means like the use of certain items or mechanics like Super Training, up to a total of 510 effort values, with up to 252 in any given stat. To finish off the animal analogy, no matter what kind of claws a mole is born with, moles who have more experience digging are probably going to be better at digging than moles which have never dug.
Nature: A Pokémon's nature is, more or a less, a stat modifier with a name meant to make it sound like a Pokémon has some personality. Natures will raise one stat by ten percent and lower another stat by ten percent. Some natures raise and lower the same stat, canceling out the effect and leaving stats unchanged. Natures can be changed with the use of special mint items from Generation VIII onwards.
Are we all prepared? Very well, then. I'm certain you all are quite eager to see me dance, but I won't be engaging in any of that. No, rather, we're going to be taking a look at a dancing cactus. Hailing from the deserts of Unova, Maractus may often be overlooked and may be on the fragile side, but a closer inspect reveals that they pack a strong punch in addition to a strong sense of rhythm.
Taking a look at Maractus' base stats, it should be abundantly clear that this cactus has a huge weakness. There's not even room to argue that Maractus' defensive stats aren't abysmal. HP is at the absolute lowest end of the usable range here, and Defense and Special Defense are outright well below the cutoff to be considered usable. Clearly, Maractus is too frail to have much staying power.
Usually, when faced with a Pokémon with defensive stats this bad, you'll want to ask yourself if the Pokémon in question is set up to be a viable glass cannon. That is to say, do you have a Pokémon with the speed and offensive stats to come out and control the field offensively until it takes a hit? Maractus certainly has the offensive stats to make a glass cannon, particularly with a base Special Attack above one hundred, but, unfortunately, its speed holds it back in this area. With a speed even lower than its defenses, Maractus has to switch in at a very opportune time to get a chance to take command of the battle with a strong offensive push, and risks being stopped in its tracks not just by bulky walls that it can't counter (such as, say, Ferrothorn), but also by other glass cannons that outspeed it.
Recognizing this, what are you to do? You can always consider a Trick Room option. That's not exactly unviable here, though there are a number of Pokémon that are as slow as or slower than Maractus, making this a little harder to pull this off than with Dragalge. Alternatively, you can consider making use of one of Maractus' abilities. If you go with Chlorophyll as your choice of ability, Maractus' speed is doubled when the weather is sunny. While putting it this way isn't entirely accurate, you can think of this, for simplicity's sake, as giving Maractus an effective base speed of 120, which is much more viable and puts Maractus among the faster Pokémon. There is one drawback to choosing Chlorophyll, though, and that drawback is losing out on another great ability.
See, if you go with something other than Chlorophyll, you can give Maractus an immunity to water-type moves. Water Absorb makes it so that any water-type move not only doesn't hurt Maractus, but actually heals it. Storm Drain, Maractus' Hidden Ability, does not cause water-type moves to heal it, but does make it immune to them and makes it so water-type moves are drawn to Maractus over other targets, effectively shielding other Pokémon you might have on the field. Of the two of them, unless you're particularly interested in Double (or Triple, as rare as they are) battles, Water Absorb is undoubtedly the better choice. Gaining HP, after all, is even better than losing no HP.
So, the question really becomes one of whether you want to go with Chlorophyll or with Water Absorb. In all honesty, Water Absorb is the better choice, as it gives you an extra option for switching Maractus in safely. It doesn't hurt at all, either, that Water Absorb will make Maractus immune to the all-too-common Scald, shutting down one option for burning Maractus and reducing its physical attack while also whittling down its HP.
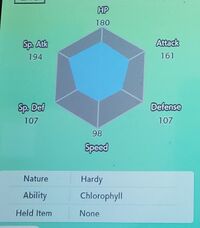
That all said, however, I am always one for experimentation and flexibility, even when it works to my detriment, so I went with Chlorophyll so that I have the option of incorporating Maractus into teams built around Trick Room or teams built around sunshine, depending on what I feel I want to use more at any given time. As a result, we'll be looking at a Maractus running with Chlorophyll. With flexibility as my focus, how exactly did I handle Maractus' IVs and EVs?
As you can see, I elected to ignore Maractus' defenses entirely. This is a Pokémon that I'm assuming will go down fairly quickly once it gets hit, so I have no reason to try and extent its longevity over ensuring it can hit as hard as possible while it lasts. Now, I did aim to have perfect IVs in its defenses, because, even if I'm not investing in them, it doesn't hurt for them to be as high as they can be without investment.
You might notice that I did, however, elect to invest in HP, and, as a matter of fact, poured a considerable amount of EVs into it. In all honesty, I'm not entirely sure what I was thinking, doing that. Perhaps I thought that too much investment in Speed would result in Maractus' not fitting well on a Trick Room team and that I should compensate for the lower HP IV somehow, but, even if that were the case, I should have instead finished investing in Attack so that Maractus could hit as hard as possible with either physical or special moves. Quite honestly, I should have let either Defense or Special Defense have a less-than-perfect IV and have aimed for the perfect IV in HP, so that, again, even without investment, Maractus' HP stat could be as high as possible so it could have a chance of taking a weaker attack without fainting.
The most important thing to focus on here, though, is really maximizing the offensive stats of Maractus. If you go a different route than I did and raised a Water Absorb Maractus or a Chlorophyll Maractus you plan to use exclusively on sunshine teams, it would be best to ensure you have a perfect IV and full investment in both Special Attack and Speed. While a Maractus focused on those two stats won't make a great glass cannon, it is viable and it is probably better than what I've done here.
Nevertheless, I chose what I did, so, while I can't explain the HP investment, I can explain that I thought it best to invest EVs in Attack so that I had an option when faced with opponents with a strong Special Defense. Really, my spread here reflects a goal of maximizing Maractus' power while trying, for better or for worse, to split the difference on Speed so I could use Maractus with more flexibility. My focus was on experimentation and flexibility, and you can see that even in the moveset I selected.
| Petal Blizzard | Special | he user stirs up a violent petal blizzard and attacks everything around it. |
| Giga Drain | Special | A nutrient-draining attack. The user's HP is restored by half the damage taken by the target. |
| Sucker Punch | Physical | This move enables the user to attack first. This move fails if the target is not readying an attack. |
| Spiky Shield | Status | In addition to protecting the user from attacks, this move also damages any attacker that makes direct contact. |
I'll tell you plainly that this is a fairly unorthodox moveset. Petal Blizzard is easy enough to explain. I wanted a reliable, powerful grass-type move to take advantage of STAB (same-type attack bonus, an increase in a move's power if its type matches the type of the Pokémon using it), and it fit the bill the best. Petal Dance is an alternative option that may be better suited to Maractus with more traditional glass cannon builds, as its increased power (120 to Petal Blizzard's 90) will let Maractus better break through foes and the confusion that it inflicts on Maractus after a few turns of use shouldn't matter much if Maractus isn't likely to last in battle but a few turns before taking a hit it can't tank, but I tend to be skittish when it comes to using moves that lock a Pokémon into one move for multiple turns and which cause self-inflicted confusion.
Giga Drain is, perhaps, a stranger choice, as a relatively weaker grass-type move, and, again, if you opt for a true glass cannon Maractus, you might find it useful to swap it out, but I liked the idea of having a move that could let Maractus heal some damage in the event it managed to survive an opponent's attack (or heal damage inflicted gradually by status conditions, weather, switch-in hazards). Maractus' strong Special Attack stat lets it take advantage of the move, allowing it to inflict a considerable amount of damage (and restore a decent amount of HP) despite the move's relatively low power.
Sucker Punch, I added so that Maractus continues to have an option even if it found itself stuck outside of the sun or Trick Room, and, to a lesser extent, so that Maractus can hit opponents that resist grass-type moves. If Maractus gets caught in conditions that aren't ideal and is sure to be outsped, you still have a chance of knocking out an opponent before it can knock Maractus out by turning to Sucker Punch and hoping all that investment in Attack is enough to give Sucker Punch the power it needs to deliver a knockout.
As strange as Giga Drain is, I have to admit that Spiky Shield is an even stranger move. To tell you the truth, I added Spiky Shield entirely because I wanted to experiment and because I like raising Pokémon with some surprises. If you know an opponent is going to go for a physical move (especially if they're using a move that makes contact), you can surprise them with Spiky Shield, protecting, for that turn, Maractus from damage and, if they did use a contact-making move, dealing some damage back to them. There are some cases where they'll bypass the protection it offers, and, admittedly, your opponent will likely catch on quickly enough to switch to targeting you with special moves to avoid taking any damage on turns when you are likely to raise your shield, so it has limited utility, but it is a fun surprise to break out.
Now, I could have opted for Sunny Day over Spiky Shield, since I ran with Chlorophyll, but, I planned on having other Pokémon that could use Sunny Day on a team with Maractus, so it didn't seem necessary for Maractus to use one of its four moveslots to manipulate the weather.
There isn't much more to say about how I've raised Maractus. As you can see, I raised a more experimental Maractus here, and, truthfully, that may not have been the best move. It makes for some interesting battles, but, even prioritizing fun over victory, there are some decisions which should have been made differently here. Let this be a lesson to you that, at some point, you will have to make a choice between flexibility and utility. The more flexible you make a Pokémon, the less suited it is going to be to any particular role. Do you want a jack-of-all-trades that, perhaps, won't be able to effectively compete with more specialized Pokémon, or do you want Pokémon with clear specialties that are, perhaps, predictable? On the competitive circuit, the latter may be the better route, and, if that's the route you want to go, hopefully you can see now why it would have made more sense to invest mostly in Maractus' Speed and Special Attack, with only the leftover few EVs allocated to Attack (or, if you drop Sucker Punch, to HP). Raising truly competitive Pokémon, though, isn't necessarily our goal here, and, if you want to try something different, like I have here, there's merit in doing so. I haven't won often with Maractus, but, sometimes that element of surprise provides enough of an advantage that you can throw an opponent off at a critical moment. This Maractus hasn't been a consistent loser, so there is hope yet for more experimental builds, and you shouldn't be discouraged from trying your ideas out.
That all said, that wraps everything up for the day. There's plenty of meetings left before the end of the course, so, rather than bore you with more notes, I'll end things off here. If you have questions, feel free to approach me. Otherwise, we could all use a little levity, couldn't we, and we still have to incorporate some fitness-related activity, so why not put your notebooks away and do a little dancing with Maractus? Have your fun now, and we'll meet again next month.
The Greatest Quest
Written by: The Wandering Shoestrel (talk)
Hello again, yon reader and, welcome back to The Greatest Quest, the tale of the brave and bold Sir Cucumber, who adventures to rescue Princess Tomato from the sinister Minster Pumpkin in Princess Tomato: In the Salad Kingdom. Last month, our heroes made their first contact with the resistance, fighting against Minster Pumpkin's tyranny. Finding out about the resistance's general's headache, our heroes secured the aspirin that will hopefully cure his head. Unfortunately, before they could deliver it to the general, they were sold out by the Quisling bookstore owner, Simon, leading to our hero's arrest and where we are now. So:
♪ Come gather you readers, ♪
♪ I'll tale you the tale ♪
♪ Of how the brave Cucumber warrior, ♪
♪ Escapes from the jail. ♪
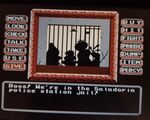
Our heroes find themselves stuffed in an overcrowded jail cell.
Checking the hallway, we see that there are no guards. Checking the inmates, we have:
- Sprout: Just a kid.
- Turnip: A resistance soldier.
- Potato: He doesn't look like he wants to corporate.
- Mushroom: His body is all soggy.
Our heroes talk to Turnip, who confirms that the resistance base is in the Parsley Forest, but, when our heroes talk to him again, he warns Sir Cucumber that the forest is a giant maze! Talking to Mushroom reveals that somebody named Mr. Mole has found some important instructions before Mushroom begs Sir Cucumber to save the princess. Potato, as Percy says, proves to be uncooperative, but Sir Cucumber hits him, convincing him to talk. Potato gives Sir Cucumber a file, and Sir Cucumber uses it to begin his escape plan. Unfortunately, just as our heroes make their escape attempt, another officer arrives, capturing them and taking them to the interrogation room.
In the interrogation room, we find ourselves face to face with the jail's warden, the traitorous Sergeant Pepper.
Talking to him causes him to ask a series of questions:
- Why were you in the bookshop?
- You resistance members?
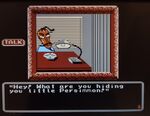
- Hey! What are you hiding, you little Persimmon?
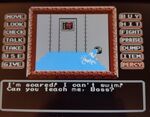
After asking the last question, he turns red with anger. Talking to him some more causes him to demand that our heroes give him their file, and, upon doing so, he surmises that the file is how Sir Cucumber escaped. After confiscating the file, he then takes the heroes into the torture room, a small room with a pipe that fills up with water. Outside the door sits Sergeant Pepper, laughing at us.
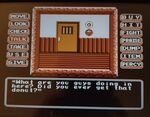
Sir Cucumber, being the observant hero he is, checks the door, realizing that there's a small hole covered in rust on it (you have to check it twice). He then strikes the door twice, tricking Sergeant Pepper into leaving, left thinking that escape is impossible. After he leaves, Sir Cucumber hits the door again before Percy checks the door once more and notices a small keyhole under the water. As luck has it, the key that we took from Simon's bookshop just so happens to fit! Using the key, Sir Cucumber unlocks the door, and he and Percy escape the death trap.
Outside the torture room, our heroes find themselves in front of another jail cell. Looking into it, our heroes see that somebody is inside (you have to look into it twice). That person? It's the Garlic Wanderer. Talking to him through the jail cell, he asks Sir Cucumber if he ever managed to get that donut.
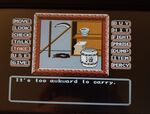
Of course, being the great hero he is, Sir Cucumber gladly hands over the donut to the imprisoned man. Sadly for Sir Cucumber. while Garlic is grateful for the donut, he has forgotten the important news he needed to tell the brave hero. Moving to the right, Sir Cucumber and Percy find a closed door, but Percy feels that it's too risky to enter. Deciding to return to Garlic, he asks you if you want to see what he made. With him handing it to you from his jail cell, you find out that it's a toy grenade carved out of soap! Deciding to look around more, Sir Cucumber and Percy move right twice, finding themselves at another door. Entering that door, they find themselves inside a storage closet. Inside the storage closet, they find a sickle, bucket, barrel, paper, and rope.
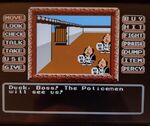
Our heroes decide to take the rope, bucket, and paper before leaving the closet (and, no, you can't take the sickle and become the lord of the harvest. Believe me. I tried.) From here, they attempt to leave the prison, but there are too many policemen (who are apparently humans?) at the front gate, and they are forced to retreat back inside. Suddenly, Sir Cucumber has an idea, and decides to return to the room that Percy deemed too risky to enter. It turns out this is the office of Sergeant Pepper, who expresses surprise we escaped from the torture room. Sir Cucumber then activates part two of his brilliant plan, pulling out the grenade and sending Sergeant Pepper into a panic. With the traitor panicking, Percy uses the rope to tie him up.
With the Sergeant now tied up and dealt with, our heroes decide now is the time to escape. Returning to the exit and checking the cops, Sir Cucumber notices they all have paper lanterns. Percy suggests finding a paper lantern to use as camouflage. Returning to the storage room, they find that somebody has put a paper lantern in the room now, so, obviously, they take it.
These cops are not quite as smart as the town gate guard; using the lantern allows us to move out the front gate, completing our hero's daring escape.
That, my friends, will bring us to the end of this chapter. Thanks to the brave Sir Cucumber's might and Percy the squire's cunning, the vegetable warriors defeated Sergeant Pepper and escaped from the jail. Join us next month, where we'll continue the tale with the newly freed Sir Cucumber continuing his effort to find the resistance and save the princess. Before we go, this chapter has inspired another song.
♪ The cruel sergeant Pepper, ♪
♪ He flooded the jail ♪
♪ But with a grenade carved of soap, ♪
♪ They escaped from that jail. ♪
To Infinity and Beyond
Written by: Waluigi Time (talk)
Greetings space rangers, and welcome back to more Toy Story 2. Last time, we went all the way to Al's Toy Barn on a Saturday - all the way to Al's! We're not quite done there yet, though. In the movie, while the toys search for Woody in Al's Toy Barn, Buzz wanders down the Buzz Lightyear aisle and encounters another Buzz in a display, just as convinced that he's a real space ranger as Buzz himself was in the first movie. Well, the game kind of takes that and blasts off into hyperspace with it, creating an entire second level with a section of space toys - Al's Space Land! It's unlocked once you have 11 Pizza Planet Tokens, so you'll immediately have access to it once you complete Al's Toy Barn. As always, here's the music for the level (this is probably one of my personal favorite tracks from the game, not to mention one of my favorite levels thematically).
Starting things off, head to the left to the arcade section. There's a drink cup on the ground for some reason, which you can use to jump up onto the seat. From here, jump onto the top of the arcade cabinet, and platform across the other arcade cabinets, dealing with the enemies along the way. There's also a pretty obvious battery to collect on the way. On the last arcade machine, there's a teetering drink cup, which you can knock off to serve as a shortcut up onto the claw machine nearby. From here, jump onto the top of the claw machine, then jump over to the ball pit to the left. The ball pit basically acts like quicksand, so you'll want to keep jumping to keep your speed up. There's some coins in here, but more importantly, the first alien to collect. Once you're done with that, climb back out and jump over to the claw machine. Inside the claw machine is a Pizza Planet Token, but you have no way of getting in there yourself. Instead, there's a button that controls the claw when you stomp it. The first time you stomp it, it'll move from left to right. The second time, it'll stop in that position, and then begin moving from front to back instead. Once you stomp it again, it'll stop moving, and grab whatever is below it before resetting. You have to stomp it at the right time both times so that it the claw is positioned above the Pizza Planet Token, which it will then drop at the bottom of the machine for you to collect. Also, this is where Rex is, if you want to talk to him.
Once you're done in the arcade, head back to the main room. Before doing anything, go towards the aisles straight ahead from where you started to get the green laser upgrade. There's a box nearby that you can push across the room allowing you to jump onto a taller stack of boxes, and from here, you can climb on the space mobile. There's some coins on the poles, but the main thing you want to focus on is the second alien, which is on a pole holding up a cutout of Mars. After getting the alien, jump over onto some boxes that are otherwise blocking you from accessing the room. In here, you'll find the level's boss - the Buzz Lightyear Buggy! This may be one of the game's few bosses that originate from the movie, assuming that he's supposed to be the other Buzz, though his texture is identical to Andy's Buzz and lacks the distinctive blue utility belt. (Then again, the same thing happens at one point in the movie due to an animation error.) Anyway, the Buzz Lightyear Buggy is a very easy boss, and you probably won't even see most of its attacks if you just spam the laser. Aside from trying to ram into Buzz, the Buzz Lightyear Buggy can fire rockets that can be deflected with a spin attack, and he also has his own version of your laser. There's also a battery in one of the corners if you need it. After defeating the Buzz Lightyear Buggy, collect the Pizza Planet Token and climb back out into the main room.
Alright, time to tackle those aisles in back! The leftmost and rightmost aisles aren't going to be useful right now, so we'll want to go straight ahead. To save time, pick the one to the left first. Climb on the boxes and swing across the poles, taking care to avoid the cannons on the left side of the aisle that are shooting at you for some reason. You'll need to double jump to the last pole, so keep that in mind. From the top of the display, you can jump over to a red shelf that contains the Cosmic Shield. Like everywhere else in the game, it's completely optional, and you can probably tank what little damage you'll take if you skip it, which I personally recommend. There's even a battery just before this section, so don't worry too much about it. The reason that the Cosmic Shield is here is because this aisle has Buzz and Zurg toys in their boxes on opposite shelves, engaged in a laser battle with you in the crossfire.
Eventually you'll reach some boxes which you'll want to climb up (if you still have the Cosmic Shield active at this point, you'll have to wait for it to go away before you can jump up) and onto a shelf with a zipline. The zipline will take you to a shelf with a battery and yet another zipline, which you'll want to take across. Don't let it take you to the end though, instead jump off onto the first set of boxes you see to collect the third alien. Platform across the rest of the boxes while dealing with enemies, and at the end you'll find Hamm. I ended up with enough coins for him while going through this area, so we'll get the Pizza Planet Token from him. Climb up onto yet more boxes where you can get the fourth alien, and push a smaller box onto the floor below, creating a shortcut back to Hamm which you can access from the leftmost aisle we initially ignored. If you haven't gotten enough coins yet, it's nice to have, if not, well you probably won't be coming back here.
After this you'll come out basically back where you started, so now you'll want to head to the aisle on the right instead. Climb onto yet more boxes (they really like using these I guess) onto yet more shelves, and jump across to the left side. Here you'll find the Flying Saucer, who challenges you to a zipline race. The race is pretty simple, just ride along the ziplines until you reach the red portion. Once you hit that part, double jump and hold forward, and you'll grab onto the next one. Keep doing this until the end, and if you arrive on the checkered platform before the Flying Saucer, the Pizza Planet Token is yours! (If you fall down, you'll have to walk all the way back to the start and deal with some enemies along the way. There's nothing else here, so no reason to intentionally come here unless you need coins that desperately.) From here, jump across to grab the fifth alien, and you can drop straight down to find the Mothership, who's been looking for them this whole time. Talk to her and she'll give you the last Pizza Planet Token. (This is the rightmost aisle, by the way.) With that, we're done!
So now we're done with Al's Toy Barn... Sort of. There's still the boss level, and as usual, it's going to have similar theming, and probably takes place in the building if the map is to be believed. But that's for next time! See you then.
Gameplay screenshots were taken from Nin's playthrough on YouTube.
Mach Speed Mayhem
Hello, 'Shroom readers! Your main man Superchao here, with yet another F-Zero racer! We might be in the final year of Mach Speed Mayhem's tenure, but that doesn't mean I'm going to take my foot off the gas in writing about the characters! So for this month, we've got #26: John Tanaka, the hopeless suitor of the F-Zero!
Main Series
John Tanaka, like so many others, is introduced in F-Zero X as part of upgrading the field from four characters to thirty. He's an engineer, and a member of the Galactic Space Federation, although it's called the Milky Way Federation in John's X bio. And he's focusing really hard on protecting Jody Summer during the race, and... that's about it, really. His hyperfixation on Jody is all we get. F-Zero GX didn't feel like adapting much either, as it only clarifies that yes, he has a huge crush on her, up to considering a proposal if he wins the Grand Prix. Considering Jody's attitude towards him is "good mechanic", good luck, John! You'll need it.
His GX interviews at least try to flesh him out a bit more, but they still don't do that much, frankly. He's very low-energy, which is ironic when he credits his victory to his energy, but he mostly provides the usual stuff - he plans to beat his rivals next time around, he joined to protect Jody, he even just plans to put his space credits in savings! He's also very dedicated to his job, since he shills the Galactic Space Federation as a good place to sign up, he mentions he plans to give his machine a nice polish, and he says that you have to love your machine to win. Oddly, though, John hits us with a left hook when he and Mr. Zero discuss that he learned martial arts by spending years as a hermit on a mountain. And it didn't even do more than keep him in shape and teach him good manners. What were you doing up there, John?
John actually gets to appear as more than just a field filler in the F-Zero GX story mode, even! When Captain Falcon arrives at the Lightning Area to find the buildings exploding thanks to Black Shadow, he finds John Tanaka has already escaped. John's the one to tell Falcon that Jody is still inside the building, and once Jody is rescued, Falcon drops her off with John to recover. And how does Mr. Tanaka here return the favor? By bringing his machine to the Chapter 7 30-car race, and being one of the tougher competitors. Thanks, John. Really appreciate it. At least once he's beaten, he doesn't interfere again!
On to his machine! The Wonder Wasp is John Tanaka's pride and joy, considering that he made it himself! Originally just a little hobby project, once Jody went for the Grand Prix, John decided to upgrade his hobby project to a full-fledged F-Zero machine. And thanks to his talent in engineering, it's not half-assed - the Wonder Wasp was built with a professional's eye for detail and quality on every single part. It took a lot of massive customization and the spirit of a genuine artisan, but the Wonder Wasp is ready to face off against anything on the track! The listed stats are D Body, A Boost, and D Grip, putting it on the weaker side of things in X - might have a good boost, but it doesn't have the rest to back it up. In GX, it gets a bit more averaged out, with the body still frail and fragile but the boost, top speed, grip, and acceleration all generally middle of the road. It won't be spectacular any time soon, but the balance makes it good when you're starting out.
GP Legend series
To be frank, John Tanaka is one of the blandest characters in F-Zero. So how did the anime handle them? Why, give him a prrrrromotion - and make him comedy relief! John Tanaka in the anime is the always suffering director of the Mobile Task Force. He is, frankly, not very good at his job, with Jody usually taking actual command of the situation and the Chief above him always making sure Tanaka takes the blame. Caught between a rock and a hard place, John bumbles his way through the anime, trying to keep his head above water. Heck, his very first appearance has Jody taking control of waking Rick Wheeler up, while John just hopelessly fears what happens when he tells his boss. Wrecked machines, missing pilots, bombs on machines... Tanaka has to balance everything in all cases, and with how milquetoast he is, he has one of the toughest times out there. It doesn't help that even his good moves don't work out. Hire a drill sergeant named James McCloud? Turns out the guy is playing both sides. Summon the Chief to watch the Task Force perform well? That's the day they botch hard. Try to blockade Dark Million? They blow up his blockade with ease. Tanaka suffers most.
While most of his appearances are background comedy relief, there's one episode where he is the star! Along with Pico. In Episode 15, Zoda hires Pico to eliminate John, which should be an easy job for him, in order to kneecap the police. Naturally, our resident director and Kate Alen superfan (the man gets concert tickets by fixing her manager's parking tickets) finds unique ways to get through all the trouble that Pico throws at him. A parcel in a time bomb? John makes statements alluding to it exploding and reaches in his desk, enough to scare Pico off and blow his initial cover. When locked in his office to prevent him from attending Kate's concert while under threat, John dramatically points out the window to make a statement - right at Pico, enough to cause him to abort a sniper attempt.
Even John's efforts to sneak out and hail a taxi driven by Pico convince the latter this is all part of a plan, considering that he hails it right to the concert... which is also where the Dark Million operation of the week is set up. Absolutely certain that John's entrapped them, Pico can only report to Zoda that John is the true ace of the Mobile Task Force, forcing Zoda to direct all his operatives to catch him at the concert. Which they do! With surprising ease. But now that they're sure he's a supercop, they spend their time interrogating him instead, long enough for the rest of the Task Force to come in and forestall it. They even compliment John on his clear bravery and surprising intellect... but unfortunately for John, when Kate Alen shows up, she only has eyes for Rick and Mr. EAD. Sorry, John. No luck for you.
John's only other appearances of note are threefold. In the Octoman episode, he actually shows up on the track for one race, where he shows off a surprising level of skill on the track, even pulling off a tactic (hitting the edge of the boost plate for more boost) that the rest of the Task Force weren't aware of. He even catches up to the lead at one point! ...And sparks an accident that takes out everyone except Octoman. On the plus side, that ends up denying Zoda the success he wanted that episode, so things worked out fine. He appears in the Imposter Blood Falcon episode, where he ticks off the Chief enough to make the Chief isolate himself in his office, allowing for the Blood Falcon with shapeshifting powers to take his place. And in the finale, he helps out the entire Mobile Task Force holding off the Dark Million minions, even making a good save for Lucy Liberty. He can do it when he counts! Even if Bart Lemming's beliefs are that he probably got the job from nepotism or bootlicking. But, Bart does give him credit - maybe it was just his piloting skills!
In the GBA games, John doesn't even get a cameo role in the F-Zero: GP Legend story mode, relegated to full backgroundhood there. At least F-Zero Climax gives him a bio! It confirms what we all know - as a weak-hearted man with a job that has high pressure, all his gentlemanly exterior is just him flailing around and trying to cover his ass while he gets pushed from both ends. His vehicle's bio, meanwhile, mentions that the Wonder Wasp is a highly technical and complicated machine to drive... but despite that, John remains a top-class driver, even though he barely races anymore. Maybe he should have turned down that promotion.
Other Information
Remember way, way back when I did Octoman's article? And I mentioned that in some of the art for the Deep Claw, it had the number 26 instead of 8, indicating it was swapped in development to represent his octopus theme? Well, since we're at number 26 now... you guessed it, in some of the early X art, John Tanaka's machine was the 8 instead. He had to take Octoman's leftovers when the latter got the octo number, but it worked out - John just feels like a #26 more than he does a #08.
That's it for John Tanaka! With only four characters left, come join me in one of the last votes!
SIMulation
How To Kill Your Grandma With a Treadmill
- Not to be confused with Dreadmill
Sometimes, grandmas are just useless, meddling fragile people who really need to go, and their advice can be shaky at best. There are multiple ways to kill them of course, one obvious one is shoving them down the stairs, but considering that we strive to be athletic and fit this month, here is a quick guide on how to do away with your old pile of bones using a healthy fitness machine: the treadmill. Who knew a minigame from Mario Tennis: Power Tour can be so deadly.
Unlike the previous guides, you do not require any DLC packs to kill your grandma.[1]
1.Get a lucky contestant family that has a grandma in it.[2] You can make yourself a family of course, but my Sims that are typically demonstrated in these issues are already subject to enough torture as is, so we will give them a break this time around.[3]
- You can also age up Sims to be grandmas but that either requires editing them through Create-a-Sim (CAS) or requires cheats, with MC Command Center being the most efficient way to instantly age them up. It's faster to pick a family with a grandma in it.
- You can even change the gender of grandpas to be grandmas too! Transgender rights!
- Ghosts that look like grandmas cannot die from treadmills, we are sorry to announce that.
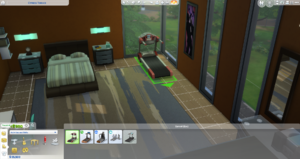
2.Buy a treadmill for her.[4] She's clearly out-of-shape and not exercising enough. You care about your grandma's well-being right? Get a brand new spanking health device for her then! You get double credit if your household already owns a treadmill.[5]
- Any treadmill works, whether you go for the §900 one or the very expensive §3,600 one. Color does matter though, pick a red one that represents blood...you know, you need good blood to exercise right, correct?
- It does not matter where you place the treadmill. You can have it in the bathroom if you like. Sell your own bathtub even. Just as long as it fits and your grandma can reach it, you will be fine, trust me.
3.Force your granny on the treadmill.[6] Grow those legs! Show age who is boss here! Just because you're 83 and almost dead doesn't mean you cannot burn calories! Eventually, she will get the dangerously exhausted moodlet, which is a sign that she will die from continued exercise. Unfortunately, the high amount of uncomfortableness from the moodlet normally prevents her from using the treadmill again;[7] however it can be counteracted by strong buffs. The noncheat way makes use of reward potions you buy from the aspiration store that override her moodlet, but in this case, the mods being used here to speed up the process are Meaningful Stories by roBurky (which turn the Uncomfortable moodlets into boosters for negative emotions) and The Sims 4 Sim Torments by Sacrificial, that gave my grandma a terrified moodlet!
- WooHooing while your grandma is under the effects of the same moodlet can kill too but for goodness sake, we're strictly an E-rated paper and it is arguably not a fitness related activity anyway.[8]
4.Watch the Grim Reaper take your granny. Wait, what, she died already? Uh...who knew that grandmas can't be Olympian champs...come on, we expect better out of her.
- Inheritance here we go! ...wait The Sims 4 doesn't even have inheritance! NOOOOOO!!!!
References
- ^ However, DLC packs do come with worlds, which come with premades, which can come with more grandmas to kill.
- ^ Grandpas work too but they're not your grandma, they're your grandpas and it would be a misnomer to kill your grandpa when the title of this explicitly says "grandma".
- ^ Just call the Grim Reaper for more info on what I mean you lazy loon!
- ^ In The Sims series, no waiting for an online order or going to a brick-and-mortar Wal-Mart necessary! Just click on Build/Buy mode and get a treadmill there!
- ^ By the way, any health device works, but again, treadmills are the focus here and "dread" rhymes with "tread" so it sounds cooler than "heavy lifting machine".
- ^ Take control of her and command her to work out. She will obey without question, with or without autonomy.
- ^ The game will gray out that interaction saying Vivian is too miserable to do this. The game wants to save grandmas for some reason, I don't know why a life simulator would want you to protect your Sims.
- ^ No, we're not going to source any scientific papers, do your own research you weirdos.
On the Origin of Species
Written by: ZelenPixel (talk)
Ya girl is playing Spore again! What's the Stabby empire up to this time? Something, I think! I wrote a lot of this back in March, but that also meant I wouldn't actually skip a month this time. Hooray!
On a note related to Spore, have you heard of Adapt? It's an early access game that seems to take heavy inspiration from Creature Stage in particular. It has a demo available right now! I've seen some footage, and played some of the demo myself, and it seems really interesting!
I recently also got a Java mobile emulator on a whim and played Spore Creatures. It's pretty neat! It's kind of like top-down Creature Stage. I've played it for so long on actual mobile devices, so I'm very familiar with it, and everything is more or less the same to how that was, though the music is way fancier and that's been really interesting to hear! The Spore mobile games have oddly really good music, too! The editor theme in this is great!
Space Stage (you can guess)
Last time we were just working on badges. That involved picking up artifacts, contacting empires, terraforming, and all that stuff. We also found a bunch of Interesting Glitches. Let's catch you up to the terraforming nonsense! For context for the next mission, I had just finished making a creature to put in a new set of flora and fauna to populate planets with.
I had to run off and pick up more wildlife to get it to T3, but realized I could actually pick up some more terraforming instruments! The Hot Cloud Vacuum is particularly going to be useful for this one, as it raises the temperature and lowers the atmosphere level. For now, I can only get instruments to lower the atmosphere level alongside changing the temperature, as most planets I find will have low atmosphere, but Terra-Wrangler 5 or Empire 5 will unlock the same tools that let me raise the atmosphere level. I'm about to go terraform again and then I get my city attacked by aliens again! I dealt with that problem, terraformed, and now I have another T3 purple spice colony! I have to place cities and buildings first, of course, but that's easy.
While I have the stuff in my cargo, let's also finish terraforming this one random planet on my home system and get it to T3, just because I felt like it is all! I do have to terraform Something to get Terra-Wrangler 5, in any case. I look around for more planets to occupy with spice I want, but I'm finding nothing that hasn't been occupied. Luckily, we have trading! I established trade routes with my allies on a pink spice colony, a green spice colony, and I also just took up a free planet with yellow spice, also terraforming it. For some reason, only Umielvin (one of my red spice colonies) gets raided by mean empires? This is the third time I've had to defend it today. I sure am earning the Body Guard badge for it, though!
Alright, the yellow spice planet's now been terraformed to T3, with the Spice Storage and Uber Turret also put there and all the buildings in cities in place as well! Once I'm done with the trade routes and I purchase those systems, I should have at least two colonies per each spice type, so with each run I do of picking up spice from my colonies, I get at least 60 of each color! I also went and picked up spice in the order of the colors of the rainbow again, just because it's nice! I sold it off, decided to also terraform my home planet's moon, also just because I felt like it. I temporarily cleared out my cargo while doing it because I need to reorganize it badly. Gosh, not again! Umielvin is getting attacked again! Can't you see I'm busy? Great, while I was picking creatures back up after dealing with that, I get both an ecodisaster AND another raid (guess what, it's Umielvin again). Leave me alone?
Apparently one of the mean empires that was at war with me (but hasn't touched me in a while) has been destroyed by someone. Huh. I didn't know they were in trouble until I saw the alert for it. Judging by the wrong name showing in the Sporepedia, my zealot allies are the ones who got rid of them. I finally finished organizing my cargo, and decided I'm gonna go terraform the planets I established trade routes with. This will even give my allies a relationship boost for "Helping our planet"! Even if I'm only doing this because this is going to be my planet later! And oh, hey, look, the second planet I'm terraforming here will also get to make use of the Hot Cloud Vacuum. Nice! It's just faster and more energy efficient to use this instead of the Heat Ray and Cloud Vacuum separately.
I leave the planet after terraforming it to T3 and get three alerts. Guess what? Umielvin is getting raided for the billionth time! Also my allies get attacked, which I'm not gonna do anything about because I'm not going to attack my own allies who are attacking my other allies! The specific empire that keeps going after Umielvin has only one star, but they have two planets occupied within it, so I'm thinking of going after one of those planets and taking it out in defense. I did that, and I still filled out some ecosystems on their planets because I wanted the little plant icon to be a little creature icon instead. One of my allies was losing interest in my alliance and I gave them a bunch of money and did a mission for them so they're happy with me again! Aw, the poor guys in the tribe planet they sent me to only have a medium plant in their ecosystem and that's it. Somehow they're carnivores too, despite having no creatures to hunt? How did this happen? They have meat and eggs in their food storages. Whose meat? Whose eggs???
I was wandering elsewhere and how did this happen, too? I've located the planet from the start of the stage that had a destroyed civilization on it, and I noticed it somehow has a sapient species on it now, in the civilization stage. It also happens to be Furbies, by the way. I look at the planet and... there is no occupied city to be found, though the destroyed cities are still in place, as well as wherever tribes used to be, judging by some blurry tribe textures. Where is this Furby civilization? Why does the planet show like it has the civilization when it actually doesn't? What's going on? This game just loves to invent entirely new kinds of glitches I've never seen before! ...I've decided to get this mystery planet to T3 too. Might as well. I have no idea what to terraform. While placing and picking up creatures, I accidentally, well, yeeted a creature that randomly manifested in my tractor beam and it apparently landed in water and died.
I still need to terraform ten more times! That's enough to fully terraform three more planets and then still raise a T-score one more time! I restarted the game and went back to the mysterious Furby planet, but there were still no living cities to be found. This is just... so weird. I don't know for certain, but I'm pretty sure it didn't have any civilization on it when I started. I'm kind of amazed? This game may be a bugfest, but it's a spectacular and amazing bugfest sometimes. Umielvin is under attack for the kazillionth time, I've decided after I get the Body Guard 5 badge (which is eleven defendings away) I'm either taking out this empire entirely, or paying them money to stop attacking me, because frankly I've had enough.
I've also had enough of these specific guys attacking my allies, so I've decided to just go and defend them. If these other guys declare war on me, which they will (they did immediately), I'm not really gonna lose out on anything, I don't think. I defended my ally's planet from attack and also got it from T2 to T3 since it was pretty close to it! I've also decided to terraform my shark guys' planets, because I am their mom and they deserve having better planets. One of my allies got affected by an ecodisaster and so the mission text gets the glorious sentence of "Eradicate the infected Spode creatures from the herd." Spode, as in, the deity that zealot empires believe in. (Of course that was just a creature that got infected that happened to be named Spode, but y'know!).
I noticed the Terra-Wrangler badge was staying at 10 more terraforms and I looked it up and, as it turns out, for Some Reason, it doesn't count for the badge if the planet you're terraforming is occupied by another empire. What? I don't get it? This has to be deliberate, but why? I was going for those planets specifically because I wanted to be nice to my allies while earning stuff towards the badge, but that doesn't count for the badge, apparently! Your own colony works, civilization and tribe planets work (I tested), but not other space empires. What? Why? Anyway, guess I have to instead help out civilizations that don't care either way about my existence, as they haven't yet gone to space. Let's help out these creatures that look like a green sausage and are named "Slug2" (I think they're the civilized slugs I mentioned last issue) whose city hall is also a computer part. Sure. Whatever.
I bought one colony from my allies, sent the same exact amount of money to purchase another colony, and apparently (I clicked through it too fast to see what they said) they just said "No lmao" and restarted the trade route again? Huh? Hello? After that, I set up the usual colony stuff on the pink spice colony I purchased, though, then went looking for more planets to terraform and this civilization one is in a pretty poor state, being T1 with only medium plants. I got them to T3 too. I sure hope all these sapient creatures don't mind that I introduce so much more life to their planet within their lifetimes? I mean, it has to be better for them, and the ecosystem is balanced, but it's still a pretty drastic change, right? Whatever the answer is has no bearing on the game. They don't actually care either way. It's just interesting to think about!
I went on another civilization planet and witnessed a plane wildly spinning about somehow. It was moving more or less like normal, but just kept rotating rapidly, and the movement was in itself kind of slow and wonky. Several other planes were doing this, but not all of them! A nearby city also had a ton of planes stacked in the same spot. Oh, this game! Just for good measure, I had to defend Umielvin and my allies again. Why does this keep happening, huh? For the last terraforming, I've decided to terraform the other planet on the first system I got a colony on. Just T1 for now!
And thus I finally get Terra-Wrangler 5! I unlock the Hot Cloud Seeder (raises temperature and atmosphere), and, get this, Air Conditioning (lowers temperature, raises atmosphere) tools. I just thought the second name was funny. At last, I can terraform easier than ever! Not sure what badge to work towards next, though. Body Guard 5, maybe? That's kind of reliant on RNG though, I just have to wait to defend my colonies, so I can't really work towards it. It does say I have to defend "6 more friends" though! Which actually means I can defend one of my colonies 6 more times and be done with it. No idea what to do for now. Should I look for artifacts, maybe? I have 62/100 on Collector 5 right now. I'm not gonna be able to finish it any time soon, as it only counts if you don't find a duplicate, but hey, I also found some Rubies, which definitely looked teal.
I also realized I should probably clean up my inventory of all the flora and fauna I still have here. I mean, I got Terra-Wrangler 5, so I don't necessarily need all of this right now! Let's get something to T3 and then deposit the fauna onto my sanctuary planet. First of all, hey, look, Umielvin is under attack again. What is it like living there when it keeps being attacked every other week (presumably)? Anyway, I've picked a specific colony of one of my allies to terraform. It happens to be situated in the system where I initially got a mission to put a colony in, as well as terraform a planet. The allies are situated on a T0 planet for some reason, instead of the already ready T1 planet. Time to get them to T3! With the help of Air Conditioning.
It has been done, and the remaining creatures have been deposited to my sanctuary planet. It's got 25/30 animal slots now, and I suspect I'm gonna need another sanctuary planet eventually. Back to the artifact hunting, though, now that my cargo is cleared up! I happen to be near a system with an empire that is mean to me and they keep sending ships after me, eventually I'm sure they're going to declare war on me for simply existing within their general vicinity! Which is exactly what they do, only a few mere seconds after I write this. It's a bit of a shame these creatures I made that I like happened to be zealots and thus are meanies, but what can ya do? I'm sure the game will generate another empire with the same creature at some point, if it hasn't already. Either way, this counts towards the Warmonger badge too and I don't even have to do anything for it!
I have to cut the exploring short for Umielvin reasons. My allies are under attack by mean empires, too; I guess I can help them out next. I defend my allies and the first thing they say to me, for some reason, is this odd greeting that you can see in the image to the left. I proceed to help out my other allies too, since the empire attacking them was at orange face with me. They're at red face now! It's more towards the Warmonger badge, I guess. Exploring again, I found a tribe planet where the sapient species is Bubbles from Angry Birds, found Grape Flavored Sky (not Sky Purplinator or whatever, which would match more with the other sky paint tools I have), and, of course, a bunch of artifacts. One of them was on my ally's planet, but I gave them money immediately after picking it up, so it should be okay, I hope.
I found a T3 planet! I thought it was a storybook planet, but it wasn't, and it's actually missing some animals before it's truly T3! But wow, that's lucky! I pilfered some animals from other planets in nearby systems so I could finish out the ecosystem, just because I felt like it. Now, imagine getting FIVE alerts at once! I get like, two raids of my allies, one raid of Umielvin (again), one empire declaring war on me (oddly enough, not any sooner, even though I've been clearing up their ships from my allies for a while?), and one ecodisaster, which I deal with first because it's kind of urgent. I swear, the moment I get Body Guard 5 I'm going to do something about this empire that keeps attacking Umielvin specifically. I've had enough. Oh, and there's the badge, I got it from defending my allies. For some reason. I didn't even get a cool animation for it. It just appeared as an alert in the bottom left and that's it.
Oh yeah! I also can purchase a colony from my allies now, again. So I have it now and earn the Empire 3 badge! It's time to set up some cities and other stuff in it. It looks like the colony I bought had fences for houses and other such nonsense. Well, I'm not gonna do anything about that. Let them have their fence houses because it's funny! There's also a city here (the one that was already there) that has an exit out to water, which is neat because you can't set water exits with your own Colony Incredi-Paks for some reason. It's also funny because... see the image. I also picked up some spice from all my colonies and then suddenly remembered I wanted to put some animals onto that one T3 planet I found... Now the ecosystem is complete and I can rest. I also sold off all the spice and artifacts for some nice money, as I've spent a lot on buying that colony early!
I decided to fly around another orange-face empire to get them to declare war on me, just for kicks. Oh, look! Here's the Warmonger 4 badge! I can get Warmonger 5 by starting five more wars, which is probably inevitable with how easy it is to make someone this angry at me for existing nearby! Oh look, again, more raids! This empire is attacking Umielvin again and I'm going to make sure this is going to be for the final time. I'm also going to help my allies attack the mean guys attacking them too. The mean guys tell me "You're interrupting an existential crisis!" when I try to communicate them and the only response is just "Yes" with no punctuation. Anyway, I'm helping out my allies by clearing out enemy ships when they appear, as well as turrets. Oh, I get a notification for the other mean guys' empire being destroyed, so there they go. Hopefully this'll lead to less raids once I'm done! Also I stole some yellow spice from these guys while I was there. Oh, apparently I've completed missions for them?
Right! Umielvin! This empire that keeps attacking it are claiming that they'll destroy us all, even though they have one system and I have thirteen, each with well-defended T3 planets, and my spaceship also has incredibly powerful weapon tools. Whatever you say! I've decided to bribe them to stop attacking me, because I want to resolve something peacefully for once, and they did help me get Body Guard badges, I guess? I'll also just admit it doesn't feel particularly great to eradicate entire empires like I've done before. Apparently these don't go extinct and they become pirates after you get rid of them, but still, it doesn't feel good. This empire claims I must have been "insane with terror" to offer this much, which is really funny coming from an empire with only one system. In reality, I'm just kind of tired of them and am only leaving them there out of mercy.
I'm back to look for artifacts. I found a planet named Xenomill, and it's a civilization planet, and the sapient species on it are named "Someone" or "Something", and they look like a crocodile head with two legs and a curly coming out of it. Y'know, it's nice to have some peace for once, where for now I only have to defend one ally from enemies every once in a while and hopefully not for long too. I picked up Screeble's Column for 69/100 artifacts! Nice! Speaking of Screebles, that's actually the main creature played in the E3 2006 Spore showcase, hailing from the planet - check this out - Blizac! The one I named mine after!
I get... two alerts anyways? Seems like there's a new empire to keep attacking one of my allies. Sigh. Sigh. Well, it's time to help out my allies with attacking one of the mean guys again, then. Those allies don't have very many colonies, so them being attacked repeatedly is just unfair and mean! I saw an alert for another empire being destroyed; I forgot who they were, but RIP, I guess. My allies ended up dispersing from the planet I asked them to attack again, but I can ask them again and come back to help! I steal some more spice while my allies are dealing with the remaining city. And that's it! The empire is gone and my allies now own the planet! I sell them the spice I took from this very planet, haha! It was at a cheap price though, so it's fine. Also I found a planet named Barfer!
I think something is glitched because I heard sirens when I went on any planet, and the siren sound only exists around where I spawn on the planet. I restarted the save game to see if it fixed the glitch and it did! I recorded the glitch while it was active, though, since it's not something I've ever encountered before. Spore glitches are... something, I can say that much! My suspicion is that this one happened because I had to defend or help attack colonies numerous during this session. Alright, let's get back to the artifacts. I got some unique ones! Finding two artifacts per planet is also just always fun! It happened basically twice in a row, and then there was a pirate ambush. I've noticed that, if there's two planets with yellow radio waves in a system, that means one of them is going to have artifacts and the other will have pirates for certain.
Hey, look! 75/100 artifacts! Hey, look! Again! Someone is really really mad at me for flying within the vicinity of their system and automatically destroying the one ship they sent after me to attack me! And, of course, the best way to deal with enemy ships flying across systems after you is to ignore them and let your fleet and Mega Auto Blaster take care of them. I also found the Rainbow Dash empire, who are scientists for some reason. I don't know what archetype Rainbow Dash would be, but certainly not a scientist? Anyway, she happened to be the first empire I came across and thus got a bunch of my artifacts, giving me money and cargo space.
The pirate ships that ambushed me this time were a bunch of Bubbles from Angry Birds, exactly like that tribe planet I encountered earlier. I think it's time to end this issue on these interesting two encounters, huh? I guess this is what happens if you keep forgetting the GAprop tag on your creations. See you next time, whenever that may be!
Koops, Your Emblem is on Fire
You guys have no idea how much I've sacrificed to make today's watch a reality, but, thankfully, I am still alive and able to deliver the content that so many of you just bang on my door to beg of me to never stray from my career/confinement/cell.
Today, we have another two-parter, this time due to a split. Eliwood and Hector files are both getting used to display two versions of one chapter, and whichever one you get is determined by a very arbitrary requirement. Therefore, ya boy over here had to satisfy the game's demands and sacrifice another part of his soul. But enough about that, here's the goods!
Our new recruit for the month, the invisible man himself (nobody but a select few know what he looks like because of arbitrary requirements), here's the mystery man, Geitz!
Geitz
The eldest son of a wealthy merchant. Finding himself.
Level 3 Warrior.
HP: 40 ~ 45 (85%)
Str: 17 ~ 20 (50%)
Skl: 12 ~ 14 (30%)
Spd: 13 ~ 15 (40%)
Luck: 10 ~ 11 (40%)
Def: 11 ~ 12 (20%)
Res: 3 ~ 4 (20%)
Con: 13
Move: 6
Weapon Ranks: B Axes, B Bows.
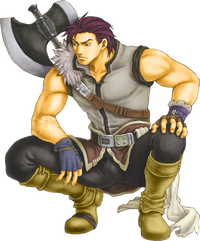
It really is a damn shame that Geitz is locked behind such a obtuse requirements, because holy hell, he's good. If Hawkeye was Marcus without a horse, then Geitz is Marcus without a horse and on steroids. His strength is pretty much on par with Hawkeye's, but Geitz has the extra edge in speed, allowing him to double pretty much everything the former cannot (save for the really fast enemies), so he basically kills everything he touches. He has worse bulk, true, but it's still largely enough to serve him well anyway. That said, he doesn't quite enjoy the same resistance advantage, so magic may actually pose a little bit of a threat, but it's not a huge problem. Geitz also comes with B axes and B bows, allowing him to use a wide variety of weapons from each type, and considering the archers before him aren't exactly the best unit, he gets easy dibs on stuff like the Brave Bow. His Con of 13 does hold him back a little, as it still makes it so Steel Axes weigh him down, but Steel Axes aren't really a great weapon to begin with, and Hand Axes sit at a reasonable 12 weight, and those are the ones Geitz or any other axe user cares about anyway. Plus, the lower Con makes him easier to rescue, so he has a pretty much perfect amount of that. In terms of raw stats, bar none but the final unit, Geitz has the best bases in the game, especially so on Hector Hard Mode.
Geitz has only two flaws, and they don't even have to do with him as a unit. First off, his availability isn't perfect, as there aren't too many chapters in which he can be used, though it's still a serviceable amount and you can still enjoy his presence for a reasonable period of time. The bigger issue, however, is his recruitment method. We've already established that the lords are all pretty mediocre generally, with Hector being the one who struggles least, and uh, it just so happens that they all need to be at a combined level of 50. This means either having all of them around level 17-18-19, having one at level 20 and two at level 15, so on and so forth. Obviously, this requires an enormous amount of investment that is usually not even worth it, considering how much you'd have to slow your pace down just to get them up to speed. Even if Geitz were the uncontested best unit in the game, training the lords just for him just doesn't seem like such an attractive prospect. As much as I want to say that he is worth the pain, the fact of the matter is that he isn't. Even as good as he is, other units can still perform what he can do, save for the B rank in Bows. That's an actually pretty nice niche.
All in all, Geitz is a super good unit, but unfortunately not top tier due to his availability and recruitment condition. That said, if you do get him, then by all means, have fun and cherish him.
Alright, pack it up boys and girls. See you next time.
| The 'Shroom: Issue 181 | |
|---|---|
| Staff sections | Staff Notes • The 'Shroom Spotlight |
| Features | Fake News • Fun Stuff • Palette Swap • Pipe Plaza • Critic Corner • Strategy Wing |
| Specials | Feedback Survey |


