
Yoshi's Safari
- Not to be confused with Safari Yoshi.
| Yoshi's Safari | |
|---|---|
 North American game cover For alternate box art, see the game's gallery. | |
| Developer | Unknown |
| Publisher | Nintendo |
| Platform(s) | Super Famicom/Super Nintendo Entertainment System |
| Release date | |
| Genre | First-person rail shooter |
| Mode(s) | 1–2 players |
| Media | Super NES: |
| Input | Super Nintendo: SNES Light Gun SNES Controller (2-player only) |
Yoshi's Safari (known as Yoshi's Road Hunting in Japanese) is a video game made for the Super Nintendo Entertainment System in 1993. It is one of the few games to use the SNES's Super Scope light gun peripheral, and it is the first of only two dedicated rail shooters in the Super Mario franchise, with the other being Luigi's Mansion Arcade. In Japan, it was released on the same day as Super Mario All-Stars.
In Yoshi's Safari, Mario and Yoshi are requested by Princess Peach to save King Fret and his son, Prince Pine, from King Bowser and his Koopalings, who have invaded the kingdom of Jewelry Land. The Koopalings are equipped with powerful mechs and command legions of minions. Mario rides Yoshi and uses the Super Scope to combat the Koopas.
StoryEdit

Bowser and the Koopalings attack Jewelry Land and imprison its rulers, King Fret and Prince Pine. They also steal the twelve gems that keep the land stable and the resulting earthquake splits the kingdom into two halves: the Light Realm and the Dark Realm. The gems are distributed amongst Bowser, the Koopalings and four powerful minions, all of whom lord over the many regions of the captured kingdom. Fortunately, Prince Pine is a friend of Princess Peach, who promptly sends Mario and Yoshi to save Jewelry Land; she gives them the Super Scope to aid in their quest.
After defeating the Koopalings in the Light Realm and freeing King Fret, Mario and Yoshi head to the Dark Realm to save Prince Pine from Bowser. At the end of the game, a code for a harder game is given to use at the title screen. This not only changes the colors of the levels, but it also makes the bosses harder and changes the text of the story scenes to say that the events of the story are repeating themselves.
GameplayEdit
The game is played from the perspective of Mario, who rides on Yoshi's back and must shoot incoming enemies with the Super Scope. Yoshi's head is always visible, and shooting at him causes a loss of health. The Super Scope can fire automatically, which quickly drains power. The RPM of the Super Scope will decrease when its Power Meter is close to empty; when it becomes completely empty, the Scope will continue firing, but only one shot at a time, even if the Fire Button is still held down (signifying that the player needs to release the Fire Button and let it recharge). There are two Fire Flowers in the game, and collecting them increases the amount of time that the Scope can shoot before needing to recharge.
Yoshi's Safari puts some emphasis on platforming, and at times it's imperative to jump (via the Cursor button) in order to avoid some obstacles. Also, there are branching paths that leads to different enemies, mini-bosses or prizes; they always end with the same main road, which leads to a boss. The bosses include the Koopalings, with some of them piloting Mechs; bigger versions of normal enemies (such as a large Magikoopa or the Big Boo); and Bowser himself, wearing a suit of armor equipped with two Gun-Hands and a devastating energy cannon located in the stomach.
ControlsEdit
- Super Scope
- FIRE: Shoots at the screen.
- CURSOR: Makes Yoshi jump. During boss battles, uses item.
- PAUSE: Pauses/resumes the game.
While the game is paused, holding CURSOR and repeatedly pressing FIRE twice resets the game back to the title screen.
When selecting 2-Player Mode, and plugging a Super NES Controller into the first control slot, the player with the SNES Controller controls Yoshi's movements, allowing him to move side to side or duck. The player using the Super Scope will only be able to shoot at enemies; they will not be able to make Yoshi jump by pressing CURSOR during this mode.
- Super NES Controller (2-Player Mode only)
 : Moves Yoshi.
 : Makes Yoshi jump. During boss battles, uses item.
 : Reduces Yoshi's speed during a course.
CharactersEdit
PlayableEdit
| Image | Character | Description |
|---|---|---|
| Mario | The controllable character, Mario carries, aims, and fires the Super Scope while riding on Yoshi's back. He is not directly seen in gameplay. | |
| Yoshi | Yoshi carries Mario through the stages, walking automatically along the path and stopping for bosses that get in the way. If hit by enemies or the Super Scope's shots, he takes damage and eventually loses a life. |
Non-playableEdit
| Image | Character | Description |
|---|---|---|
| Princess Peach | The princess of the Mushroom Kingdom, Princess Peach sends Mario and Yoshi on their journey. | |
| King Fret | The King of Jewelry Land. He is saved after the Light Realm is completed. | |
| Prince Pine | The Prince of Jewelry Land. He is saved after the Dark Realm is completed. |
EnemiesEdit
Normal enemiesEdit
| Image | Enemy | Description | Stages |
|---|---|---|---|
| Flying Goomba | Basic enemies that fly in fast arcing patterns from offscreen before homing in on Yoshi, usually in a one-by-one line. | 1: Grass Land 2: Mushroom Land 4: Crescent Coast 5: Spirit Mountain 6: Grand Bridge 10: Float Castle II 12: Bowser's Castle | |
   
|
Koopa Para Troopa | Enemies that fly very slowly in large groups. Their shell color varies by stage, but is most often green. | 1: Grass Land 2: Mushroom Land 3: Pipe Island 4: Crescent Coast 6: Grand Bridge 8: Cornice Cave 11: Dark Sea 12: Bowser's Castle |
| Bullet Bill | Quick-moving enemies that travel in a straight -but often inaccurate- line towards Yoshi in groups. | 1: Grass Land 5: Spirit Mountain 7: Float Castle I 10: Float Castle II 12: Bowser's Castle | |
| Koopa Shell | Turtle shells that knock around walls in a zigzag pattern, usually in groups. | 2: Mushroom Land 6: Grand Bridge 7: Float Castle I | |
| Podoboo | Fireballs that hop around slowly and aimlessly. | 2: Mushroom Land 7: Float Castle I 8: Cornice Cave 9: Ghost Mansion 10: Float Castle II 12: Bowser's Castle | |
| Nipper Plant | Small enemies that slowly crawl along the ground at Yoshi while snapping their jaws, eventually leaping into him. | 2: Mushroom Land 3: Pipe Island 4: Crescent Coast 7: Float Castle I 9: Ghost Mansion 10: Float Castle II 11: Dark Sea | |
| Monty Mole | Small enemies that pop out of pipes before scurrying around. | 3: Pipe Island 8: Cornice Cave | |
| Cheep-Cheep | Fish that swim back-and-forth in synchronized schools underwater, or leap in arcs over the path before flopping around to knock Yoshi in while above water. | 4: Crescent Coast 6: Grand Bridge 11: Dark Sea | |
| Bloober | Squid that bob around lazily but unpredictably underwater or pop up and bounce around slowly above water. | 4: Crescent Coast 6: Grand Bridge 11: Dark Sea | |
| Para Bomb and Bob-omb | Living bombs that parachute down onto the path before walking forward. | 5: Spirit Mountain 6: Grand Bridge 10: Float Castle II | |
| Spiny Egg and Spiny | Spiked turtles that drop from the sky before crawling at Yoshi. | 5: Spirit Mountain 7: Float Castle I 9: Ghost Mansion | |

|
Big Boo | Ghosts that bob erratically, holding still and guarding against shots when faced head-on. | 9: Ghost Mansion |
| Mechakoopa | Toy Bowsers that walk back-and-forth, getting briefly stunned if shot, allowing them to be kicked out of the way. | 12: Bowser's Castle |
Mini-bossesEdit
| Image | Mini-boss | Description | Stages |
|---|---|---|---|

|
Hammer Brother | A turtle that throws pairs of slow, arcing hammers one after the other at diagonal angles. Occasionally, it hops a short distance. | 1: Grass Land 12: Bowser's Castle |

|
Boomerang Brother | A turtle that throws a pair of looping boomerangs one after the other at diagonal angles. Occasionally, it runs a short distance. | 3: Pipe Island 6: Grand Bridge 12: Bowser's Castle |
| Sea Devil | An enormous octopus pot-trap that appears from over the underwater horizon. It constantly spawns small octopodes to crawl toward Yoshi. | 4: Crescent Coast | |

|
Sledge Brother | A hefty turtle that throws sequences of vertically arcing hammers while slowly hopping across the path. Sometimes it makes a big jump, bouncing Yoshi when it lands. | 5: Spirit Mountain 10: Float Castle II 12: Bowser's Castle |

|
Firesnake | A chain of five blue Podoboos that winds speedily and chaotically around the screen. Shooting its segments enough eventually detach them one-by-one, turning them into normal Podoboos. | 8: Cornice Cave 12: Bowser's Castle |
| Lakitu | A cloud-riding turtle that swoops back-and-forth on- and off-screen while throwing Spiny Eggs, which turn into Spinies when they land. | 9: Ghost Mansion 12: Bowser's Castle |
BossesEdit
| Image | Boss | Description | Stages |
|---|---|---|---|

|
Lemmy Koopa | •Lemmy attacks in a self-faced robot with five cannons, each able to occasionally shoot slow, green projectiles. Occasionally, the robot hops a short distance to the side. The face is the weak point. •After enough damage, the face is destroyed, exposing the cockpit and removing one of the cannons. The machine becomes more active in jumping and shooting, but now can only be damaged when Lemmy peeks up from the cockpit. •After enough further damage, the machine is destroyed and Lemmy is sent flying. |
1: Grass Land |

|
Ludwig von Koopa | •Ludwig attacks in a dinosaur-like robot with him moving around in a cockpit at the end of its neck, occasionally firing green projectiles from the cockpit's two cannons. To damage it, the large pink lump on the dinosaur's spiky back must be shot when the cockpit moves out of the way. •After enough damage, the main body is destroyed, leaving behind the cockpit and legs, which combine to form a small robot with two arms and legs. It now attacks by launching its fists at Yoshi, occasionally jumping to the side. Shooting a fist enough causes it to be destroyed, exposing the cannon behind it again and causing it to begin firing once more. •Once both fists are destroyed, a third cannon in the cockpits mouth activates, occasionally opening to fire. To damage the machine further, this cannon must be shot when the mouth is opened. The machine continues its previous pattern of occasionally hopping. •After enough damage, the machine is destroyed and Ludwig is left defeated on the ground. |
2: Mushroom Land |
| Wendy O. Koopa | •Rather than pilot a machine, Wendy carries an impenetrable shield while she peeks out between four pipes, throwing bombs every so often. Sometimes, a winged anvil flies slowly above, occasionally stopping over a pipe and launching a horseshoe at Yoshi. Shooting the anvil when it faces the camera causes it to drop, being replaced by another after a few moments. To damage Wendy, the anvil must be dropped onto her. •After being hit by three anvils, Wendy surrenders. |
3: Pipe Island | |

|
Larry Koopa | •Larry attacks in a submarine resembling a sun with a seal's face. It bobs around the area, occasionally opening the two yellow hatches to fire green projectiles from the cannons located behind them. The machine can only be damaged when the hatches are open. •After enough damage, the submarine's face is destroyed, exposing Larry's cockpit. It now rapidly swims back-and-forth, going offscreen on both sides before returning, and occasionally shooting a small bubble projectile from the mouth of a secondary face. It can now be damaged by shooting it anywhere on the cockpit. •After enough damage, the machine is destroyed and Larry floats to the surface. |
4: Crescent Coast |

|
Morton Koopa Jr. | •Morton attacks in a robotic frog with a pair of green projectile-shooting cannons in each back legs, alternating between firing and hopping to the side. Shooting each cannon pair damages and eventually destroys them. •After both cannon pairs are destroyed, Morton begins sometimes peeking out from under the frog's hat to throw bombs, with it still sometimes hopping while he is inside. To damage it further, Morton must be shot at when he emerges. •After enough further damage, the frog stops functioning and Morton is left helpless. |
5: Spirit Mountain |

|
Iggy Koopa | •Iggy attacks in an enormous mechanical Bloober with three flailing cannon-tipped arms on either side, from which it fires three green projectile shots in sequence from top to bottom, while the robot moves back and forth. Shooting a trio of appendages damages and eventually destroys it. •Once both sets of arms are destroyed, the robotic squid sinks a small amount and continues moving back and forth, occasionally leaping fully out of the water to shoot a sequence of two green projectiles from its funnel-mouth. To damage it, the remaining two pairs of arms underneath must be shot at while it is fully out of the water. •Once both pairs of underside arms are destroyed, the squid's body falls and sinks into the water before exploding, leaving Iggy stranded on a piece of scrap metal. |
6: Grand Bridge |

|
Roy Koopa | •Roy attacks in a mechanical hot-air balloon while Yoshi falls from the sky. It has a cannon underneath that shoots green projectiles and a pair of giant rotating arms that throw sequences of bombs. All three must be shot at to damage it, eventually destroying each of the weapons. •After all the weapons are gone, the balloon is enraged and grows six indestructible cannons on its "face" to shoot green projectiles from. Occasionally, Roy's basket descends for him to look from it, and he must be shot to damage the boss further. •Once Roy has been shot enough, the balloon explodes and Roy is left to fall without it. |
7: Float Castle I |

|
Magikoopa | •Magikoopa teleports around rapidly, casting geometric magic at Yoshi if it manages to stay in one place long enough. All three shapes in a spell must be shot and destroyed before they hit to keep it from hurting Yoshi. Damaging it causes it to teleport away again, as does shooting at its position before it fully fades in. •After being hit enough, Magikoopa floats upwards offscreen before falling back down as a giant. It continues to attack the same as before, but casts much quicker and teleports more confusingly. •After being hit enough again, the giant Magikoopa disappears in a magical explosion. |
8: Cornice Cave |

|
The Big Boo | •The Big Boo quickly floats around side-to-side, fading away if it gets too far out of Yoshi's direct line of sight. To attack, it causes several pieces of rubble from the mansion's basement to fly at Yoshi. Its face must be shot while it has its eyes open to damage it, but whenever it changes direction, it guards while facing the screen. •After enough damage, The Big Boo explodes and splits into three smaller Big Boos arranged in a circle, which constantly rotate as they move. They act the same as before, but move faster. To damage them, the one with its tongue sticking out must be shot at. •After being damaged a few more times, the Big Boos fade away while exploding again, this time for good. |
9: Ghost Mansion |

|
Chargin' Chuck | •Chargin' Chuck dashes from side to side, stopping to throw a quick volley of two bombs. Sometimes, it leaps high into the air to throw a bomb from off-screen and land with a tremor that jostles Yoshi. •After being shot enough times, Chargin' Chuck is launched into the background. |
10: Float Castle II |

|
Koopa Troopa | •Koopa Troopa attacks in a turtle-shaped artillery submarine. It emerges from the water to shoot green projectiles from one of four rotating cannons and occasionally swims back-and-forth, ducking back under shortly afterwards. It must be damaged by attacking the closest cannon at the time. •Once all four cannons on the turret have been defeated, the turret explodes and the submarine's shell lifts up, revealing three invulnerable cannons that continue shooting the green projectiles. To damage it, the submarine's turtle head must be shot at whenever it raises up to open its mouth. •After enough shots to the mouth, the submarine begins sinking and exploding, a shocked expression on its face. |
11: Dark Sea |

|
Bowser | •Bowser attacks in a suit of robotic armor. He holds still, moving his arms around to shoot green projectiles from his hand-cannons. The hands must be shot for damage, eventually destroying each. •With the hands destroyed, the armor's chest opens up, revealing a large cannon. Now shooting the green projectiles from his eyes, the chest cannon must be shot when it opens to charge a large blast, damaging it further. •When the cannon is damaged enough, the armor overheats and explodes, revealing Bowser underneath. He now sidles slowly back-and-forth, throwing Koopa Shells and occasionally making the ground rumble. To damage him, his hands must be shot again, eventually causing them to get covered in bandages. •Once both hands are injured, Bowser replaces his shell-throwing attack with breathing out groups of fireballs, still sidling and making the floor shake. To damage him now, his open mouth must be shot whenever he performs his fire breath. •After enough shots to the mouth, Bowser gets covered in explosions and surrenders. |
12: Bowser's Castle |
LevelsEdit
While they are all numbered, the levels in each realm can be played in any order, except for Bowser's Castle, which is unlocked after beating levels 8-11. Once all the gems in the Light Realm are collected, the player moves on to the Dark Realm. The player can replay a level in a realm as many times as they want as long as all the gems in that realm are not collected.
| Light Realm | |||
|---|---|---|---|
| Level | Information | ||
| 1 | Grass Land | Description | |

|
A short, green area with simple enemies and obstacles to familiarize the player with the gameplay. | ||
| Mini-boss | |||
| Hammer Brother | |||
| Boss | |||
| Lemmy Koopa | |||
| 2 | Mushroom Land | Description | |

|
A short, muddy area with lots of swarming enemies. | ||
| Mini-boss | |||
| None | |||
| Boss | |||
| Ludwig von Koopa | |||
| 3 | Pipe Island | Description | |

|
A short area with relatively few enemies, but many branching paths. | ||
| Mini-boss | |||
| Boomerang Brother | |||
| Boss | |||
| Wendy O. Koopa | |||
| 4 | Crescent Coast | Description | |

|
A medium-length water-themed stage divided between a coastline area and a seabed area. | ||
| Mini-boss | |||
| Sea Devil | |||
| Boss | |||
| Larry Koopa | |||
| 5 | Spirit Mountain | Description | |

|
A high-altitude area with many dashes and jumps. | ||
| Mini-boss | |||
| Sledge Brother | |||
| Boss | |||
| Morton Koopa Jr. | |||
| 6 | Grand Bridge | Description | |

|
A lengthy pier with many enemies and an optional miniboss encounter. | ||
| Mini-boss | |||
| Boomerang Brother | |||
| Boss | |||
| Iggy Koopa | |||
| 6 | Float Castle I | Description | |

|
A castle in the sky with many drops and a battle in freefall. | ||
| Mini-boss | |||
| None | |||
| Boss | |||
| Roy Koopa | |||
| Dark Realm | |||
| 8 | Cornice Cave | Description | |

|
A winding cavern full of fire and lava. | ||
| Mini-boss | |||
| Firesnake | |||
| Boss | |||
| Magikoopa | |||
| 9 | Ghost Mansion | Description | |

|
A very long misty haunted boardwalk with two layers and several jumps. | ||
| Mini-boss | |||
| Lakitu | |||
| Boss | |||
| The Big Boo | |||
| 10 | Float Castle II | Description | |

|
A floating ruin with many enemies and boosts, as well as an optional mini-boss. | ||
| Mini-boss | |||
| Sledge Brother | |||
| Boss | |||
| Chargin' Chuck | |||
| 11 | Dark Sea | Description | |

|
A long, winding chain of tiny islands located on a shady ocean. | ||
| Mini-boss | |||
| None | |||
| Boss | |||
| Koopa Troopa | |||
| 12 | Bowser's Castle | Description | |

|
The final stage features enemies and gimmicks from all around the game and a gauntlet against the game's minibosses using the boss music. | ||
| Mini-boss | |||
| Hammer Brother, Boomerang Brother, Lakitu, Sledge Brother, Firesnake | |||
| Boss | |||
| Bowser | |||
ItemsEdit
Throughout courses, the player can earn coins from enemies, and items from Flying ? Blocks. Items dropped from yellow Flying Blocks immediately take effect, while items dropped from dark green variants are used for boss battles only. Boss battle items can be used by pressing the Cursor Button on the Super Scope or by pressing ![]() on the SNES Controller during 2-Player Mode.
on the SNES Controller during 2-Player Mode.
|
|
ObjectsEdit
- Gate: Gates block one of two paths. Shooting one makes it block the other instead. They are used for decided which way to go when the road forks. Oftentimes, this determines what enemies, items, or obstacles are encountered, and sometimes even decides whether the player will battle mini-bosses.
- Jump board: Jump boards prompt the player to jump over an obstacle such as a pool of water or lava or a pit. Failing to jump for a pool causes small damage for its duration, while failing to jump for a pit (including an ocean) resets Yoshi to shortly before at the cost of three coins.
- Dash board: Dash boards cause Yoshi to get a brief speed boost in the direction they point, even if it is not the direction he is facing.
Appearances in other mediaEdit

There were two KC Deluxe issues by Kazuki Motoyama, who also wrote adaptations of Yoshi and Super Mario World 2: Yoshi's Island.
GalleryEdit
- For this subject's image gallery, see Gallery:Yoshi's Safari.
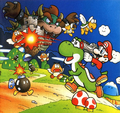
Promotional group artwork
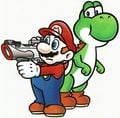
Artwork of Mario and Yoshi
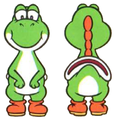
Artwork which shows different viewpoints of Yoshi
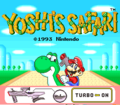
The game's title screen
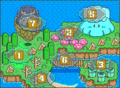
A map of Light Realm


MediaEdit
- For a complete list of media for this subject, see List of Yoshi's Safari media.
| File info |
| File info |
Pre-release and unused contentEdit
There are two unused graphics of Mario: One is him running, despite him never running in the game. The other is him looking down while riding Yoshi, which was meant for a cutscene. Additionally, early footage is shown in a Nintendo Power Previews LaserDisc used in store kiosks.[2] This includes early versions of Yoshi's damage animation and the North American box art.


Names in other languagesEdit
| Language | Name | Meaning |
|---|---|---|
| Japanese | ヨッシーのロードハンティング Yosshī no Rōdo Hantingu |
Yoshi's Road Hunting |
TriviaEdit
- This game is the first time that Princess Toadstool is referred to by her original Japanese name "Princess Peach" in the West, albeit temporarily until it was reintroduced in Super Mario 64.
- The Hammer Brothers and Boomerang Brothers present in the game have blue and green armor, respectively, the opposite of how they would eventually be consistently depicted.
ReferencesEdit
- ^ Super Smash Bros. Brawl Chronicle
- ^ Hard4Games (August 15, 2020). Nintendo LaserDisc! | Nintendo Power Previews LaserDisc V7 Preservation. YouTube. Retrieved August 25, 2020.
| Yoshi's Safari | ||
|---|---|---|
| Characters | Mario • Yoshi • Princess Peach • Prince Pine • King Fret | |
| Jewelry Land locations | Light Realm | Grass Land • Mushroom Land • Pipe Island • Crescent Coast • Spirit Mountain • Grand Bridge • Float Castle I |
| Dark Realm | Cornice Cave • Ghost Mansion • Float Castle II • Dark Sea • Bowser's Castle | |
| Bosses | Hammer Brother • Lemmy Koopa • Ludwig von Koopa • Boomerang Brother • Wendy O. Koopa • Sea Devil • Larry Koopa • Sledge Brother • Morton Koopa Jr. • Iggy Koopa (King Gessō) • Roy Koopa • Firesnake • Magikoopa • Lakitu • Big Boo • Chargin' Chuck • Mecha Nokonoko • Bowser | |
| Enemies | Anvil • Bloober • Bob-omb • Big Boo • Bullet Bill • Cheep-Cheep • Flying Goomba • Green Shell • Koopa Para Troopa • Koopa Troopa • Mechakoopa • Monty Mole • Nipper Plant • Para Bomb • Podoboo • Spiny • Spiny Egg • Tako | |
| Power-ups | Power-up Mushroom • Fire Flower • Super Star | |
| Weapons | Super Scope | |
| Miscellaneous | Gallery • Media | |