Wario Land 4
This article is under construction. Therefore, please excuse its informal appearance while it is being worked on. We hope to have it completed as soon as possible.
Template:Articleabout Template:Infobox Wario Land 4, known in Japan as Wario Land Advance: Yōki no Otakara (meaning Wario Land Advance: The Treasure of the Golden Diva), is a Game Boy Advance platform game released in 2001. It was later re-released on December 16, 2011 exclusively to all Nintendo 3DS Ambassadors. It is the fifth game in the Wario Land series, which is a spin-off of the Super Mario Land series. In the game, Wario has to gather four treasures to unlock a pyramid and save Princess Shokora from The Golden Diva. It features 2-D graphics with linear transformations (similar to Super Mario World 2: Yoshi's Island).
Story
Wario is reading the newspaper when he notices an article about a mysterious pyramid found deep in the jungle. The legend related to the pyramid is that of Princess Shokora, ruler of the pyramid, who was cursed by the money-crazed Golden Diva. Shokora was captured and became a prisoner of the Golden Diva.
Without wasting time, Wario jumps into his Wario Car (as shown in the opening animation) and speeds toward the Golden Pyramid, with the intention of stealing treasure from the pyramid, not rescuing the Princess. As he enters it, he finds a black cat and chases it. Doing so, he falls down a precipice and is stuck inside the pyramid. The only way out is to one of Shokora's peices of jewellery from each passage in the pyramid in order to gain access to the innermost part of the pyramid, which ends up being the stronghold of Golden Diva.
Wario defeats Golden Diva and exits the pyramid with all the treasure and Shokora, who gives Wario a kiss on the cheek, ending the game.
Gameplay
The Passages
The game begins in the Entry Passage (a Minor Passage), which includes one level and a boss. The remainder of the game consists of four Main Passages, each with a different theme and boss. These four passages only become available after completing the Entry Passage, and can be completed in any order. Each of the four passages is further divided into four levels. When each boss of the five passages have been cleared (four main and one entry), an inner pyramid (The Golden Pyramid, which is a Minor Passage) is revealed on the main map. This includes one last level and the final boss.
Wario is given a health meter, which contains a total of eight hearts. Wario can gain a heart by collecting health that are scattered randomly throughout a level. Wario can lose a heart by touching a threatening part of an enemy (eg. horns, teeth), or by touching spikes.
Jewel Pieces
Each of the eighteen levels has four Jewel Pieces that need to be collected, bringing the total to 16 Pieces or four complete Jewel per Main Passage. The player must collect all 16 Jewel Pieces to gain access to the boss of that passage.
Keyzers
The player must also collect a Keyzer to unlock the next level. Without the Keyzer, the 4 Jewels in that level can still be collected, but the next level will remain locked. Once all four Jewels have been completed, Wario can fight the boss of that area. When the first five bosses have been cleared, an inner pyramid (The Golden Pyramid) is revealed on the main map. This includes one last level and the final boss.
Frog Switch
When Wario enters a level, he enters through a Portal, which closes behind him. The only way to open it again is to find the Frog Switch that is somewhere in the level to open it once again to return to the map screen. A time limit is given to return to the portal. The player should focus on finding the four Jewel Pieces and the Keyzer before hitting the Frog Switch. However, there are some areas that can only be accessed by hitting the switch. This is done by the Frog Switch Blocks. The Frog Block can be seen solid or transparent. When the Frog Switch is hit, all transparent Blocks will become solid, while all the solid Blocks will become transparent.
This opens up new areas that can only be accessed when the Frog Switch is hit, so there may be some other Jewel Pieces or maybe even the Keyzer to find in that new area, but the player is limited by time, and once you are out of time, the player's score will start to decrease. Once the score reaches zero, Wario is sent back to the passage, and must start the level again.
Puzzle Rooms
There are two Puzzle Rooms in each level (excluding Entry Passage and Golden Passage). Each one is found in a Purple Pipe, and each contain either a Giant Diamond worth 1000pts., or a bunch of coins that are worth 1000 points when combined. Wario must solve some kind of puzzle to get to these points, usually using Dr. Arewo Stein as an object to throw. Completing these rooms is optional, and is not needed to complete the game, but rather if the player wants a few extra points. Likewise, the player will never see a Jewel Piece or a Keyzer is a Puzzle Room.
Sound Room
There is also an optional bonus challenge to complete. In every level except for the Entry Passage and the Golden Pyramid, there is a hidden CD that can be collected and played in the Sound Room, each containing a different sound. There is a total of 16 CDs to collect. A Karaoke can also be unlocked, a full song that can be played in the Sound Room. It can be unlocked by getting 10,000pts. or more in each of the eighteen levels.
Treasure Chest
There are a total of sixteen Treasure Chests in Wario Land 4. Four of them found in each of the four main Boss Rooms, embedded into the wall in the background. They cannot be touched by Wario. During the Boss Battle, when time starts to run low, the Treasure Chests in the background will begin to dissapear, one by one. Once Wario defeats the Boss, the Treasure Chests that are left over are collected. The amount of Treasure Chests collected do not affect the main game, but the ending. The more Treasure Chests Wario has on the game's completion, the more beautiful Princess Shokora will appear in the game's ending cut scene.
Game Modes
Upon creating a file, the game will ask what game mode the player perfers to play as.
The game modes are as follows:
- Normal
- Hard
- Super Hard (unlockable, by completing Hard mode)
The game mode affects the location of the Jewel Pieces, the amount of enemies in the levels, the health you begin with upon entering the level, and the time given to get back to the Portal after the player hits the Frog Switch.
Mini-Game Shop
Before the boss, there is a Mini-Game Shop where Wario can play one of three mini-games. If Wario gets a certain amount of points in each of the mini-games, then he can earn Frog Medals, which he can then spend at the item shop for items to assist him to defeat the boss of that passage. Each mini-game costs 5000 points to play (not including the Entry Passage, which is discounted to 2000.) Points are earned during normal gameplay.
There are three minigames included:
Item Shop
The Item Shop in Wario Land 4 is a place where Wario can spend his Frog Medals in exchange for items to assist him in defeating the boss of that passage by doing pre-damage at the battles start. The shop keeper; Mr. Game and Watch, makes his first ever appearance. However, this early version of Mr. Game & Watch has eyes. They were removed for his next appearance in Super Smash Bros. Melee.
The more effective the item has on damaging a boss, the more Frog Medals it is likely to cost. The price of the items also varies on the game mode. Eg. An item in "Hard" mode would be more expensive than the same item in "Normal" mode.
All items are as follows... (All prices are as they appear in "normal" mode).
- Apple Bomb (2 medals)
- Blast Cannon (2 medals)
- Vizorman (4 medals)
- Bugle (6 medals)
- Black Dog (10 medals)
- Large Lips (10 medals)
- Big Fist (10 medals)
- Black Dragon (10 medals)
- Smile (Free- Joke item)
Wario's Transformations
This article is under construction. Therefore, please excuse its informal appearance while it is being worked on. We hope to have it completed as soon as possible.
One of the best things that critics praised in Wario Land 4 is the many transformations that Wario can use. He has a total of 10 different transformations in the game, they all have some kind of purpose to help Wario get through the level, such as turning into a Bat to reach a high place, or catching fire to break certain blocks. All of the transformations have been re-used from previous games in the series, but the developers made more use of them in Wario Land 4. The following is a table showing each form and it's effect.
| Image | Name |
|---|---|
| Wario (normal form) | |
| Puffy Wario | |
| Flaming Wario | |
| Flat Wario | |
| Fat Wario | |
| Bubble Wario | |
| Snowman Wario | |
| Frozen Wario | |
| Bouncy Wario | |
| Zombie Wario | |
| Bat Wario |
Controls
- : Opens pause menu/confirm.
 : Jump/swim/confirm.
 : Hold to body slam (attack), throw (hold to build power).
 : Left/right to move. Up to look up.
- + : Throw upwards.
- : Ground pound (break blocks below you or defeat enemies, ends when player releases the d-pad), roll on 45 degree slope, super ground pound (break stronger blocks, hold d-pad down for more than a second while falling. Does not end when the player releases the d-pad.)
- + : Crawl.
 /
/ : Body slam with more power/run fast.
Passages
The Passages are as follows:
Entry Passage
This passage only has one level: The Hall of Hieroglyphs, which, true to its name, uses hieroglyphics on the walls to teach Wario his basic moves. The boss of this passage is Spoiled Rotten.
Emerald Passage
This Passage is nature-themed. The four levels are:
The boss is Cractus, a possessed pot-plant with a huge head that can skewer Wario with its claws and drool a poisonous liquid on him, turning Wario into Zombie Wario.
Ruby Passage
This Passage is mechanical-themed. The four levels are:
The boss is Cuckoo Condor. He is what appears to be a giant cuckoo clock. He can grab Wario and shoot gears and electricity at him. After he takes enough damage, the cuckoo clock falls apart, revealing a giant bird, presumably a condor, underneath. In this form, Cuckoo Condor can lay eggs that hatch into self-destructing chicks to damage Wario.
Topaz Passage
This Passage is toy-themed. The four levels are:
The boss is Aerodent, a rat that hides in a giant inflatable teddy bear. He throws down needles, which can be used to deflate the teddy bear, making Aerodent an easier target. Later in the fight, Aerodent will drop flames, which do not harm Wario, but instead turns him into Flaming Wario. Fiery Wario will run around the screen for a while, wasting valuable time.
Sapphire Passage
This passage is horror-themed. The four levels are:
The boss is Catbat. He is essentially a big cat with a statue of a bat on his head, which is his weak spot. He creates waves which must be jumped over, and can also spit out orange and purple spiked balls, which either damage Wario or turn him into Puffy Wario, respectively. The latter's purpose is to waste time.
Golden Pyramid
The final area in the game. It only has one level, the Golden Passage. Its boss is the Golden Diva, the last boss of the game.
Bosses
| Image | Name | Passage | Description |
|---|---|---|---|

|
Spoiled Rotten | Entry Passage | A slowly moving eggplant-like creature that is harmless at first, but turns into a fanged, yet still slow enemy after a certain number of hits. |

|
Cractus | Emerald Passage | A floating plant-like boss that attacks with its razor-sharp leaves. Its weak spot is its head that has to be ground pounded. |
| File:Cuckoocondor.gif | Cuckoo Condor | Ruby Passage | A condor-like creature hiding in a giant cuckoo-clock equipped with a claw in the fight's first phase, and laying eggs containing explosive chicks in the second one. Both times its attacks have to be countered. |

|
Aerodent | Topaz Passage | A small mouse-like boss riding a large inflatable teddy bear. Wario has to throw Aerodent's spiky minions at the teddy bear in order to make the boss visible. |

|
Catbat | Sapphire Passage | A monster resembling both a cat and a bat that flies above a pool of water and creates waves. Wario has to ride the waves in order to attack the top head first and later Catbat's bald head. |

|
Golden Diva | Golden Pyramid | The final boss first sends masks at Wario he has to throw at her fan. Afterwards she uses four different attacks that each require a different counter strategy. In the last phase her vulnerable face is revealed and she starts destroying the room's ground. |
Enemies
During his adventure, Wario encounters more than three dozen types of enemies. While a dozen of them is found in the levels of different passages, most enemy types are normally only found in a certain passage. They usually go in line with the passage's theme.
Common Enemies
| Image | Name | Description |
|---|---|---|
| File:Bouncers.png | Marumen | A weak walking enemy that is unable to hurt Wario. |
| Spear-Mask (yellow) | A common enemy wielding a spear as a weapon. Spear-Mask turns blue when doing a Ground Pound near it. | |
| Tornado Spear-Mask (blue) | It spins its spear before it starts to walk or when it changes its direction. A Ground Pound near it causes it to turn red. | |
| Angry Spear-Mask (red) | The strongest version of a Spear-Mask charges at Wario. It becomes yellow again by performing a Ground Pound. | |
| Totsumen | A creature wearing a mask with a knife on it. It charges at Wario at high speed when he comes near it. | |
| Harimen | An enemy that is protected by a pink spiked shell. A Ground Pound causes it to flip, making it vulnerable.It also looks just like Needle Kirby from Kirby:Nightmare In Dream Land. | |
| Harimenzetto | Basically a stronger version of a Harimen with a black shell. | |
| Goggley-Blade | The most common aquatic enemy charges at Wario when it sees him. Goggley-Blade's belly is its weak spot. | |
| Spiked Head | An immobile spiked creature that is immune to all of Wario's attacks. | |
| File:Shieragutchi WL4.png | Shieragutchi | A spiked clam found underwater. It quickly moves up when Wario comes near. |
| Ringosukī | A monkey that throws apples which turn Wario fat upon contact. | |
| Beezley | A bee which flies down and stings Wario, causing his head to swell to a ridiculous size. | |
| File:Archer.PNG | Bow Balloon | An archer that shoots arrows at Wario which have the same effect as a Beezley's sting. |
| Menhammer | A hammer-wielding creature that tries to flatten Wario. A hit will turn him into Bouncy Wario. | |
| Yukiotoko | A yeti that tries to freeze Wario with its icy breath. | |
| Dr. Arewo Stein | A scientist who is not an actual enemy, but is treated similarly and is often required to solve puzzles in the bonus rooms. |
Entry Passage Enemies
| Image | Name | Description |
|---|---|---|
| Eggplant Warrior | An eggplant creature wearing a headband with a knife that assists the boss Spoiled Rotten. It acts the same way as Totsumen. |
Emerald Passage Enemies
| Image | Name | Description |
|---|---|---|
| Imomushi | A harmless slowly moving caterpillar. | |
| Moguramen | A mole-like creature wearing a mask with a drill. Some of them dig through the ground. | |
| Utsuboankō | An invincible giant sea monster that hides in a hole and will not crop up until Wario comes near. | |
| Togenobi | A large octopus with four rotating tentacles holding maces. It is invincible. | |
| Tobawani | A crocodilian enemy swimming near the water surface. It jumps up and tries to bite Wario once he is above it. |
Ruby Passage Enemies
| Image | Name | Description |
|---|---|---|
| Togerobo | A heavy robot with spikes on one side as well as a spiked head that rolls along the ground when Togerobo drops it. | |
| Kaentsubo | A walking jar whose flames turn Wario into Flaming Wario. It flips and creates a flame on the ground when it notices Wario. | |
| PET Bottom | A bottle walking on four legs. It is armed with a spear on its front. | |
| File:Drill Bat.PNG | Robo Bird | A robotic bird that attacks by flying in a straight line as soon as soon as it spots Wario. |
Topaz Passage Enemies
| Image | Name | Description |
|---|---|---|
| Toy Car | A toy Wario in a miniature version of the Wario Car with spikes on the front. | |
| File:Spear Bot.PNG | Dice Men | A walking dice wielding a spear. |
| File:Doodle.PNG | Hoggus | A floating pig-like artist that doesn't harm Wario, but whose paintings come to life. |
| Denden | A pig in a spiked shell created by Hoggus. It rolls along the ground when Wario comes near. | |
| File:Butatabi WL4.png | Butatabi | A pig with a spike on its head created by Hoggus. It glides from right to left and inversely. |
| Deburina | A drawing of a dancing pig that has come to life. She has a hula-hoop around her body that rotates while Deburina dances. | |
| File:Tack Soldier1.PNG | Tack Soldier | A hopping creature with a spike on the bottom assisting the boss Aerodent. They have to be thrown by Wario at the bear balloon. |
Sapphire Passage Enemies
| Image | Name | Description |
|---|---|---|
| Skeleton Bird | A skeletal bird shooting green objects that turn Wario into Zombie Wario, the latter being the needed form to harm this enemy. | |
| Men'ono | A hooded creature armed with an ax. It charges at Wario when it sees him and swings its weapon at the treasure hunter. | |

|
Yūrei | A pirate ghost that doesn't harm Wario, but follows him and tries to pick every coin before Wario can do so. |
| File:Vampire Bat.PNG | Minicula | An invincible bat flying in circles that turns Wario into Vampire Bat Wario upon contact. |
| Mayu Bird | A bat-like creature that only flies within a small area, but is found in large groups. | |
| Onomī | A mummified enemy holding an ax. It uses the same attack as Men'ono. | |
| Iwao | A burly creature that throws rolling rocks at Wario. It can only be defeated with a Ground Pound. | |
| Drill Fish | A mechanical fish with a drill patrolling the pool of the boss Catbat. A Super Ground Pound is the only way to defeat it. |
Golden Pyramid Enemies
The last part of the game doesn't introduce new enemies, aside from the final boss, the Golden Diva, and the creatures created by her. However, some enemies that are otherwise exclusive to the Sapphire Passage reappear in the last level before the boss, the Golden Passage, including Skeleton Birds, Men'ono and Miniculas.
Reception
The game received generally positive reviews. IGN gave Wario Land a 9 out of 10, or "Outstanding", citing its well thought out level design and replayability. It was not given a full 10 because the game does not necessarily push the performance power of the Game Boy Advance. Global sales exedeeded 2,000,000 copies.
Media
- Main article: Wario Land 4/Media
Gallery
Box Art and Flyers
- Wario Land Advance JAP cover.jpg
Japanese box art
- JapCover WL4.jpg
Japanese flyer
- Wl1.jpg
European box art
- Wario Land 4 NA cover.jpg
North American box art
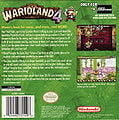
The back of Wario Land 4
- WL4 LogoKorean.png
Korean version of the logo.

Artwork
Wario
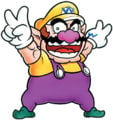
Wario striking his victory pose
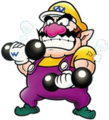
Wario lifting dumbbells

Wario reading the newspaper
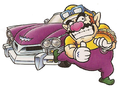
Wario with his Wario Car
- Fatwario.jpg
- Zombiewario.jpg


Allies
- Keyser.jpeg

Princess Shokora(monochrome)

Enemies
- Beezley.png
- Goggley-Blade.png


Beta Elements
- Main article: Wario Land 4/Beta elements
Names in Other Languages
External Links
Template:BoxTop Template:WarioGames