User:Shokora/Work: Difference between revisions
(→Super Mario Bros. Mushroom World: It's a start.) |
|||
| Line 1,519: | Line 1,519: | ||
|notes= | |notes= | ||
}} | }} | ||
'''''Super Mario Bros. Mushroom World''''' is a pinball machine licensed by [[Nintendo]] and developed by [[Wikipedia:Gottlieb|Gottlieb]]. It was released to commercial buyers in the U.S.A. in June 1992. ''Mushroom World'' is the direct sequel of ''[[Super Mario Bros. (pinball)|Super Mario Bros.]]'', released two months earlier. But unlike its predecessor, ''Mushroom World'' was more focused on commercial buyers, as it was given redemption features. The machine is based on the game ''[[Super Mario Bros. 3]]'', as the cabinet displays artwork of the [[Koopalings]] and uses in-game powerups such as [[Frog Mario]] and [[Raccoon Mario]]. A total of 519 units were manufactured. | |||
== | ==Flyers and logos== | ||
<gallery> | <center><gallery> | ||
File:SMB Mushroom World-Logo.PNG|Product logo | |||
File:Super Mario Bros Mushroom World-Front Flyer.jpg|Gront of flyer | File:Super Mario Bros Mushroom World-Front Flyer.jpg|Gront of flyer | ||
File:Super Mario Bros Mushroom World-Back Flyer.jpg|Back of flyer | File:Super Mario Bros Mushroom World-Back Flyer.jpg|Back of flyer | ||
</gallery> | </gallery></center> | ||
==Machine cabinet== | |||
<center><gallery> | |||
File:SMB Mushroom World-Side Cabinet View.jpg|Full cabinet side view | |||
File:SMB Mushroom World-Front.jpg|Front view | |||
File:SMB Mushroom World-Backbox Right.jpg|Right view of the backbox | |||
File:SMB Mushroom World-Cabinet Right.jpg|Right view of the side | |||
File:SMB Mushroom World-Backglass Shot.JPG|Backglass shot | |||
File:SMB Mushroom World-Backglass artwork.JPG|Detail of the backglass artwork | |||
</gallery></center> | |||
==Playfield== | |||
<center><gallery> | |||
File:SMB Mushroom World-Playfield.jpg|Overhead playfield view | |||
File:SMB Mushroom World-Illuminated Playfield.jpg|Playfield illuminated during gameplay | |||
</gallery></center> | |||
=''Super Mario Activity Book'' series= | =''Super Mario Activity Book'' series= | ||
Revision as of 09:12, November 17, 2012
|
It is requested that any part of this user's work page source is not copied and used on any another page. |
Golden Passage
Template:Level Golden Passage is the last level before the final boss, Golden Diva in the Game Boy Advance game, Wario Land 4. It is found in the Golden Pyramid. This level is very different and is made far more challenging than the others, because at the beginning, Wario is forced to jump on the Frog Switch upon entering the level (it is placed towards the end on every other level). The Frog Switch limits the time that the player can spend in the level. So in this case, with the Frog Switch being at the beginning of the level, the player must obtain the Keyzer, along with all four Diamond Pieces within a strict time limit in order to progress to the next level.
The time given to complete the level varies on the game mode.
- On normal mode, the time given is 9:00 minutes.
- On hard mode, the time given is 6:00 minutes.
- On super hard mode (unlockable), the time given is 3:30 minutes.
As with the Hall of Hieroglyphics, there is no CD to collect in this level.
Trivia
- The actual soundtrack of Golden Passage is unhearable, since Wario is not given a chance to listen to it. The usual fast-paced Frog Switch music will play thoughout the whole level. However, the hidden, unused soundtrack does exist, and can only be heard by avoiding landing on the Frog Switch, which can not be done during normal gameplay; only by using an Action Replay or another hacking device.
Deburina
Deburina is one of the many enemies in the GBA platform game, Wario Land 4. They only appear in the level Doodle Woods. In some parts of this level, there are drawings of Deburinas on the wall, and some drawings come to life when Wario either gets near it or walks under it. Their in-game sprite seem to resemble a dancing, female hula-hooping pig. Deburina will slowly dance towards Wario, intending to damage Wario by grazing him with the seemingly dangerous edge of the hula-hoop. Deburina can not be attacked from the side while she is dancing, because the hula hoop would harm Wario. Wario can only defeat them by a ground pound on the head.
If the player does a standard jump and lands on a Deburina's head without doing a ground pound, then Deburina will fall to the ground, the hula-hoop will stop spinning and fall with her, and she will start to cry. She will then be completely defenceless, and she will be no longer immune to side attacks. However, if Wario leaves her alone for a while, then she will soon get back up, and start dancing again.
Smile
The Smile appears in the Item Shop in Wario Land 4. This is the only thing in the item shop that is free, and it is designed to attract your attention immediatly, and then suddenly give your hopes up. Because this item is completly useless. It is a joke item, all you get is a smile from the shop-keeper; Mr. Game and Watch.
All of the other items in the Item Shop, on the other hand, are there to assist you in defeating a boss. They all cost a certain amount of Frog Medals, which is the currency that is used in the game.
Golden Pyramid
Golden Pyramid can refer to two things, both from the GBA game Wario Land 4.
1. Is the Outer Pyramid that is raided by Wario, which is seen in the opening cutsceen (refer to picture). Wario raids it because the in-game rumour is this pyramid has a large amount of treasure inside. He them gets stuck inside the pyramid after falling down a crevice.
2. The Inner Pyramid is in the middle of the main room in the game. It is protected by five passages: the Entry Passage, Emerald Passage, Ruby Passage, Topaz Passage and Sapphire Passage. Upon completing all five, Wario could enter the Golden Pyramid itself. It contains one level, the Golden Passage, with the final boss, the Golden Pyramid following that.
Trivia
- The Pyramid made a small minor appearance in WarioWare: Twisted!, as a picture in the opening cutscene, along with the Music Box from Wario Land 3.
Blast Cannon
Blast Cannon is one of the items up for purchase from the Item Shop in the Game Boy Advance game, Wario Land 4. It appears as a multi-colored cannon. It is one of the weaker items in the game and can be purchased for only 2 Frog Medals from the shop keeper, Mr. Game & Watch. The prices vary on the game mode. Items from the Item Shop are there to assist Wario in defeating one of the many challenging bosses in the game.
Effect
The Blast Cannon, when purchased, is wheeled to the Boss Room by Mr. Game & Watch. He then clicks his fingers, then the Blast Cannon fires a bomb-omb at the Boss, which causes 2 HP worth of damage. Mr. Game & Watch then leaves the room, leaving Wario to defeat a slightly weaker boss.
Big Fist
The Big Fist is an item that Wario can purchase from the Item Shop in the Game Boy Advance platform game, Wario Land 4. It can be bought off the Shop Keeper; Mr. Game & Watch, for 10 Frog Medals (depending on the game mode, it could cost more). All items from the Item Shop are used to assist Wario in defeating a boss by doing pre-damage at the battle's start.
The Big Fist is the strongest item in the game, since it does the most damage to a boss.
Effect
When purchased, Mr. Game & Watch will follow you to the Boss Room. He will transform into a big fist, which will then swing a powerful punch at the boss, taking a massive 10 HP worth of health. Mr. Game & Watch will then dissapear, leaving Wario to fight a greatly weakened boss.
Trivia
- The Big Fist looks a lot like Master Hand and Crazy Hand from Super Smash Bros. Brawl.
Frog Switch Block
{{conjecture}}
The Frog Switch Block appears in the Game Boy Advance game, Wario Land 4. These Blocks have a frog face on it. They can either appear solid (Wario is not able to walk through them), or transparent (Wario is able to walk through them). Depending if Wario has hit the Frog Switch or not, they may switch around. Eg. All transparent Blocks will become solid, and all solid Blocks will become transparent. This would open up new areas only accessible by hitting the Frog Switch, so the player may have to find the rest of the Jewel Pieces or maybe even the Keyzer within a time limit.
Puzzle Room
A Puzzle Room in the Game Boy Advance game Wario Land 4 is a room where Wario can collect a Giant Diamond, or a combination of 1000pts.; but only if the player solves a puzzle before-hand. They are found in a Purple Pipe, and there are two in each level, not including the Entry Passage and the Golden Passage. The puzzles vary in difficulty, depending on how far Wario is in the game. For each puzzle, Wario must work out a way to get to the Giant Diamond, or the 1000pts.
For example, in the picture on the right, Wario must throw Dr. Arewo Stein to hit the ! Switch and activate a set of stairs. Wario will then be able to reach his prize of a Giant Diamond.
Solving these rooms is optional, and is not nessesary to completing the main game, but rather if the player wanted to gain a few extra points.
PET Bottom
Template:Species-infobox A PET Bottom is one of the many enemies that appear in the Game Boy Advance game, Wario Land 4. They only appear in the Ruby Passage, and resemble a bottle full of a pink liquid, which has a sharp spear attached to the front of the cap. They have legs, and they walk back and forth. The only threatening part of a PET Bottom is the spear.
Wario can defeat a PET Bottom by either ground pounding the top side of the enemy, body slamming the non-sharp side, or by doing a super ground pound nearby; the PET Bottom will flip upside down and Wario can attack the underside.
Trivia
Even though the "PET" part of the word PET Bottom is in capitals, it doesn't seem to stand for anything.
Bugle
The Bugle is one of the eight items (nine, if the Smile counts) that can be bought at the Item Shop in the Game Boy Advance game Wario Land 4. The Bugle can be bought of Mr. Game & Watch, the shop keeper, for 4 Frog Medals (depending on the game mode, it could cost more). All items from the Item Shop can be purchased to assist Wario in defeating a Boss by doing pre-damage at the battles start.
The Bugle varies from a real life bugle, since it has multicolored stripes on it.
Effect
When purchased, Mr. Game & Watch will follow the player to the Boss Room, carrying the Bugle. He will then start playing the Bugle and many music notes will come out and damage do 4HP worth of damage to the boss. Mr. Game & Watch will then leave the room, Leaving Wario to fight a slightly weaker boss.
Game & Watch Collection 2
Game & Watch Collection 2 is a rare, limited edition Nintendo DS game that was originally only available exclusively to Club Nintendo of Japan in 2008. In USA, Europe and Australia as of April 2010, it was made available to those reigions. Like the Japenese service, it it only available to Club Nintendo. It is the sequel of Game & Watch Collection, which was also released on the Nintendo DS. Like the original, it came with both Mode A and Mode B. The original alarm feature is also included.
It includes three games, two which are exact ports (copies) of the original Game & Watch titles.
Parachute X Octopus is a combination of the two, where the player must catch parachutes on the top screen and the Octopus can be seen on the bottom screen.
Game & Watch Collection 2 is one of the most expensive items on each of the Club Nintendo stores in each reigion.
Character appearances in Game & Watch Collection 2
- Rower (playable in Parachute)
- Shark (enemy in Parachute)
- Scuba-diver (playable in Octopus)
- Octopus (enemy in Octopus)
Gallery
- GAWC2 Icon.png
Game & Watch Collection 2 game icon.
- ParachuteXoctopus.PNG
Parachute X Octopus during gameplay.
Wario Forms Table
| Image | Name | Description | |
|---|---|---|---|
| Wario (normal form) | Wario in his standard form. In this state, he can perform a ground-pound, ram enemies or blocks, crawl to get through tight spaces and throw objects such as enemies or rocks. | ||
| Puffy Wario | Wario after getting stung by a Beezley, or getting hit by the arrow of a Bow Balloon. His cheeks puff up, and he is able to float continually upwards. The effect ceases once Wario hits a ceiling. | ||
| Flaming Wario | Wario catches fire from a Torcher. He will run without stopping while the fire spreads, however, the player can still make Wario jump by pressing | ||
| Flat Wario | When Wario gets crushed by a Compressor, he will transform into Flat Wario. His body will become flat and as light as a feather. If he leaves the ground, he will fall back to earth slowly, swaying side to side, like a feather. He can get into small spaces. Wario can transform back into normal form by entering a Decompressor. | ||
| Fat Wario | Wario, fatter than usual! It can be achieved by eating the apples that is thrown by an Apple Monkey. Wario is invulnerable to enemy attacks, and just by touching an enemy will defeat it. However, Wario's weight has doubled, so he cannot jump very high and he walks very slowly. The effect will wear off once Wario walks a certain distance. | ||
| Bubble Wario | When Wario touches a large Bubble underwater, he will enter that bubble and float upwards until he reaches the surface. This effect is useless unless there is a water current. The bubble resists these currents, so Wario can access areas which are otherwise in-accessible. | ||
| Snowman Wario | When a mound of snow falls from the ceiling, Wario will collapse and re-emerge as Snowball Wario. Snow will stick to Wario around his belly area, and will be greatly weighed down. When Wario sets foot on a slope, he will turn into a huge snowball and start rolling, breaking any Snowman Blocks that get in the way. | ||
| Frozen Wario | When a Yukiotoko sneezes (yuck!), it will exhale a blast of cold air. It's so cold, that it will freeze Wario instantly. He will be immobile, and will slide backwards. The ice will crack once Wario hits a wall or object. | ||
| Bouncy Wario | When a Hammer Warrior strikes Wario with his hammer, Wario will curl up into a spring and transform into Bouncy Wario! The player is able to make Wario bounce to incredible heights by pressing |
||
| Zombie Wario | When a Skeleton Bird chucks goo at Wario, he will become contaminated and turn into a fearsome Zombie. Zombie Wario is slow moving, and jumping above a thin platform will cause him to fall through the floor, reaching otherwise inaccessible places. Wario can transform back by either touching water, or being exposed to bright lights. | ||
| Bat Wario | Contact with a Minicula will transform Wario into Bat Wario. In this form, Wario takes on the appearance of a Bat, and is able to fly by repeatedly pressing |
Wario Land 4 Item Damage Table
| Item | Boss / Damage taken by Item | |||||
|---|---|---|---|---|---|---|
| Spoiled Rotten | Cractus | Cuckoo Condor | Aerodent | Catbat | Golden Diva | |
| Apple Bomb | 2 | 2 | 2 | 1 | 2 | 1 |
| Blast Cannon | 3 | 3 | 2 | 2 | 1 | 1 |
| Vizorman | 6 | 4 | 3 | 3 | 3 | 2 |
| Bugle | 8 | 5 | 4 | 4 | 4 | 3 |
| Black Dog | NA | 7 | 9 | 8 | 10 | 8 |
| Large Lips | NA | 9 | 8 | 14 | 7 | 5 |
| Big Fist | NA | 8 | 12 | 7 | 9 | 6 |
| Black Dragon | NA | 10 | 7 | 9 | 8 | 7 |
WL4 Story
On a dark and quiet night when everybody else is asleep, Wario starts the engine of his Wario Car, and speeds through the city. A Black Cat is crossing the road but Wario makes no attempt to slow down, and he gains speed. Frightened, she covers her eyes with her paws, and the Car's wheels narrowly miss the her. A newspaper flies into the Cat's face. It reads "LEGENDARY PYRAMID DISCOVERED DEEP IN JUNGLE!!". The Cat takes a curious interest in the article.
Meanwhile, Wario speeds out of the city and enters the desert. With his mind on the ancient treasure, he speeds full throttle toward the Legendary Pyramid mentioned in the newspaper article. After some time, he reaches the jungle, and Wario is forced to abandon his vehicle once it gets too thick. After much trekking through the jungle, he finally reaches the Pyramid. Unable to contain his excitement, he climbs it and without hesitation and finds an entrance. Inside the pyramid, he descends a set of stairs and comes across the Black Cat, which runs into the next room after catching sight of Wario. Curious, Wario follows. He and the Cat come across a precipice in the ground. The Cat jumps in and Wario, worried that he will be beaten to the treasure, jumps in after her.
He lands in a strange room somewhere near the center of The Pyramid. Here, Wario must clear the Pyramid's five Passages. A Boss challenges Wario to a battle at the end of each passage. When Wario clears all five passages, the Inner Pyramid is revealed. Inside lurks the Golden Diva, final Boss and ruler of the Pyramid.
At the beginning of the battle, The Black Cat attacks the Golden Diva by scratching her face. The Golden Diva is unaffected, and she casually swallows the Cat. Wario then battles the Golden Diva. When defeated, the Cat is set free, the treasure is recovered, and Wario flexes his muscles in a not-at-all-modest way. At that moment, the Pyramid begins to shake and crumble. Scared, Wario gathers as much treasure as he can and escapes the Pyramid with the Black Cat leading the way out.
On the edge of the forest, Wario and the Black Cat watch the Pyramid crumble to the ground. They both laugh. The Golden Diva's jewelry flies out of the treasure sack, and The Black Cat absorbs them. Suddenly, she undergoes a transformation and turns into the legendary Princess Shokora, true ruler of the Pyramid. She was defeated and transformed into a cat by the Golden Diva. The Princess gives Wario a kiss and says, "Thank you, Wario." Wario cannot believe his eyes, and he doesn't say a word as she is surrounded by four angels and flies up to heaven. Wario sits there for a while still making sense of it all.
Pyramid Jewel
The Pyramid Jewels are collectables in the Game Boy Advance game Wario Land 4. Each one is made up of four Jewel Pieces, joined together. Each Jewel Piece is found in a Jewel Piece Box. Wario must collect these to proceed in the game, because at the end of each Passage, there is a Boss Door where the Pyramid Jewels fit. When all Pyramid Jewels in a passage are recovered, Wario gains access to the Boss. Each passage has different colored Jewel Pieces to collect.
- Entry Passage: Purple
- Emerald Passage: Green
- Ruby Passage: Red
- Topaz Passage: Yellow
- Sapphire Passage: Blue
- Golden Pyramid: Gold
In the Entry Passage and the Golden Pyramid, there is only one level. That means only one Jewel Piece to recover. All the other Passages have four.
Wario Land 4/Staff
Executive Producer
- Hiroshi Yamauchi
Producer
- Takehiro Izushi
Director
- Hirofumi Matsuoka
Supervisor
- Yoshio Sakamoto
Programmers
- Katsuya Yamano
- Yoshinori Katsuki
- Nobuhiro Ozaki
- Kota Fukui
- Goro Abe
Designers
- Hiroji Kiyotake
- Tomoyoshi Yamane
- Takehiko Hosokawa
- Masani Ueda
- Isao Hirano
- Shinya Sano
- Ryuichi Nakada
- Ko Takeuchi
- Takayasu Morisawa
Music
- Ryoji Yoshitomi
Voice
- Charles Martinet
- Junko Yoshitomi
- James Mesbur
- Ayumi Shimokawa
Artwork
- Yasuo Inoue
- Sachiko Nakamichi
Special Thanks
- T. Harada
- K. Nakamichi
- H. Momose
- F. Miyamoto
- H. Sugino
- K. Yoshimura
- M. Hattori
- Y. Mantani
- T. Morita
- W. Trinen
Super Mario Club
- T. Hosio
- H. Katsui
- T. Nishizawa
- M. Syukutani
- M. Kawakita
- Y. Matsumoto
- T. Suganuma
- M. Fukushima
- Y. Eguchi
- H. Miyoshi
- H. Ookura
- Y. Ikeda
- M. Mori
- H. Takagi
- Y. Murata
- K. Ibata
- H. Takeda
- M. Mukai
- M. Hirose
- K. Miyake
- Y. Hashimoto
- S. Motou
- M. Takahashi
- H. Inaba
- N. Iwata
- R. Kodama
Event Block (Wario Land 4)

Template:Articleabout The Event Block in the main feature in the Wario Land 4 level The Big Board. It is a block with a constantly moving set of numbers from 1 to 6 on the face, and a blue button on the bottom where Wario can jump up and hit. It has many uses to help Wario make it through the level. When Wario stands below it, a ribbon appears, which shows what Wario could gain from a hit of the Event Block. The numbers stop rolling when hit, and then that number of spaces is counted on the ribbon. It can land on many things, including switching all dotted red lines to solid blocks and back again, giving Wario health, changing Wario to one of his forms, producing Dice Men (to throw), make lightning strike (damages Wario), drop a Giant Diamond. At the end of the ribbon, the Keyzer can be obtained, which opens the door to the next level. Wario can reach the end of the ribbon in a room in that is very colorful and decorative. It has the words Get a goal! written everywhere; the goal being the Keyzer.
Black Cat
- “Meow!”
- —Black Cat, Wario Land 4
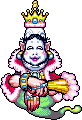
The Black Cat is one of the main characters in the Game Boy Advance game Wario Land 4. But she is more than a Cat. Her true form is that of Princess Shokora, ruler of a Legendary Pyramid. After her thousand year reign, the evil, power-hungry, money crazed Golden Diva was jealous of her power and beauty. So she defeated her in a magical duel and ascended to the throne. With her ancient powers, she transformed Princess Shokora into a being that lacked great beauty or power-an ordinary Black Cat-and banished her from the Pyramid forever. With nowhere to go, the Black Cat walked until she came across a city inhabited by modern humans. There, she lived on the streets with a group of stray animals and soon forgot about her exile. Many months later, the Pyramid was discovered by a group of archaeologists, but many strange occurrences, and even the disappearance of a group member, caused all future investigations of the Pyramid to be cancelled, and a Newspaper Article was published. In the game's introduction, the Black Cat was crossing a steet whilst Wario speeds towards her in his Wario Car. Frightened, she covers her eyes with her paws, and the car's wheels narrowly miss her. A Newspaper flies into her face. It reads; "Pyramid discovered deep in jungle. Legendary Treasure nearly found, but accidents hindered findings." The Princess in her feline form remembers the once beautiful Pyramid that she once ruled in the hands of evil, and decides to try to steal it back.
She journeys out of the city, through a desert, and deep into a jungle. She gets there before Wario, and deciding that a human accomplice may prove useful, shows him to the main room. With little power over the Diva's guardians, she persuades Wario to make his way through the Pyramid's Passages, ridding the Pyramid of it's evil, and eventually entering the Golden Diva's stronghold. With no knowledge of the Black Cat's true form, Wario faces the challenge in the hope of a large amount of Treasure at the end of it all. When Wario and the Black Cat face the Golden Diva, the feline makes the first move by scratching the Diva's face. It has little effect, and the Diva swallows her whole. Wario challenges the Golden Diva to a duel. She accepts, and when Wario defeats her, she will spit out the Black Cat, and in a final wave of fury, she destroys the internal structure of the Pyramid. The Pyramid begins to crumble. With the Cat warning Wario to escape quickly, he gathers up as much treasure as he can (including the Golden Diva's Jewelery). With the Black Cat leading the way out, they escape the Pyramid before it crumbles on top of them.
When they are at a safe distance, they watch the Pyramid fall to the ground. With the Cat contented about the defeat of the Golden Diva, and Wario satisfied with his haul of Treasure, they laugh. But suddenly, the Black Cat undergoes a transformation and turns into the beautiful Princess Shokora, true ruler of the Pyramid. The crown, earrings, necklace and bracelets that Wario swiped from the Golden Diva return to their rightful owner. Wario cannot believe his eyes, with such a beautiful being standing before him. The Princess kisses Wario on the cheek and says, "Thank you, Wario..." With a wave of farewell, four angels surround her and lift her into heaven. Wario just sits there, trying to make sense of it all. He quickly dismisses it, and picks up the sack of remaining Treasure, and drives back home. The ending cut scene is very similar to the opening one, except a White Cat crosses the road this time. The Newspaper that blows into this Cat's face is advertising a restaurant and it reads, "Steaks! Eat as much as you can!!".
Trivia
The Black Cat can be seen in the rooms before the Boss entering the Item Shop. But when Wario enters the Shop, the only other being there is Mr. Game & Watch, the shop keeper. And if Wario purchases an item before facing the Golden Diva, after the item's use concludes, Mr. Game & Watch will transform into the Black Cat. This implies that the Black Cat has an additional form as Mr. Game & Watch.
Template:BoxTop
{{WL4}}
Category:Wario Allies
Category:Wario Characters
Legendary Treasure
The Legendary Treasure (or Great Treasure) refers to the large amount of Treasure that Wario aims to steal from An Ancient Pyramid in Wario Land 4. He first hears about the Treasure when he read a newspaper article, and he sets off towards the Pyramid in his Wario Car in the middle of the night; in the hope of having the Treasure all to himself. When speeding through the city, he almost runs over a Black Cat. The newspaper article flies into her face, and she seems to read it with a curious interest. At the Pyramid, the Black Cat guides Wario to the main room. Here, there are five passages. The four main ones (Emerald Passage, Ruby Passage, Topaz Passage and Sapphire Passage) each have a Boss which guards a Great Treasure and three Treasure Chests. The boss Spoiled Rotten guards no Treasure. Cractus defends the Crown, Cuckoo Condor guards the Earrings, Aerodent wears the Necklace and Catbat protects the Bracelets. When each of these bosses are defeated, the Treasure Chests and the Great Treasure is collected, and stored into the Golden Pyramid on the main map.

When all five bosses have been defeated, the Golden Pyramid will become accessible. This is the stronghold of the Golden Diva, the game's final boss and the evil ruler of the Pyramid. The Golden Diva wears all of the Ancient Jewelry that was taken from the four bosses. There is also a wall with twelve treasure chests, three from each boss. If the Golden Diva is defeated, then in a final wave of fury, she will begin to destroy the internal structure of the Pyramid, causing it to begin crumbling to the ground. Panicking, Wario gathers up the Treasure and puts it into a sack, and makes an escape with the Black Cat leading the way out. When they reach a safe distance, they watch it crumble to the ground. Suddenly, the Black Cat transforms into Princess Shokora, true ruler of the Golden Pyramid. The four Great Treasures that the Golden Diva was wearing fly out of the sack and return to their rightful owner. The Princess kisses Wario thank you and farewell. Four angels surround her, and they lift her into heaven. After sitting there for a while trying to make sense of it all, Wario grabs what remains of the Treasure, throws it into the back of his Wario Car, and drives across the desert back home.
During the credits, various treasures fly out of the treasure sack and shown to the player. For each treasure, Wario remembers a scene from his childhood. To view the images of Wario's flashbacks, see here.
Heart Box
The Heart Box in the Game Boy Advance game Wario Land 4 is a box similar in shape and size to the Jewel Piece Box and the CD case. When opened, a 500 Coin drops out, and a giant heart that changes color with a crown hovers above the open box. If Wario collects it, his health meter will be fully replenished. There are one of these to find in each level, except the Golden Passage. Their positions change with the Game Mode.
Super Mario 64/Media
This is a list of all theme music from the Nintendo 64 game Super Mario 64.
Pre-game
Stage themes
Boss
Around the castle
Transformations
Cut scene themes
Template:BoxTop {{SM64}} {{NavMedia}}
Pig Head Statue
The Pig Head Statue is an object/enemy in the Game Boy Advance game Wario Land 4. It appears in the level Toy Block Tower, and some Puzzle Rooms. It is a grey, pig-faced statue fixed on the level's background wall, and it will open it's mouth on regular intervals, spitting out fire which will smoulder on the ground below. If Wario touches or walks into the flames, he will transform into Flaming Wario, which will allow him to break Bonfire Blocks. Template:BoxTop {{WL4}} {{Pigs}} Category:Wario Land 4 Enemies Category:Wario Species Category:Pigs
Pearl Bird
Template:Species-infobox A Pearl Bird appears in the Game Boy Advance game Wario Land 4. It is a strange, green bird with small wings, and a mouth that can expand to a large size. It is only seen once in a Puzzle Room, in the level 40 Below Fridge. It doesn't harm Wario in any way, but actually helps him by spitting out glass spheres which Wario can catch and throw at two ! Switches that would otherwise be out of reach. These ! Switches, when hit, will change corresponding colored blocks from solid to transparent, allowing Wario to pass through them to reach a Giant Diamond. The challenge is to make both colored blocks transparent at one time, so that Wario may reach the prize. Template:BoxTop {{WL4}} Category:Wario Land 4 Enemies Category:Birds
WL4 Table
The passages, levels and bosses in the game are as follows:
Entry Passage
This passage only has one level; the Hall of Hieroglyphs, which, true to its name, uses hieroglyphics on the walls to teach Wario his basic moves. The boss of this passage is Spoiled Rotten.
| Image | Name | Description |
|---|---|---|
| File:WL4-Icon01.png | Hall of Hieroglyphs | |
| File:WL4-Icon02.png | Spoiled Rotten (boss) |
Emerald Passage
A nature-themed passage of low difficulty. The boss is a pot-plant called Cractus.
Ruby Passage
This passage is mechanical-themed. The boss is a giant cuckoo clock called Cuckoo Condor.
Topaz Passage
A toy-themed passage, the boss being a giant inflatable teddy-bear called Aerodent.
| Image | Name | Description |
|---|---|---|
| File:WL4-Icon13.png | Toy Block Tower | |
| File:WL4-Icon14.png | The Big Board | |
| File:WL4-Icon15.png | Doodle Woods | |
| File:WL4-Icon16.png | Domino Row | |
| File:WL4-Icon17.png | Aerodent (boss) |
Sapphire Passage
This passage is horror-themed, with many ghosts and zombies appearing in the levels. The boss is Catbat, a giant Cat with a Bat as an alliance.
| Image | Name | Description |
|---|---|---|
| File:WL4-Icon18.png | Crescent Moon Village | |
| File:WL4-Icon19.png | Arabian Night | |
| File:WL4-Icon20.png | Fiery Cavern | |
| File:WL4-Icon21.png | Hotel Horror | |
| File:WL4-Icon22.png | Catbat (boss) |
Golden Pyramid
The final area in the game. It only has one level, the Golden Passage. It's boss is the Golden Diva, the last boss of the game.
| Image | Name | Description |
|---|---|---|
| File:WL4-Icon23.png | Golden Passage | |
| File:WL4-Icon24.png | Golden Diva (boss) |
Pinball Block
The Pinball Block is an object in the Game Boy Advance game Wario Land 4. It only appears in the level Pinball Zone. It is a block that guards the door to the next room. Ithas a digital face that counts down how many Pinball Slots remain in the room. Wario must throw a Pinball in each of the four Pinball Slots. They have a mouth which opens and closes on regular intervals, determining whether or not the Pinball will enter the slot. If a Pinball is correctly placed in a Pinball Slot, the slot will disappear and it will drop a 50 Coin. With every Pinball Slot filled, the digital number on the Pinball Block will decrease by one, beginning from four. When it reaches zero it will flash briefly and disappear, dropping a 500 Coin and granting access to the door, which will lead to the next room in the Pinball Zone. There are a total of six Pinball Blocks amongst thirteen individual rooms in the level. Template:BoxTop {{Blocks}} {{WL4}} Category:Wario Objects
Karaoke (Medamayaki)
The Karaoke (also known as Medamayaki or Sunny Side Up in English[1]) is an unlockable song in the Game Boy Advance game Wario Land 4. It can be played in the Sound Room, which is a place within the Golden Pyramid where Wario can play tracks off CDs as they are collected in the levels. However, the Karaoke is obtained in a different way; the player must collect 10,000 or more points in each of the eighteen levels in order to unlock it. The song itself is an extended version of the Palm Tree Paradise theme. It features a female singing a song in Japanese over a catchy tune. The lyrics appear at the bottom of the screen in Romanized Japanese (Romaji), with the letters flashing red as they are pronounced. The vocals can be toggled on or off (with the exception of the introductory "Hello there!" at the song's beginning) by pressing L or R, while still leaving the backing track and lyrics. Whenever this is done, the album's cover changes from a pale orange with a sleeping cat to a green cover with a singing cat. The speed and pitch of the song can also be toggled using the D-Pad. All this control over the music gives a complete Karaoke feel to the player. The music video show contains a mix of sixteen different Wariograms seen in the videos of other CDs. The Karaoke plays in a recurring loop, unlike other tracks in the Sound Room.
Lyrics and Translation
| Original Romaji Lyrics | English Translation |
|---|---|
| Hello there! Ukurere mitaina tabiwo shiyo aruite iko tsukino kakerawo hiroinagara chizuno kawarini kyanbasu nijino shizukude (somemasho) hinodeni maniauyoni boyaketa tokeiwa oiteko umini tameiki tokashite inshini koewo kizamo teukiwo supuni ukabetara hyougarano kumonga warau | Hello there! Let's go on a ukulele-like trip let's go on foot whilst finding a fragment of the moon a canvas for a map with a drop of a rainbow (let's color it) so we're in time for the sunrise let's leave the dim clock behind let a sigh dissolve in the sea and carve a voice into a stone when the moon floats on the soup the leopard-print cloud smiles |
Interpretation
Two people are deeply in love with each other. They go for a walk in a fantasy place in the middle of the night, playing their favorite songs on a ukulele whilst taking inspiration from the moon. With only a canvas for a map, they paint their own colorful path. They reach the sea in time to watch the sunrise over the horizon. The long darkness of the night is quickly forgotten. They sigh in awe as they watch the beauty of the sunrise, and that moment will live in their hearts forever. The moon is still visible in the sky. A cloud is half in shadow, other half orange from the light of the rising sun, and it appears to be smiling at them.
*Interpertation based on an explication by YoshiKong. If anyone wishes to challenge the current interpretation, or a more accurate explication is found; then please discuss the matter on the article's talk page.
Media
References
Template:BoxTop {{WL4}} Category:Music
Wario Land 4/Glitches
This page contains a list of glitches found in the Game Boy Advance game Wario Land 4.
Glitches
Template:Conjecturaltext
Sometimes when Wario picks up an object (such as a rock or enemy), if it quickly gets knocked out of his hand, he may still appear to be holding something, even if nothing can be seen in his hand.
Template:Conjecturaltext
No-ice glitch: If the player uses an action replay or other game hacking device and avoids hitting the Frog Switch in Fiery Cavern, the second half of the level won't be covered in ice.
Template:Conjecturaltext
Unused soundtrack: If the player uses an action replay or other game hacking device and avoids hitting the Frog Switch upon entering the level Golden Passage, the usual Frog Switch music will not play. Instead, a unique theme will replace it as the level's unused theme.
Template:Conjecturaltext
Sometimes, but very rarely, if Wario jumps repeatedly
References
Template:BoxTop {{WL4}} Category:Glitches
List of Frog Switch times in Wario Land 4
This page is a list of Frog Switch times given to complete levels in different game modes in the Game Boy Advance game Wario Land 4. It also includes the times to defeat the in-game bosses.
| Level | Frog Switch times given in different game modes to complete the levels | ||
|---|---|---|---|
| Normal | Hard | S-Hard | |
| Entry Passage | |||
| Hall of Hieroglyphs | 1:00 | 0:15 | 2:30 |
| Spoiled Rotten (boss) | 1:00 | 0:30 | 0:15 |
| Emerald Passage | |||
| Palm Tree Paradise | 1:30 | 0:45 | 4:30 |
| Wildflower Fields | 2:30 | 1:29 | 0:50 |
| Mystic Lake | 3:00 | 2:00 | 1:30 |
| Monsoon Jungle | 4:00 | 2:45 | 2:00 |
| Cractus (boss) | 4:00 | 3:00 | 2:00 |
| Ruby Passage | |||
| The Curious Factory | 3:30 | 2:50 | 2:30 |
| The Toxic Landfill | 5:00 | 3:30 | 2:30 |
| 40 Below Fridge | 4:00 | 3:30 | 2:00 |
| Pinball Zone | 6:00 | 5:15 | 3:30 |
| Cuckoo Condor (boss) | 4:00 | 3:00 | 2:00 |
| Topaz Passage | |||
| Toy Block Tower | 4:00 | 2:30 | 2:00 |
| The Big Board | 3:00 | 2:30 | 2:00 |
| Doodle Woods | 6:00 | 5:15 | 4:00 |
| Domino Row | 4:00 | 3:00 | 2:00 |
| Aerodent (boss) | 4:00 | 3:00 | 2:00 |
| Sapphire Passage | |||
| Crescent Moon Village | 3:30 | 2:45 | 2:00 |
| Arabian Night | 4:00 | 3:00 | 1:30 |
| Fiery Cavern | 5:00 | 4:00 | 2:45 |
| Hotel Horror | 4:00 | 3:15 | 2:00 |
| Catbat (boss) | 4:00 | 3:00 | 2:00 |
| Golden Pyramid | |||
| Golden Passage | 9:30 | 6:00 | 3:00 |
| Golden Diva (boss) | 6:00 | 5:00 | 4:00 |
Princess Game & Watch
- “Here's a Smile for you!”
- —Princess Game & Watch, Wario Land 4
Princess Game & Watch is the keeper of the Item Shop in the Game Boy Advance game Wario Land 4. As her speculated name suggests, she takes on an appearance that is closely related to Mr. Game & Watch, having a similar figure and movement. It is believed that the basic shape and idea of this character was slightly redesigned and used in Super Smash Bros. Melee, where the game features the first official appearance of Mr. Game & Watch. However, the main difference between the two cameos is the character has eyes in Wario Land 4. Her use in the game is to sell Wario items, which can be purchased with Frog Medals. These items can be used to assist Wario in defeating a boss by inflicting damage at the battle's beginning.
Princess Game & Watch is actually a being that is transformed from a Black Cat, which in addition is Princess Shokora trapped in a feline's body. When Wario travels to the Golden Pyramid after hearing a rumour of Legendary Treasure, he spots the Black Cat at the entrance. He sees the Cat again on many occasions, such as on the main map and in the corridor before a boss battle. When Wario enters this corridor, the Black Cat can be seen running into the Item Shop up ahead. But if Wario enters the shop, the only other being there apart from himself is Princess Game & Watch, who is the shopkeeper. When an item is purchased, the shopkeeper will go with Wario to the boss room. There, Princess Game & Watch will use the purchased item against the targeted boss. Once the damage has been dealt, the Princess will exit the room, leaving Wario to challenge a slightly weaker boss. For some items, the shopkeeper will even transform into various creatures to inflict damage. This applies to the items Black Dog, Big Fist, Large Lips and Black Dragon.
Trivia
- When an item is used against the final boss Golden Diva, instead of Princess Game & Watch leaving the room after the item has been used, she will stay and transform into the Black Cat, which in turn will confront the Golden Diva. The Black Cat will still appear if Wario does not purchase an item, she will just come in later after Wario.
- The fact that Princess Game & Watch transforms into the Black Cat is the only solid evidence in the game that the two characters are actually the same being.
Gallery
- WL4-MGW.PNG
Princess Game & Watch sprite - WL4-Cat.PNG

Item Shop logo - WL4-PG&W Unused.PNG
Unused sprite of Princess Game & Watch - WL4-PG&W Sound Room.PNG
Princess Game & Watch in the Sound Room - WL4-PG&W Sound Room2.PNG
Princess Game & Watch in the Sound Room - Smile4u.PNG
Princess Game & Watch in the Item Shop
Category:Wario Land 4 Category:Wario Allies Category:Shapeshifters Category:Wario Characters
WL4 Table
List of Quotes in Wario Land 4
This is a list of quotes found in the Game Boy Advance game Wario Land 4.
Quotes in the game
- "Legendary Pyramid discovered deep in Jungle!!" Newspaper article seen in the game's opening cutscene.
- "Owww!" Dr. Arewo Stein, when Wario hurts him.
- "Stop that, please!" Dr. Arewo Stein, when ???
- "Win medals in mini-games." The Game Bots in the Mini-Game Shop.
- "Want to play some more?" Game Bots, after Wario finishes playing a mini-game.
- "Welcome to the Item Shop." Princess Game & Watch welcoming Wario to the Item Shop.
- "Here's a Smile for you!" Princess Game & Watch, when Wario selects the Smile item in the Item Shop.
- "Meow!" The Black Cat in the corridor before a boss battle.
- "Hurry up!" Wario, when he hits the Frog Switch in a level.
- "Oh sorry!" Wario saying sorry to the player when no buttons are pressed in a while, and he starts working out.
- "Hello there!" English introduction to the Japanese vocal-covered Karaoke.
- "Thank you, Wario…" Princess Shokora, after Wario rescues her from the Golden Diva and brings her to safety outside the Pyramid.
- "Steaks! Eat as much as you can!!" Newspaper article seen in the game's ending cutscene.
Quotes in the manual
Categorizing Notice Templates
Gallery:Golden Diva
This is a gallery of all images which pertain to the boss Golden Diva from Wario Land 4.
Golden Diva
Golden Diva
- WL4-SpikeRock.PNG
- WL4-BearBomb.PNG
- WL4-DuckEgg.PNG
- WL4-SpikeHammer.PNG
- WL4-Lips.PNG
Golden Diva's Masks
- Golden Diva-Mask1.PNG
Mask 1
- Golden Diva-Mask2.PNG
Mask 2
- Golden Diva-Mask3.PNG
Mask 3
- Golden Diva-Mask4.PNG
Mask 4
- Golden Diva-Mask5.PNG
Mask 5
- Golden Diva-Mask6.PNG
Mask 6
- Golden Diva-Mask7.PNG
Mask 7
- Golden Diva-Mask8.PNG
Mask 8
- Golden Diva-Mask9.PNG
Mask 9
- Golden Diva-Mask10.PNG
Mask 10
- Golden Diva-Mask11.PNG
Mask 11
- Golden Diva-Mask12.PNG
Mask 12
- Golden Diva-Mask13.PNG
Mask 13
- Golden Diva-Mask14.PNG
Mask 14
- Golden Diva-Mask15.PNG
Mask 15
- Golden Diva-Mask16.PNG
Mask 16
Legendary Treasure

The Earrings, obtained from Cuckoo Condor

The Necklace, obtained from Aerodent


Screenshots
- WL4-Diva Map.PNG
The Golden Diva on the map.
- WL4-Golden Diva.PNG
The Golden Diva in the boss battle room
- BlackDragon.PNG
The Black Dragon in use.
Other
- WL4-Icon24.png
Golden Diva map icon
- WL4-Cat.PNG
Image Map
Error: Image is invalid or non-existent.
Cough Virus
The Cough Virus is an enemy in the Game Boy Advance game Wario Land 4. They only appear in the boss battle against Catbat in the Sapphire Passage. Two or three of these viruses are exhaled from Catbat's mouth due to a coughing fit which occurs every time Wario deals damage. They can be described as a colored ball covered in spikes with one eye and a tongue sticking out. During the first part of the battle, the Cough Viruses are purple. If Wario is to touch one, he will transform into Puffy Wario, which is of no use to the player and will merely waste valuable time. When Catbat's health gets lower as the battle goes on, the feline's cough becomes more severe, and it will send out red cough viruses instead of purple ones. These will harm Wario instead of transforming him.
The Cough Viruses trace a wavy path of movement through the air, and will continue in the direction of Catbat's exhale until they leave the screen. They cannot be truly defeated, but they will disappear immediately when Wario touches them and the relevant effect has been applied.
Firefly
Template:Species-infobox The Firefly is an enemy found in the Game Boy Advance game Wario Land 4. It only appears in the boss battle against Cractus in the Emerald Passage. Each time Wario damages Cractus, it will stand immobile on the stage for a few seconds. While it does so, it drools a clear, toxic liquid which will transform Wario into Zombie Wario, which is a completely useless transformation in this situation and it would just waste valuable time. As soon as he transforms, a Firefly will be seen, slowly moving across the screen. Since light can reverse the effects of Zombie Wario, the player would need to try and touch the Firefly by jumping. But as slow moving and jump-deficient Zombie Wario can be, this may waste a fair amount of time. As soon as the status effect is reversed, the Firefly will disappear. It will return again whenever Wario transforms again.
Yellow Duck
Template:Species-infobox Template:Seealso The Yellow Duck is an enemy in the Game Boy Advance game Wario Land 4. It only appears in the battle against the boss Cuckoo Condor in the Ruby Passage. It can be described as a yellow-colored duck which hatches from an egg that is produced by the Condor form of Cuckoo Condor. Upon hatching, Yellow Ducks will move slowly across the bottom of the screen. At this stage, they are very weak and vulnerable, being able to be destroyed by a simple ground pound or ram. But after a few seconds of being left alone, they will begin to flash orange and greatly increase their pace. If Wario is to touch any Yellow Ducks at this stage, he will take damage. After a while, they will blow up of their own accord. Alternatively, Wario can catch the eggs before they hit the ground. He would then be able to throw them at the Cuckoo Condor to deal damage and counter the attack.
Yellow Ducks behave in a very similar way to Black Ducks, which appear in the final battle against the Golden Diva. The Black Ducks are more aggressive, and will blow up a lot more quickly.
The Goodwill Ambassador
- “I wish to improve my kingdom's ties with the Mushroom Kingdom. I bring a gift form Queen Bean.”
- —The Goodwill Ambassador, Mario & Luigi: Superstar Saga

The Goodwill Ambassador is a character found in the Game Boy Advance game Mario & Luigi: Superstar Saga, released in 2003. The ambassador, who is actually the witch Cackletta disguised as Lady Lima, only appears in the opening cut-scene of the game where she and her accomplice (the evil mastermind Fawful) pay a "good faith" visit to the Mushroom Kingdom. Their intentions are to steal Princess Peach's voice in order to awaken the Beanstar, a magical and mystical object which is said to grant wishes and fulfil anyone's greatest desires. In order to stop people using this power for evil, the Beanstar was cast into a deep sleep that could only be awoken by the voice of a pure and noble soul. The only person currently known to possess such a voice is Princess Peach, ruler of the Mushroom Kingdom.
The evil Cackletta and Fawful, of course, have no greater desire than to rule the world. So they take the disguise of goodwill ambassadors of the Beanbean Kingdom who come in the name of their monarch, Queen Bean. They notify the Mushroom Kingdom in advance. To welcome them, the kingdom organizes a ceremony in the honor of their arrival. Upon entering the castle, the ambassador and her accomplice formally present themselves to Princess Peach. Explaining that she wishes to improve her kingdom's ties with the Mushroom Kingdom, she brings a gift from Queen Bean. Fawful then presents a box to Princess Peach, who shows her curiosity for the gift and steps forward in interest. The box's lid unexpectedly flips open to reveal a jack-in-the-box, which disperses a green gas that surrounds Peach's head, extracting her voice. The Toads nearby start panicking, unable to do anything to stop them. Casting their disguises aside, the villains make their escape through the roof of the castle. They then fly back towards the Beanbean Kingdom to steal the Beanstar from Beanbean Castle.
Cackletta and Fawful do not take the disguise of the ambassadors a second time in the game. However, it is revealed later on in the plot that Prince Peasley of the Beanbean Kingdom knew that Cackletta was after the royal voice, so he beat them to the castle and warned the princess. Peach's tells her most trusted subject, Toadsworth, and together they organize an an imposter to take her place for when the ambassadors arrive. They steal the imposter's voice instead while Peach and Toadsworth hide behind a curtain. The voice is not found to be a fake until it drives the Beanstar mad, instead of awakening it as planned.
Princess Peach's voice
- “Listen to me, everyone!!! Something terrible has happened! The Goodwill Ambassador from our neighbor, the Beanbean Kingdom, just paid a visit! But it was no friendly visit! The ambassador stole Princess Peach's voice!”
- —Toad, Mario & Luigi: Superstar Saga
Princess Peach's voice is the sound that is produced when the character Princess Peach speaks aloud. The voice itself is the main desired subject to fill the enemy's plot in the Game Boy Advance game Mario & Luigi: Superstar Saga.
The plot
When The Goodwill Ambassador of the Beanbean Kingdom announce that she is to pay a good faith visit to the Mushroom Kingdom, a ceremony is organised in the honour or her arrival at Princess Peach's Castle. The Goodwill Ambassador and her accomplice formally present themselves to Princess Peach and states that with the desire to improve the Beanbean Kingdom's ties with the Mushroom Kingdom, she brings a gift from her monarch; Queen Bean. She bows while her accomplice presents a box to Princess Peach, who shows her curiosity for the gift and steps forward in interest. Inside is a jack-in-the-box which sprays out a gas, which immediately takes effect and surrounds Peach's head, extracting her voice. The ambassador and her accomplice are revealed to be the notorious villains Cackletta and Fawful when their disguises are cast aside. The nearby Toads begin panicking, unable to do anything to stop them. The perpetrators begin cackling as the voice is absorbed by Fawful's Headgear, which causes the princess to faint. They make their escape through the roof of the castle and flee back to the Beanbean Kingdom.
Mario and Luigi are quickly called to the scene, where the Koopa King Bowser and two Toads are pondering over the situation. The Bros. are informed of what happened to their princess. She tries to say something, but all that is produced is an Explosive Vocabulary (or Royal Speech Bombs), where her speech is converted to Bob-ombs and other explosives which in turn will fall from the animated speech bubble and blow up once they hit the ground. Bowser urges Mario to retrieve the voice, because "If I kidnap Princess Peach in this state, she'll wreck my castle!" Mario is to travel with Bowser on his Koopa Cruiser to the Beanbean Kingdom to hunt down Cackletta and Fawful.

In the skies above the Mushroom Kingdom, Luigi catches sight of them through his binoculars, which is followed by a round of attacks from Fawful's Headgear. Laughing in a maniacal manner, he lets it slip that "Princess Peach's sweet voice will soon be the bread that makes the sandwich of Cackletta's desires." Fawful then let out a final wave of fury on the Koopa Cruiser and it crash lands somewhere near the border of the two kingdoms. Mario and Luigi quickly find each other, but Bowser is not seen anywhere.
Soon after crossing the border into the Beanbean Kingdom, the Bros. enter the Stardust Fields and soon meet the Starshade Bros., who are quite thrilled to see the famous Mario & Luigi. The Mario Bros. tell them about the theft of Princess Peach's voice, and the Starshade Bros. think it's incredible that the voice is in the hands of some vile enemy. One bro. adds "Her voice must be recovered no matter what it takes!". Mario and Luigi soon come across a Cannon where Bowser finds himself stuck. A Starshade Bro. soon becomes tired of Bowser's whining and decides to light the fuse on the cannon. Scared and panicking, Bowser stats yelling "M-MARIO!!! Green 'Stache!!! You gotta get Princess Peach's voice back! It's all up to you!" The cannon then fires Bowser out of sight, and Mario and Luigi go forth to look for him.

The Bros. scale Hoohoo Mountain and on the summit, they meet Prince Peasley who encountered Cackletta and Fawful on the mountain during his "secret mission". Mario informs him of the theft of Princess Peach's voice, but the Beanbean prince disregards their worries, saying "I wouldn't worry about Princess Peach. I'm quite sure she'll be fine. At any rate, we should chase Cackletta!" Prince Peasley then requests the Bros. to visit Queen Bean at Beanbean Castle once they climb down the mountain. He suspects that Cackletta's next target is the castle.

When the Bros. reach Beanbean Castle Town, they find that the place has been attacked by Cackletta and Fawful. Beanbean Castle had not appeared to be attacked however. Shortly after entering the castle, the Bros. meet Lady Lima, the highest and longest-serving lady at court. She sends the Bros. to the Castle Sewers where they later come across a locked door. After is has been unlocked, Lady Lima will emerge, thanking the Bros. for feeing her. She explains that Cackletta concealed her, which then reveals that the Lady Lima that the Bros. spoke to earlier was an imposter. Repairing the castle plumbing was for the villain's benefit, as it disabled the castle's security system protecting the Beanstar, a mystical object which is said to grant wishes and fulfil anyone's greatest desires. The residents of the castle have always acted as guardians for the Beanstar, keeping it out of evil hands. But as many of the royalists were imprisoned, the Beanstar has very little protection. Mario and Luigi are urged by the real Lady Lima to go upstairs and stop Cackletta from taking the Beanstar. But by the time they get there, it's already too late. The villains are about to leave the castle with the treasure. Fawful mocks the Bros. by saying "Once we awaken the Beanstar with Princess Peach's voice, this world will be Cackletta's snack cake!" The villains then flee.

The Bros. explain to Queen Bean that Cackletta has stolen both the Beanstar and Princess Peach's voice, but Queen Bean seems clueless as to why Cackletta would steal those particular objects in the first place. Lady Lima seems to know, and she tells the story of how the Beanstar is the protector of the Beanbean Kingdom and has the power to grant all desires. To prevent such power being used for evil, the Beanstar was cast into a deep sleep and could only be awakened by a voice of a pure and noble soul. In this day and age, Princess Peach is the only one who possesses such a voice. The reason Cackletta stole Princess Peach's voice is because she plans to awaken the Beanstar and fulfil all of her desires. And there's no mistaking her one true desire; to rule the world. Queen Bean then booms with laughter, and urges them to not fear. She claims to have foreseen Cackletta's desire long ago and the kingdom is well prepared. The group are then informed of the arrival of Prince Peasley and the Bros. head out to meet him. Prince Peasley's hard work on his mission is about to pay off, since he has found that Cackletta's current whereabouts are within Woohoo Hooniversity. It seems like the perfect place to awaken the Beanstar with the voice, and the Prince intends to get there as soon as possible. Queen Bean encourages Mario and Luigi to also make their way there, saying "This may be your chance to recover Princess Peach's voice!"
With the town now repaired, the Bros. travel southeast to Woohoo Hooniversity. A door near the main room grants access to the area that Cackletta and Fawful are carrying out their plan. Fawful is making some final adjustments to one of three Peach-bots, which are robots that are programmed to play a perfect copy of the stolen voice. Each Peach-bot is positioned around the Beanstar. The villain's intention is to awaken the Beanstar with the voice projected from the Peach-bots. He cues to Cackletta to unleash the voice of Princess Peach on the Beanstar. Cackletta cackles with glee, as she can feel the moment when the world will bow down to her is nigh. Mario and Luigi walk in just as Cackletta pulls out a remote control from her pocket, which sends out a signal for the Peach-bots to speak. The bots immediately begin to emit waves of sound and for a few seconds everything seems to be going to plan, but something strange and unexpected happens. The calm green of the Beanstar suddenly turns an angry shade of red, and the now enraged star begins to float up in the air. It soon comes crashing down to the ground several consecutive times, creating a hole in the floor with each bounce. Cackletta and Fawful make a rush to take cover. On the fifth bounce the floor gives in, sending the Beanstar and all three Peach-bots plummeting down to the floor below. With everything now silent, Cackletta walks over and begins to laugh, but quickly realises what really happened. She didn't expect anything like this at all. Fawful suggests that they flee. But at that very moment the Mario Bros. emerge from their hiding place, and the villains cry out with rage.

After a battle, Fawful recovers first and he sucks up the weak Cackletta's energy with his Headgear. He then prepares to give Mario and Luigi one final attack, but Prince Peasley arrives just in time and sends the villains flying from the Hooniversity and out of sight. He then tells the Bros. to quickly get to the fallen Beanstar, but they first explain how the Beanstar reacted to Princess Peach's voice. Prince Peasley seems as clueless as them as to why the voice drove the Beanstar mad, but he senses a surprising secret at the end of this riddle. The Bros. then make their way to recover the fallen Beanstar. When they reach the bottom floor of the Hooniversity, they find that the Beanstar is breathing hard on the ground, but it seems to be slowly recovering and turning back to its calmer green self. But suddenly, a Peach-bot that got stuck on the way to the ground suddenly falls, and its voice drives the Beanstar mad again. Mario and Luigi try to grab a hold of the Beanstar, but it is not enough to stop it from flying straight through the roof of the Hooniversity. Mario and Luigi soon lose their grip and they fall out of sight. The Beanstar, free from the irritating voice at a hundred feet in the air but still weak, splits into four pieces. Each piece gets scattered far and wide throughout the Beanbean Kingdom.

While Mario and Luigi are on their way back to the castle, they bump into Prince Peasley who happened to be looking for them. The Prince informs the Bros. that Princess Peach is blessing the Beanbean Kingdom with her presence, and he would like them to head to Beanbean Airport to greet her. But while this is occurring, on the other side of the kingdom within the Stardust Fields, a weak and struggling Fawful carries the energy of a suffering Cackletta within his Headgear. They come across Bowser lying in a crumpled heap. With Cackletta's consent, Fawful transfers her energy into Bowser's body, possessing him and resulting in a grotesque mix of the two forms which is later titled Bowletta.
Meanwhile, Mario and Luigi are watching the plane land at Beanbean Airport. The group meets at Beanbean Castle Court Gardens, and the Bros. appear to be very honoured to see their princess again. She bows and prepares to say something, but the Bros. instinctively take cover as they haven't forgotten Peach's "Explosive Vocabulary" as a result of losing her voice "Mario! Luigi!", Princess Peach says without falter. The Bros. seem very puzzled. Toadsworth thinks that it may be time to reveal the truth. He says "I must tell you… Princess Peach's voice… was never stolen!"

Prince Peasley then tells the shocked Mario Bros. that he knew Cackletta was after the royal voice, so he beat her to the castle and warned Princess Peach. Birdo acted as the imposter who wore a dress with a wig, taking the appearance of Princess Peach. Peach and Toadsworth hid behind a curtain while the theft took place. The voice that got stolen was Birdo's voice; that's why the Beanstar acted so strangely. Peach apologises to Mario and Luigi for causing them all this trouble, and claims that she intended to tell them immediately after the theft, but Bowser beat them to the castle and she couldn't "spill the beans", so to speak. Toadsworth adds a word of congratulations on defeating Cackletta, and the Mario Bros. strike a "modest" victory pose.
It is interesting to note that Prince Peasley didn't immediately reveal the truth about Princess Peach's voice to the Bros. up until this point in the game. He always acted like he knew little about the theft of the voice, even though he has a significant role in it. The exact reason why the Prince didn't tell the Bros. until Cackletta was defeated is unknown. But it is likely to be because ever since meeting the Mario Bros. on Hoohoo Mountain, Prince Peasley felt as if he could use their help to try and hunt down Cackletta. The Bros. initially came to the Beanbean Kingdom to retrieve the voice, it may have occurred to Prince Peasley that if the Bros. knew that the princess was safe after all, then they were likely to return to the Mushroom Kingdom and leave the Cackletta situation solely in his hands.

Soon after her arrival, Princess Peach announces that she wishes to visit Little Fungitown, a Toad-inhabited town up in the north of the kingdom. While Luigi is walking alone in the town during their stay, everything turns dark and he is suddenly surrounded by a wave of lightning. Bowser's Clown Car hovers ahead of Luigi, and Princess Peach is seen within the car. Peach cries for help as she is dragged down and a dark, silhouetted figure emerges. At first Luigi thinks it is Bowser, but he soon realises that he is sorely mistaken. It is Bowletta; the form Cackletta took when she possessed Bowser's body. She says to Luigi "I need no voice this time… I'll just steal… The real deal!!!".

Back at Beanbean Castle, Bowletta contacts the group, demanding them to bring her the four pieces of the Beanstar if they want their princess returned safely. Prince Peasley says that there is little that they can do now, and they must gather the Beanstar pieces as Bowletta demands. The four pieces are scattered far and wide throughout the Beanbean Kingdom. Once they have been recovered, Bowletta will contact them again at Beanbean Castle. She tells them to bring the Beanstar to a drop-off point at Joke's End, an area in the northeast of the kingdom. But the Beanstar for the princess seems unlikely to be an honest trade, as recent events imply that Bowletta is to use the princess herself to awaken the Beanstar. Queen Bean contemplates this thought, and says "Hmm… But if he…she…uh, IT plans to return Princess Peach when we give it the Beanstar… Then it can't he planning to use Princess Peach's voice to awaken the Beanstar after all…" Toadsworth agrees. Prince Peasley has the idea to supply the Bros. with a Fake Beanstar, so any attempt to awaken it with Peach's voice will be fraught. Concerned about the cleanliness of the princess, Toadsworth also gives the Bros. with an extra dress for her.

After crossing the ocean, the Bros. will reach Joke's End with an extra dress for Peach and both the fake and genuine Beanstar. A long journey to the top floor leads them to the reception area, where Fawful awaits the arranged Beanstar. Luigi proceeds to give the fake Beanstar, but Fawful easily sees through their deception and attacks Luigi. He then stores the real Beanstar within his Headgear and returns to Bowletta. The Bros. know that the villains aren't likely to keep their side of the promise, and as of now they have both the princess and the Beanstar in their possession. Luigi breaks down crying, not seeing very much hope, but Mario has an idea. Luigi is to wear Peach's extra dress along with a blonde wig in order to take an uncanny appearance of Princess Peach. The only characteristic that could possibly reveal the fake Princess is Luigi's mustache, which he covers with his hands while confronting Bowletta and Fawful. The villains appear very confused when Mario has another princess with him, and become enraged when that princess tells them that they expected something like this to happen, so they prepared an imposter. After a bit of a chuckle, Mario and the "princess" begin to casually leave the scene. Seeing little use in a fake princess hostage that can't awaken the Beanstar with her voice, they discard her and chase after the disguised Luigi, who they capture instead. Mario is left with the real Princess Peach, and she thanks him with a kiss. Meanwhile, the villains are already above the clouds on Bowser's Koopa Cruiser which they repaired in order to carry out the final step of the plan. They appear very pleased with themselves, saying "At last, we have both Princess Peach and the Beanstar." They plan to awaken the Beanstar with her voice after they are a safe distance away from the kingdom, but one thing strikes them with curiosity. Why does the stolen damsel cover her mouth with her hands? Bowletta tricks Luigi into turning around by pretending that there is a large cockroach behind him. Luigi's hands fly up in the air with fright, and he quickly realises that there was nothing there after all. He quickly ducks down to make an attempt to hide the mustache, but it's too late. Bowletta and Cackletta have seen it, and they aren't happy. They chase Luigi through the Koopa Cruiser until he comes across the room where the Beanstar is situated, which he takes with him before he sky-dives out of the cruiser. He uses Peach's dress as a parachute and he floats back towards the ground. Bowletta and Fawful run into the room only to find the cruiser's hatch open and the Beanstar gone. They've got nothing. No Beanstar to fulfill their desires, and no voice to awaken it.
Quotes
The following is a list of quotes from Mario & Luigi: Superstar Saga that concern Princess Peach's voice. Quotes appear in chronological order.
- "Listen to me, everyone!!! Something terrible has happened! The Goodwill Ambassador from our neighbor, the Beanbean Kingdom, just paid a visit! Yeah! But it was no friendly visit! The ambassador stole Princess Peach's voice! …A-And replaced it with this explosive vocabulary!" – Toad, Princess Peach's Castle
- "Mario! Please! Go and retrieve Princess Peach's beautiful voice! Only you can do it!" – Toad, Princess Peach's Castle
- "Bwa ha ha ha! Yes! Go, capture that fiend and get back Peach's voice! And then I can kidnap her!" – Bowser, Princess Peach's Castle
- "Royal Speech Bombs! The villain who stole the lovely voice of the princess has fled to the Beanbean Kingdom!" – Kingdom Courier Bulletin, Toadtown Square
- "You! You're the fiend who stole Peach's voice! How dare you pull of such a cool evil plan?" – Bowser, The skies above the Mushroom Kingdom
- "If you are giving us the chase just to get your silly princess's voice back, then you are idiots of foolishness! Princess Peach's sweet voice will soon be the bread that makes the sandwich of Cackletta's desires!" – Fawful, The skies above the Mushroom Kingdom
- "Incredible! To think… Princess Peach's lovely voice in the hands of some vile enemy! Her voice must be recovered, no matter what it takes!" – Starshade Bros., Stardust Fields
- "M-MARIO!!! Green 'Stache!!! You gotta get Princess Peach's voice back! It's all up to you!" – Bowser, Stardust Fields
- "Is that so? Princess Peach's voice has been stolen? Heh heh heh… I wouldn't worry about Princess Peach. I'm quite sure she'll be fine. At any rate, we should chase after Cackletta!" – Prince Peasley, Hoohoo mountain Summit
- "At last… at long, long last… I have in my possession both the Beanstar and Peach's voice!" – Cackletta, Beanbean Castle
- "The Beanstar and Princess Peach's voice are already mine!” – Cackletta, Beanbean Castle
- "Once we awaken the Beanstar with Princess Peach's voice, this world will be Cackletta's snack cake!" – Fawful, Beanbean Castle
- "Hmm… So, Cackletta has stolen Princess Peach's voice and the Beanstar… But why would Cackletta steal the Beanstar and Princess Peach's voice in the first place?" – Queen Bean, Beanbean Castle
- "The Beanstar is the protector of this land, and it has the power to grant any and all desires… To prevent such power from being used for evil, the Beanstar was cast into a deep sleep… It is said that a voice of great beauty is required to wake the Beanstar from its slumber. It must be the voice of a pure and noble soul… In this day and age, Princess Peach is the only one who possesses such as voice. So… the reason Cackletta stole Princess Peach's voice… Aha! She must plan to awaken the Beanstar and fulfil all of her desires! And there's no mistaking her one true desire: to rule the world!" – Lady Lima, Beanbean Castle
- "Master Mario! Master Luigi! This may be your chance to recover Princess Peach's voice!" – Queen Bean, Beanbean Castle
- "O Great Cackletta, unleash the voice of Princess Peach on the Beanstar when you are wanting to!" – Fawful, Hoohoo Hooniversity
- "The moment when all the world will bow down to me has come at last… Eeyah ha ha ha! Peach-bots! SPEAK!!!" – Cackletta, Hoohoo Hooniversity
- "What? The Beanstar heard Princess Peach's voice and it went mad? But why would Princess Peach's voice drive the Beanstar mad? I sense a surprising secret at the end of this riddle!" – Prince Peasley, Hoohoo Hooniversity
- "You see… I must tell you… Princess Peach's voice… was never stolen!" – Toadsworth, Beanbean Castle Court Gardens
- "I knew Cackletta was after the royal voice, so I beat them to the castle and warned the princess." – Prince Peasley, Beanbean Castle Court Gardens
- "I need no voice this time… I'll just steal… the real deal!!!" – Bowletta, Little Fungitown
- "Hmm… But if he…she…uh, IT plans to return Princess Peach when we give it the Beanstar… Then it can't be planning to use Princess Peach's voice to awaken the Beanstar after all…" – Queen Bean, Beanbean Castle.
Media
Extra pics
{{ML:SS}} Category:Mario & Luigi: Superstar Saga Category:Peach Items Category:Objects Category:Villains' Items
Gallery:Super Mario 64 DS#Course Maps
- SM64DS-Bob-omb Battlefield Map.PNG
- SM64-Whomps Fortress Map.PNG
- SM64DS-Jolly Roger Bay Map.PNG
- SM64DS-Cool Cool Mountain Map.PNG
- SM64DS-Cool Cool Mountain Map2.PNG
Ice slide in Cool, Cool Mountain
- SM64DS-Big Boos Haunt Map.PNG
- SM64DS-Big Boos Haunt Map2.PNG
First floor of the Big Boo's Haunt mansion
- SM64DS-Big Boos Haunt Map3.PNG
Second floor of the Big Boo's Haunt mansion
- SM64DS-Big Boos Haunt Map4.PNG
Merry-Go-Round area of Big Boo's Haunt
- SM64DS-Big Boos Haunt Map5.PNG
Secret Room map
- SM64DS-Hazy Maze Cave Map.PNG
- SM64DS-Hazy maze Cave Map2.PNG
The cavern of Hazy Maze Cave
- SM64DS-Lethal Lava Land Map.PNG
- SM64DS-Lethal Lava Land Map2.PNG
Volcano of Lethal Lava Land
- SM64DS-Shifting Sand Land Map.PNG
- SM64DS-Shifting Sand Land Map2.PNG
The Pyramid of Shifting Sand Land
- SM64DS-Shifting Sand Land Map3.PNG
Eyerok's room in Shifting Sand Land
- SM64DS-Dire Dire Docks Map.PNG
- SM64DS-Snowmans Land Map.PNG
- SM64DS-Snowmans Land Map2.PNG
The igloo in Snowman's Land
- SM64DS-Wet Dry World Map.PNG
- SM64DS-Wet Dry World Map2.PNG
Downtown in Wet-Dry World
- SM64DS-Tall Tall Mountain Map.PNG
- SM64DS-Tall Tall Mountain Map2.PNG
Secret slide in Tall, Tall Mountain
- SM64DS-Tiny Huge Island Map.PNG
The "tiny" Tiny-Huge Island
- SM64DS-Tiny Huge Island Map2.PNG
The "huge" Tiny-Huge Island
- SM64DS-Tiny Huge Island Map3.PNG
The cave in Tiny-Huge Island
- SM64DS-Tiny Huge Island Map4.PNG
The Wiggler battle area in Tiny-Huge Island
Super Mario Bros. (Pinball)
Template:Infobox Arcade Game Template:LLQuote
Super Mario Bros. is a pinball machine licensed by Nintendo and developed by Gottileb. It was released in the U.S.A on April 25, 1992, and a total of 4,200 units were manufactured. The machine is designed by Jon Norris, with artwork by David Moore and Constantino Mitchell. It was the first pinball machine produced by Gottileb to use the Dox Matrix Display; a screen on the bottom of the lightbox which keeps track of the current score and can also display various animations during gameplay (such as Mario running towards a castle). Despite the name "Super Mario Bros.", the machine appears to share a majority of its artwork with Super Mario World, released two years before.
Playfield layout
The pinball machine contains many Mario themed interactive features, such as on-field artwork that lights up during gameplay and the main objective of rescuing the princess. There are three flippers; the third found at the top of the playfield on a raised, separate Yoshi-themed area. Underneath this raised area is Luigi’s cave. A blue revolving castle is located at the top of the playfield, which the player is able to "destroy" by shooting at it while "Super Mario". This can be achieved by lighting up the letters that spell S-U-P-E-R, located near the middle of the playfield. The castle has an artwork of King Koopa on the top. A kick save is found on the left outlane. Yellow and blue Warp Pipes on either side of the middle act as slingshots, which powerfully eject the ball soon after it enters. Four sinkholes are seen throughout the playfield, most providing points or a bonus, depending on the situation. Two are seen either side of the field just below the slingshots, one above the third flipper on a raised platform at the top of the playfield and one just in front of the castle. This sinkhole has a plastic tube that runs down to the bottom right hole just above the right slingshot. A wireform ramp leads from the top sinkhole and drops the ball into the left inlane. A few of the sinkholes are able to light up one of the letters that spell S-U-P-E-R. There are three pop bumpers on the top half of the field. These pop bumpers toggle the lights to different types of bonuses the player may receive on the five spot targets.
Rules and gameplay
The aim of the game is to become Super Mario by spelling S-U-P-E-R, which then allows the player to shoot for the castle. Destroying seven castles in seven different worlds will rescue the Princess and the player is then able to enter their name and score. They will receive a replay if the high score to date is beaten. All castles destroyed will be carried over to the next game. This makes it possible to begin a game with six castles, and the player will only need to destroy one to win. But the score would be significantly lower in comparison to gameplay throughout all seven worlds. The player is initially given three balls, but more may be gained during play.
Bonus rounds
The game consists of six different rounds, which provide temporary objectives in the game that can reward points for completing certain tasks. In order to play a round, the player must light three Shells, which can be done by hitting spot targets or ramp shots where shells are lit. Once done so, the player must obtain the Key by getting the ball in one of the three sinkholes when the Key light has been lit. The player can then select with the flippers which round they wish to play. If it is not selected within a few seconds, the system will choose whichever round the player is currently selecting. The six rounds and their description are as follows:
- Bomb round – Light the Bob-omb fuse by hitting the left ramp pop bumper while it is flashing. Once done so, shoot the ball into any of the sinkholes to gain 30 million points. The upper playfield sinkhole will also stay lit for the rest of the ball, being worth 20 million points.
- Mega Bumpers round – Simply hit each pop bumper to score a bonus 1 million points.
- Yoshi’s Countdown round – Hit Yoshi’s spot target on the raised upper playfield to collect the countdown value, which begins at 24 million and will slowly decrease. The value does not countdown during Multiball (see below).
- ! Round – Hit the "!" targets to collect increasingly higher scores. The scores range from 1, 2, 3, 5 and finally 10 million.
- Castle Extra Ball round – Enter the castle during in this round to collect an extra ball.
- Cave Count-Up round – Hit the spot targets within the area known as Luigi’s cave. The player collects a count-up value with each hit, which stops at 48 million.
Entering a round as Super Mario doubles the value of that round, including extra balls. Each round will only last for about a minute. Once a round has been completed, it cannot be played again during the same game. Completing all six rounds in a game lights Castle Special.
Multiball
To achieve multiball, the player must light 1-2-3-4 in sequence. Each number is situated within a different area of the playfield; "1" is on the left ramp, "2" is the Yoshi target on the raised area, "3" is the right loop shot that feeds the ball back into the bumpers and "4" is the shot made from the third flipper on the raised platform. Once these shots have been made, the player must hit the ball into the bottom left sinkhole to gain the multiball. There are two types of multiball; 2-ball and 3-ball. The latter can be played by being Super Mario when multiball is gained. The object of multiball is to get as many balls in the castle as possible. Each ball in the castle earns a jackpot, which begins at 5 million. As multiple balls enter the castle, the jackpot increases to 10, 20 and finally 40 million. Additionally, this total is increased during 3-ball.
Video mode
The game’s video mode is shown after the ball has entered the castle and the Bullet Bill sequence is complete. The Dot Matrix Display seen on the light box will show what appears to be a classic Super Mario Bros. game, where the player runs and jumps across gaps in the ground with a Goal Pole and castle seen at the end. The right flipper is used to jump, while the left is to run faster. 10 million points is awarded for making it to the end. But if the player is to hold the left flipper in for the whole level, the game will deal 10 million points instead. When the last castle has been destroyed and the ball has drained, Mario will run across the screen towards the castle. If the player is to make him jump, they will receive 30 million points instead of the normal 10.
Gallery

Product logo
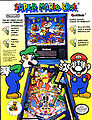
Front of flyer
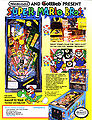
Back of flyer


Super Mario Bros. Mushroom World
Template:Infobox Arcade Game Super Mario Bros. Mushroom World is a pinball machine licensed by Nintendo and developed by Gottlieb. It was released to commercial buyers in the U.S.A. in June 1992. Mushroom World is the direct sequel of Super Mario Bros., released two months earlier. But unlike its predecessor, Mushroom World was more focused on commercial buyers, as it was given redemption features. The machine is based on the game Super Mario Bros. 3, as the cabinet displays artwork of the Koopalings and uses in-game powerups such as Frog Mario and Raccoon Mario. A total of 519 units were manufactured.
Flyers and logos

Product logo
- Super Mario Bros Mushroom World-Front Flyer.jpg
Gront of flyer
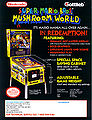
Back of flyer

Machine cabinet
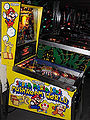
Full cabinet side view
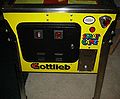
Front view
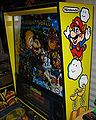
Right view of the backbox

Right view of the side
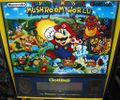
Backglass shot
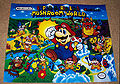
Detail of the backglass artwork


Playfield
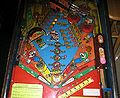
Overhead playfield view
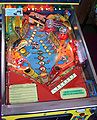
Playfield illuminated during gameplay


Super Mario Activity Book series
Gallery
File:Mariobook.jpg
<gallery>